
Group Name: The Elite Four (# 24)
Members:
Clay Whetung (cwhetung@)
Jae Young Lee (jyltwo@)
Jeff Snyder (jasnyder@)
Michael Newman (menewman@)
What we built:
We chose to build a nightlight combined with a wake-up alarm. Our nightlight features not one, not two, not three, not four, not five, but SIX — yes, SIX! — LEDs that turn on when a photosensor detects a decreased amount of ambient light. Not only that, but we also included a buzzer that plays a friendly tune whenever our system detects that ambient light levels have increased again. The purpose of this system is twofold: First, by providing light when its surroundings are dark, it reassures and comforts those who are afraid of the dark. Second, it audibly announces the return of light to those who might have closed their eyes or otherwise lost sensory input (e.g., the sleeping or suddenly blind). Our system is a smashing success, as it correctly lights up in the dark and plays a tune, as specified. We particularly liked the reassuring charm of the system’s adorable lights and catchy jingle. A possible improvement would be implementing a continuous alarm that the user can turn off (for example, by turning a potentiometer) — more like a typical alarm clock. We could even include a snooze button.
Design sketches:

Arduino Orchestra Instrument: Pitch is controlled with soft pot, and volume is controlled with FSR.
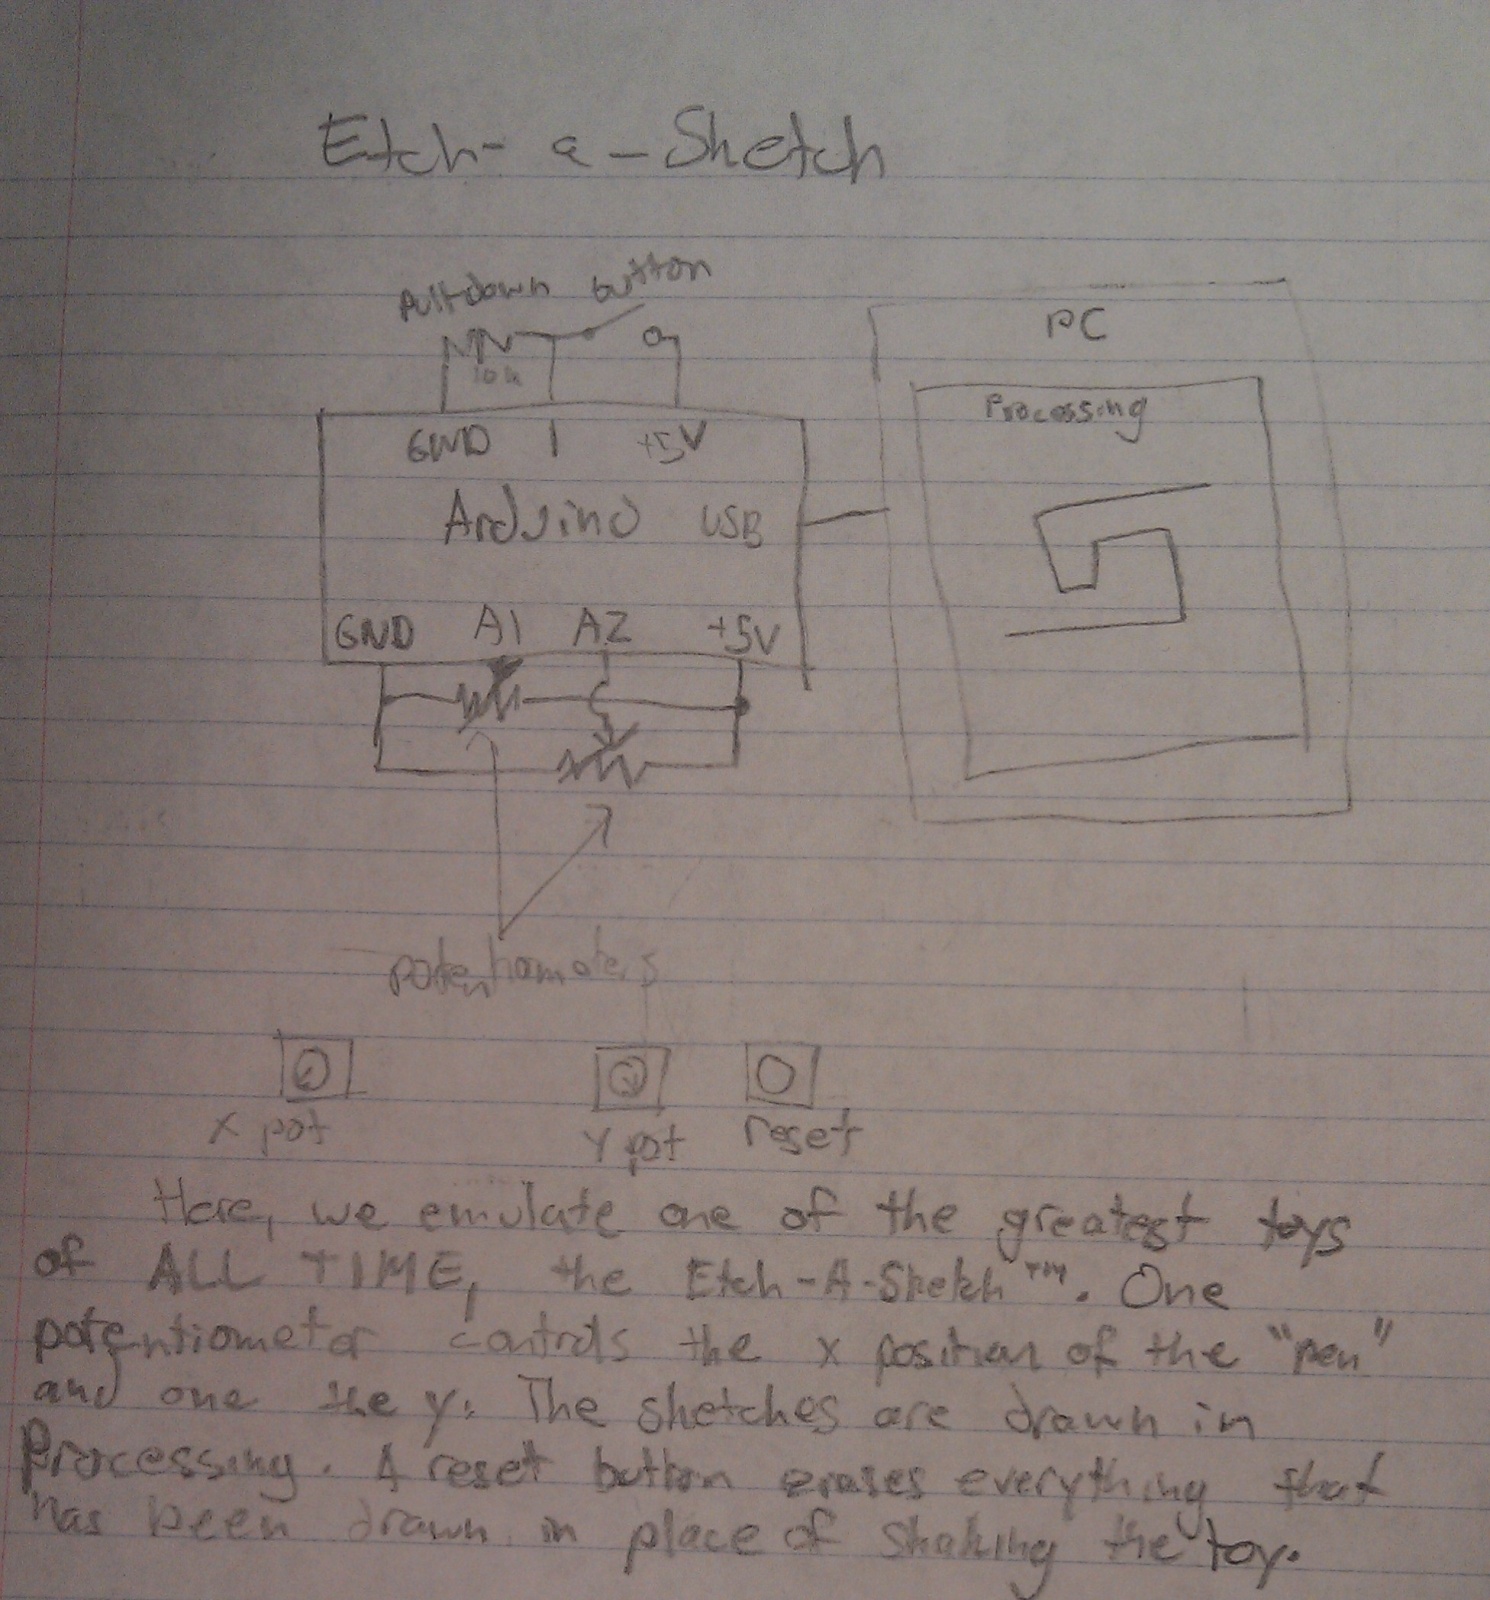
Etch-a-Sketch: Potentiometers control the x and y coordinates of the “pen,” and a drawing is rendered onscreen using Processing.
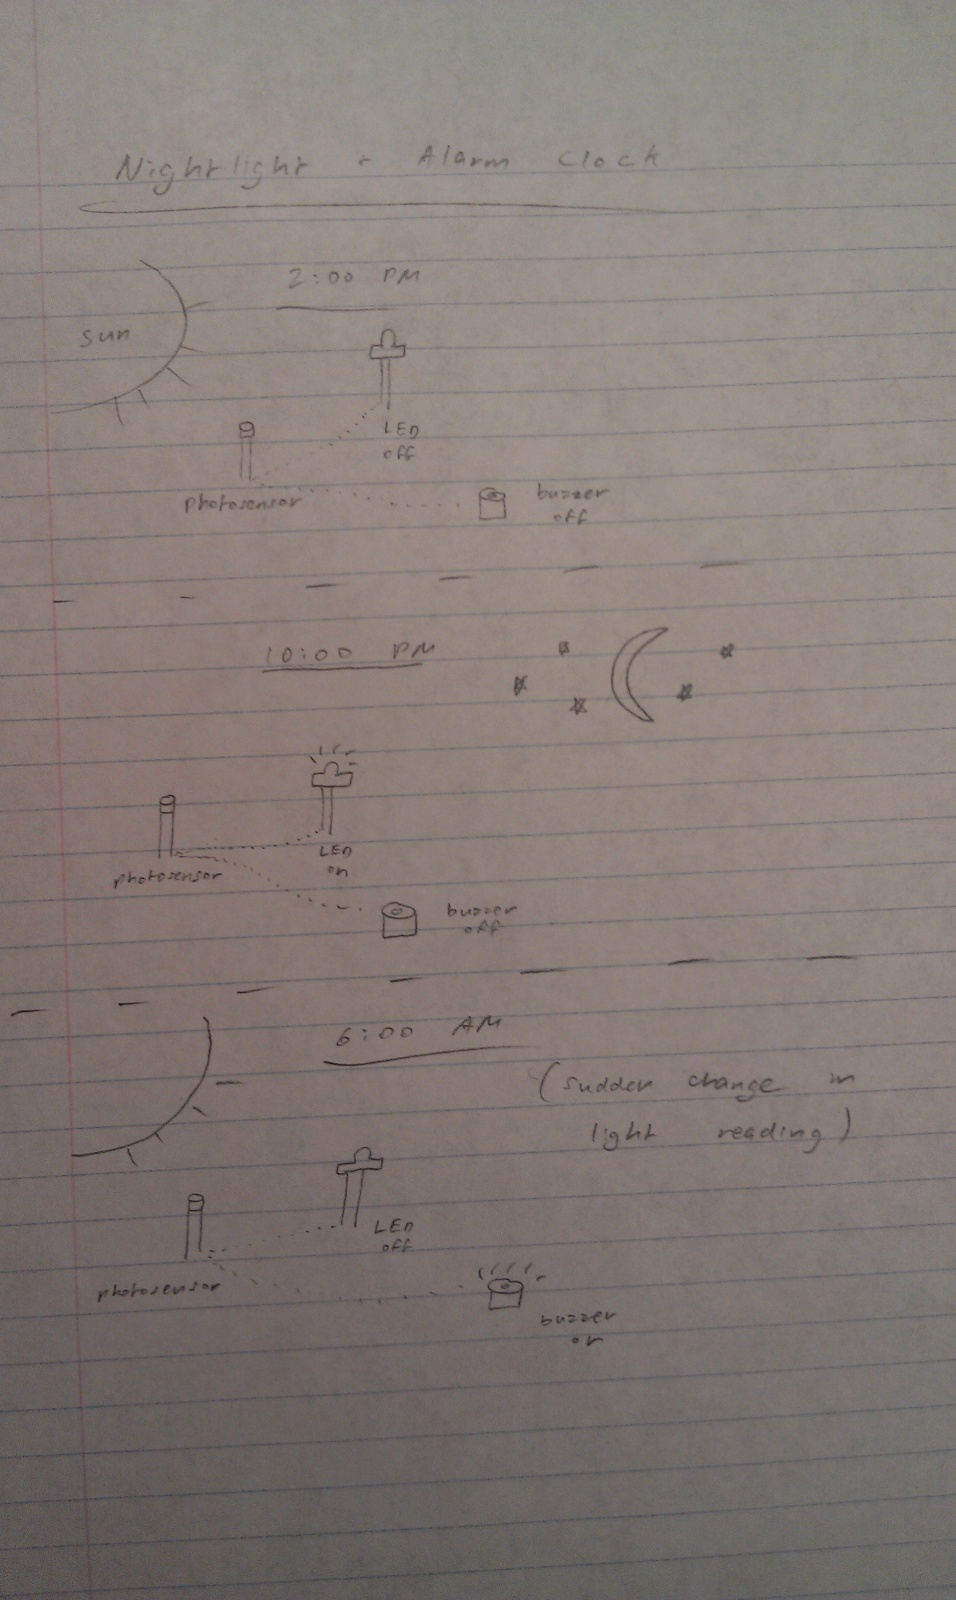
Nightlight/Alarm Clock: LEDs turn on when the light dims, and buzzer goes off when light is restored.
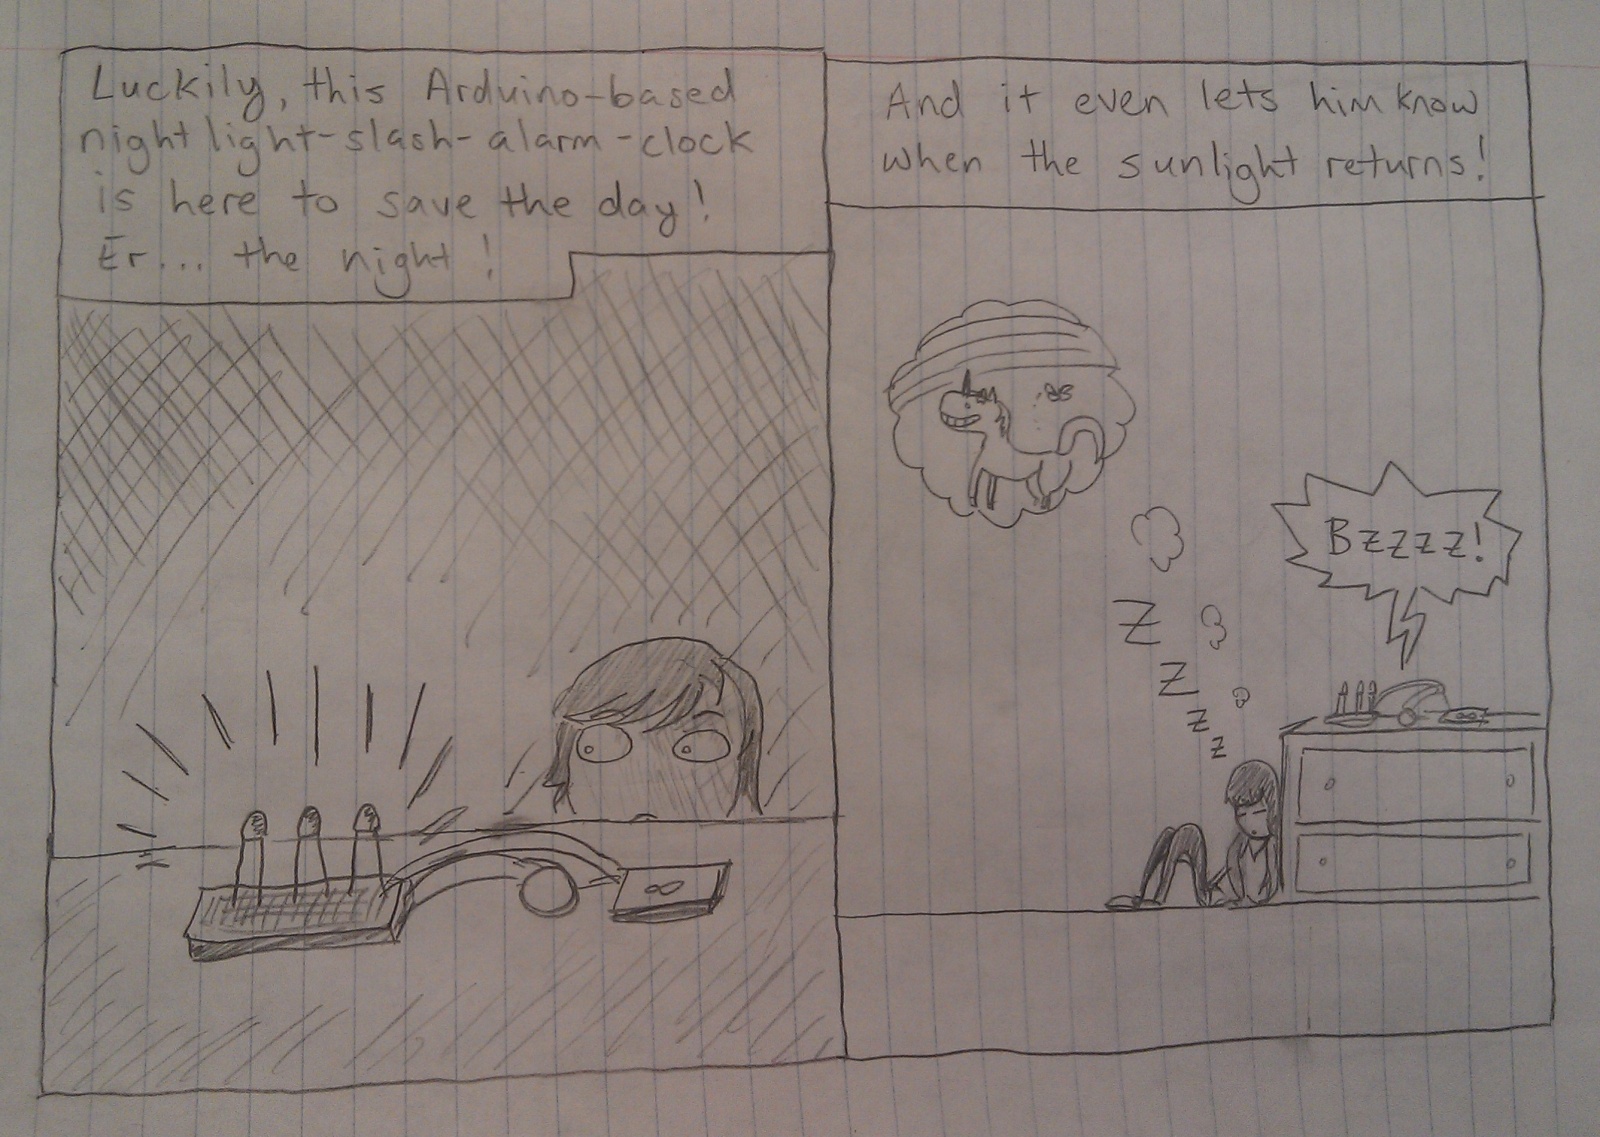
Storyboard:

Photos of our system:
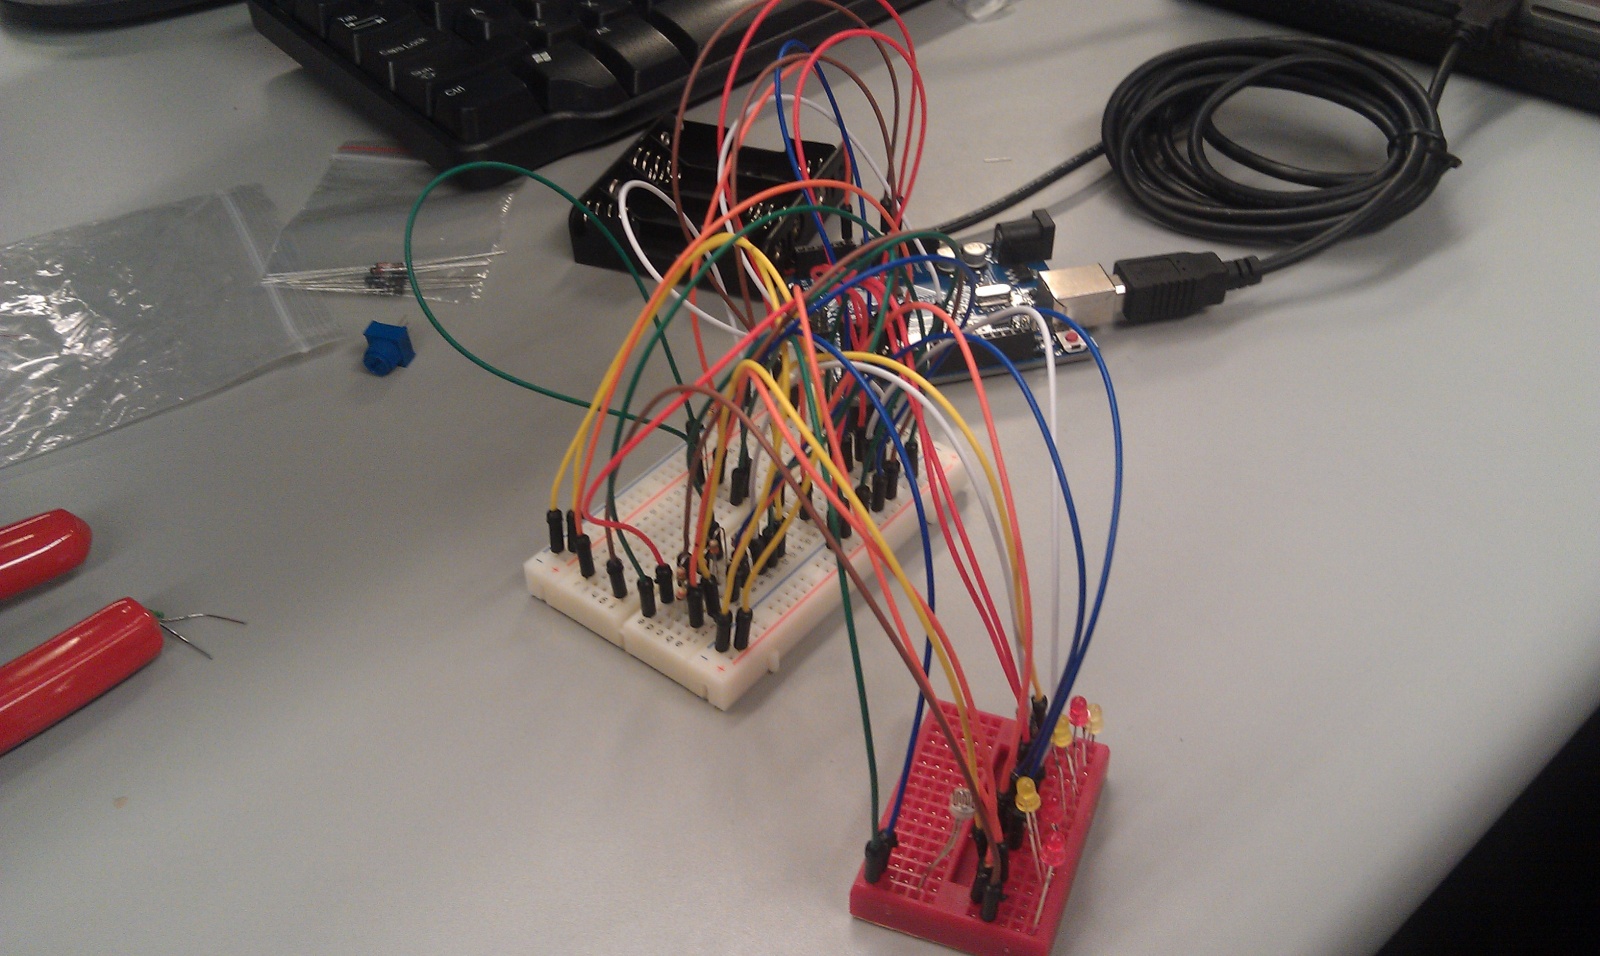
The entire system

Arduino’s connections

Big breadboard connections
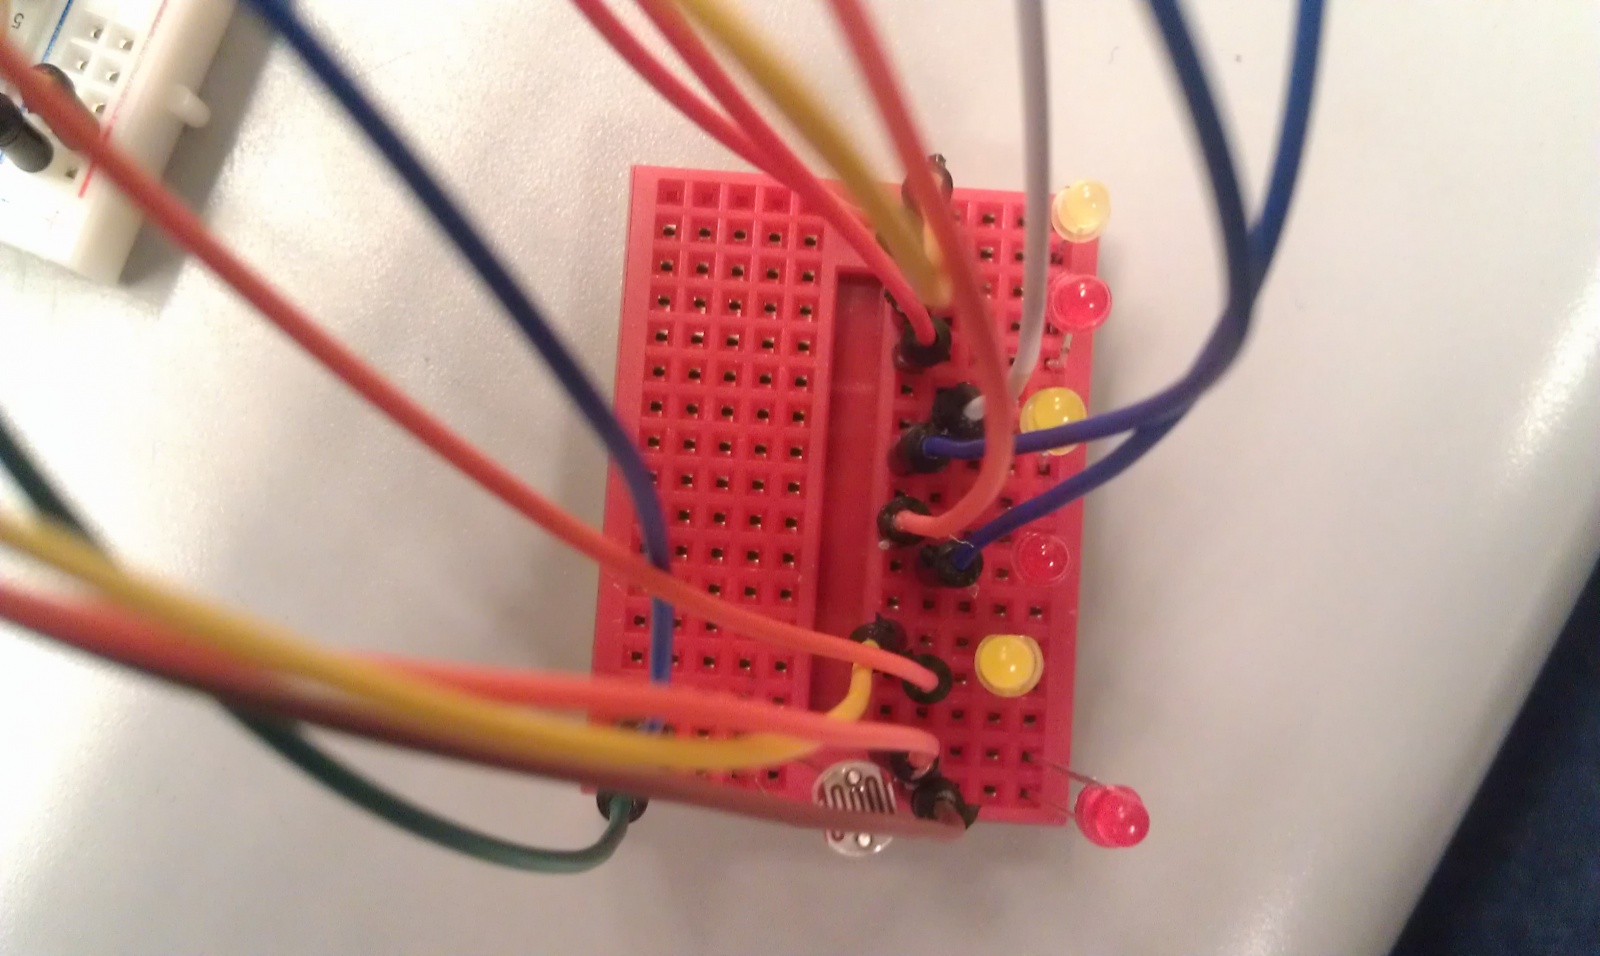
Little breadboard
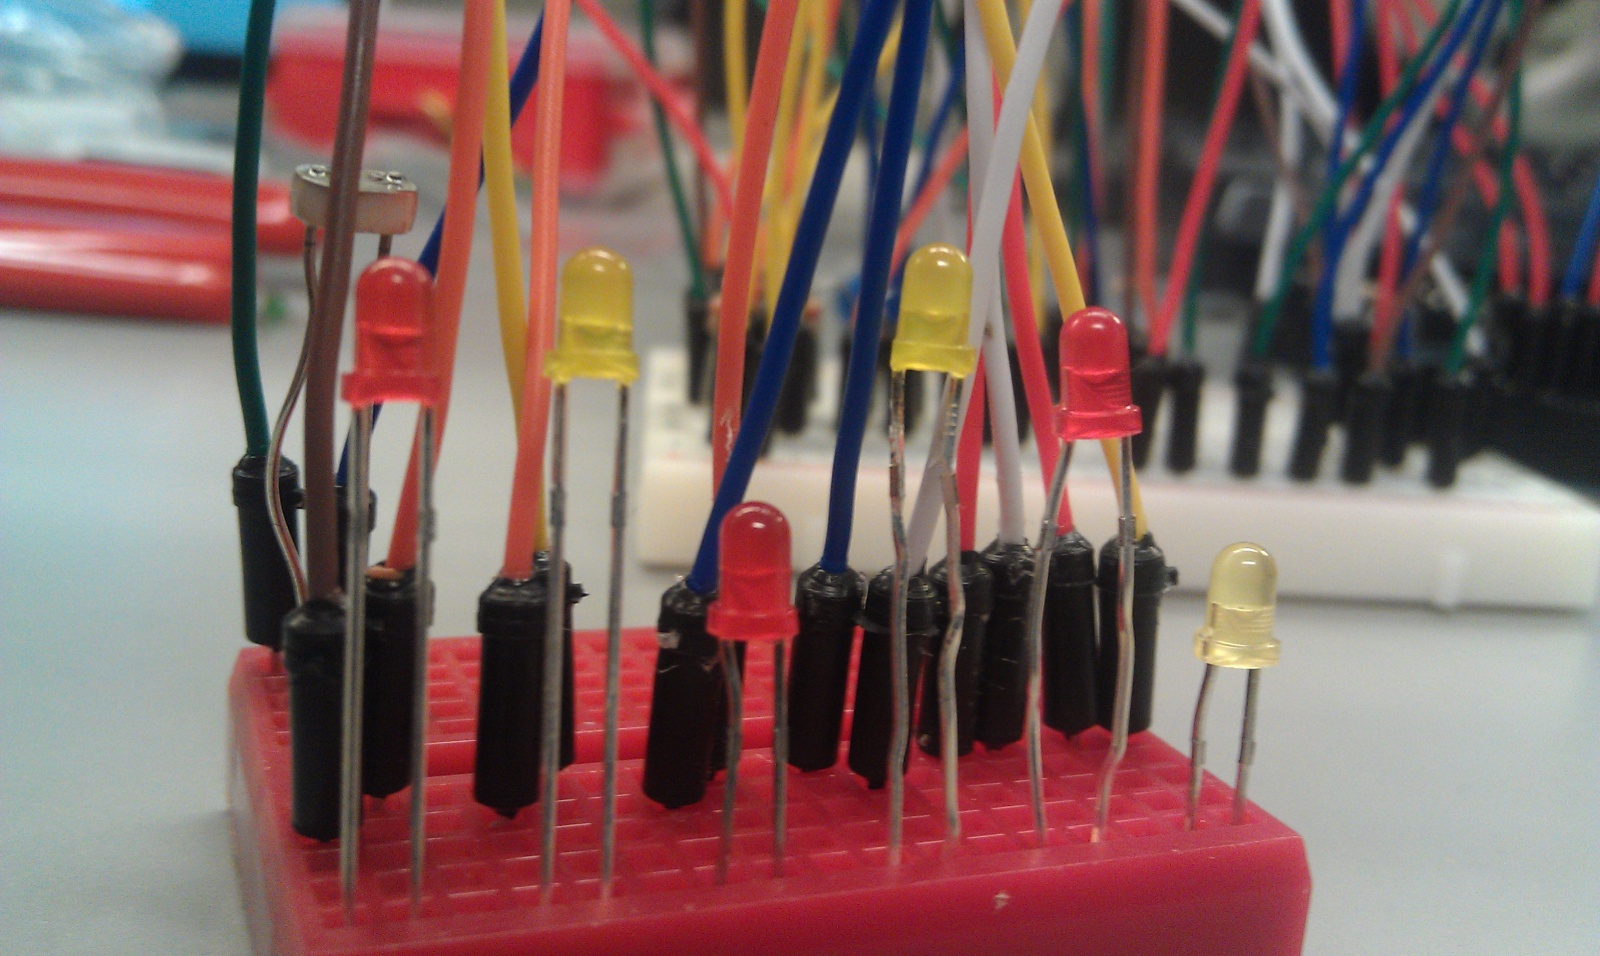
LEDs during the day
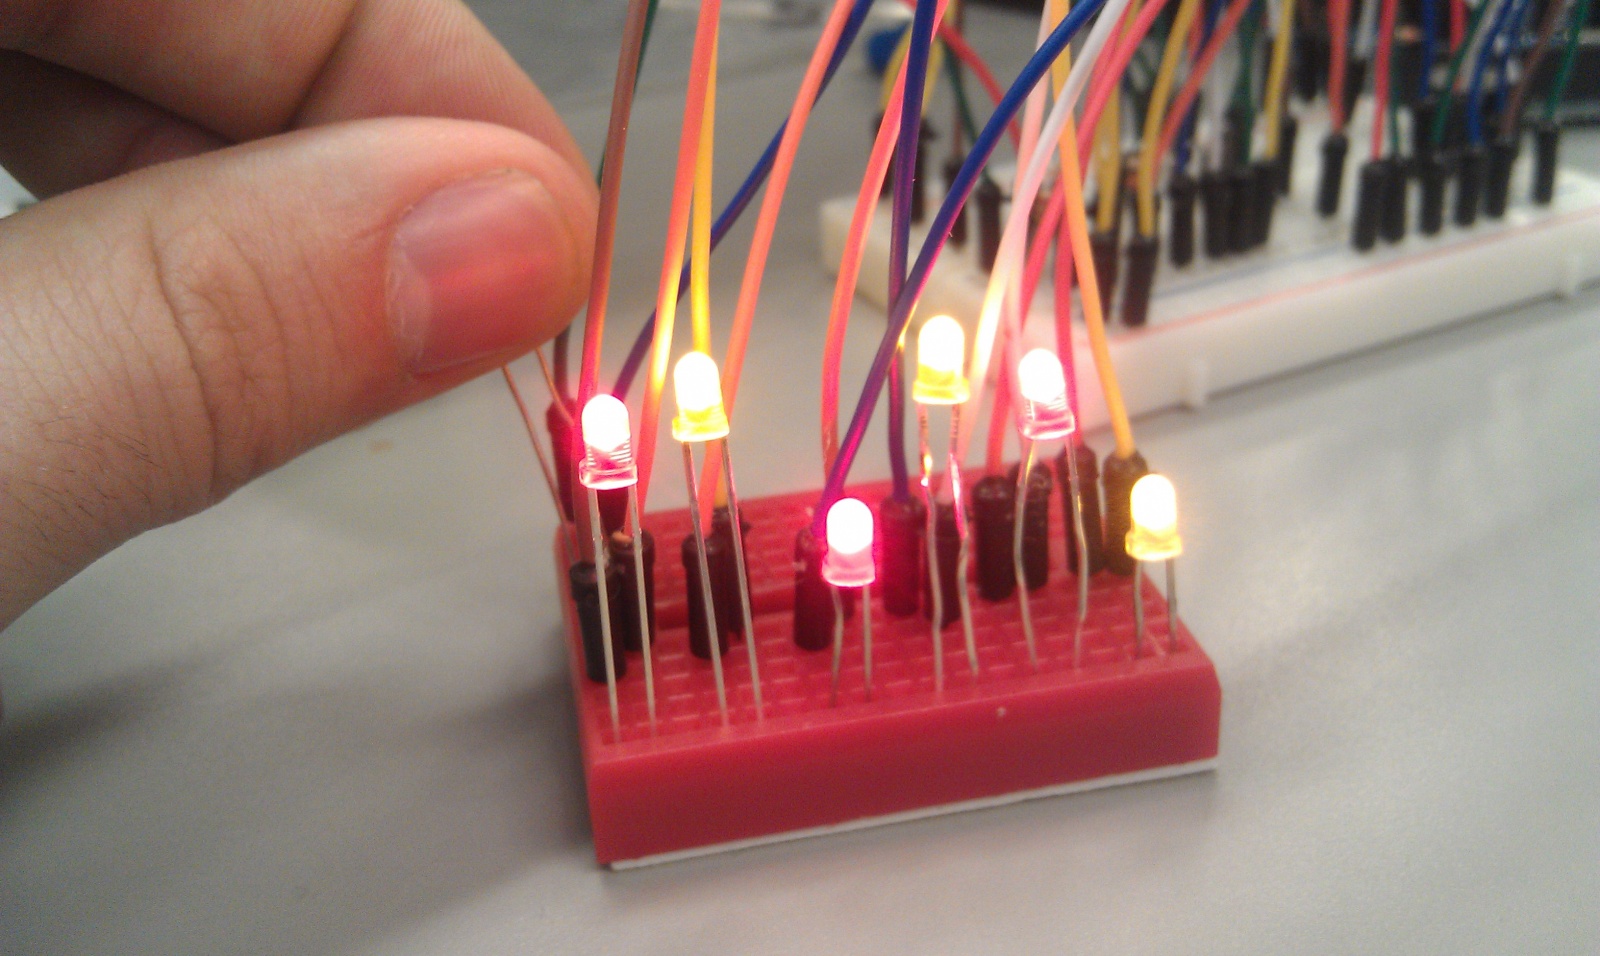
LEDs when ambient light levels decrease
Video of our system in action:
Ingredients:
– 6 LEDS (3 yellow, 3 red)
– 1 speaker
– 1 photoresistor
– 1 Arduino
– jumper wires
– 2 breadboards
– 6 330-ohm resistors
– 1 10k-ohm resistor
– 1 laptop with usb cable
Recipe:
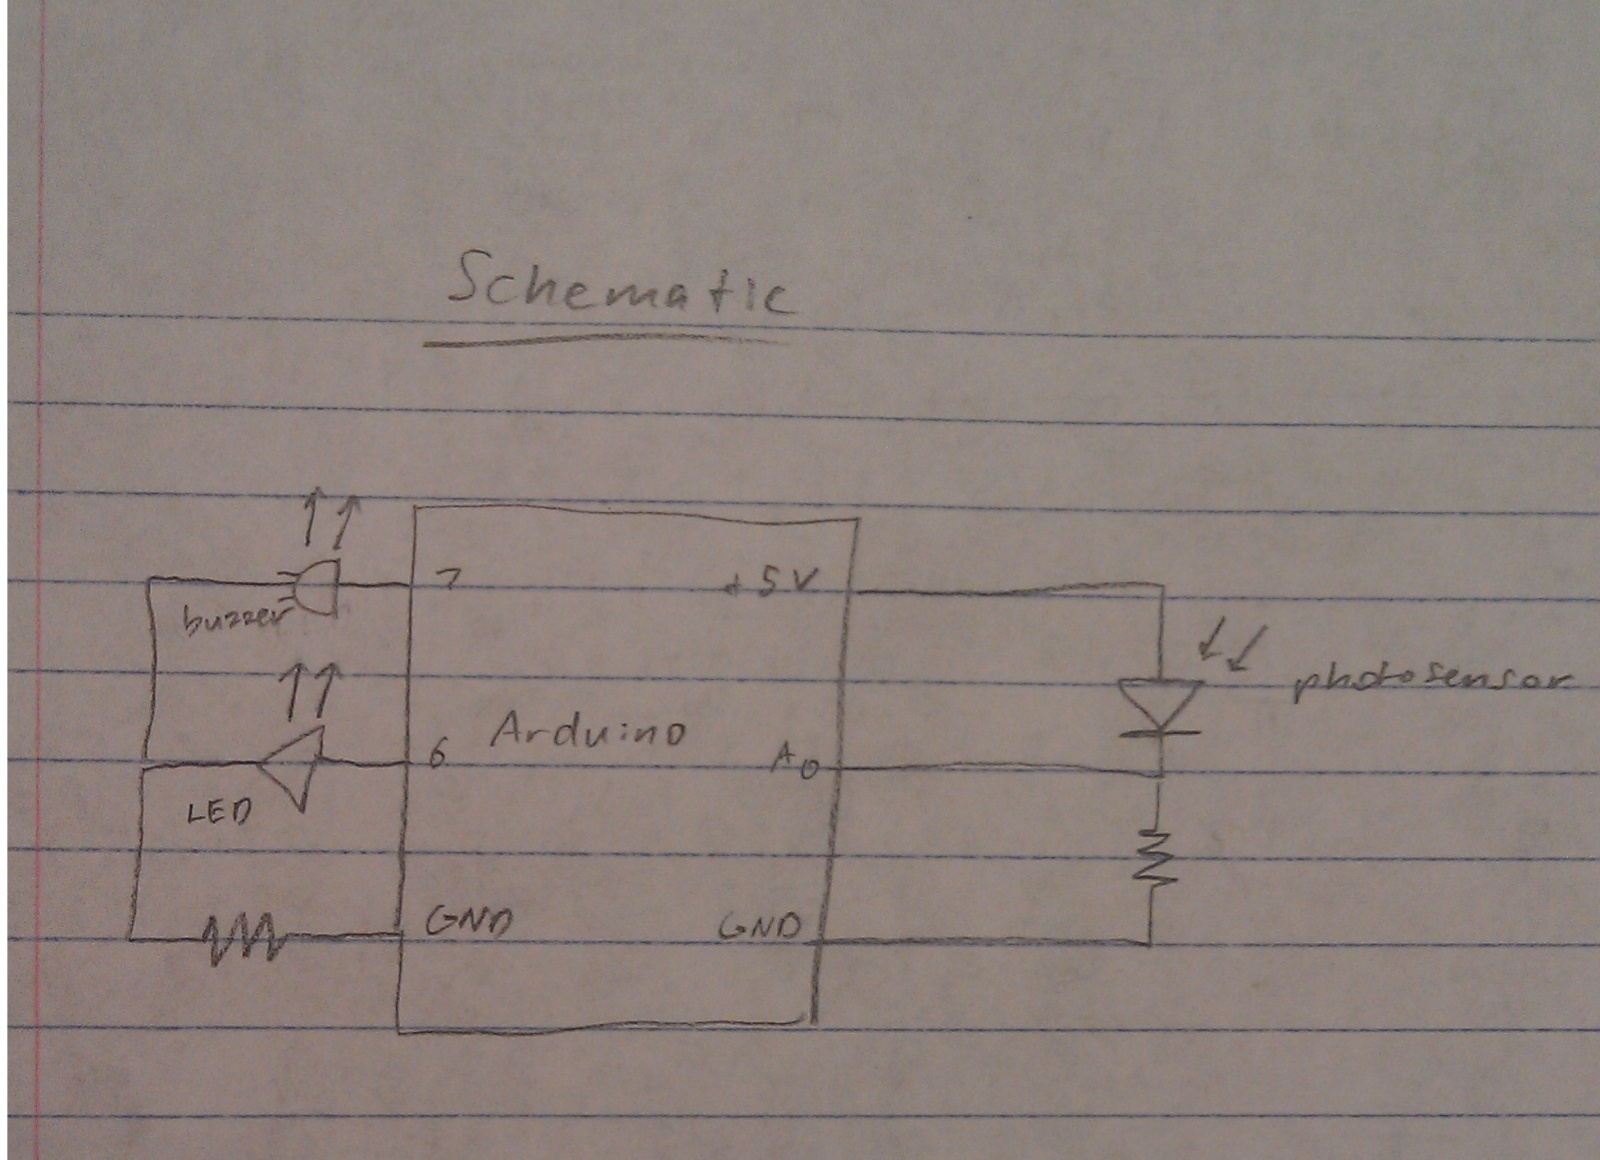
Circuit diagram
1. Set up the LEDs in a line on a breadboard next to the photoresistor. Place the speaker across the center divider of the other breadboard. You may find it helpful to connect ground and +5V to the power rails of the breadboard for the following steps.
2. Make the following connections:
– Connect the anodes of the 6 leds to pins 0-5 of the arduino.
– Connect the cathode of each LED to ground via a 330 ohm resistor.
– Connect one pin of the speaker to pin 8 and the other to ground via a 330 ohm resistor.
– Connect one side of the photoresistor to a +5V pin.
– Connect the other side both to A0 and to ground via a 10 kilo-ohm resistor.
3. Check the values output by the photoresistor using the serial monitor and the Serial.println() function. In the code, change the PHOTO_MAX and PHOTO_MIN values as appropriate.
4. Enjoy the comfort and security of living with the sweet alarm nightlight.
Source Code:
/*
  Authors: jasnyder, cwhetung, menewman, jyltwo
  Date: 2/25/2013
  COS 436 Lab L1: The Nightlight Alarm

  The nightlight alarm: lights turn on when it's dark, and when it
  gets bright again, the lights turn off and an alarm goes off to
  wake you up!
*/

#include "pitches.h"

const int FALSE = 0;
const int TRUE = 1;

//  Input / Output Constants
const int PHOTO_MIN = 100;  // set me as appropriate!
const int PHOTO_MAX = 1023;  // set me as appropriate!
const int DARKNESS = 500;  // set me as appropriate!
const int LIGHT = 700;  // set me as appropriate!

//  Musical Constants
const int NOTE_DELAY = 300; // (ms)
const int NOTE_DUR = 250;

//  Pin Connection Constants
const int photo = A0;
const int red1 = 5;
const int red2 = 3;
const int red3 = 1;
const int yellow1 = 4;
const int yellow2 = 2;
const int yellow3 = 0;
const int speaker = 8;

//  Variables
boolean islight = false;
int photovalue = 0;  //  value returned by photo sensor

//  Set internal pull-ups for output on LED pins
void setup()
{
  pinMode(red1, OUTPUT);
  pinMode(red2, OUTPUT);
  pinMode(red3, OUTPUT);
  pinMode(yellow1, OUTPUT);
  pinMode(yellow2, OUTPUT);
  pinMode(yellow3, OUTPUT);
}

void loop() {
  //  Grab the light value
  photovalue = analogRead(photo);

  // If it has recently become dark, turn on nightlight
  if (photovalue < DARKNESS && islight) {
    digitalWrite(0, HIGH);
    digitalWrite(1, HIGH);
    digitalWrite(2, HIGH);
    digitalWrite(3, HIGH);
    digitalWrite(4, HIGH);
    digitalWrite(5, HIGH);
    islight = false;
  }
  // If it has recently become light, turn off nightlight and play alarm
  else if (photovalue > LIGHT && !islight) {
    digitalWrite(0, LOW);
    digitalWrite(1, LOW);
    digitalWrite(2, LOW);
    digitalWrite(3, LOW);
    digitalWrite(4, LOW);
    digitalWrite(5, LOW);
    playAMerryWakingUpSong();
    islight = true;
  }
}

//  Play a classic little ditty!
void playAMerryWakingUpSong() {
  tone(speaker, NOTE_C5, NOTE_DUR);
  delay(NOTE_DELAY);
  tone(speaker, NOTE_C5, NOTE_DUR);
  delay(NOTE_DELAY);
  tone(speaker, NOTE_AS4, NOTE_DUR);
  delay(NOTE_DELAY);
  tone(speaker, NOTE_C5, NOTE_DUR*.75);
  delay(NOTE_DELAY*2);
  tone(speaker, NOTE_G4, NOTE_DUR*1.5);
  delay(NOTE_DELAY*2);
  tone(speaker, NOTE_G4, NOTE_DUR);
  delay(NOTE_DELAY);
  tone(speaker, NOTE_C5, NOTE_DUR);
  delay(NOTE_DELAY);
  tone(speaker, NOTE_F5, NOTE_DUR);
  delay(NOTE_DELAY);
  tone(speaker, NOTE_E5, NOTE_DUR);
  delay(NOTE_DELAY);
  tone(speaker, NOTE_C5, NOTE_DUR);
  delay(NOTE_DELAY);
}