
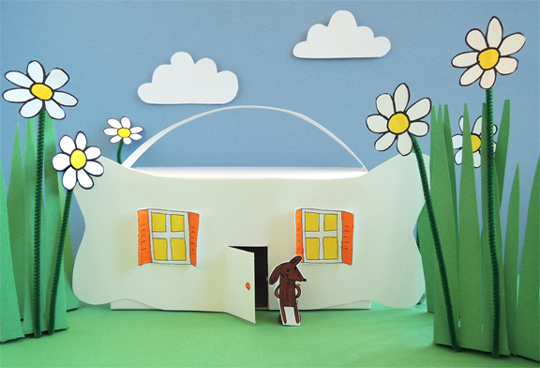
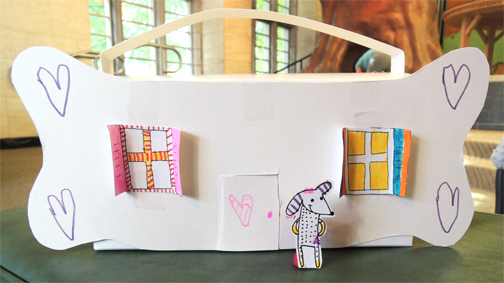
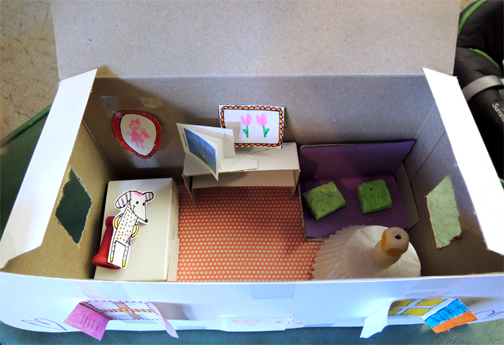
 Do not adjust your monitor. The cuteness you are seeing is correct. That is an itty bitty dog proudly standing in front of his bone house in a field of daisies. Inside the house – an itty bitty sofa, rug, wall art, table, lamp, and book too!
We read Itty Bitty by Cece Bell (Candlewick Press, 2009). Itty Bitty is a very very tiny dog. One day, while on a stroll, he discovers an enormous bone. Soon Itty Bitty has hollowed out the bone (and added windows and a door to boot). But the bone is so big and empty, it just doesn’t feel right. So Itty Bitty goes SHOPPING! In the “Teeny-Weeny Department Store” he selects a table, rug, sofa, lamp, and book (don’t miss the hilarious selection of book titles on the teeny-weeny shelves). Once everything is arranged inside the bone, there’s no denying it. Itty Bitty has found his very own, perfectly cozy, incredibly pleasing, brand new…home.
For our story time activity, we made bone houses with carrying handles. But we also created some magic bucks and went a-shoppin’ for furnishings at a series of kid-sized retail stores!
 You’ll need:
- 1 box (mine was 4 ½” X 4 ½” x 9” – a large tissue box works too)
- 1 box cutter
- 1 bone template, printed on 8.5″ x 14″ paper
- 1 large rectangle of white poster board for bone (mine was 6″ x 12.5″)
- 1 strip of white poster board for handle (mine was 1.5″ x 15″)
- 1 house template, printed on 8.5″ x 11″ white card stock
- 1 wooden spool (approximately 1″ tall)
- 1 paper baking cup
- 1 plastic sample cup
- 2 wooden beads
- 1 small box (mine was 2” x 3” x 3”)
- 1 piece of construction paper, any color (mine was approximately 3″ x 4″)
- 2 small pieces of kitchen sponge
- A selection of patterned paper
- 1 magic bucks template, printed on 8.5″ x 11″ white standard paper
- 1 set of retail stores (more on that later!)
- Scissors, tape, stapler for construction
- Markers for decorating
- Hot glue
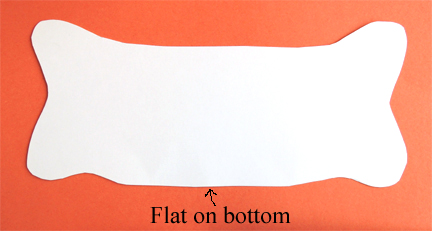
Before we embark on the project, a quick word about the bone template. Believe it or not, we tested 6 bone prototypes before Katie finally struck on a model that worked. You’ll notice that, on one side of the template, the bone bulges outwards and the bottom of the bulge is flat. This allows the bone to be flush with the bottom of the box. So bulgy flat part = bottom of the bone.
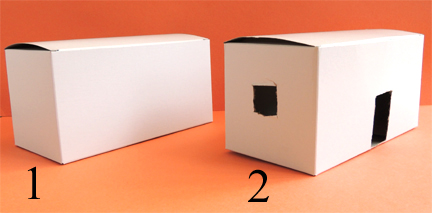
 On to the house! Use a box cutter to create a doorway in the front of the box, and a small window on each side.
 Tab the ends of a strip of white poster board, and staple the tabs to the underside of the box lid (if your box doesn’t have a lid, attach the ends of the strip to the sides of the box). Your box house now has a carrying handle.
Using the template, trace and cut a white poster board bone. Lay the bone on top of the box (and make sure to line the bulgy flat part flush with the bottom of the box). But – before you hot glue the bone to the box, use scissors to cut a little door in the poster board, directly above your box’s doorway. Then hot glue the bone to the box.
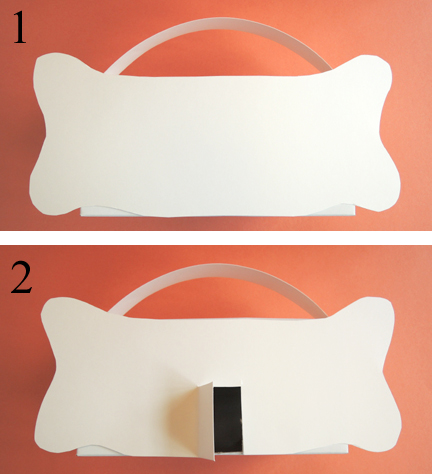 The final touch to the exterior is the shuttered windows (you’ll find them on the house template). I had the kids color and tape them on either side of the front door.
On to the furniture! We prepped most of the furniture and accessories in advance, and then “sold” it in our teeny-weeny retail shops. I’ll provide instructions for how to make the furniture and accessories first, and then describe the order in which they were sold in our shops.
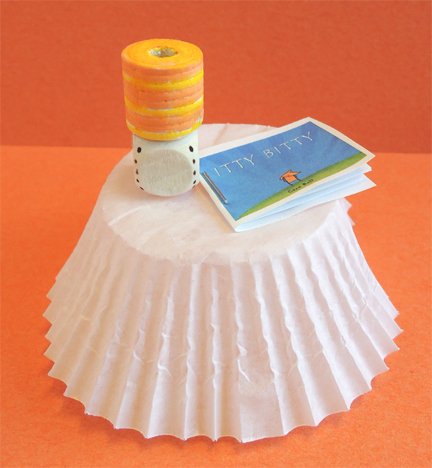
To make a lamp table, hot glue a paper baking cup “table skirt” on top of a plastic sample cup. The “lamp” consists of 2 wooden beads hot glued together (I used unpainted beads so the kids could decorate them later with markers). The little book (which is a teeny-weeny copy of Itty Bitty of course) is on the house template. Cut it out, add a few blank pages, and staple everything together. Here’s what a finished table, lamp, and book look like:
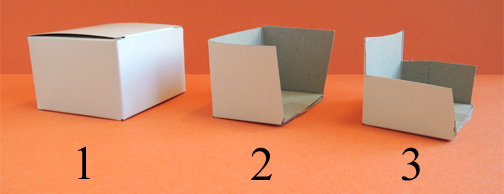
 To make a couch, cut a small box down until it resembles a straight-backed couch with armrests:
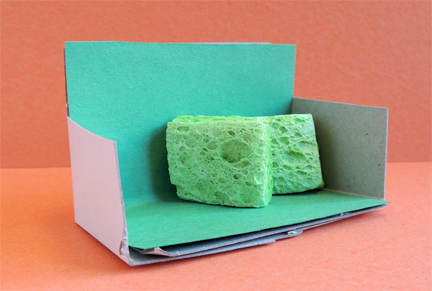
 Fold a small piece of construction paper, then glue (or tape) it inside the couch. Add 2 comfy sponge cushions.
 There are also 4 wall art frames on the house template – they can be colored in and attached with tape (or glue). The final item on the template? An itty bitty dog! That gets colored as well, and hot glued to the front of a wooden spool.
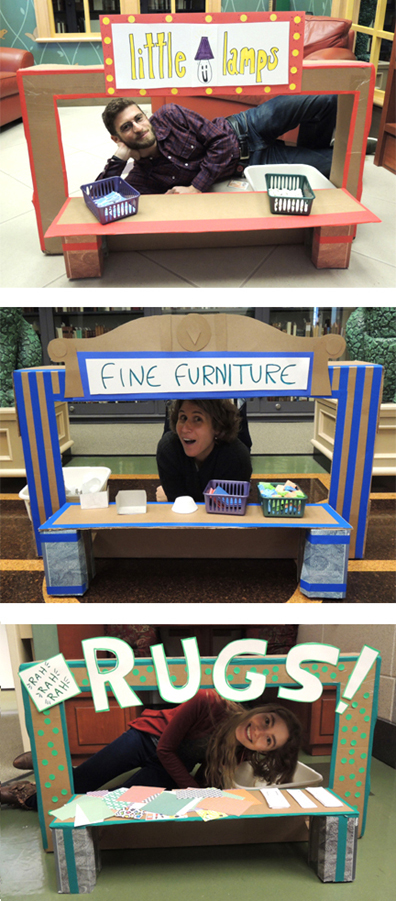
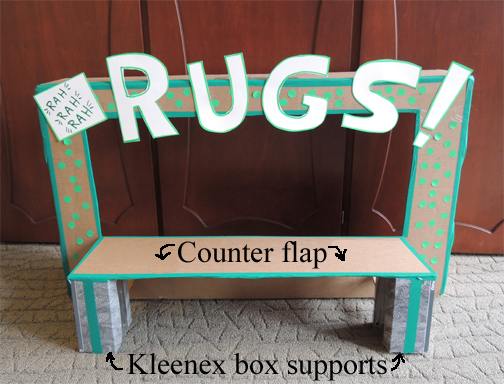
 Now it’s time to SHOP! The shops can be as simple as tabletop stores set up in different areas of your classroom or program area. I just happened to have 3 oversize boxes with lids on hand (which I salvaged from the recycling pile). So we used the bottom of the boxes to make store fronts.
Basically, we cut a flap in the box and folded it down to create a counter. We reinforced the ends of the counter with tissue boxes, and then decorated the outside with color masking tape, poster board, and dot stickers.
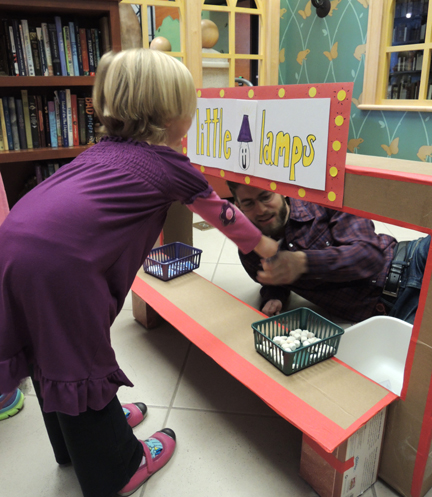
 The last step is making some money! I handed each kid 3 undecorated “magic bucks” from the template and told them to decorate the bucks. When everyone was finished coloring, they grabbed their houses (the carrying handles made them perfect shopping baskets) and hit the stores. At “Little Lamps” with Mr. Ian, a magic buck earned the shopper a lamp and a book.
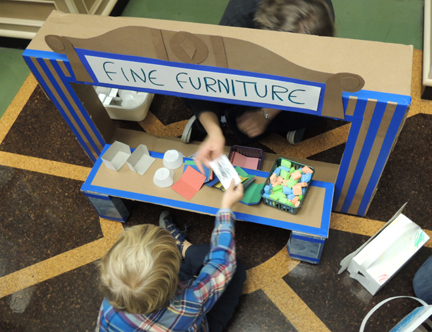
 At “Fine Furniture” with Dr. Dana, a magic buck went pretty far – you got a couch frame, a piece of construction paper for upholstery, 2 sponge pillows, and a lamp table.
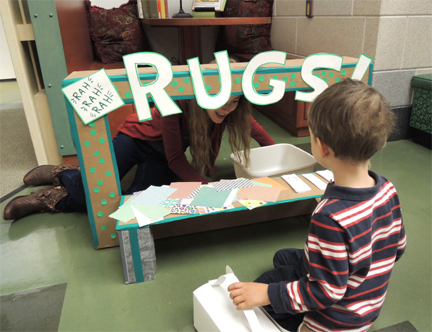
 At “Rah! Rah! Rah! Rugs!” with Miss Joani, a magic buck earned the holder one “rug” (i.e. a piece of patterned paper) and wall art frames.
 When story time was over, we had a drawing for patrons who were interested in taking the story fronts home for more playtime (and there were plenty of takers!). With the shopping completed, kids took their purchases back to the program area to do some intense interior decorating. I had to snap a photo of this little house. Look at that fancy Itty Bitty!
 She added a bed and a bookshelf to her house too!
 Much later that day, I spotted an Itty Bitty house proudly being walked down the street by a father and daughter. It’s always fantastic to see the projects out and about after story time.
I also received this e-mail from a mom:
Thank you very much for the program yesterday! My kids have been playing with Itty Bitty and his house non-stop since yesterday. He’s gone on a car trip, a boat trip (in a river and across an ocean), and he slept beside my son’s bed.
This e-mail brought a HUGE smile to my face. I’m still smiling actually.
From ITTY BITTY. Copyright © 2009 by Cece Bell. Reproduced by permission of the publisher, Candlewick Press, Somerville, MA.