 It was the best of cakes, it was the worst of cakes. Armed with a recipe, lemons, and an inordinate amount of patience, Katie took a Lemon Bar Cake Bake literary recipe for a test drive….twice. Which means I got to eat TWO cakes Katie baked. Which means yum (though, as you will soon read, one was a tad melancholic). Take it away Katie!
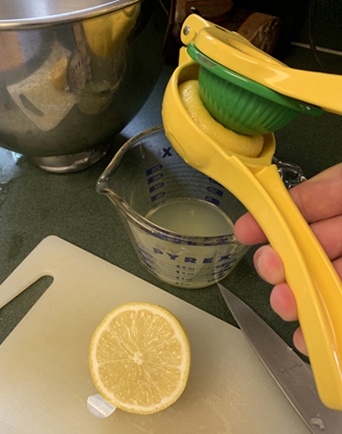
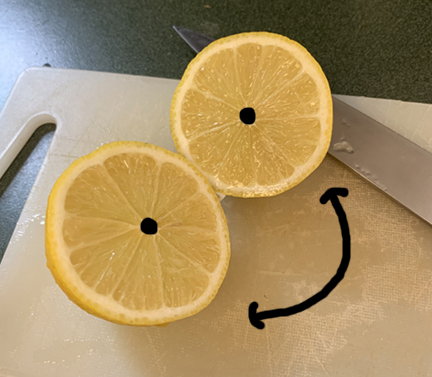
My house typically has a small but steady supply of lemons, but a recent error in sharing grocery store shopping lists meant we were faced with having TOO many lemons. While it’s hard to grow tired of fresh lemonade, my hands and arms were getting worn out from the constant squeezing. I decided it was time to do something new with our lemon abundance.
I went on a search and discovered a recipe for a Lemon Bar Cake Bake in the picture book titled Pop Pop and Me and a Recipe, written by Irene Smalls, and illustrated by Cathy Ann Johnson (Xist Publishing, 2012 – read here by The Little Reading Nook). Pop Pop and his grandson cook up a fine day together preparing, baking and eating a delicious lemon cake. Filled with sweet rhymes and beautiful imagery of a grandfather with his young grandson, this book is sure to bring a smile to your face.
Armed with a plethora of lemons and a bottle of lemon extract left over from making Harry Potter’s favorite Triple Power Icy Lemon Pops, I pulled out the rest of the required ingredients that were already in my pantry and got to work.
I soon discovered there were a couple of ambiguous directions in the recipe. Under the list of needed utensils, it mentioned a flour sifter, but the recipe never specifically stated when you should use it. The instructions also said the butter needed to be either softened or melted. I decided to use softened butter, which I later learned was not the correct choice (more on that shortly).
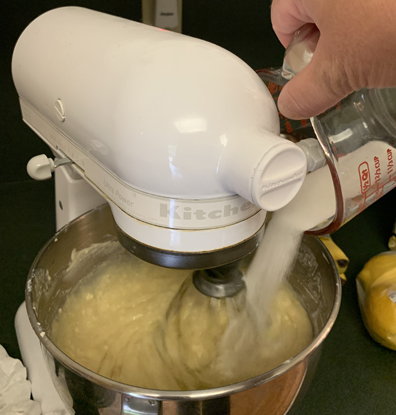
After stirring the dry ingredients together, substituting all-purpose flour for cake flour, I set the bowl aside and started combining the other items into a different mixing bowl. That’s when the troubles started. I ran out of lemon extract, so I decided to add a little bit more lemon juice to cover the missing extract. The softened butter was also not fully mixing into the batter, despite using my trusty Kitchenaid mixer at high speed.
My son was heading down the shore for a few days with some family friends, so I decided to send a cake down with him. Thankfully, there was enough batter to separate the cakes into two smaller aluminum baking trays.
When I pulled the trays out of the oven, I knew something was amiss. It looked… weird. Upon trying the cake, my tastebuds confirmed what my eyes had seen. The cake was off. It wasn’t particularly bad, but it wasn’t good either. There was a strange odor that I have reason to believe was the lemon extract. According to the bottle, the extract hadn’t expired, but I know it was roughly four years old. There may have also been a reason why the recipe called specifically for cake flour, and I knew I should have fully melted the butter before mixing it together with the other wet ingredients.
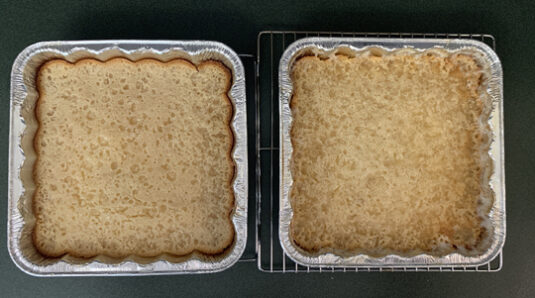 Sad and defeated, I threw what was left of my original lemon bar cake into the trash. I later learned the cake I sent with my son also ended up in the garbage. The beachgoers shared my opinion and were underwhelmed with the texture and flavor of the cake.
[Dr. Dana: I also had a piece. The lemon was anemic and definitely off. The cake had a weird heavy texture with an occasional eerie lump thrown in. It was kinda gross, but if you’re wondering if I still ate the whole piece, the answer is YES.]
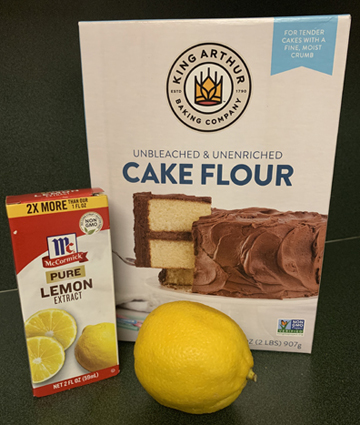
However, I am not one to give up on a recipe. I was determined to make Pop Pop proud and bake, bake his favorite cake. On a future visit to the grocery store, I bought a new bottle of lemon extract and a box of cake flour. I followed the recipe down to the very letter.
 I sifted the dry ingredients together, the butter was fully melted, I had plenty of fresh lemon extract, and I let my mixer run for an extra minute to make sure all of the ingredients were blended well together. I slid the new cake into the oven, hopeful the changes would yield a better result.
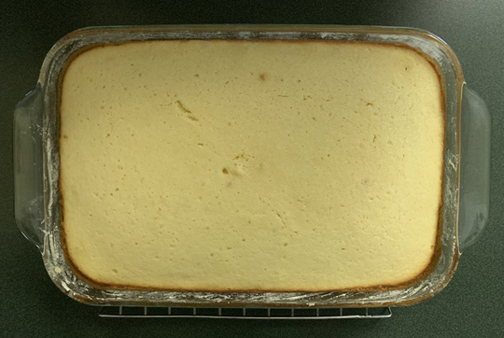
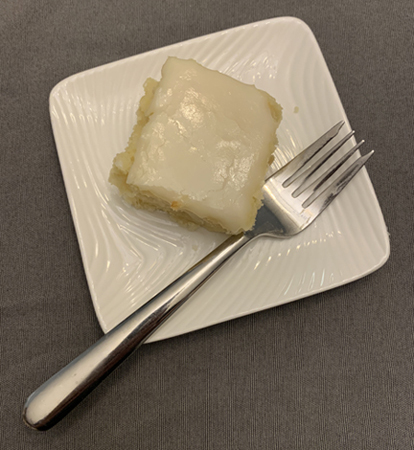
And it did! As you can see from the photo, the cake is definitely yellower and has a much more even texture compared to the first attempt. It passed the taste test too. It was delicious!
The Lemon Bar Cake Bake is a heavier density cake that reminds me of a pound cake, but the flavor was like a big lemon party (to quote one of my colleagues). My son and I both loved the lemon icing that coated the cake with a sweet lemonade essence. No question that the second effort was much, much better than the first.
[Dr. Dana: I too enjoyed a piece of the second cake attempt. MUCH better flavor, better texture, no lumps, and the glaze was super yum!]
Lesson learned: trust the recipe and do what it tells you to do. Clearly Pop Pop knows best!

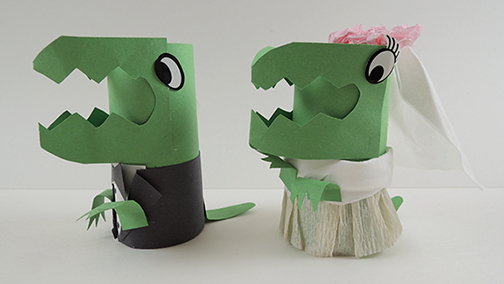
 It’s not June, but we’re already rolling out the fancy wedding cakes for romantic reptiles! This simple project was met with incredible enthusiasm with the story time kids, both with cake decorating, and well-dressed dinosaurs.
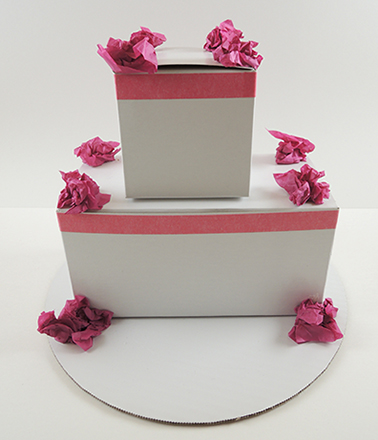
 Theoretically speaking, what WOULD happen if a llama created a black hole with his overzealous cake consumption? Would the world survive?
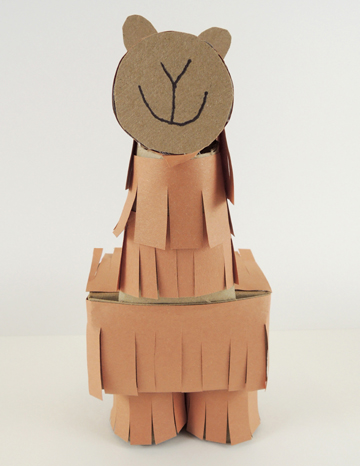
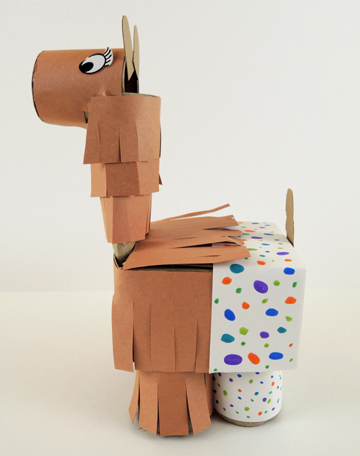 First, wrap 4 toilet paper tubes with constructions paper…2 with brown paper fringes, 2 with plain white. Next, cut the bottom off a small box (like a square tissue box). Then set the box on top of the legs (we hot glued the legs in place, too). The rest of the box gets decorated with brown construction paper fringes and white construction paper “pants.”
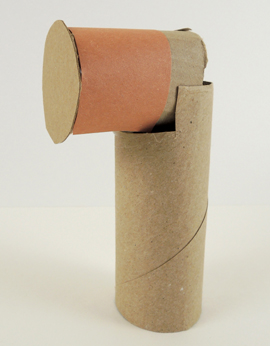 Now wrap the neck with brown construction paper fringes, pinch the bottom of the neck, and slide it into the front of the box (if you’re using a tissue box, you’ll need to cut a slit in the box). Use spare cardboard to make llama ears and a tail, add some eyes, and you’re done!
 We decided to take the project one step further by introducing a black hole activity (and yup, crafting a black hole was a first in my long history of story times!). First, we had kids make pies and cakes using a paper cup, tin foil, and a paper baking cup.
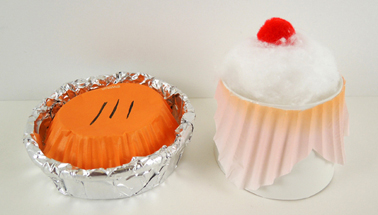 The pie tin is the top of the paper cup (i.e. the open mouth part of the cup) wrapped in tin foil. The pie is the bottom of a paper baking cup.
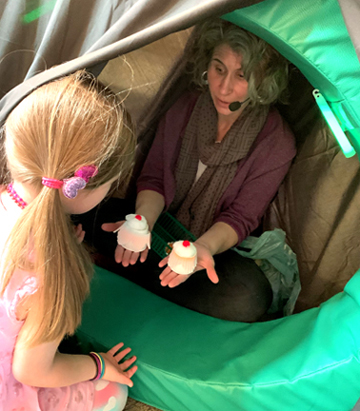 I sat inside, and kids had to enter the black hole, look at the 2 cakes and 2 pies “floating” inside it, and select the one they had created!