 A lighthouse shines in the darkness, allowing your little boat to safely navigate our story time waters – which look surprisingly like blue contact paper. Huh. Who knew the ocean came in long, rectangular sheets?
We read Who Sees the Lighthouse?, written by Ann Fearrington, and illustrated by Giles Laroche (G.P. Putnam’s Sons, 2002). With a blink, flash, and twirl, a lighthouse sends its light over the waters to watchful sailors, pilots, turtles, whales, and a few even more interesting visitors. This charming counting book has a surprise ending when it comes to concept and scale!
You’ll need:
- 1 small oatmeal container
- Construction paper
- 1 plastic cocktail cup
- 1 craft stick (use a 4.5″ one)
- 1 box cutter
- 1 LED light or mini glow stick
- 1 small box (ours was 2″ x 3″ x 3″)
- 2 strips of poster board
- 1 foam bead
- 1 drinking straw
- 1 piece of string (ours was 39″ long)
- 1 toilet paper tube
- Hole punch, scissors, and tape for construction
- Markers for decorating
- Hot glue
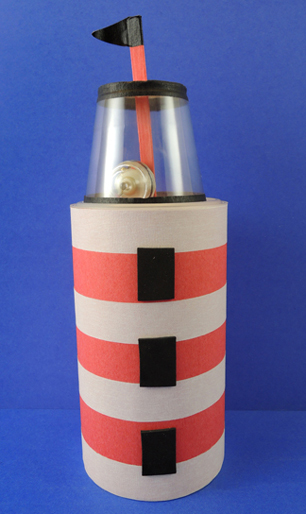
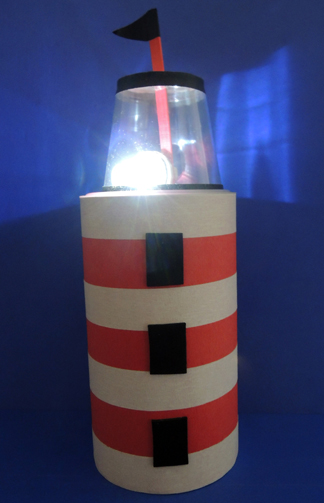
We’ll begin with the lighthouse! First, wrap a small oatmeal container with construction paper. We used color masking tape to create stripes, and self-adhesive foam to make a doors and windows, but you can also use construction paper or markers for this.
 The most important part of this lighthouse is the light! You can put an LED votive or a mini glow stick in there and be done. But we wanted two things: 1) The top of the lighthouse to rotate; and 2) The light inside to “spotlight” like a real lighthouse. So I grabbed a bunch of submersible LED lights from the floral section of Michaels Craft (bring a 40% off coupon, because these are pricey at $20 for 12).
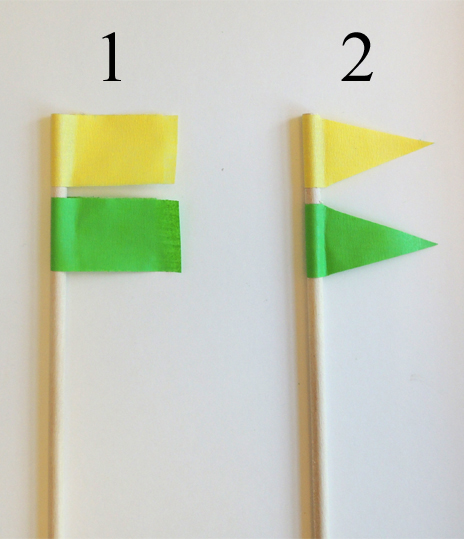
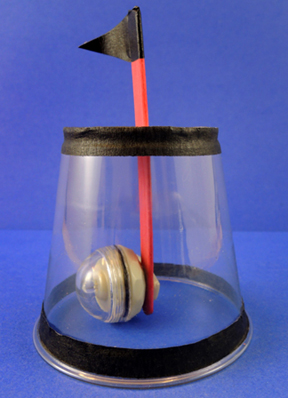 First, wedge one end of a 4.5″ craft stick into the clip on the back of the LED light. Next, cut a slit in the top of a soft plastic cocktail cup. Thread the free end of the craft stick up through the slit in the cup. Finish by adding a masking tape or construction paper flag to the top of the craft stick.
So why the craft stick? Submersible LED lights need to be twisted to turn the bulb on, but it’s awkward to twist a small light inside an equally small cup. With our design, you can lower the craft stick to drop the light outside the cup, then pull the stick upwards to return the light inside the cup. Cool, right? When the LED is lit, place the cup on top of the oatmeal container. Then simply rotate the unattached cup on top of the oatmeal container. You now have a lighthouse spotlight!
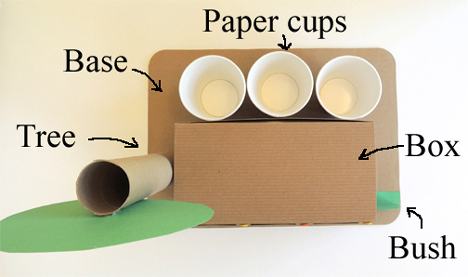
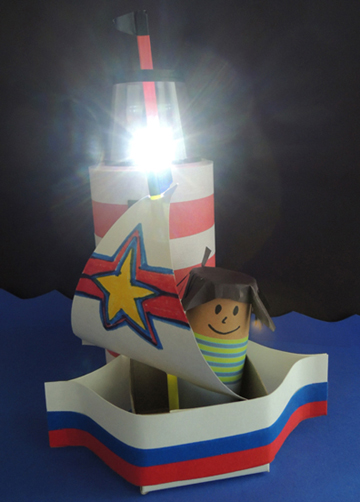
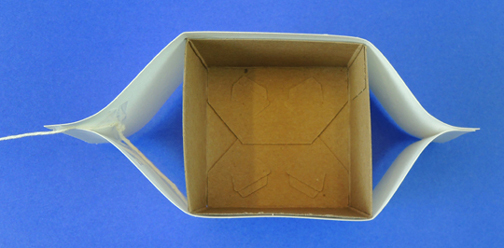
 Next up, the sailboat! Cut the top and/or lid off a small box, then hot glue 2 poster board strips on each side of the box. Pinch and hot glue the free ends of the poster board together in the front and back to create a boat shape. Tape a string to the top front of the boat (if you tape the string to the bottom, the boat will keep capsizing).
 Next, use scissors to enlarge the hole of a foam bead. You want the hole large enough to hold a drinking straw. Hot glue the foam bead to the front of the boat. Note how the foam bead is not centered in the boat – it’s glued a little ways towards the front:
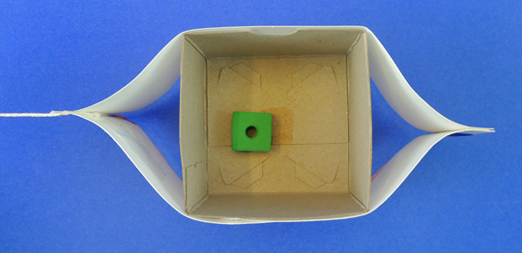 Why is the foam bead slightly forwards in the boat? So you can fit your toilet paper tube person behind the sail of the boat (though if you use a slightly larger box, this might not be an issue).
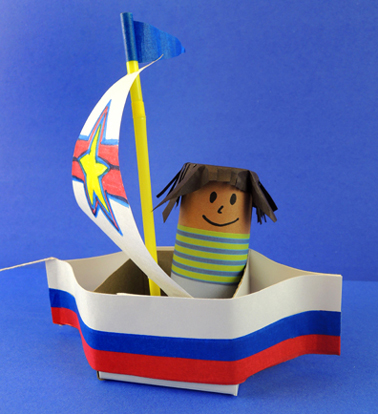 To finish the boat, use a hole punch to create holes in the top and bottom of a triangle of white construction paper. Decorate the sail with markers, then thread it through a drinking straw. Insert the bottom of the straw into the foam bead (we also recommend a masking tape or construction paper flag to the top of the mast to keep the sail from popping off). Use construction paper and markers to decorate the boat and a toilet tube person.
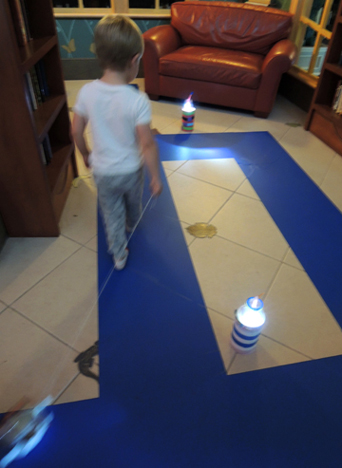
When all the lighthouses and boats were done, we led the kids to an area of the gallery where we had created an ocean “pathway” using a roll of blue contact paper. We placed all the lighthouses along the pathway and turned off the overhead lights.
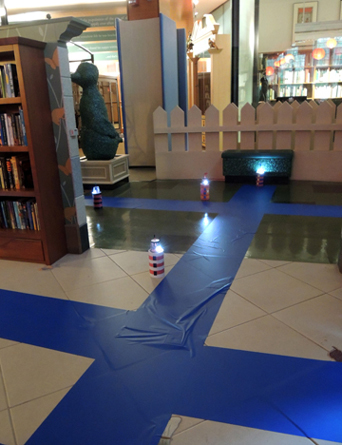 The kids pulled their boats along the pathway, which was lit by beautiful little lighthouses…
Because Who Sees the Lighthouse? is a counting book, we asked the kids to count each lighthouse they passed. Then they came to me with the final number and were awarded fish stickers!
It’s another bonus points blog title! Best Disney song, ever. Still waiting for someone to bust it out on The Voice…
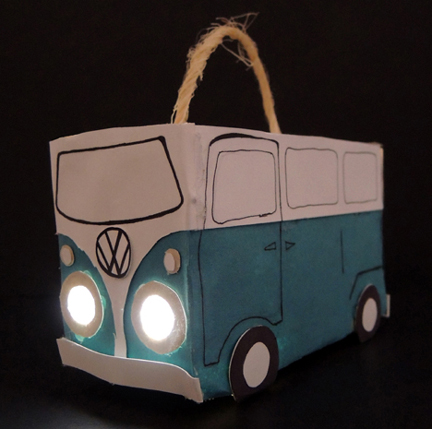
 We used a submersible LED to light Marissa’s van. You can find them in the floral section of Michaels craft store – 9 cost $21, but I always use a 40% off coupon.
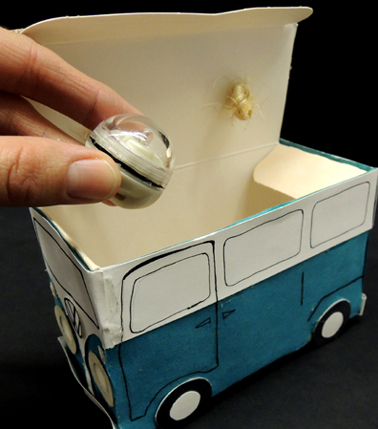 If the LEDs are too pricey, a glow stick will do the trick. Drop the illumination of your choice in the vehicle box, close the lid, and you’re done. Vroom vroom vroom!