
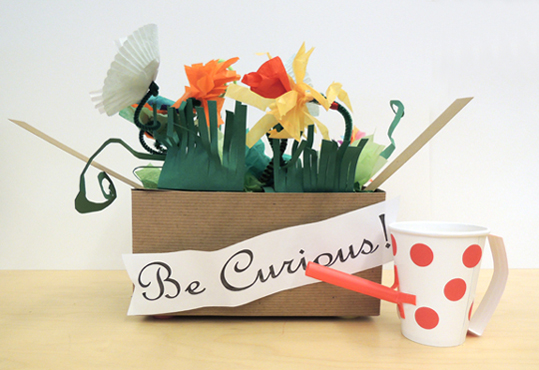
It’s a garden…
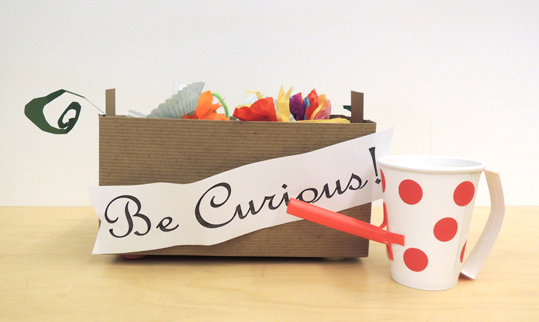 …that grows before your very eyes!
 Pssst…the secret is the little cardboard tabs on the side.
We read The Curious Garden by Peter Brown (Little, Brown, 2009). While taking a walk in a dreary city without any trees or greenery, little Liam discovers a neglected patch of wildflowers and plants. He decides to help. As the garden flourishes, it gets curious and begins to spread over the entire city, slowly changing the dull landscape into a fantastic, colorful masterpiece (and the citizens of the city into eager, joyful gardeners).
You’ll need:
- 1 box (mine was 9” x 4 ½” X 4 ½” but a large tissue box works too!)
- 1 piece of tagboard
- 4 large large plastic buttons, or anything that has a little weight to it (pennies, bottle caps, etc.)
- Hot glue
- Construction paper, pipe cleaners, tissue paper & markers for decorating
- Tape and scissors for construction
- 1 white paper cup
- 1 strip of poster board (approximately 1″ x 5″)
- 1/2 of a bubble tea straw (approximately 4″ segment)
- Blue cellophane
- 1/2 sheet of dot stickers (optional)
- A “Be Curious” banner template printed on 8.5″ x 11″ paper
Cut the top (or lid) off the box. Save for later. Next, hot glue the four buttons to the (outside) bottom of the box, like little feet:
 These buttons will keep the box grounded when you’re pulling on the tabs to make the garden “grow.”
Now it’s time to construct the fake floor of the box. Since I used a box with a lid, I simply re-used the lid. You can also use tagboard. Cut the floor to fit the (inside) bottom of your box. Make sure the floor is smaller than the inside of the box, so it slides up and down smoothly.
Now cut 2 strips of tagboard to make the tabs that will raise and lower the floor. The size of the strips depends on your box, but make sure they are at least 2″ taller than the top of your box so kids can grab them easily. Staple the tabs on the short ends of the floor, then bend upward.
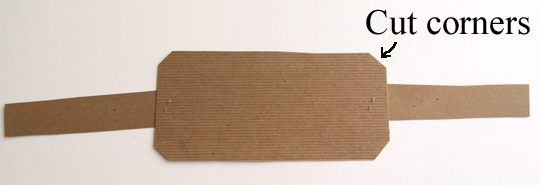 After some trial and error, we determined that cutting the corners off the floor allows it to slide up and down more easily.
Now it’s time to decorate! We provided green construction paper in various shapes and sizes, a rainbow assortment of tissue paper, three different types of green pipe cleaners…and let everyone go wild. But remind the kids that they can only decorate the fake floor of the box. If they tape stuff around the top or inside of the box, the floor won’t slide!
Since some kids (and parents) are somewhat daunted by tissue paper flowers, I created a really easy muffin cup flower. Punch a pipe cleaner through a muffin cup. To keep the muffin cup in place, put kinks in the pipe cleaner on both sides:
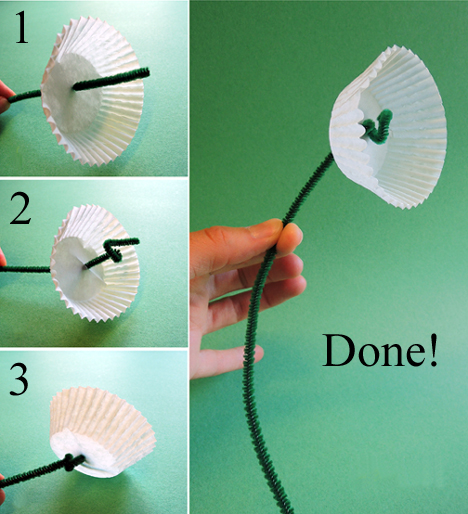 Variation: Punch the pipe cleaner through TWO muffin cups, and fringe one!
 On to the watering can! Use markers to decorate the white poster board handle of the watering can and tape it to the white paper cup.
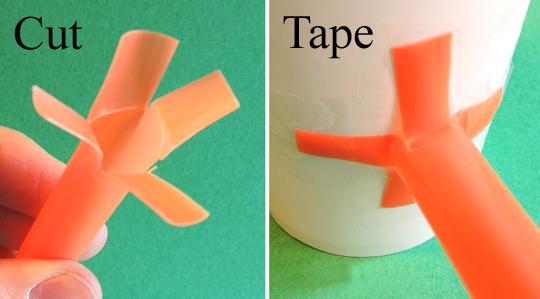
For the spout, cut four tabs on one end of your bubble tea straw segment. Spread the tabs out, and tape to the cup. When taping, you’ll need to adjust the tabs to get the straw to point upwards like a spout.
 Finish the watering can by peppering it with dot stickers! For extra fun, I put squares of blue cellophane in a plastic tub “pond” and kids strolled over to “fill up” their watering cans. The final touch on the project was a “Be Curious” banner taped to the front of the box!
To “grow” your garden, drop the fake floor in the box with the tabs sticking upwards, sprinkle everything with “water” from your watering can, and then pull slooowly on the tabs to make your garden emerge!