It’s a big job, but our stellar sanitation team is up to the task! Drive your garbage truck to multiple locations around town, then head to the city dump and send everything flying down the chute. Yes we made a mess, but we had SO much fun!
We read Trashy Town, written by Andrea Zimmerman & David Clemesha, illustrated by Dan Yaccarino (HaperCollins, 1999), and read here by Michigan City Public Library. Mr. Gilly is a trash man and wow is he is busy! There are lots of stops all around town (like the school, town park, a pizza parlor) and finally to the city dump to unload. But there’s still one more stop for Mr. Gilly after that…the bathtub!
This was a special final Tiger Tales story time request from a family who was moving out of the area. The story time kiddo asked for “garbage trucks” and “chutes” and we think we delivered!
 You’ll need:
- 1 large craft box (ours was 4.5” X 4.5” x 9” but a large tissue box works too!)
- A box cutter
- 1 sparkle stem
- 1 toilet paper tube
- Tin foil
- 1 truck template, printed on 8.5″ x 11″ card stock
- Black construction paper
- Yarn
- Hole punch, scissors and tape for construction
- Markers for decorating
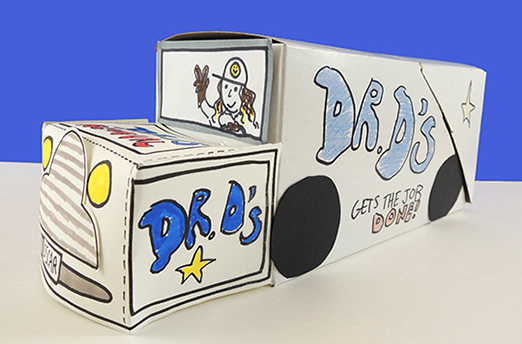
First, the garbage truck! Use a box cutter to make diagonal incisions in the back and bottom of your box, then fold the entire section upwards. This is your garbage truck’s loading hopper. In order to make it easier for kids to raise and lower the hopper, we looped half of a sparkle stem, then taped it to the tailgate.
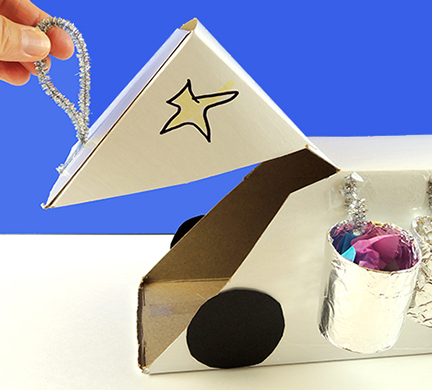
Notice the garbage cans hanging on the side of the truck in the above photo? To make those, cut a toilet paper tube in half, then wrap each in tin foil. Punch a hole in the side of each can and hang them on sparkle stem hooks taped to the side of the truck. We filled our can with scrap tissue paper “garbage” as well.
The front of the truck is a template from this post (just disregard the roof section on the template – or better yet, cut it into little bits and use it to fill your mini garbage cans!). Tape that in place, then add some black construction paper wheels and decorate the truck with markers. Tape a yarn pull string to the front of your truck for hauling.
It’s time to get to work! We constructed models of each of the sites mentioned in the book…school, park, doctor’s office, pizza parlor, fire station, and the city dump. Many thanks to my daughter for helping me construct them (love the smiling pizza slice)!
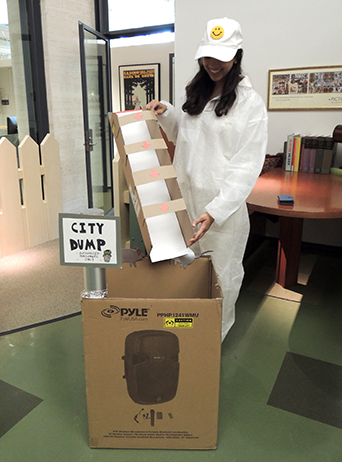
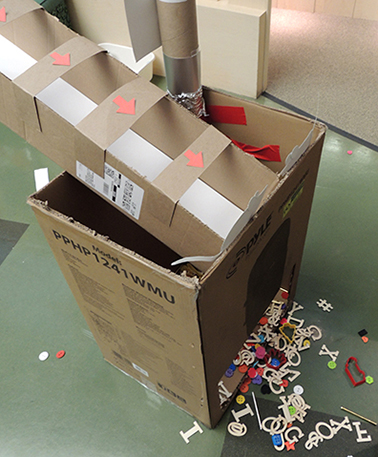
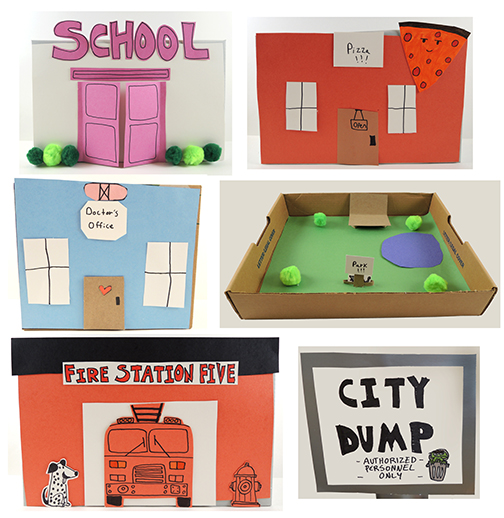 We constructed the buildings and park with shoe boxes and box lids, but the city dump was much larger. It was big box with a removable chute that allowed kids to tip their garbage and send it sliding into the dump. You can see the whole thing here, modeled by our awesome grad student volunteer Shruti Sharma (who was also a cloud scientist at a library event this spring).
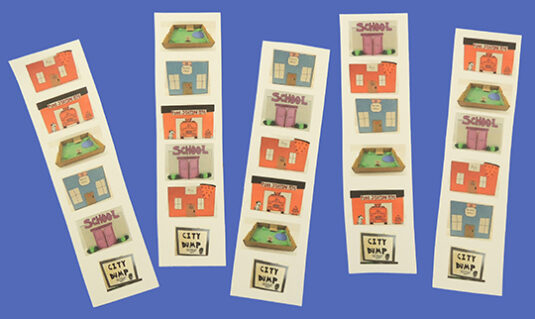
 Once every kid had made a truck, they received a “route card” that showed the order in which they needed to visit each place. Since there were 5 sites, I made 5 routes, all different so they story time kids wouldn’t clump together. Each route, of course, ended at the city dump.
 We placed the buildings around the library, and each had it’s own unique “garbage” to be collected. Mostly, these were little do-dads and art supplies from the cabinet. The school’s garbage, for example, are leftover wooden letters from this project. Caregivers and older siblings volunteered to staff each site, refilling “garbage can” cups as each truck rolled up, and the story time garbage kids got to work.
 At the city dump, Shruti helped kids slide the garbage down the chute. The back of the big box was cut open, in case kids wanted to take their garbage home. It got a little messy and chaotic. But hey! It IS a dump after all!
 If you would like to do this story time and don’t have time to make the buildings, no worries! Here’s a printable set of the buildings that you can tape to walls and tables. Drive safe, and happy collecting!
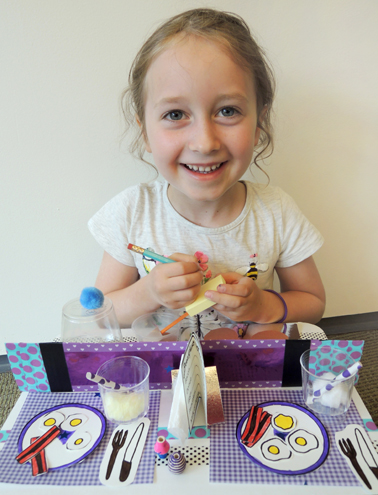
 If you like, you can use
 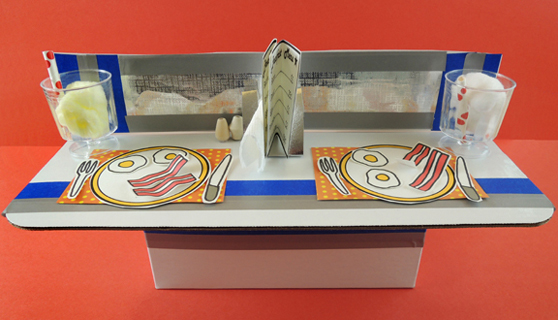 The plates, utensils, food, and menus are on the template. We used
 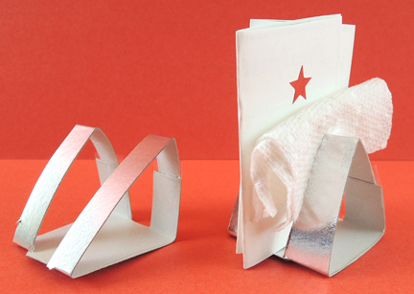 Basically, these are triangles of silver
 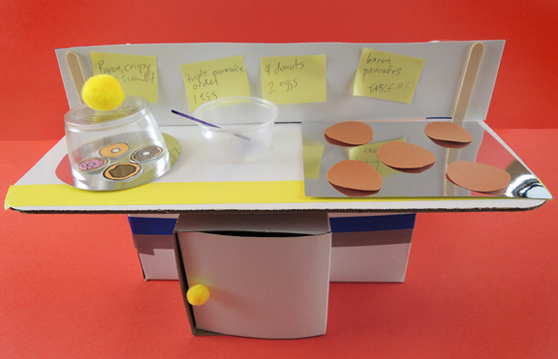 The donut dome is a plastic cocktail cup that has been cut down to 1.5″ and has a small pom-pom hot glued on top. There’s mirror board plate underneath it, and a mirror board griddle as well. There’s also a plastic sample cup mixing bowl with spatula (that’s a bit of silver mirror board taped to a mini craft stick). The pancakes are construction paper. Oh, and we included a fridge made out of a little box, but that’s totally optional.
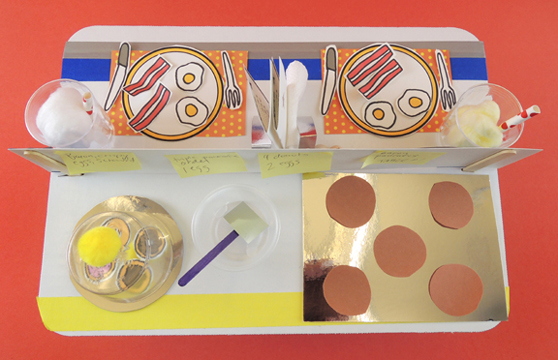 Miniature food sets are REALLY popular at story time. Sometimes, I hear about kids who are still playing with their sets months – sometimes years! – after story time (specifically our
 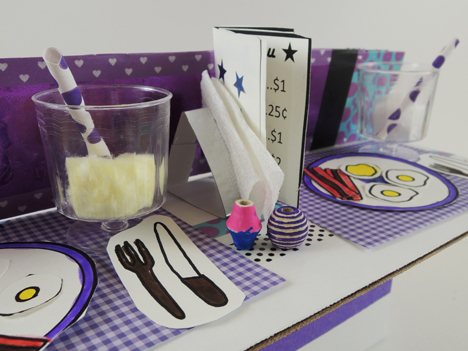 Look at the gorgeous purple decor! The carefully detailed salt and pepper shakers! The purple stripes on the bacon!
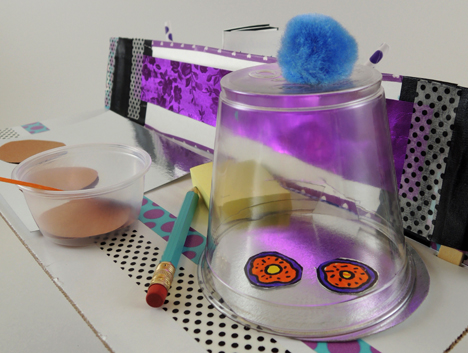 Which are only surpassed by the purple donuts. And then the black polka dots! LOVE.
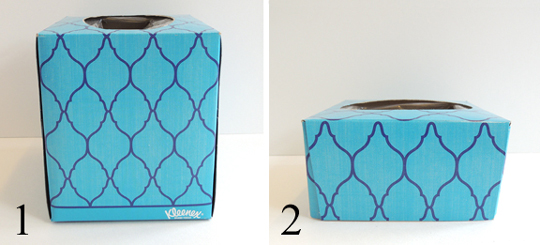
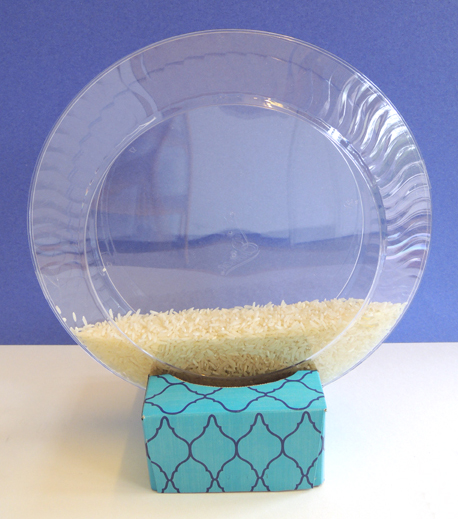
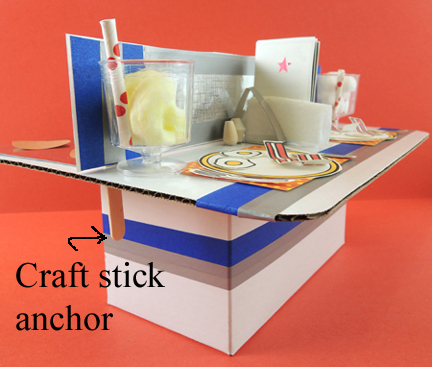
 Now for the base. Cut a small tissue box in half. Recycle the bottom half. You now have a 2.5″ base with an opening at the top.