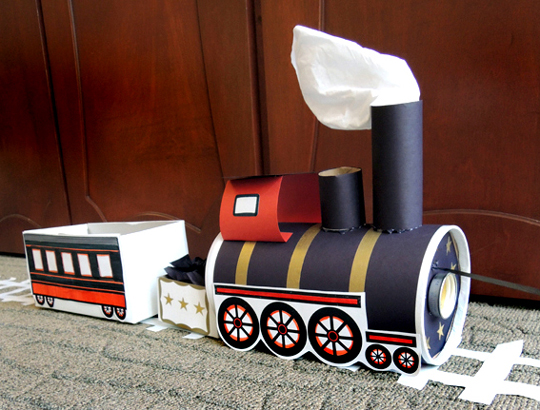
 All aboard! This splendid stream engine pulls a passenger coach on masking tape tracks, making a number of stops to take on coal, water, and passengers before heading through a mountain tunnel!
 We read Chugga Chugga Choo Choo, written by Kevin Lewis, and illustrated by Daniel Kirk (Hyperion, 1999). A toy engine chugs through his day in the playroom, collecting freight, going through mountains, over bridges, across rivers, and finally relaxing in the roundhouse. Cleverly, the landscape is entirely made of toys (I especially like the bridge over the fish tank). It’s a sweet, simple story that was oft-requested in our household.
You’ll need:
- 1 large oatmeal container
- Construction paper, any color
- Construction paper, black
- A selection of color masking tape
- A box cutter
- 2 small craft sticks (mine were 3″ long)
- A 36″ piece of curling ribbon
- 1 small box (mine was 4” x 4” x 4” – a small tissue box works too)
- 2 name tag stickers with gold borders (optional)
- 1 engine wheels template printed on 8.5″ x 11″ white card stock
- 4 toilet paper tubes
- 1 drink lid
- 1 small l (optional)
- A selection of foil star stickers (optional)
- 1 tissue (i.e. Kleenex)
- 1 large box (mine was 4 ½” X 4 ½” x 9” but a large tissue box works too)
- 2 passenger car templates, printed on 8.5″ x 11″ pieces of white card stock
- Train track & stops (more on that later!)
- Scissors and tape for construction
- Markers for decorating
- Hot glue
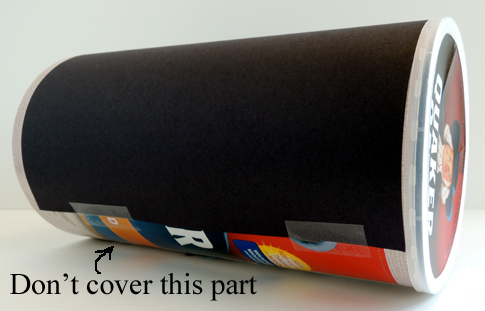
Start with the engine! Wrap a 9″ x 11″ piece of construction paper (any color) around half of the oatmeal container. It won’t reach all the way around the container but that’s good. You want the uncovered section of the container to slide smoothly over the floor.
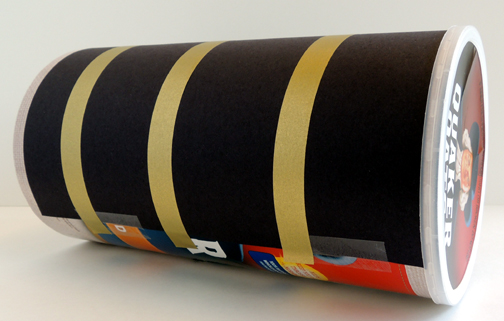
 Use color masking tape to make three lines on the construction paper. Again, it’s best if they don’t go all the way around the container.
 Cut a 4.5″ diameter circle out of black construction paper and use tape loops to attach it to the bottom of the container. Important! The bottom of the container is NOT the end with the lid. It is the plain cardboard end.
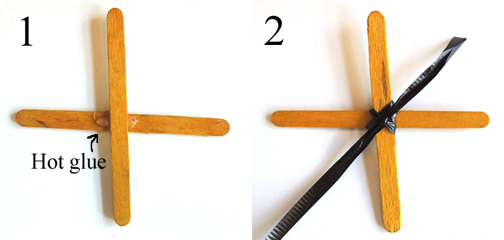
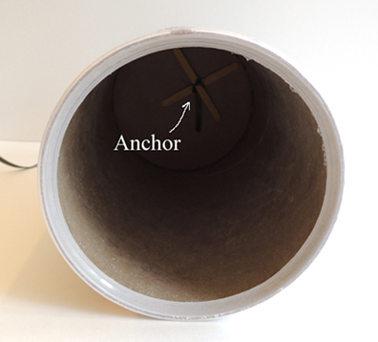
We’ll pause in exterior engine building for a moment to construct your train’s pull string. Hot glue two small craft sticks together in a cross. This creates the anchor for your pull string. Knot one end of curling ribbon around the anchor.
 Next, use a box cutter to cut a small slit in the bottom of the oatmeal container, about 1.5″ from the top edge. This is where your pull string will come out.
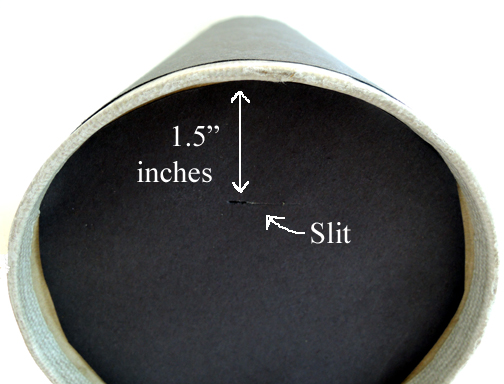 Use scissors to enlarge the slit. Then take the lid off the oatmeal container, reach inside, and poke the free end of the curling ribbon through the slit. Keep pulling the ribbon through until the anchor is snug up against the bottom of the container. Replace the lid and tape it closed.
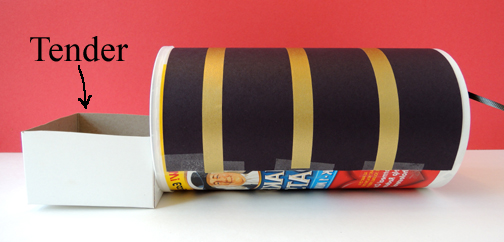
 Now for the engine’s tender! Cut a small box down to 3″ high. Hot glue it to the lid of the oatmeal container and reinforce the connection with tape. Since this box is what keeps the oatmeal container from rolling around, make sure part of the box comes in contact with the floor, and that it’s really attached well.
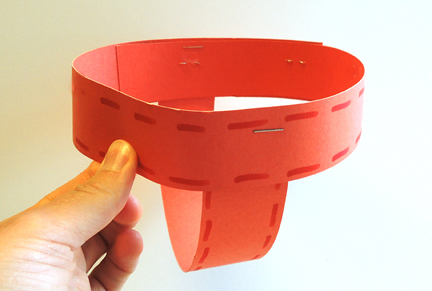
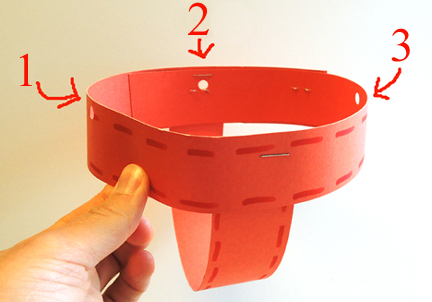
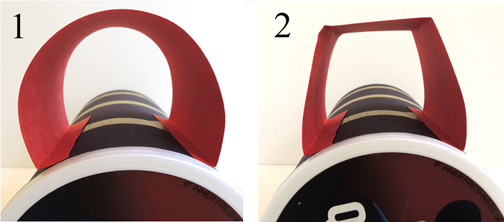
 The engine’s cab is next. Fold the edges of a 3″ x 9″ piece of construction paper inwards to create two, 0.25″ folds:
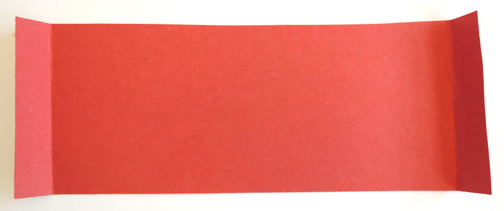 Curve the folds under and hot glue (or tape) them to the back of the engine (i.e. the end with the tender). Gently pinch the curvy top of the cab to make two more folds, giving the cab a flat roof.
 Hot glue (or tape) a 3.25″ x 3.25″ square of black construction paper to the roof of the cab. I also added some file label sticker windows. You can do this, or draw the windows on with markers. You can see the finished cab in the image below.
For your engine’s chimney (or “stack” as they sometimes call it) wrap a toilet paper tube with black construction paper and hot glue it to the top of the engine. Cut a second toilet paper tube down to 2″ and wrap it with black construction paper. This is your engine’s “dome”. Hot glue it behind the chimney. Tape a piece of tissue inside the chimney for smoke. 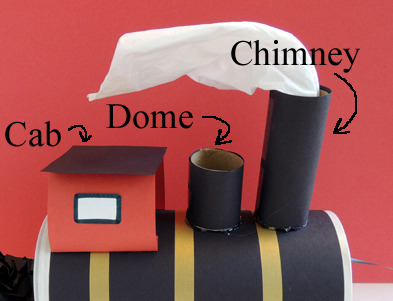 Color and cut out the engine wheels template. Hot glue (or tape) them to the sides of the engine. Crumble up some pieces of black construction paper to make “coal” for your tender. I added some gold-bordered name tag stickers to the sides of the tender, along with some gold foil stars.
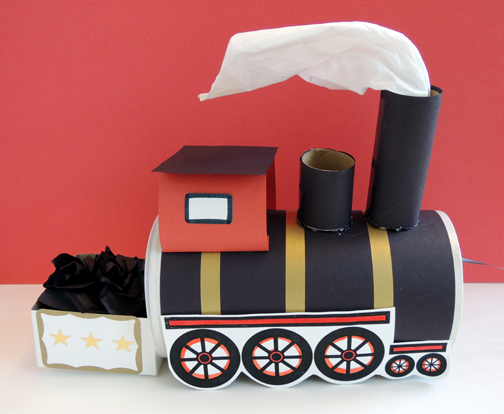
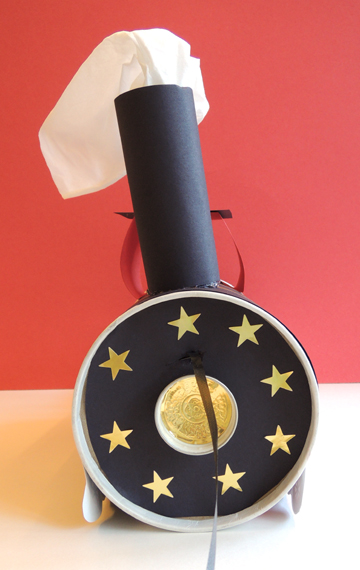
Finally, hot glue a drink lid to the front of the train for a light (we stuck a gold foil seal inside it for some extra shine). We added some gold foil stars to the front of the engine as well (whoops, I didn’t put the chimney on exactly straight did I?).
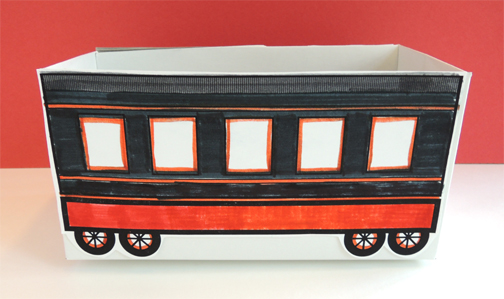
 For the passenger car, simple color and cut the passenger car templates and hot glue (or tape) them to the sides of a large box. Some kids cut the lid off their boxes, and some left the lid intact. Totally up to you! Just don’t let the wheels of the train car extend past the bottom of the box, or it won’t slide on the floor!
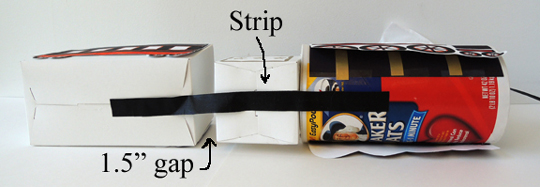
 To couple your passenger car to your engine, cut two, 15″ pieces of masking tape (I used black masking tape, but any color will do). Lay one piece on top of the other, with the sticky sides facing each other. Hot glue this masking tape “strip” to the bottom of the train. Make sure to leave a 1.5″ gap between the tender and the passenger car.
 Your train is done! You can stop there, or you can go a step further like we did and make a track and “stops” for the train. If you’re up for that, read on…
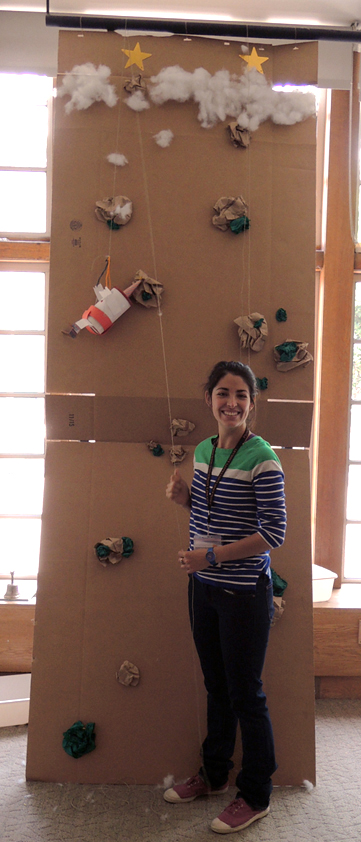
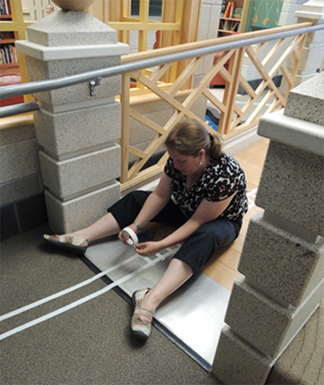
For the tracks, use masking tape to make the two rails. Then connect the rails with more masking tape “ties.” It’s simple to do, but it takes time. Especially because we laid a whole lotta track all over the gallery (just look at the tape blob that resulted from clean up)! Here’s Katie, who is, quite literally, “working on the railroad.”
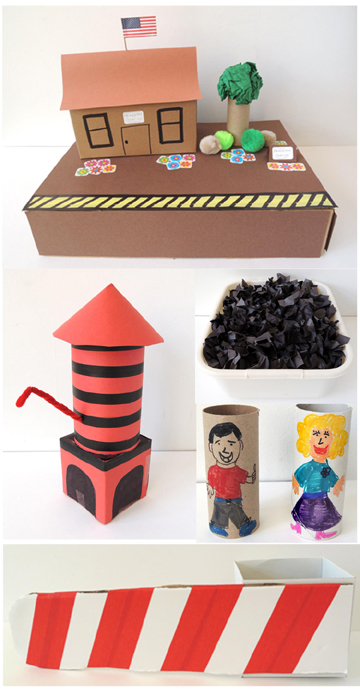
 Next, Katie made a couple different elements for the railroad: a station (a copy paper box lid with a box station and some accoutrements); a water tower (a small oatmeal container, a small box, some construction paper, and a pipe cleaner); a big container of extra coal (little crumbled up pieces of black construction paper); a couple of toilet paper tube passengers (I’ve named them George and Martha); and a crossing gate (white cardboard wrapped with red masking tape hot glued to a box).
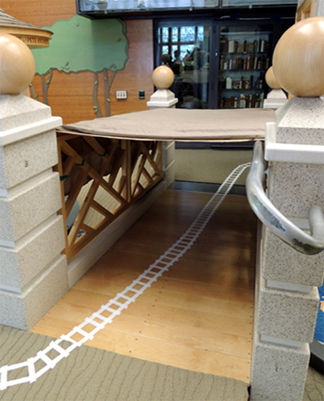
The morning of story time, I made the tunnel. It was 2 huge pieces of cardboard taped to the railings of our gallery bridge. Once they were secured, I covered them with a brown sheet.
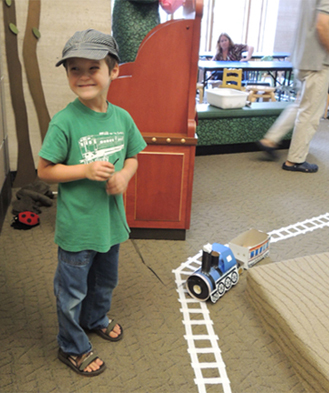
 Ready to see the whole route in action? At the starting line, Katie shoveled extra coal into each engine’s tender. Then the trains were off, chuffing down the track!
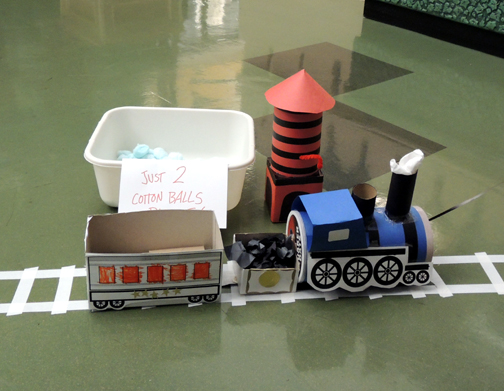
 The first stop was the water tower, where kids pushed two blue cotton balls into the train’s dome to feed the boiler.
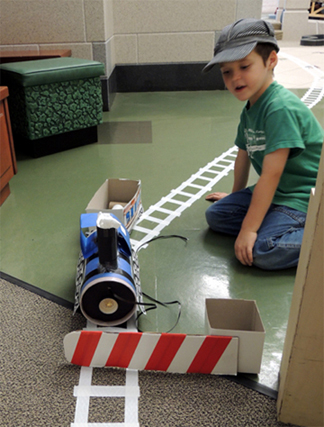
 Next the train encountered a crossing gate. I was operating this particular mechanism (I do a very convincing “ding ding ding ding”).
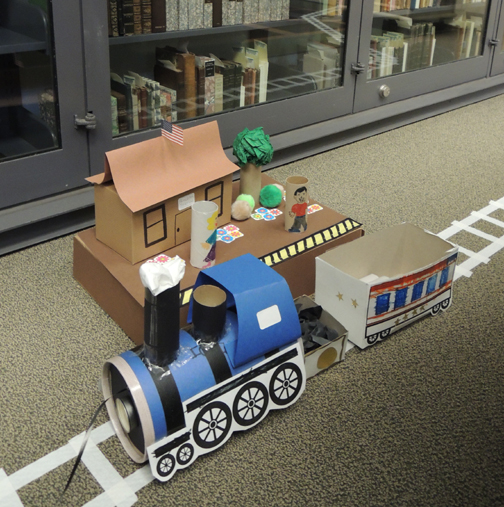
 After that, the trains headed around a long bend to the station, where kids loaded 2 toilet paper tube “passengers” into their passenger car (we had a bin sitting nearby with extra tubes for them to take home and color in later).
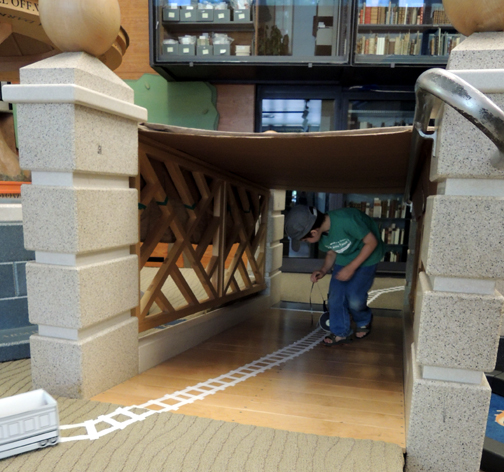
 Then it was off to the mountain tunnel. I made sure that the train route would lead kids uphill in the tunnel (because it’s hard for kids to navigate, stare at a train, and duck into a tunnel without also having to balance downhill).
 After the tunnel, it was a quick trip to the finish line. All the while, the little engineers were being serenaded by my Rare Books colleagues AnnaLee and Kelly, who performed a most excellent rendition of “I’ve Been Working on the Railroad.” THANKS LADIES!