Is There a Ducktor in the House?

duckter in the house

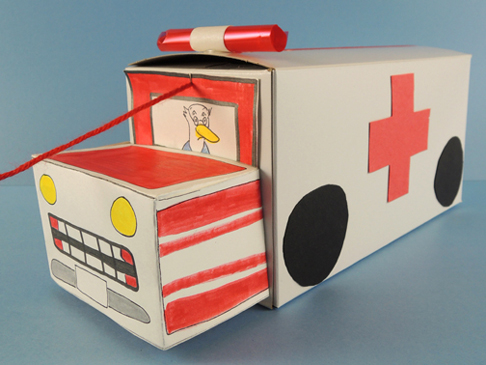
Rev up this fantastic ambulance stocked with medical equipment…your patients need you, stat! This project is entirely Katie’s brainchild, including the BEST craft stethoscope and syringe the world has ever seen. Ever.

We read Dr. Duck, written by H.M. Ehrlich, and illustrated by Laura Rader (Orchard Books, 2000). Dr. Duck is a very busy doctor indeed, visiting various patients in his big red van. There are weasels with sneezles, hoarse cows, and a moose whose antlers are loose. At the end of the day, however, it’s Dr. Duck who catches a bug and crawls into bed, feeling horrible. His panicking patients rush to his bedside with advise and TLC. Soon, Dr. Duck is back on his feet again, thankful that he has friends who care so much about him.

You’ll need:

  • 1 box (ours was 4.5” X 4.5” x 9” – a large tissue box works too)
  • 1 ambulance template, printed on 8.5″ x 11″ card stock
  • Red, black, and white construction paper
  • 1 small piece of bubble tea straw (ours was 2.75″)
  • 1 small rectangle of red cellophane (ours was 3.5″ x 5″)
  • 1 piece of yarn (ours was 40″ long)
  • 1 doctor kit template, printed on 8.5″ x11″ card stock
  • Doctor’s kit contents (more on this later!)
  • Scissors and tape for construction
  • Markers for decorating
  • Hot glue

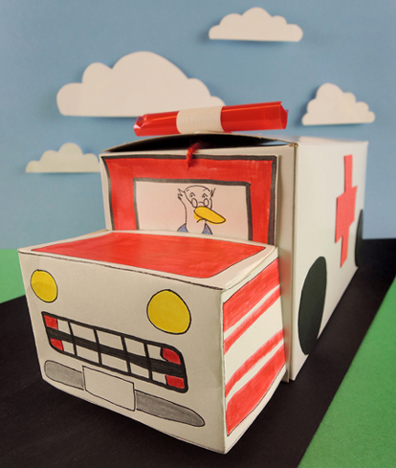
finished ambulanceWe’ll start with the ambulance! It’s basically a box on a pull string…but look at Katie’s awesome light on the roof! That’s a rectangle of cellophane wrapped around a snippet of red bubble tea straw. Wrap a piece of masking tape or white construction paper around the middle, and hot glue it to the roof. Add a construction paper windshield, wheels, and red crosses for the sides (or draw them on with markers).

The hood of the vehicle is exactly the same as this pickup truck project, so I’ll repeat the steps here. Cut the front of the truck from the template. There are 5 folds you’ll need to make on the template. Each fold is marked with a dotted line. First, fold the 2 tabs on either side of the hood.
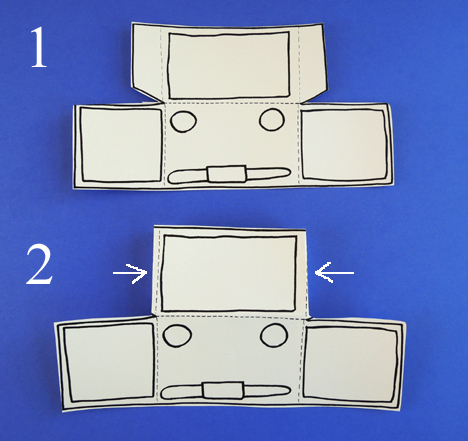
truck template fold 1 Next, fold the 2 panels on either side of the truck’s headlights.
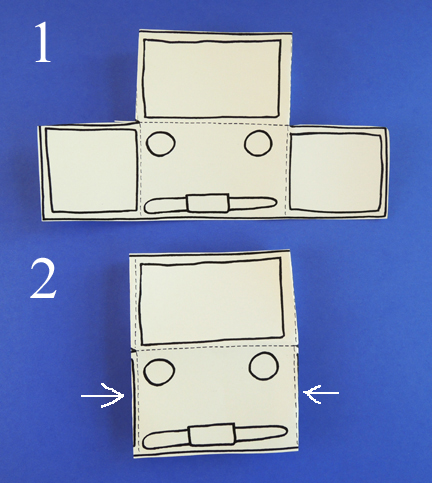
truck template fold 2Finally, fold the hood down to meet the side panels, and secure it with tape.
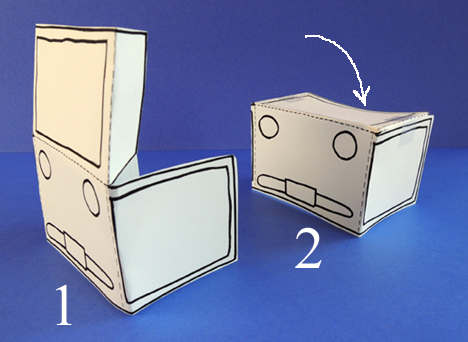
truck template fold 3Tape it to the front of the box (use markers to color it before you fold it, or after). Finish the ambulance by attaching a yarn pull string to the front. Up next is all your medical equipment, which gets conveniently stored in your ambulance box.
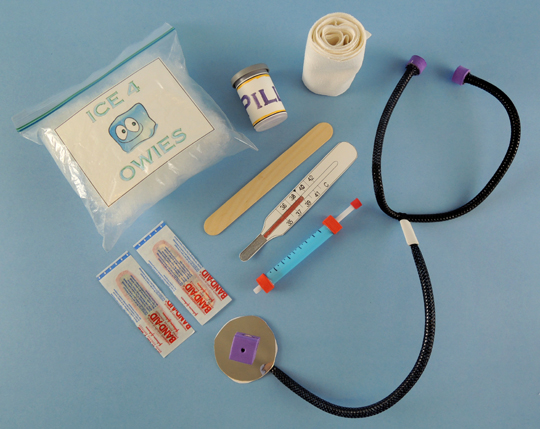
doctors kitMost of the items in the kit are quick to assemble. The ice pack is polyester fill in a sandwich bag with a template label. The pill bottle is a plastic film canister with mini pom-pom pills and a template label. The bandage roll is cut is from a white tablecloth someone donated, and the thermometer is on the template. A craft stick tongue depressor, a couple real Band-Aids, and you’re set!

Now for the most amazing craft stethoscope of the century. It’s easier to explain it if I label the stethoscope parts with their actual names (I had to look these up – you learn something new every day!).
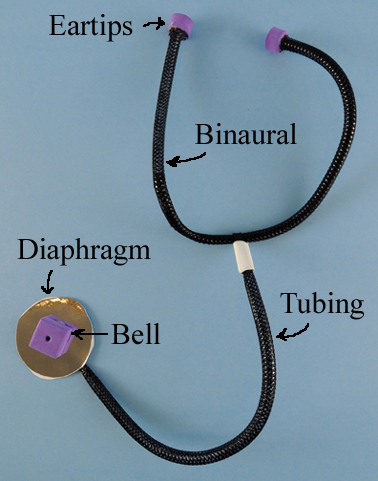
stethoscope partsThe stethoscope is basically constructed out of of two, 15″ pieces of black mesh tubing. To make the binaural, insert a black pipe cleaner into the center of a piece of mesh tubing, then bend it upwards into a U shape. You can just see the pipe cleaner in the image below.
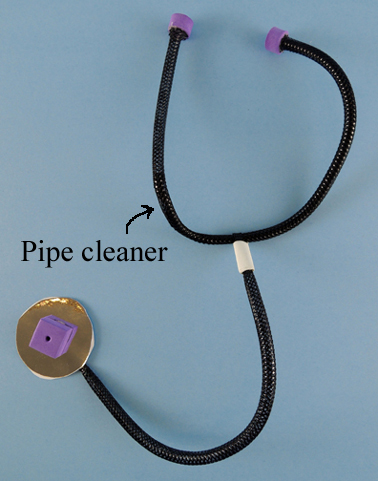
stethoscope pipe cleaner placementHot glue 2 foam beads to the end of the mesh tubing to create your ear tips. What’s cool is that these actually fit in your ears and stay there, making your stethoscope look all the more fabulous. The dangling tubing part of the stethoscope is the second piece of mesh tubing. The mesh tubing is folded around the binaural, and secured with a piece of masking tape. The diaphragm is a piece of mirror board, and the bell is a foam bead.
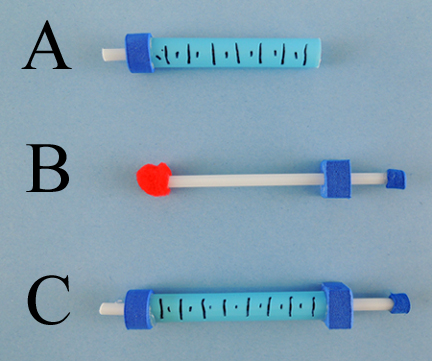
syringe stepsTo make the syringe, you’re going to need a 2.75″ piece of bubble tea straw, a 4.25″ piece of balloon stick, a mini pom-pom and 3 foam beads. You’ll need a square foam bead, a round one, and a little itty bitty one (or another round one). Here are the steps:

A. Hot glue the round foam bead to the bottom of the bubble tea straw. Cut a 0.5″ piece off the balloon stick, and hot glue it to the foam bead. Use a Sharpie to add lines to the syringe if you wish.

B. Hot glue an itty bitty (or round) foam bead to one end of the remaining section of the balloon stick. Then slide a square bead up the stick. Make sure the foam bead slides easily up and down the stick. Hot glue a mini pom-pom to the bottom of the stick.

C. Slide the pom-pom into the syringe, then hot glue the square bead to the bubble tea straw. The pom-pom acts as a cushion as you push the plunger up and down in the syringe. It feels legit!

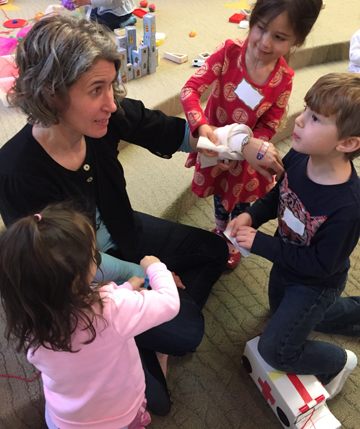
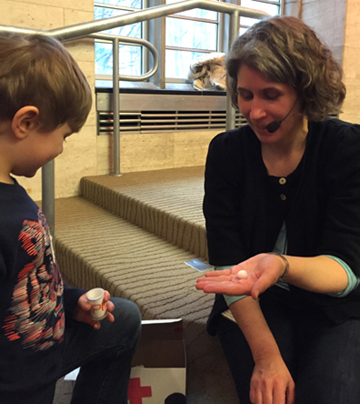
After that, it was time to treat some patients! I must say, I got quite a few treatments that day. Some pom-pom pills…
getting medsLots of bandaging…

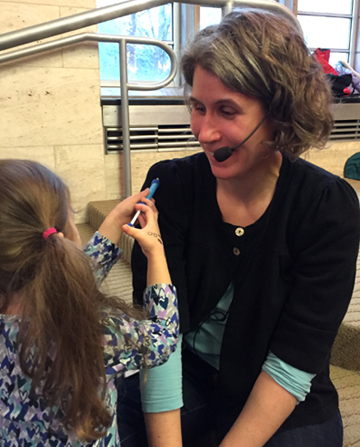
getting bandagedAnd LOTS of shots…

getting a shotAt one point, six kids were crowding around me, administering shots. I was a very, very, healthy person by the end of story time.

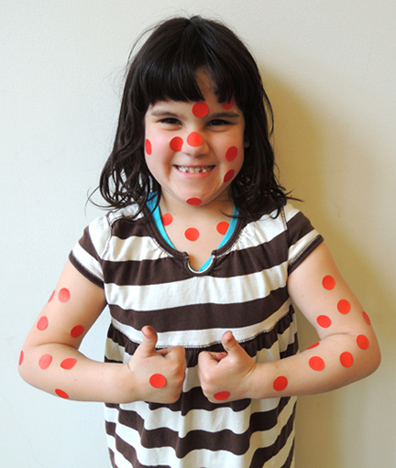
When Chicken Pox Totally Rox

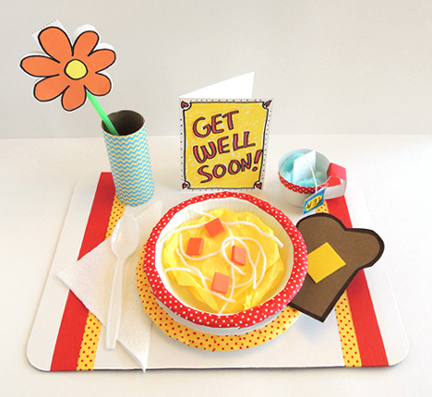
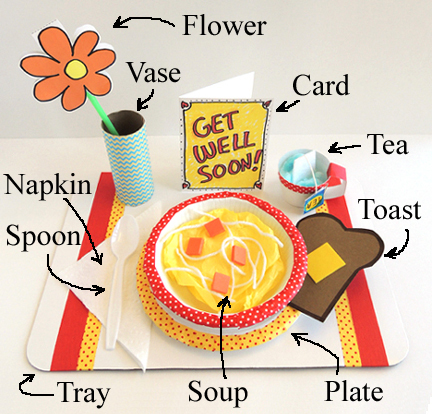
pox totally roxNo one likes to get sick…unless you have our special strain of story time chicken pox! These pox are guaranteed to bring a smile to your face. But, just in case you’re still feeling under the weather, we have a cozy bed tray and get well card for you!

bed trayWe read Goldie Locks Has Chicken Pox, written by Erin Dealey, and illustrated by Hanako Wakiyama (Antheneum Books, 2002). Poor Goldie. She’s absolutely covered in chicken pox, and her little brother has decided to be a total pest while she convalesces. He demands to connect her dots with crayons, whines that she’s eating all the ice cream, and teases her relentlessly about her “polka-dots.” Finally, Mother steps in to break things up. But justice has already been served. There’s a new case of chicken pox in the house, and guess who has it?

You’ll need:

  • 1 corrugated cardboard base (I used a 9.5″ x 13.5″ cake pad)
  • 1 small paper plate (mine was 7″ in diameter)
  • 1 paper bowl
  • A selection of color masking tape
  • A selection of patterned tape
  • 1 paper napkin
  • 1 plastic spoon
  • 2 rectangles of yellow tissue paper (approximately 5″ x 6.25″ each)
  • 6 pieces of white yarn (approximately 5″ each)
  • 4 tiny squares of orange craft foam (approximately 0.5″)
  • A rectangle of tagboard (approximately 4.25″ x 4.5″)
  • A small square of yellow self-adhesive foam (approximately 1.25″)
  • 1 toilet paper tube
  • A selection of patterned paper
  • 1 flower template, printed on 8.5″ x 11″ white card stock
  • 1 green drinking straw
  • 2 small rectangles of stiffened felt (approximately 1.25″ x 1.75″)
  • A piece of string (approximately 4″ long)
  • A small rectangle pf white card stock for tea bag label (approximately 1″ x 2.5″)
  • 1 paper cup
  • 1 small strip of white poster board for teacup handle (approximately 0.75″ x 4″)
  • 1 blue cotton ball (or a small piece of blue tissue paper)
  • A large piece of white card stock, folded like a greeting card (approximately 5″ x 7.5″)
  • 1 sheet of red dot stickers for the “Everyone Has Chicken Pox” game
  • Scissors and tape for construction
  • Markers for decorating
  • Hot glue

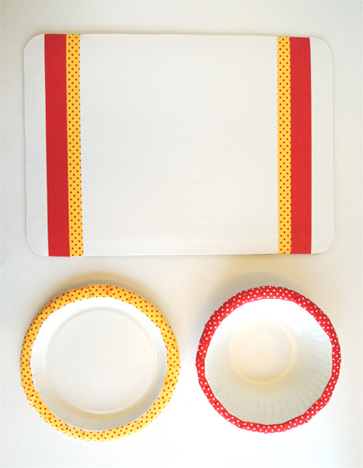
labeled bed trayThe bed tray has many pieces, but the assembly is a snap! The only thing we prepped in advance was the tea bag. Otherwise, the kids put together all the the pieces themselves. Begin by decorating the borders of the corrugated cardboard base, plate, and bowl.

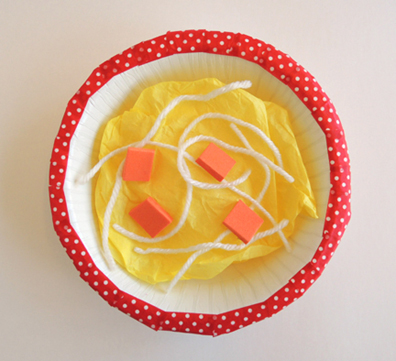
step 1 tray plate bowlTo make “soup,” gently crumble two yellow tissue paper rectangles and place them in the bowl. Add 6 white yarn “noodles” and 4 orange craft foam squares of “chicken” (or “tofu”).

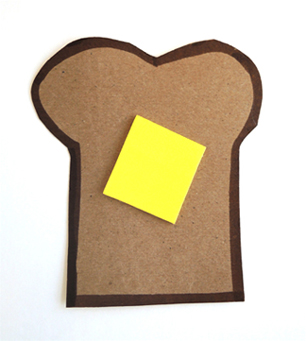
chicken soupPut your soup bowl on top of the plate, and tuck a napkin and plastic spoon next to it. To make buttered toast, cut a rectangle of tagboard (or brown poster board) into a toast shape, then use a brown marker to color the border of the toast. Add a pat of self-adhesive foam butter (or simply draw the butter on with a yellow marker).

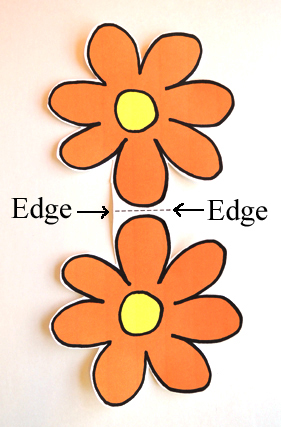
buttered toastTo make a flower vase, wrap a toilet paper tube with patterned paper (or use white paper you’ve decorated with markers). Next, color and cut the flower from the template. Note: the flower on the template is double-sided. As you see in the image below, you cut both flowers out as one piece, making sure to cut up to the edges of the dotted line:

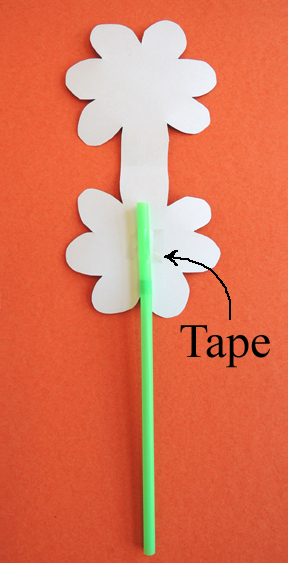
cut flower templateTape a green drinking straw to the bottom half of the flower…

taped flowerThen fold the template along the dotted line, bringing the top half of the flower down to match the bottom half. Secure with tape, and stick the flower in the vase!

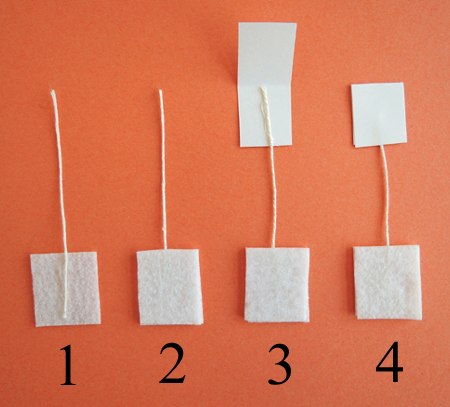
Time for tea! We’ll begin with the tea bag. First, hot glue a 4″ piece of string to a square of stiffened felt. Hot glue a second square of felt on top of the first. To make the “label” for your tea bag, fold a small rectangle of card stock in half, then hot glue the free end of the string to the bottom half of the card stock. Fold the card stock over the string, and hot glue in place. Decorate the tea label with markers!

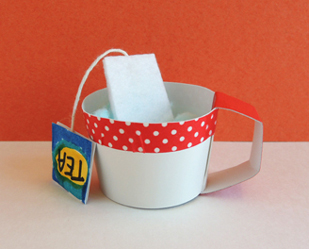
tea bagTo make a teacup, cut a paper cup down until it is about 1″ tall. Decorate the rim with color masking tape and/or patterned tape. Tab the ends of a small strip of white poster board to create the handle, then attach the handle to the inside and bottom of the cup with tape (or hot glue). Drop a blue cotton ball (or a crumpled piece of blue tissue paper) into the cup, then set the tea bag inside.

finished teacupFinally, use markers to draw a get well card on white card stock. When the card is done, assemble the items on your tray. Some kids wanted me to hot glue everything to their trays, others wanted most of their items loose. You’ll definitely want to hot glue the flower vase to the tray. Otherwise, the top-heavy flower will keep tipping the vase over.

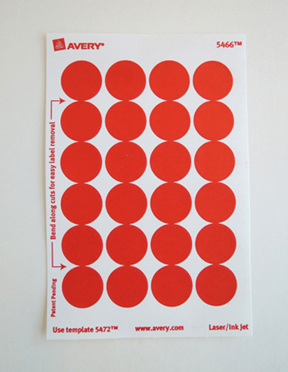
Ready to get sick? Setting our bed trays aside, we gathered in the story time area to play the “Everyone Has Chicken Pox” game. Basically, every child was given a half a sheet of  Avery red dot stickers (meaning each kids received 12 dot stickers total):

chicken pox stickersWhen I said “Go!” the kids had to run around, sticking a “pox” on different people in the room (including adults!). When everyone was good and sick, we returned to our bed trays to get “better.”

The Dentist is In

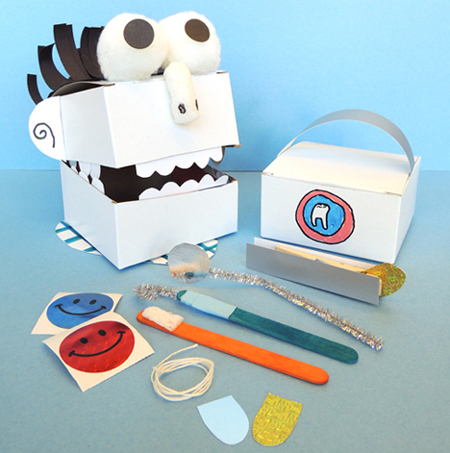
the dentist is inMost people don’t put the words “dentist” and “fun” in the same sentence, but here at Pop Goes the Page, you’ll find that fun is indeed possible with this neat-o set of dentist tools and peppy patient!

We read Doctor De Soto by William Steig. Doctor De Soto is a mouse dentist who works on creatures both big and small. He draws the line, however, at patients who snack on mice. But when a truly miserable fox shows up at the office begging to be let in, Doctor De Soto and his wife (who also happens to be his assistant) decide to treat him. During the procedure, it becomes quite apparent that the fox intends to eat them when he feels better. So Doctor De Soto and Mrs. De Soto come up with a clever plan to outfox the fox.

For the patient, you’ll need:

  • 1 box for the head (mine was 4” x 4” x 4”)
  • A box cutter
  • 2 rectangles of white card stock for upper and lower teeth (approximately 1.25″ x 4″)
  • 4 rectangles of red poster board for gums (approximately 1″ x 4″)
  • 12 rectangles of white card stock for molars (approximately 1″ x 1.25″)
  • 1 rectangle of red construction paper for tongue (approximately 1.5″ x 4.5″)
  • 1 triangle of white poster board (mine was roughly 5.5″ x 5.5″)
  • Black, red, yellow, brown or red construction paper for hair
  • 2 jumbo pom-poms (mine were 2″)
  • 1 Styrofoam packing peanut
  • 2 black dot stickers
  • 2 squares of white card stock for ears
  • Scissors and tape for construction
  • Markers for decorating
  • Hot glue

For the dental tools, you’ll need:

  • 1 box for the dental bag (mine was 2” x 4” x 4″)
  • 1 rectangle of silver poster board for handle (mine was 1.5″ x 6.75″)
  • 1 wooden clothespin
  • 2 small rectangles of silver poster board for the forceps (approximately .75″ x 3.75″)
  • 1 sparkle stem
  • 2 craft sticks (mine were 4.5″ long)
  • 1 Styrofoam packing peanut
  • A selection of color masking tape
  • 2 small rectangles of mirror board  for silver fillings (approximately 1″ x 1.25″)
  • 2 small rectangles of gold paper for gold fillings (approximately 1″ x 1.25″)
  • 1 small circle of mirror board (mine was 1.25″ in diameter)
  • 1 piece of string for floss (mine was 17″)
  • Some reward stickers
  • Tape and scissors for construction
  • Markers for decorating
  • Hot glue

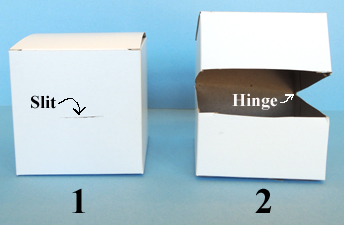
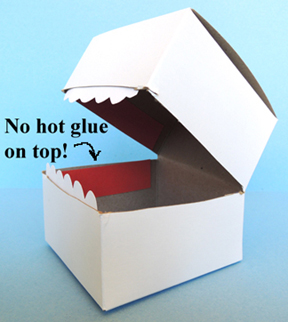
We’ll begin with your patient! Use the box cutter to cut a slit in the front of the box. Carefully inset scissors into the slit and cut three sides of the box. Leave one side intact as the “hinge.”

box stepsPrepare the upper and lower teeth by cutting “tooth bumps” on the card stock rectangles like so:

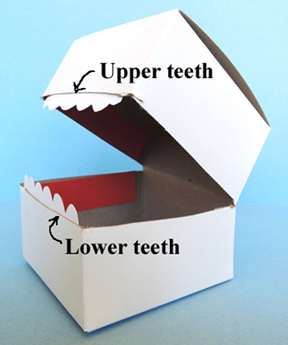
tooth bumpsThen hot glue the upper and lower teeth inside the mouth.

upper and lower teethThis is also a good time to hot glue the red poster board “gums” inside the mouth. Since you’re basically creating a pocket for the teeth, only glue three sides of the gums. The top of the gums should remain glue free.

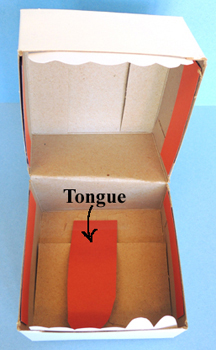
gumsTo create the tongue, round one edge of the construction paper rectangle and hot glue (or tape) inside the mouth.

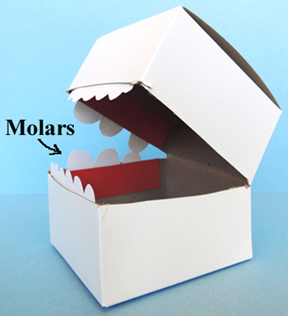
tongueTo make “molars,” round the edge of each white card stock rectangle, and slide them into the upper and lower gum pockets.

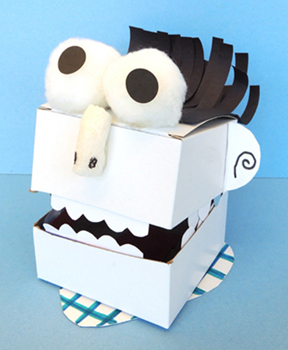
molarsThe mouth is done, now for the rest of your patient! Let’s revisit “Mr. Smiley” before we get started…

patientUse construction paper fringes to create hair and tape it to the top of the box. Hot glue two jumbo pom-poms on the top of the box for eyes and a Styrofoam packing peanut on the front for a nose. Stick the black dot stickers to the pom-poms for pupils, use markers to add nostrils to the nose, and shape ears out of white card stock squares and tape them to the sides of the box.

The final touch is your patient’s white poster board “shirt.” We tried a number of different shapes and determined that a triangle with rounded edges looked best:

shirtWell, this image depicts an uneven, lopsided, yet somewhat rounded triangle. But you get the idea. Color the triangle with markers, then hot glue the head to the top. Done!

Now for your delightful dental tools. I actually had to look one of these up. I mean, who knew that the “little hook thingee they scrape your teeth with” is called a sickle probe? Thank you, Wikipedia.

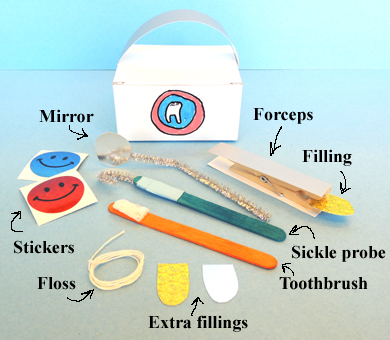
dental toolsBag: Decorate the box with markers. Then tab the ends of the poster board handle and tape it to the underside of the lid.

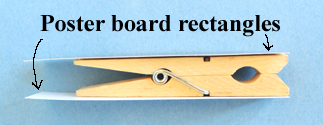
handleForceps: Hot glue the 2 poster board rectangles to the sides of the wooden clothespin.

forcepsSickle probe: Cut a 3″ segment off the sparkle stem, then curve it into a hook and tape to the end of a craft stick. You can use color masking tape or scotch tape.

sickle probeToothbrush: Snip a small piece off a Styrofoam packing peanut, then hot glue it to a craft stick. Bonus…when the Styrofoam moves across the card stock teeth, it really does sound like a toothbrush!

toothbrushMirror: Tape a 5.75″ piece of sparkle stem to the mirror board circle. Bend the sparkle stem slightly.

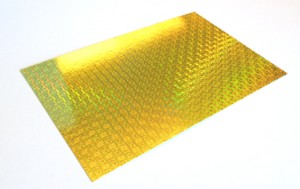
mirrorDental fillings: Round one edge of the silver mirror board and gold paper squares. A quick word about the gold paper squares. I unearthed this from the art cabinet:

gold paperIt’s gold hologram paper mounted on thin cardboard. If you don’t have this stuff, you can improvise with metallic crayon or markers on card stock. Just make sure to use paper that’s thick enough to withstand being played with repeatedly.

The final two pieces of the dental kit are floss (I used string, but real floss would be even cooler) and some much-appreciated reward stickers.

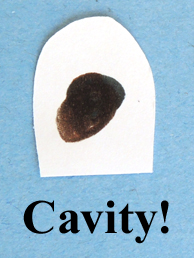
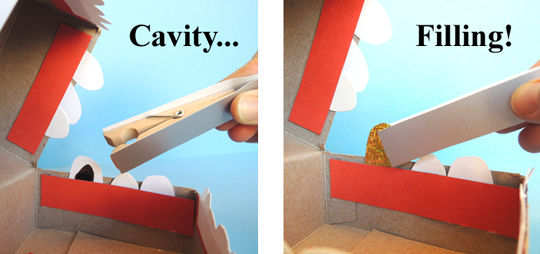
Ready for your check up? Not only can you examine, floss, and brush to your heart’s content, you can also remove cavities! Use black and brown markers to draw a cavity on a molar:

cavityThen insert the molar back into gums. After a quick examination with the mirror and sickle probe, use your forceps to remove the cavity and replace it with a sturdy new filling.

replacing a toothGood job! Reward your patient with a sticker, and send ’em the bill!