
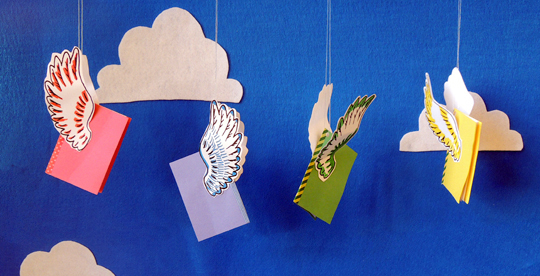
 We brought this flying book craft to a community event. It’s simple to prep, easy to make, and the smile you get when a finished book “flies” off the table is priceless!
You’ll need:
- 1 sheet of 9″ x 12″ construction paper
- 1 sheet of 8.5″ x 11 standard white paper
- 1 book wings template, printed on 8.5″ x 11″ card stock
- A selection of patterned tape or color masking tape
- 1 piece of clear elastic beading cord
- Markers for decorating
- Stapler, hole punch, and scissors for construction
- Two glue dots
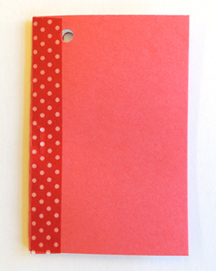
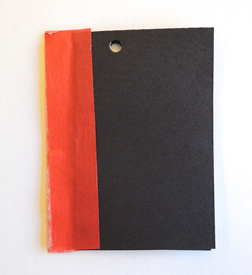
Start by cutting the construction paper into quarters, resulting in four, 4″ x 6″ rectangles. 1 rectangle = 1 book cover. Next, cut the standard white paper into quarters, resulting in four, 4.5″ x 5.5″ rectangles. The white paper rectangles will be the pages of your book. Fold two white paper rectangles into the construction paper cover and staple it to create a book.
Punch a hole in the top of the book, about 1″ away from the spine. Then run a piece of patterned tape (or color masking tape) down each side of the book to create a “spine.” Or, you can skip this step and simply use markers to decorate the spine and cover of the book.
 One boy wanted to make a “monster” book, so I created a spiky spine on his book using color masking tape. To make a spiky spine, stick one piece of tape right on edge of the spine. Repeat on the other side. Press the tape together.
 Then cut out the monster spines!
 Use the markers to customize your wings, then attach a wing to each side of the book with glue dots. Finish by running a piece of elastic beading cord through the punched hole, loop the ends together, and knot. Dangle, flip, jiggle, and swoop your book at the end of the cord for full-on flying action!