
 What do you do when your dream house is haunted? Call in a professional ghost remover of course! We decorated a ghost box, whipped up 4 tissue paper ghosts, and then went a-ghost huntin’ in this custom 4-story cardboard house.
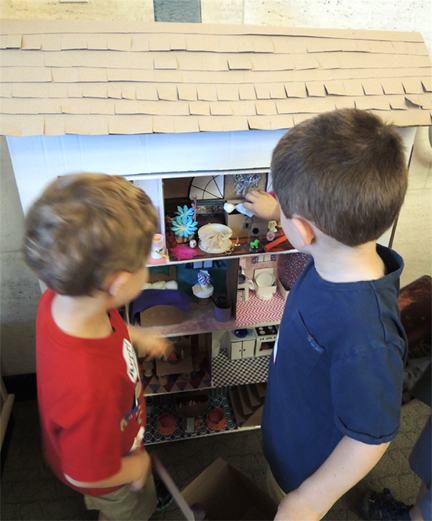
 I hid each kid’s ghosts in various locations in the dollhouse and then invited him/her to find them and tuck them back in his/her ghost box!
 We read Ghosts in the House by Kazuno Kohara (Square Fish reprint edition, 2010). A girl (and her cat) move into a new house but…oh my…the house is haunted by ghosts! The girl, however, happens to be a witch and quickly begins catching the ghosts. After a spin in the washing machine, the ghosts happily become curtains, tablecloths, and cozy blankets. This book was in the holiday section of my local library but it’s so sweet and fun, it really should be read year-round!
You’ll need:
- A box (mine was 4 ½” X 4 ½” x 9”)
- Brown masking tape (or a selection of color masking tape)
- 2 small pieces of mirror board (approximately 1″ x 1.75″ and 1.25″ x 1.25″)
- Black permanent marker
- Box decorating materials – I offered embossed foil paper, patterned paper, construction paper (blue, black, gray, purple, orange, pink), mirror board, small feathers, fabric leaves, white 6″ doilies, foil star stickers, and fabric flowers.
- 12 squares of white tissue paper (approximately 6.5″ x 6.5″)
- 4 pieces of white yarn (approximately 6″ long)
- 1 ghost house (more on that below!)
- Scissors, tape, and glue stick for construction
- Markers for decorating
- Hot glue
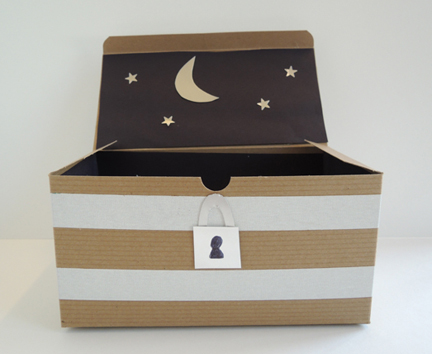
Begin by decorating a box for your ghosts to live in. The exterior should be quite minimal (the interior is where you go a little wild). I went for an old-fashioned steamer trunk with a padlock:
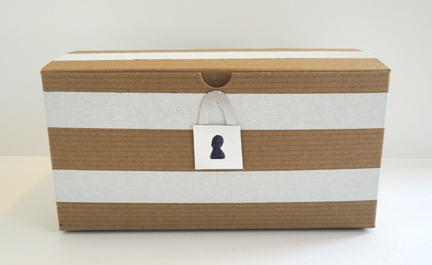 If you’re using a patterned tissue box, you might want to cover it with construction paper or paint first. Then use brown (or color) masking tape to create lines on the outside of the box.
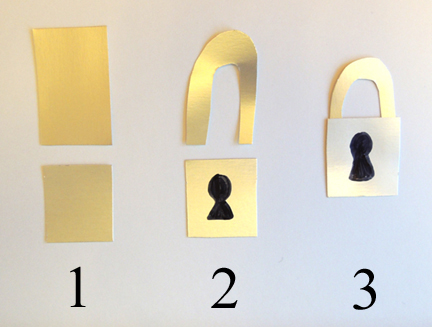
To make a padlock, cut a rectangle of mirror board into an upside-down U shape. Use a black permanent marker to draw a keyhole on a square piece of mirror board. Hot glue (or tape) the U shape to the back of the keyhole square. Attach the padlock to the front of the box with hot glue (or tape).
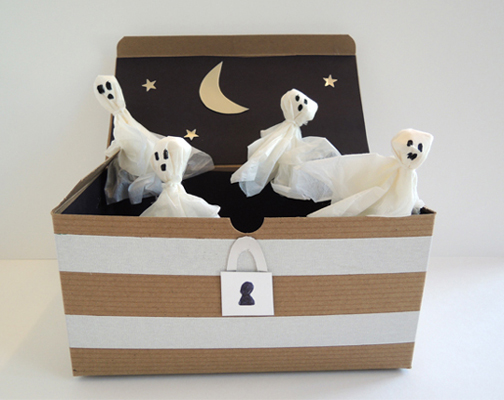
 The exterior of the box is finished, now for the interior! I decided to go for a classic “night sky inside a box” for my ghosts. I lined the inside of the box with black construction paper, added foil stars, and finished the look with a crescent moon.
 Some kids replicated this look, but others used embossed foil paper, patterned paper, small feathers, fabric leaves, white 6″ doilies, and fabric flowers to whip up some amazing ghost domiciles.
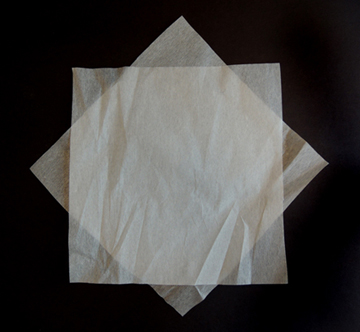
With the box finished, it’s time for the ghosts! Take 2 squares of white tissue paper and lay them flat on top of each other like so:
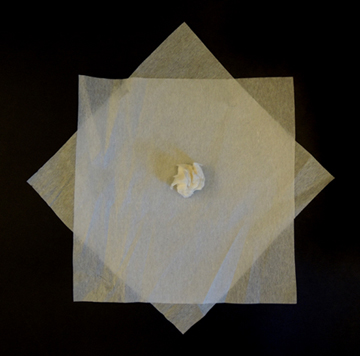
 Then crumple a third tissue square and place it in the middle of the flat squares.
 Bunch the flat squares around the crumpled tissue and pinch tightly,
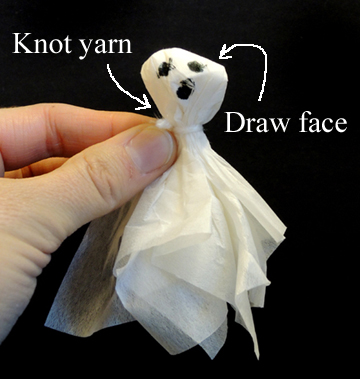
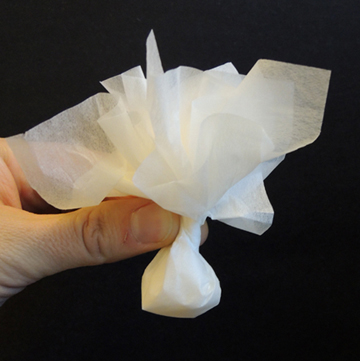 Flip the tissue bunch over and knot a piece of yarn around it to created your ghost’s neck. Trim off any excess yarn and use marker to draw a face. Repeat these steps until you have 4 ghosts.
 You have a box, you have ghosts, now for the house! If you’d like to keep it super simple, hide the ghosts in different locations in a room, classroom, or library. You could even turn off the lights and use a flashlight for an extra spooky ghost hunt. However, if you’d like recreate our ghost house, read on!
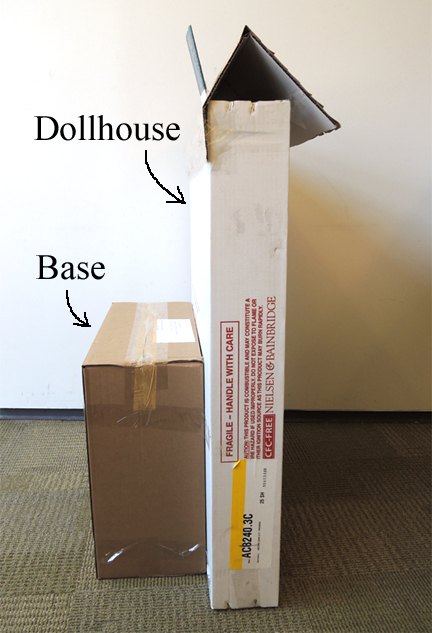
My colleagues in Firestone Library know to call me if they’re about to dispose of any large or unusually shaped boxes (you can read more about our library-wide recycling program here). So this dollhouse began as a tall, 6″ x 33″ x 41″ box. I also had a couple old archive boxes to use up (you can see more of them in action in this post and this post).
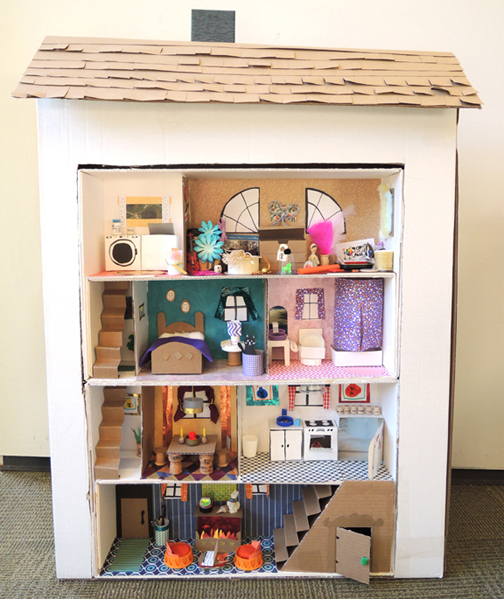
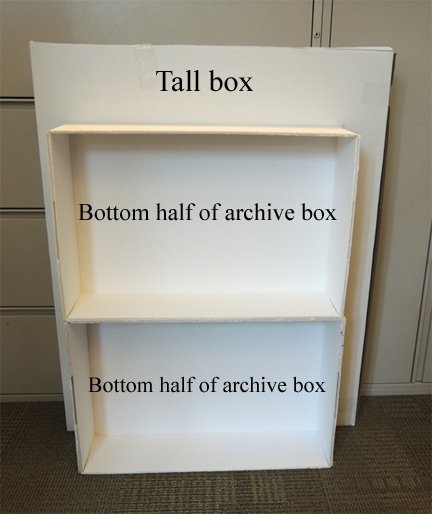 First, Katie and I measured where the stacked archive boxes hit the tall box, and then cut a big hole in the tall box for the archive boxes to slide into. The leftover cardboard was used to make the roof (to which I added some tagboard shingles and a cardboard chimney).
Next, we sliced one of the archive box’s lids in half and hot glued the halves inside the two archive boxes. This created four “floors” in our ghost house. We finished by hot gluing the archive boxes inside the tall box, and added a few pieces of packing tape for good measure.
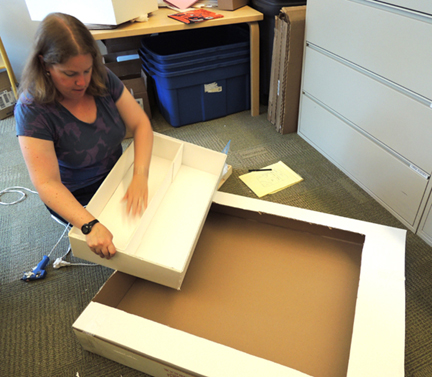 To keep the house upright and sturdy, we hot glued a 5.5″ x 17″ x 25.5″ box to the back as a base. We reinforced the connection with lots of packing tape too. We knew it was going to get bumped and bashed by the ghost hunters!
 Next, Katie used pieces of corrugated cardboard to create the walls that divided the rooms, and tagboard to make the staircases. You can see the whole thing evolving here. And this is only the beginning of the mess we made that day. Oh yes it is.
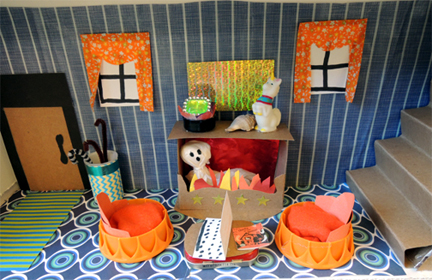
 With the basic elements in place, we decorated the interior. For hours and hours. Katie’s son even stopped by at the end of the day to get in on the fun (my favorites are the laptop in the living room and the Angry Birds artwork in the kitchen). But rather than go into excruciating decorating details, here are photos of the different rooms of the house, as well as some ghosts demonstrating various hiding places.
Living Room
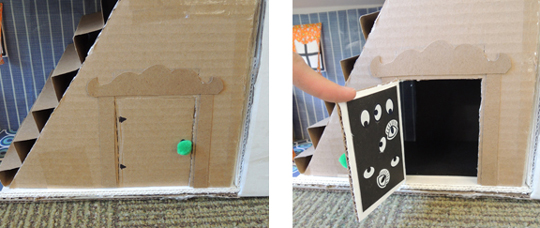
 Dark closet under the “grand” staircase (spooky eye stickers courtesy of Katie’s son)
 Small Staircases
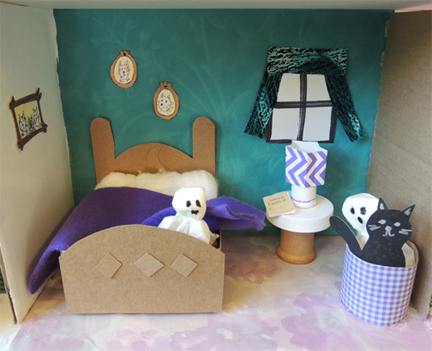
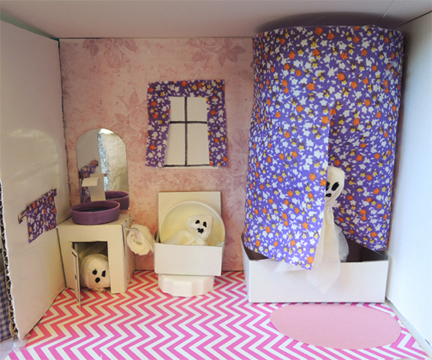
 Bedroom
 Bathroom
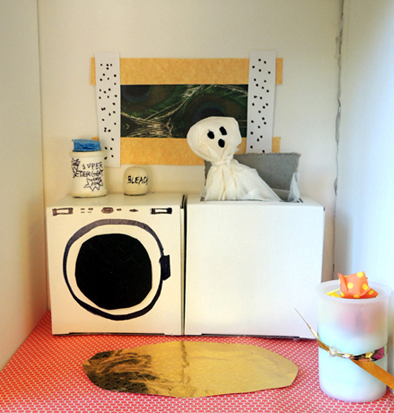
 Laundry Room
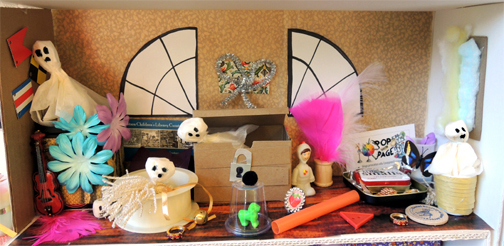
 Attic (complete with Amityville windows)
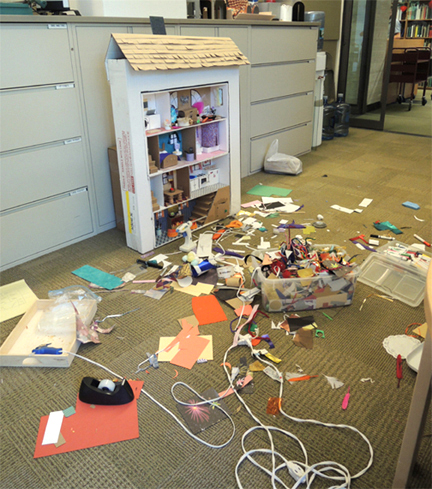
 And here is a photo of the tremendous mess we made during the building of the ghost house. Oh yeah.
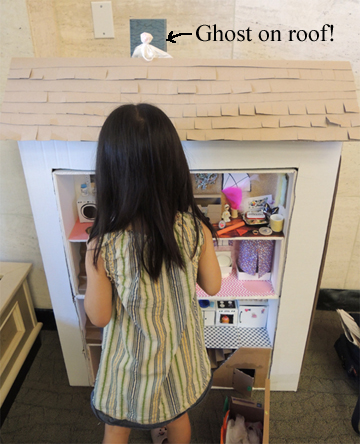
 During story time, kids could play the ghost hunting game as many times as they liked. I came up with some pretty creative new places to hide ghosts (like the overhead light fixture in the kitchen, and the roof).
 At the very end of story time, interested parties put their names in a hat and the winner took home the ghost house! If, however, you’re still yearning for more dollhouses and miniatures, mosey on over here to see some truly spectacular Harry Potter creations.