
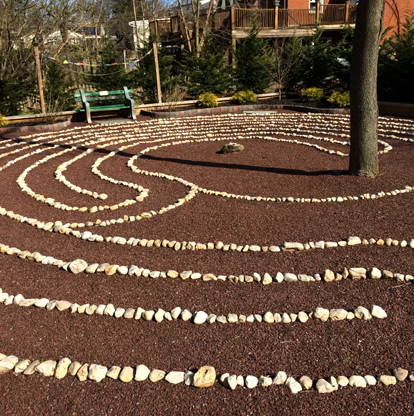
 Do you have some restless rovers in the house? How about sending them out to build and navigate a custom labyrinth or maze…for less then five dollars! This idea came courtesy of the Princeton Buddist Meditation Group, which hosts this little labyrinth in the community space behind their center.
You’ll need:
- Open space
- Rocks
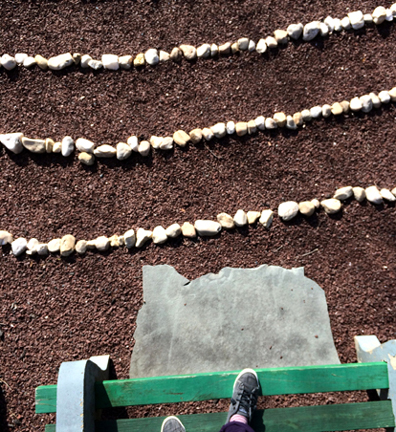
For starters, you need a bit of open space. Any patio, porch, driveway, or sidewalk will do. If you’re in an apartment, you can always clear a room or build a tabletop version.The only other thing you need? Rocks! Bags of these are available at home improvement stores and garden centers. A 0.4cu foot bag of white rocks at Lowe’s, for example, is just $3.98.
To create the labyrinth, simply line the rocks up to form the walls of your winding path, and off you go! If you don’t want to create your own design, there are plenty of labyrinth templates available online for you to replicate.
What’s the difference between a labyrinth and a maze? A labyrinth is a single winding path that ends in the center of the creation. The focus is on the journey. In a maze, the path has choices, dead ends, and may or may not end in the center. The focus is on entering and exiting.
This rock labyrinth can certainly be modified to become a maze. The beauty of using rocks is that you can switch things up at anytime! And if you’d like a slightly crazier maze challenge, why not try our “No Right Turn” maze here?
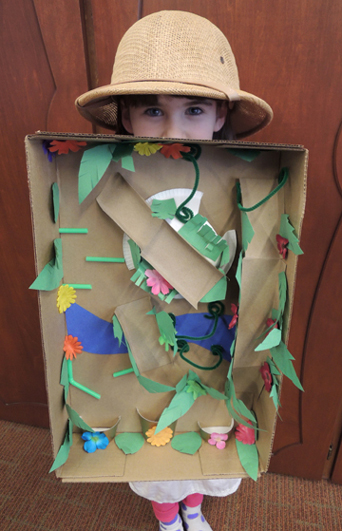
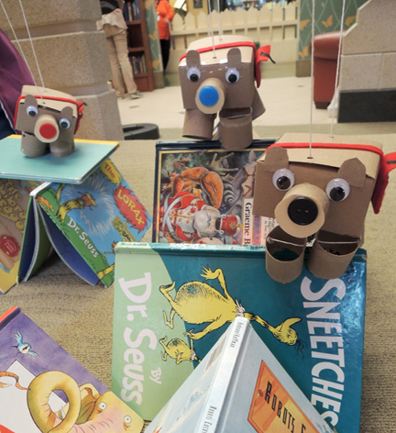 This intrepid bear marionette marches over all obstacles in our library landscape… searching for new friends and a cozy place to call home!
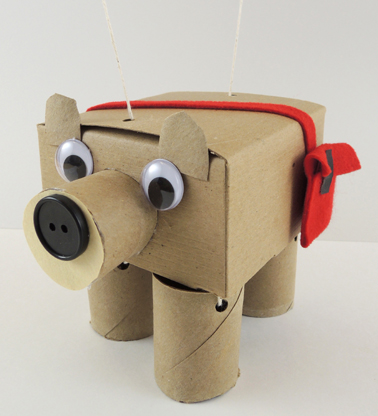 This marionette is designed with simplicity in mind! First, cut the bottom off a small box.Then cut the box down to about 2.25″ tall. Punch two holes in the top of the box, and thread a 29″ piece of string up and out of both holes like so:
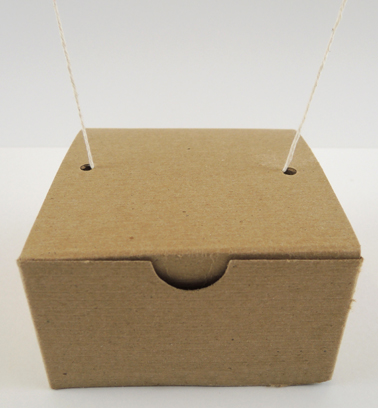 Tie the free ends of the string to a wooden dowel rod. If the top of your box has a lid like ours did, make sure to tape it down tightly.
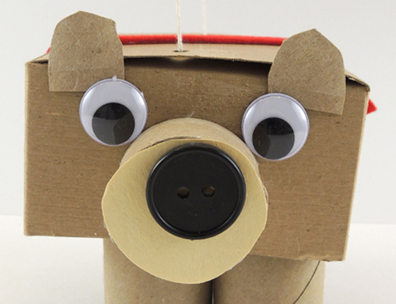 To make the bear’s legs, cut 2 toilet paper tubes in half. Punch 2 holes in the top of a half, then thread a 10″ piece of string through the holes like this:
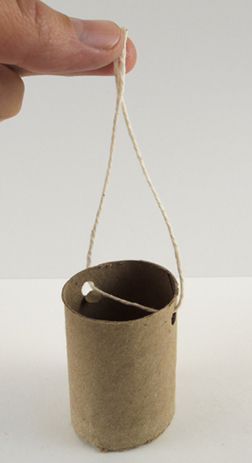 Repeat the above steps with the remaining three legs, then tape all 4 legs to the inside “ceiling” of the box. Here’s a shot of the underside of the box with the leg strings taped in place.
 Did you notice the black button in the image above? We hot glued that to the inside rear of the bear to counterbalance the button on the bear’s snout. It helps keep the marionette from leaning forward too much.
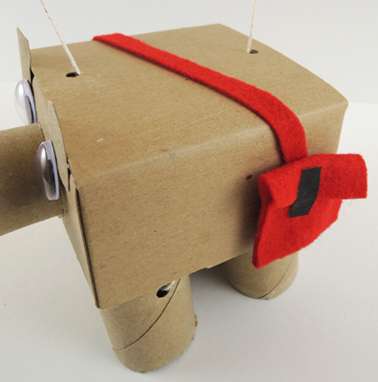 When the bear marionettes were finished, we encouraged kids to pull books off the shelves and use them to create mountains, walls, ramps, bridges, and paths for their bears to travel across. A few kids also made cozy little places for the bear to nap. Awwwww!
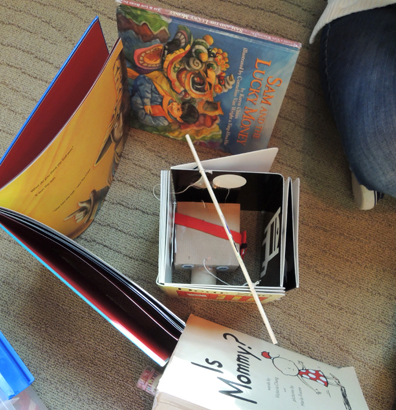
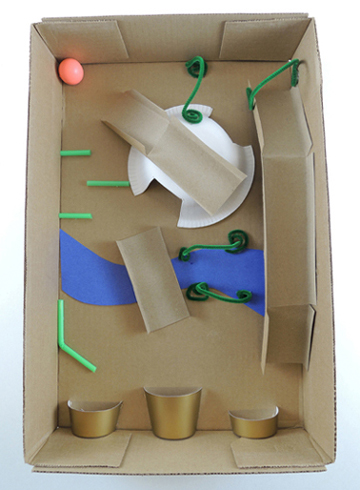 As you can see, we had a paper bowl tunnel, a bumpy drinking straw “path,” green pipe cleaners acting as vine wickets, and a blue construction paper river. We used tagboard to make a bridge, as well as a ramp and an elevated pathway. At the bottom of the box lid are the “goals”…paper cup halves cut down to various heights. Want to fill things out a little? Add construction paper foliage:
 You can also add fabric (or construction paper) flowers for some pops of color!
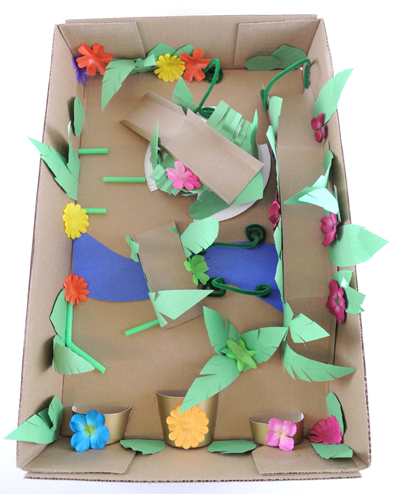 To play, drop a bouncy ball in anywhere, then navigate through the obstacles and foliage by tilting and turning your box top. The ball goes in a cup, you win! Bonus fun – use multiple balls at once, or play with one kid at each end of the box top!