Gather, all you ninjas in training, for the ultimate obstacle course. Challenge your balance, hiding, and throwing skills to earn a noble blade of aluminum foil!
We read Ninja Camp, written by Sue Fliess, and illustrated by Jen Taylor (Hachette Books, 2019). A team of young ninjas gather at Ninja Camp to train and defend the Shadow Blade from a rival camp. A total story time win…this fun rhyming book packs plenty of action and adventure!
You’ll need:
- 1 black t-shirt
- 4 paper towel tubes
- 1 piece of ribbon (ours was 13″ long)
- Aluminum foil
- A selection of color masking tape
- A ninja obstacle course (more on this below!)
- Scissors and tape for construction
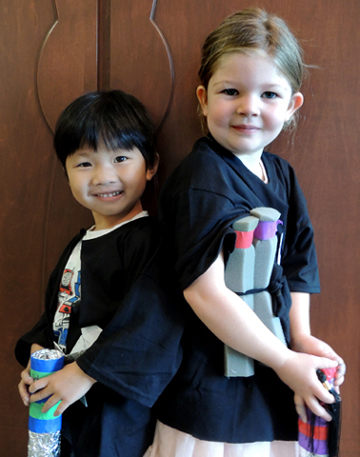
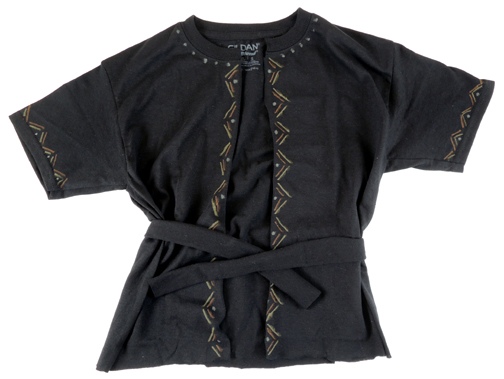
Our story time project consisted of a ninja jacket, nunchucks, throwing star, and a sword. To make the jacket, cut a slit up the front of a black t-shirt (we used a kid’s size L). Then, cut a 2.5″ strip off the bottom of the shirt to create a belt. We offered metallic markers to add some designs to the jacket as well.
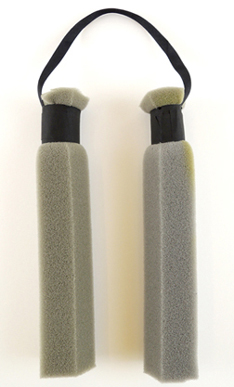
 Our nunchucks are surplus foam book spine protectors recycled from Princeton University’s Department of Special Collections! But you can also use paper towel tubes. Connect the tubes with a 13″ piece of ribbon secured with color masking tape.
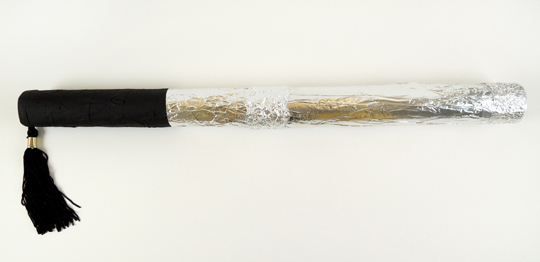
 The throwing stars are of the classic origami variety (instructions here). The sword is 2 paper towel tubes connected with masking tape, then covered with tin foil. The hilt is masking tape as well. But the REAL stroke of genius? We added a tassel to the sword hilt, compliments of the Office of Student Affairs at Princeton University. Our tassels were surplussed from commencement, but you can also purchase them rather inexpensively on Amazon.
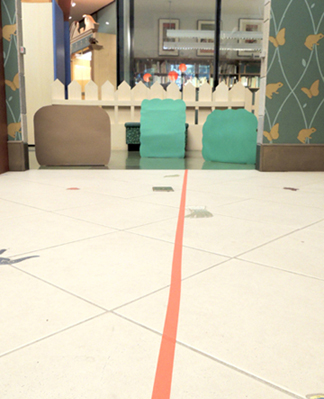
 Once our ninja kids were ready, we gathered at the start of the obstacle course. First, ninjas walked the red masking tape tightrope to build balance skills:
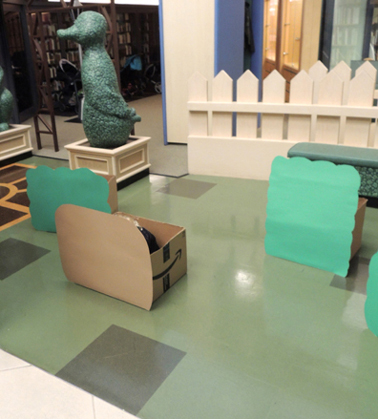
 Next, they entered the forest to demonstrate their hiding abilities. Can you spot the ninja in this photo?
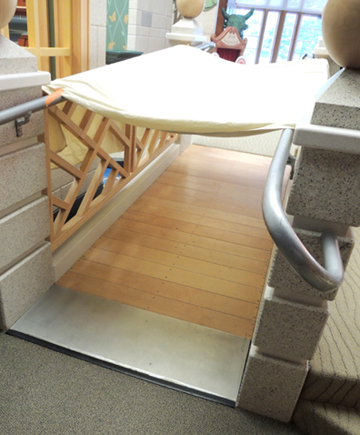
 Then the ninja stealthily moved along a dark corridor and crawled through a tunnel…
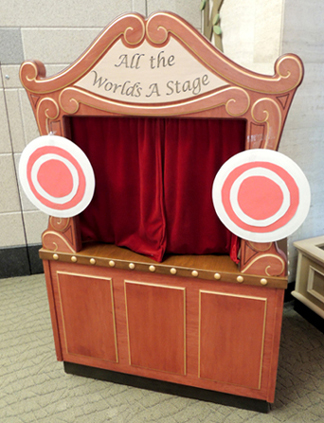
 Finally emerging at our throwing star range, where they took aim at targets:
 When the obstacle course was complete, the ninja headed over to the Shadow Blade stone, where they drew their swords under the proud eye of Sensei Katie!
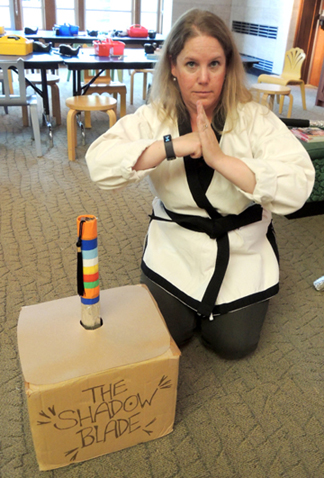 Fun fact: Katie has a black belt in Tae Kwon Do.
Note to self: Don’t mess with Katie.
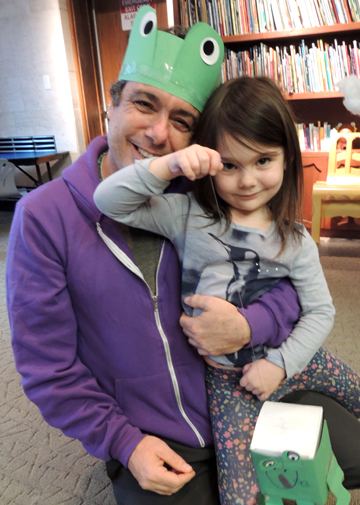 The world is full of delightful things for a little frog to jump over, but the absolute best place to eventually land? The loving arms of Mama (or Dada!) frog. Our story time kids jumped box frogs over several obstacles, but waiting at the finish line – with a BIG hug – was their respective grown-up, bedecked in a frog headband!
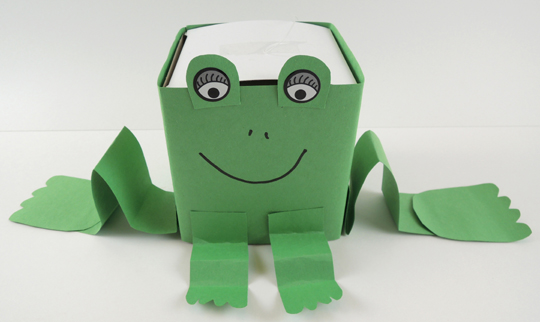 To make the bouncy jump cord, tape a 22″ piece of clear elastic beading cord to the top of the box, then knot the other end around a craft stick handle. We wrapped tape around the knot on the craft stick as well, just to make it extra secure.
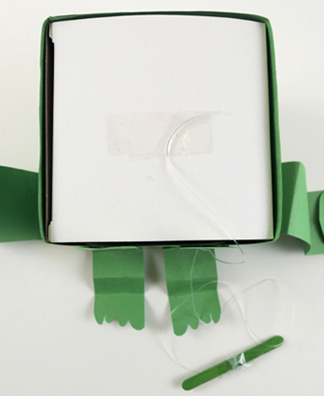 Below is the big frog headband for grown-ups. This is also made of green construction paper. We added jumbo eye stickers as well, but you can also draw on the eyes with markers.
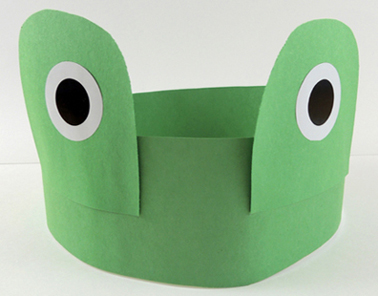 Your 2 frogs are done, now for the obstacle course! It can really be as simple as “jumping” over chairs, tables, and books. But we had a couple big boxes come in through our
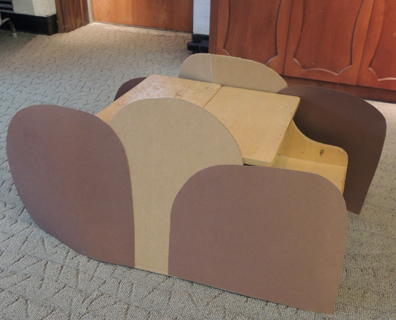
  When he shouted go, a kid / frog duo headed onto the course. First they leaped over the meadow, then jumped past an owl nest (which had an owl in it – another audience recruit).
 Next was a log tunnel, and just beyond it, a blue twin sheet “river” to jump over.
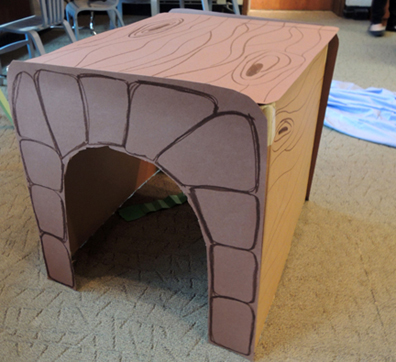
 And stopped to say hello to a rainbow cloud (i.e. Michelle, a Princeton University student assistant). Did you notice her little puff hat? Soooo cute.
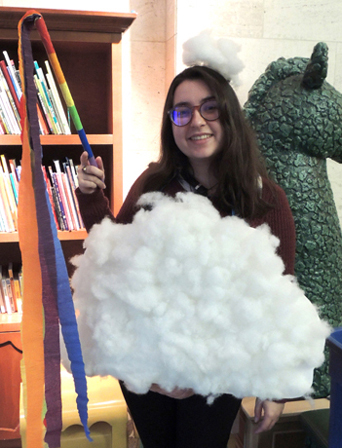 Next it was on to Miss Melinda, who had a lily pad for each frog to rest on. We made these out of green poster board and a paper muffin cup.
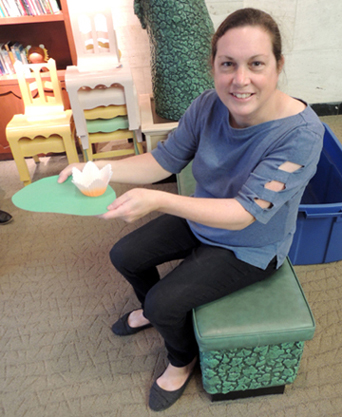 The final step was to jump into the arms of your mom/dad frog, who was waiting at the finish line in a fine frog head band! Ready to see the course in action?
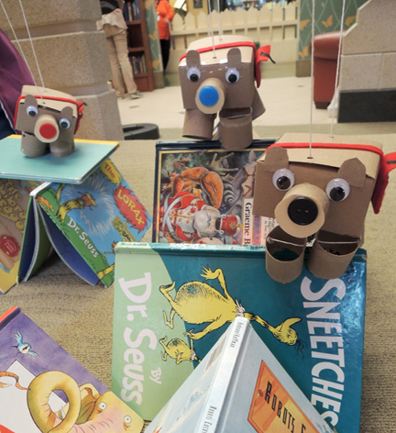 This intrepid bear marionette marches over all obstacles in our library landscape… searching for new friends and a cozy place to call home!
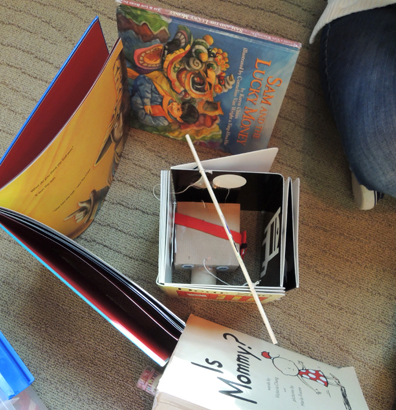
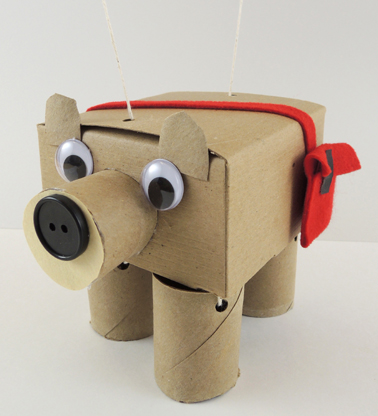 This marionette is designed with simplicity in mind! First, cut the bottom off a small box.Then cut the box down to about 2.25″ tall. Punch two holes in the top of the box, and thread a 29″ piece of string up and out of both holes like so:
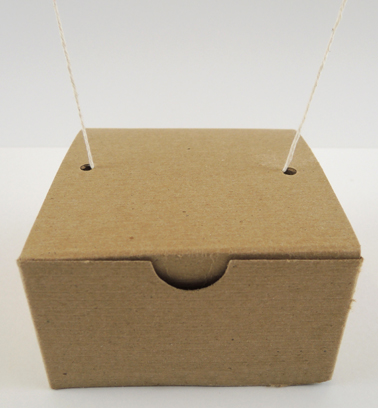 Tie the free ends of the string to a wooden dowel rod. If the top of your box has a lid like ours did, make sure to tape it down tightly.
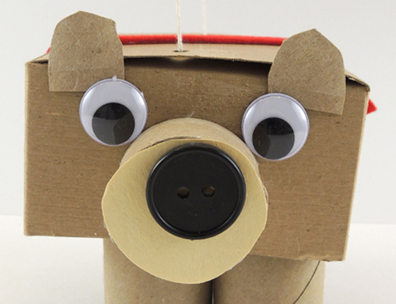 To make the bear’s legs, cut 2 toilet paper tubes in half. Punch 2 holes in the top of a half, then thread a 10″ piece of string through the holes like this:
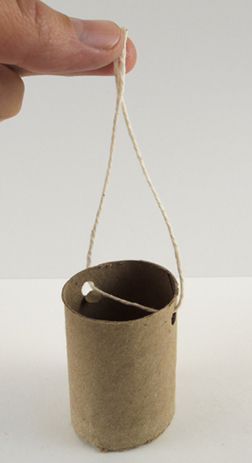 Repeat the above steps with the remaining three legs, then tape all 4 legs to the inside “ceiling” of the box. Here’s a shot of the underside of the box with the leg strings taped in place.
 Did you notice the black button in the image above? We hot glued that to the inside rear of the bear to counterbalance the button on the bear’s snout. It helps keep the marionette from leaning forward too much.
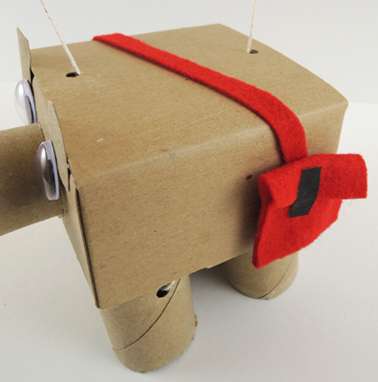 When the bear marionettes were finished, we encouraged kids to pull books off the shelves and use them to create mountains, walls, ramps, bridges, and paths for their bears to travel across. A few kids also made cozy little places for the bear to nap. Awwwww!