
 Today, we’re heading to the frozen lakes of Minnesota! Climb into your cozy ice shack with your fishing pole and tackle box stocked with delicious snacks. Who knows? Maybe you’ll catch a northern pike, a walleye, or a pumpkinseed!
 We read One Frozen Lake, written by Deborah Jo Larson, and illustrated by Steve Johnson and Lou Fancher (Minnesota Historical Society Press, 2012). A boy and his grandfather head to a frozen lake to do some ice fishing. The fish aren’t biting, but the duo’s patience is finally rewarded. The boy catches a fish…but ultimately decides to throw it back! This clever little counting book introduces all sorts of fishing terminology – line, jig sticks, lures, tackle, sinkers, spoons, spins, rigs, jig sticks, test line – and the fantastic illustrations help place everything in context.
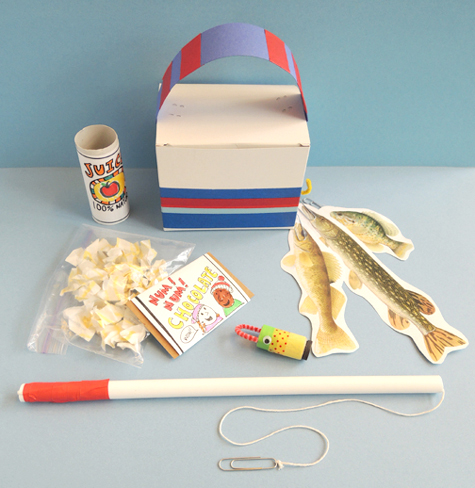
You’ll need:
- 1 box (mine was 4 ½” X 4 ½” x 6”)
- A selection of color masking tape
- A selection of patterned tape
- 1 poster board strip for tackle box handle (mine was 1.75″ x 12.5″)
- A 6″ piece of pipe cleaner for tackle box hook
- 1 snack template, printed on 8.5″ x 11″ white card stock
- A rectangle of white construction paper (approximately 5.5″ x 7″)
- 1 plastic sandwich bag
- 1 toilet paper tube
- 1 rectangle of tagboard (approximately 2.5″ x 4.25″)
- A 15″ piece of PVC pipe
- A 35″ piece of string
- 4 jumbo paper clips (mine were 1.75″ long)
- 1 wine cork
- 1 button magnet
- A 4″ piece of pipe cleaner for fishing lure
- 2 mini wiggle eyes
- 1 fish template, printed on 8.5″ x 11″ white card stock
- Scissors, tape, and stapler for construction
- Markers for decorating
- Hot glue
- 1 ice shack (more on this later!)
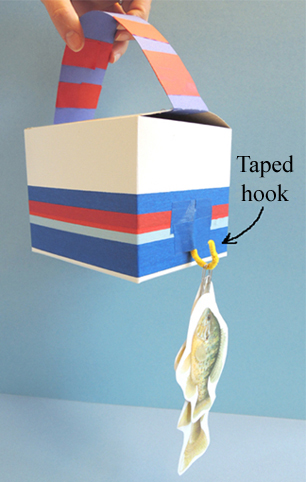
We’ll begin with the tackle box! Use color masking tape and/or patterned tape to decorate the outside of a box (if you don’t have tape handy, plain old markers work too). I wrapped a few pieces of masking tape around the poster board strip too. Tab the ends of the poster board strip and staple them under the lid of the box (if your box doesn’t have a lid, just attach the handle to the sides of the box with staples or hot glue).
 Bend a 6″ piece of pipe cleaner into a “V” and twist both sections of the V together tightly. Curl the bottom into a hook, and tape it to the side of the tackle box. Later, you’ll use this hook to hold the fish you catch.
 The tackle box is done, now for the snacks! To make buttered popcorn, use a yellow marker to scribble on both sides of a rectangle of white construction paper. Cut the paper into small squares, then crumble the squares and drop them into the plastic sandwich bag.
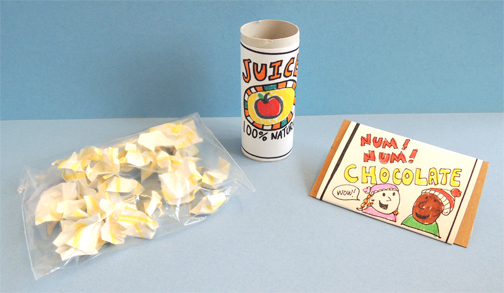 To make a can of juice, color and cut the juice label from the snack template. Then wrap it around a toilet paper tube. To make a chocolate bar, color and cut the chocolate bar label from the template. Wrap it around the rectangle of tagboard (or brown poster board).
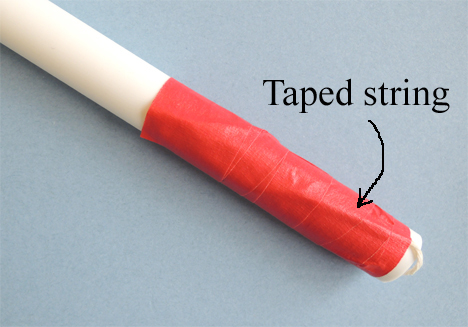
Finally, your fishing pole! Tie a jumbo paper clip to a piece string, then lower the paper clip through the hole at the top of a piece of PVC pipe. Keep lowering the string until the paper clip hangs well beyond the bottom of the pole and there’s just a few inches of string sticking out of the top. Next, turn your pole so it looks like this:
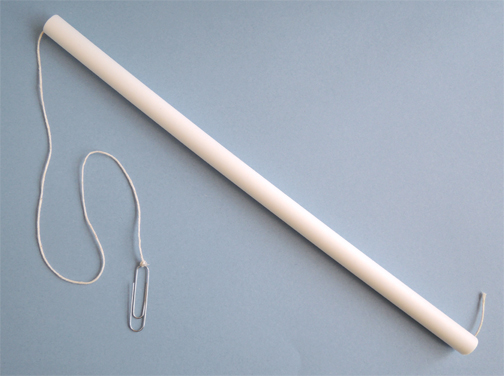 Push the unattached end of the string against the pole, and cover it with color masking tape. Continue wrapping the pole until you’ve created a 3″ handle.
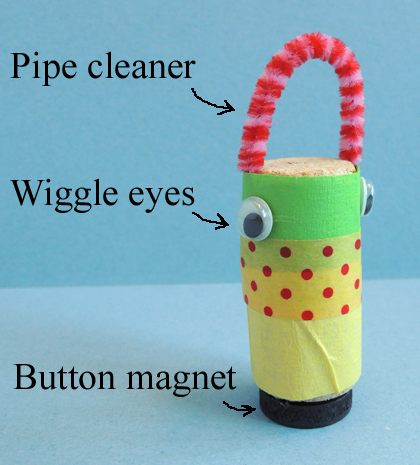
 To make a fishing lure, bend a 4″ piece of pipe cleaner into a “U” shape. Use color masking tape and/or patterned tape to attach the pipe cleaner to a wine cork, then continue wrapping until the entire cork is covered with tape. Hot glue a pair of mini wiggle eyes on the sides of the cork, and a button magnet on the bottom.
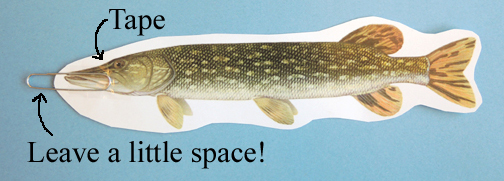
 Cut each fish out of the template and slide a jumbo paper clip over its mouth. Make sure, however, to extend the paperclip a little past the fish’s mouth (so it can hang on the tackle box hook later). Secure the paper clip to the fish with tape.
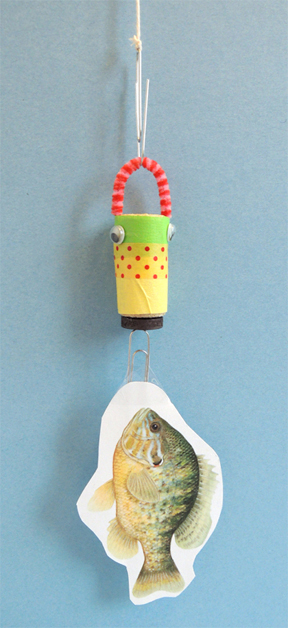
 Ready to fish? Hook the fishing pole’s paperclip through the pipe cleaner on your lure. Slowly lower the lure toward the fish’s mouth. The paperclip on the fish will attach to the magnet on the lure…and you’ve caught yourself a fish!
 Feel free to fish on a tabletop, out of a big bucket, off a blue towel “lake” on the floor…but if you’d like an ice shack like ours, read on!
 People at work know to get in touch with me before they recycle a big box (read more about that program here). I greedily drag these boxes into my lair for future story time use. I must admit, however, that my current stash was threatening to outgrow my storage space. So we had a big box blowout and made two ice shacks. We used 2 big boxes, 2 oversize box lids, and 2 old archive boxes.
Speaking of oversize box lids, you can see the bottom halves of the boxes in action at this retail-licious story time. For past projects that have utilized old archive boxes, check out this haunted house, this miraculous mechanism, and this fast food stand.
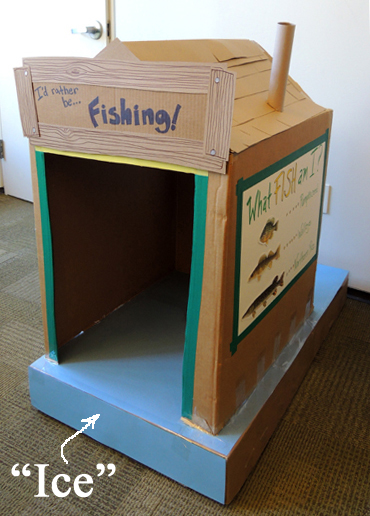
But back to the ice shack. An oversize box lid is the key since it transforms into the “ice” the shack rests upon.
 My box lid was 5.5″ deep x 24″ wide x 42″ long. Since multitudes of kids were going to be sitting on it, we reinforced the underside with sliced up archive boxes. We hot glued everything together, then reinforced the connections between the boxes with packing tape. Here’s a photo of the underside of the lid, all glued and taped. You can also see the round “hole” we cut in the ice for future fishing.
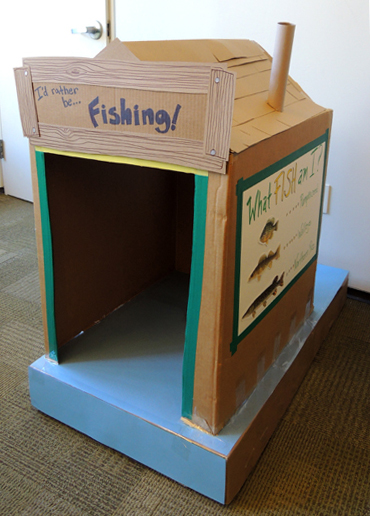
 When the underside was finished, Katie covered the top of the lid with light blue poster board “ice.” She attached the poster board with hot glue, then reinforced the edges with packing tape. Meanwhile, I cut a doorway and a window in the sides of a big box (my largest box was 22″ x 27″ x 32.” The second box was 22″ x 26″ x 26″). I made a shingled tagboard roof, added a paper towel tube chimney, and hot glued a cardboard sign on the front.
Katie used packing tape – lots of it – to secure the ice shack to the box lid “ice.” IMPORTANT! When positioning your shack on the ice, make sure the hole is located towards the rear of the shack. Otherwise, kids run the risk of tripping on the hole as they enter the shack.
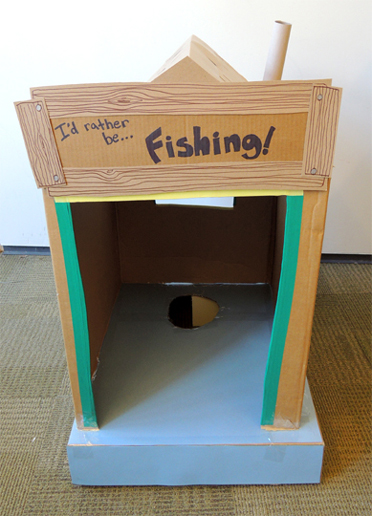 As a finishing touch, Katie lined the doorways and windows of both shacks with color masking tape. She used very special colors – purple & black for the Minnesota Vikings, and green & gold for the Green Bay Packers.
Finally, Katie made fish identification charts and attached them to to the sides of the shacks. We found some excellent wildlife illustrations on the Minnesota Department of Natural Resources’ website, and they were kind enough to let us reproduce them for story time and the blog template. The kids loved matching their fish up to the charts.
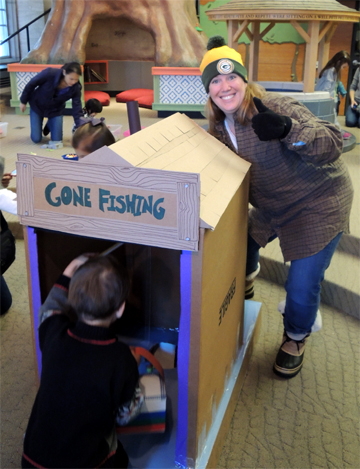
 I’ll leave you with one final image. Katie hails from the Midwest. When she was a kid, she actually went ice fishing with her grandparents in Spring Grove, Minnesota! She’s also been ice fishing in Colorado. While prepping this story time project, she expertly fielded my questions about ice fishing, ice shacks, bait, driving trucks on ice, operating ice augers, and the expression “derhey.” She brought her cold weather gear to story time too. Just look at this dedication to authenticity folks!
Fish illustrations used with permission of the Minnesota Department of Natural Resources.