
Can you tiptoe your tiger through the forest without making a sound?
We recommend reading The Tiptoeing Tiger by Philippa Leathers (Candlewick Press, 2018, read here by DaddyRead2Me). When Tiger prowls the forest, the other animals NOTICE and move away. But not Little Tiger. No one is afraid of him in the slightest! So he contrives to sneakily tiptoe around the forest until he thoroughly terrifies someone. It doesn’t work with Boar, Elephant, or the monkeys…but Little Tiger might have met his match at the pond!
You’ll need:
- 1 small oatmeal container
- Construction paper and/or poster board
- 2 brass fasteners
- 2 craft sticks, approximately 3″ long
- Scissors, tape, and box cutter for construction
- Markers for decorating
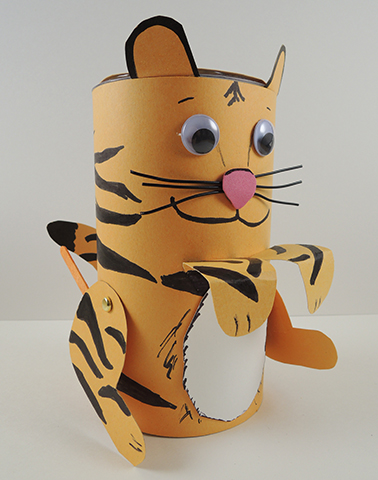
Begin by decorating a small oatmeal container like a tiger. For added texture, we used a pair of wiggle eyes, a bit of self-adhesive foam for the nose, and twisteez wire whiskers, but you can also just use markers to add these features. The dynamic part of the project comes when you add the moveable back legs!
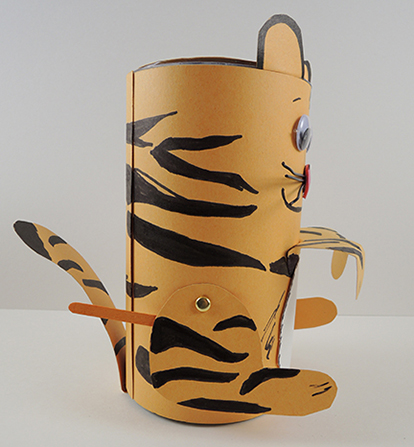 Use a box cutter to make small slices in the oatmeal container, then attach the tiger’s back legs to the body using brass fasteners. Next, attach two, 3″ long craft sticks to the legs, leaving plenty of room for you to grasp the sticks. To operate, move the sticks up and down while gently sliding the oatmeal container forward, and you have yourself a splendid tiptoeing tiger!
 Storms can be very scary, but this story time project lets YOU be in charge of the clouds, rain, and lightning!
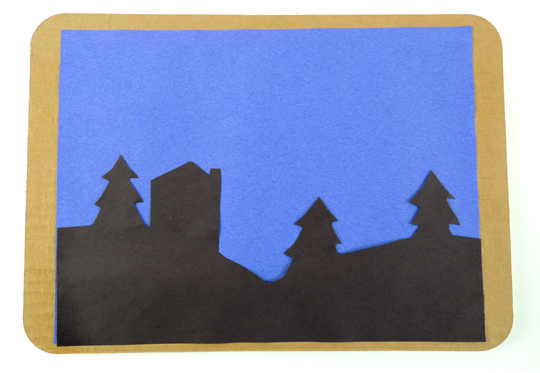 First, glue a piece of blue construction paper to a corrugated cardboard rectangle (we used 9.75″ x 13.75″
 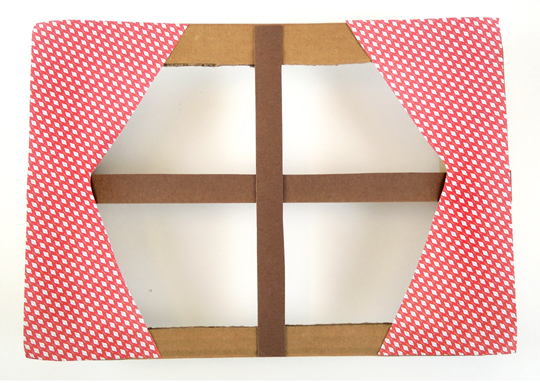 Use a box cutter to cake a window in the second corrugated cardboard rectangle. Then glue or tape 2 strips of poster board to the front of the window (definitely use poster board, construction paper is a little too saggy). Add a pair of optional window curtains. Then flip the front piece over…
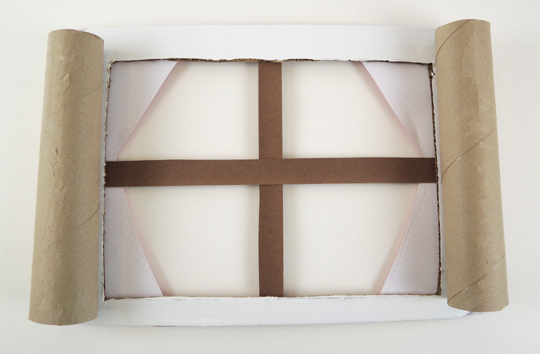 Shorten 2 paper towel tubes so they fit inside the sides of the window, then hot glue them firmly in place (we reinforced the connection with tape as well). Hot glue the tubes to the back piece of the theater. Now there is a gap between the front and back of the theater. This is where you drop your stick puppets! We also hot glued a small box to the very back of the theater to keep it more steady (our box was white, sorry, it’s a little hard to see in the photo!).
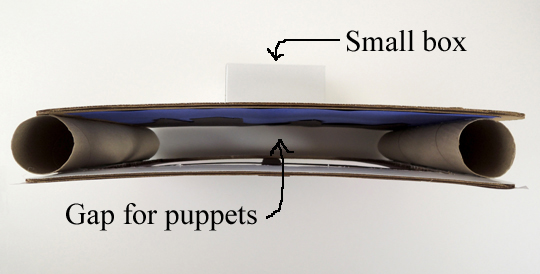 To make the stick puppets, cut a lightning bolt, fringe of rain, crescent moon, and storm cloud from construction paper, then glue or tape them to the bottom of a jumbo craft stick (ours were 8″ long).
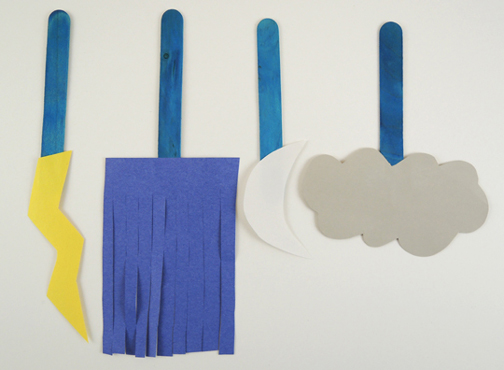 To operate the theater, simply drop the puppets into the gap and narrate the story as storm clouds move in, rain comes, lightning strikes, and the skies finally clear to reveal the moon!
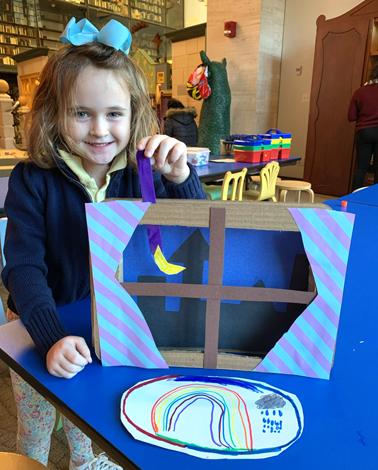
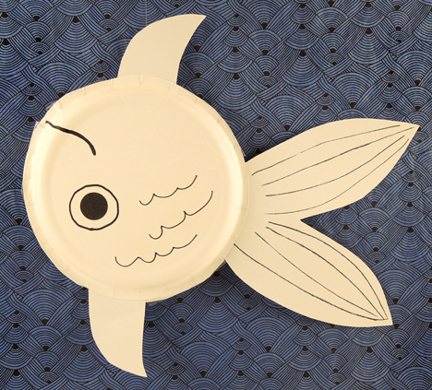 After spotting the fabulous upside down goldfish ghost
 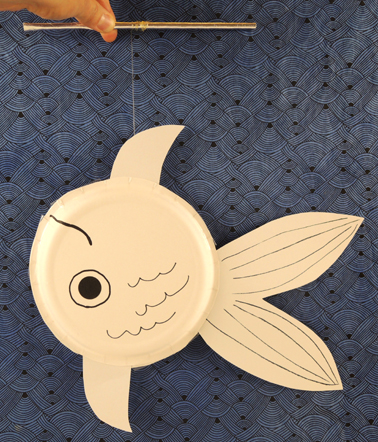 To make the marionette, trim the outside perimeters off 2 paper plates. Use marker to draw eyes, a mouth, and scales on the plates.Next, tape a white construction paper tail and fins to the inside of 1 plate.