
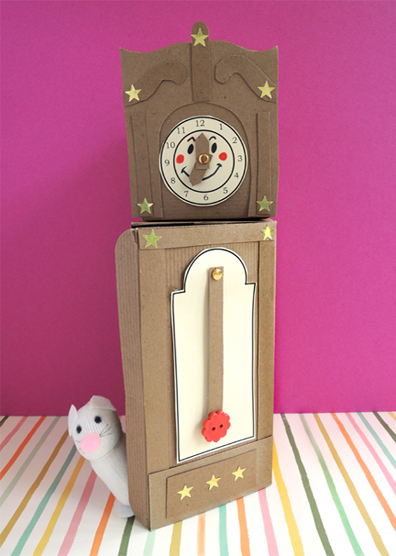
 This friendly grandfather clock houses a squeaky surprise. A sweet little sock mouse that curls up inside with a pillow, blanket, and piece of cheese!
We read The Clock, written by Constantine Georgiou, and illustrated by Bermard Lipscomb (Harvey House, Inc., 1967). Inside a farmhouse, a clock ticks. Throughout the day and night, the clock stands in the hall and tells time. A little mouse lives and sleeps inside the clock. One night, however, the clock stops and it’s up to the mouse and the clock to get things fixed before the family wakes up!
You’ll need:
- 1 rectangular box (mine was 4 ½” X 4 ½” x 9” – a large tissue box works too)
- 1 square box (mine was 4” x 4” x 4” – a small tissue box works too)
- Brown construction paper or paint (if needed, to cover boxes)
- A selection of patterned paper
- An 8.5″ x 11″ piece of tagboard (or brown poster board)
- 1 clock door and face template, printed on 8.5″ x 11″ manilla (or white) card stock
- 2 brass fasteners
- 1 large button
- 10-12 gold foil star stickers (optional)
- 1 white baby sock (I used Target brand low-cut socks for 6-12 months)
- A small ball of polyester fill
- A 6″ piece of white yarn for mouse’s neck
- 1 rectangle of white stiffened felt (approximately 1.75″ x 3.5″) for feet & ears
- A 3″ piece of white yarn for tail
- 1 mini pom-pom (mine was 0.5″) for nose
- Black permanent markers (I used Sharpie fine tip, and ultra-fine tip markers) for eyes & whiskers
- 1 white cotton ball
- A rectangle of fleece cloth (mine was 3.5″ x 5″)
- A small triangle of orange or yellow kitchen sponge (mine was 1.5″)
- Scissors, tape, white glue for construction
- Markers for decorating
- A box cutter
- Hole punch
- Hot glue
 The clock is first! The boxes I used for this project were brown. But if you’re using non-brown boxes, you’ll need to cover them with brown construction paper (or paint) first.
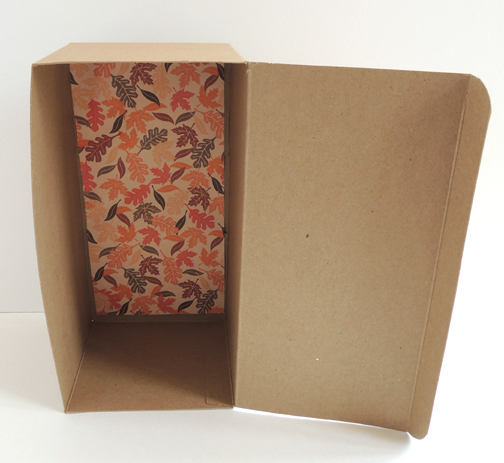
My rectangular box had a lid that I used to create the clock’s door. If yours doesn’t have a lid, you’ll need to use a box cutter to cut one in the side of the box. Once the door has been cut, open your clock and glue (or tape) a piece of patterned paper to the back wall. This is your mouse’s wallpaper.
 For the exterior of the clock, we wanted lots of texture. So we pre-cut 14 tagboard clock pieces, as well as the card stock clock face and the “glass door” from the template. We put each set of clock objects in an envelope (along with 2 brass fasteners).
During story time, each kid was given an envelope and we went step-by-step, announcing the item they needed to find in the envelope and where/how to attach it to the boxes. Here are all the pieces laid out (everything can be attached with white glue, hot glue, or tape):
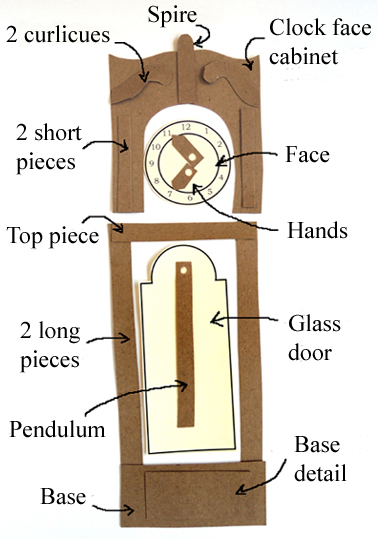 You certainly don’t have to get this elaborate. In fact, you can skip the tagboard flourishes and just put on a clock face, the clock hands, the glass door, and the pendulum and be done. Here’s how we did those particular steps.
First, cut the door and the face from the template. Use markers to draw a friendly face on your clock. Then use a box cutter to make a small slit in the clock face and the glass door like so:
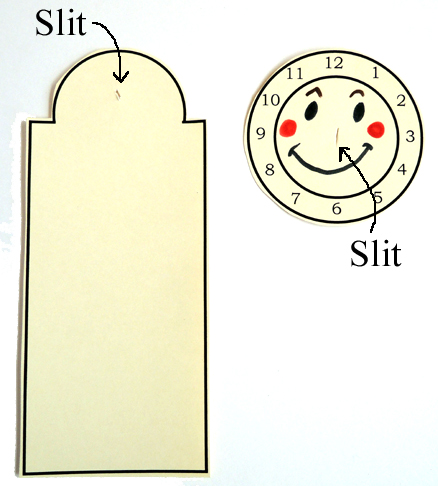 Take your pendulum piece (a tagboard strip with a hole punched in one end) and your clock hands (2 small tagboard arrows with holes punched through the blunt ends) and thread a brass fastener through them. Push the brass fastener through the slits like this:
 Glue, tape, or hot glue the glass door and the face to your clock boxes. Then hot glue the two clock boxes together. Hot glue a plastic button on the bottom of the pendulum…
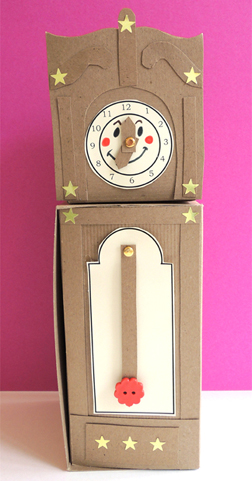
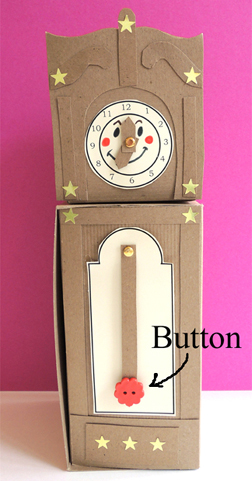 And add some gold foil star stickers to the outside of the clock. Or, skip the star stickers and decorate the clock with markers. You’re done with your clock, now for the mouse!
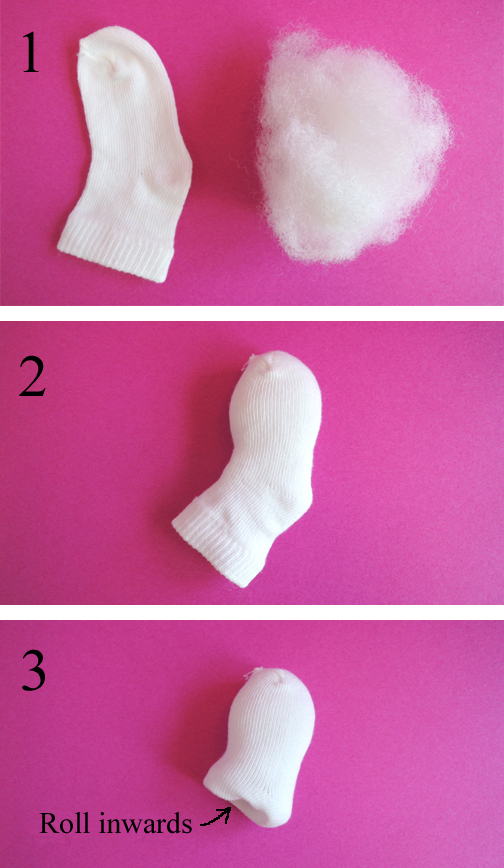
 Stuff a white baby sock with some polyester fill. Don’t over stuff the sock. You definitely want to leave a little room at the bottom, where the sock opens. Gently roll the opening of the sock upwards and inwards (in other words, roll it into the sock). The rolled up part is now the base of your mouse.
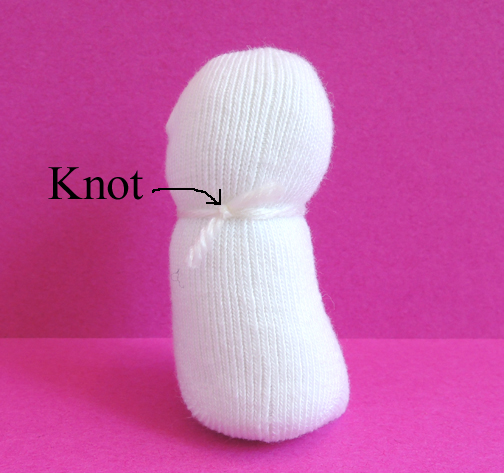
 Stand the sock up on its base and gently knot a 6″ piece of yarn around the top to create a “neck.” You don’t need to knot it super tight – just enough to suggest a neck. Trim the extra yarn off.
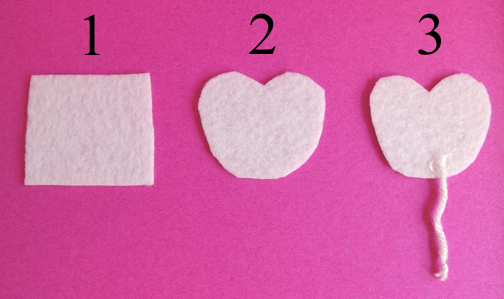
 Put the sock aside for a moment, and cut the mouse’s feet out of a rectangle of white stiffened felt (use the leftover felt to make 2 little ears). Hot glue the tail to the mouse’s feet. The tail is a 3″ piece of white yarn, knotted on the unglued end so it wouldn’t unravel later.
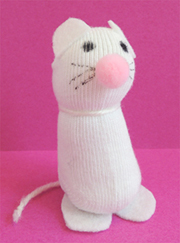
 Hot glue your mouse body to the feet. Then hot glue a mini pom-pom nose and 2 stiffened felt ears to the head. Use a fine point Sharpie marker to draw eyes, and an ultra fine Sharpie to draw whiskers. Done!
The mouse in the book sleeps in the clock with a pillow, blanket, and piece of cheese. We used a white cotton ball, a piece of blue fleece, and a triangle of orange kitchen sponge for the cheese. Sweet dreams little mousie!
