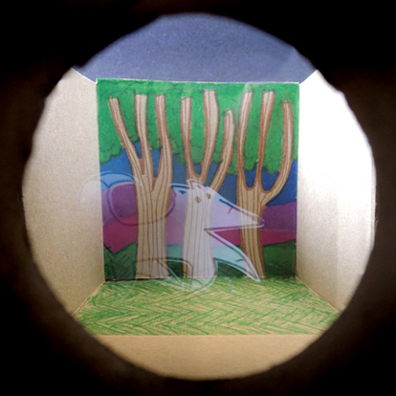
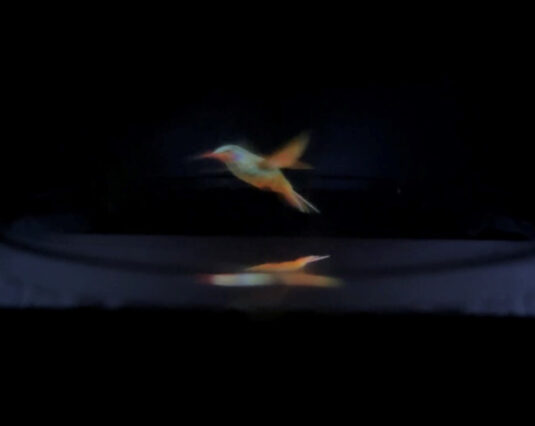
 A quiet forest appears empty. But gaze long enough and…a fox spirit will magically appear before your eyes! No, its not Photoshop or camera trickery. It’s a simple physical stage illusion called Pepper’s Ghost (invented by English scientist John Henry Pepper in 1862). We conjured it at To Be Continued, our chapter book story time program for 6-8 year-olds. Scroll to the bottom of the post to see a video of the illusion in action!
We read Arlo Finch in the Lake of the Moon, written by John August (Roaring Brook Press, 2019). Summer camp for most kids means bonfires, canoeing, and hiking. But for Arlo Finch and his friends, it means surviving the supernatural forces of the Long Woods. Doppelgangers, menacing strangers, talking foxes, locations both in and out of time, and a mysterious object unearthed after decades in hiding test both Arlo’s courage, and his friends’ loyalty.
In the book, Arlo has a special ability to see the spectral world. And I’ve wanted to make a Pepper’s Ghost project for kids for AGES. Through an afternoon of happy experimenting, I was able to construction this inexpensive and kid-friendly tabletop version.
You’ll need:
- 2 large tissue boxes
- A box cutter
- 1 toilet paper tube
- 1 piece of glass or clear polystyrene (more on this below)
- White card stock
- Scissors, glue, and tape for construction
- Markers for decorating
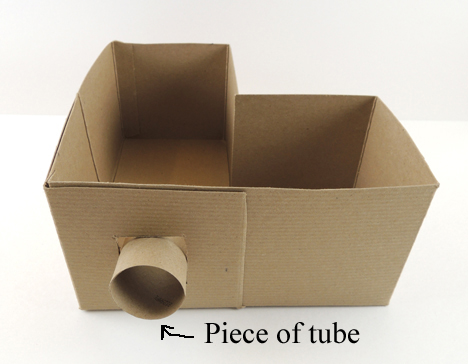
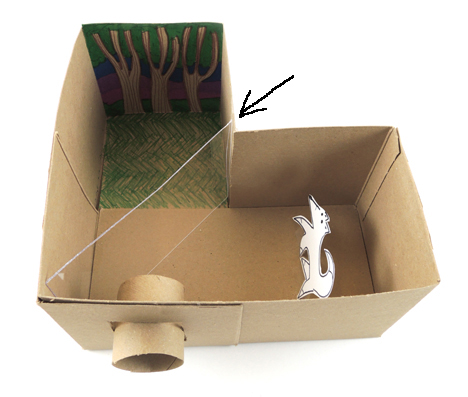
First, cut the lids off the top of a pair of large tissue boxes. Then cut the boxes in such a way as to create an L shape box like so:
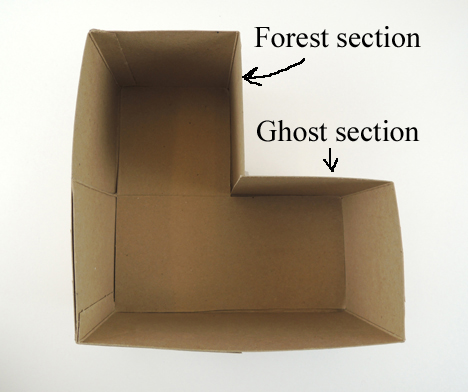
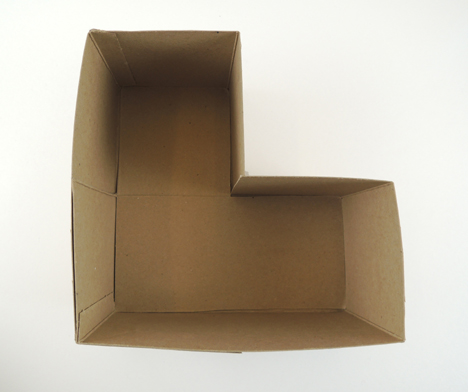 The L shape box is consists of two sections: a “forest section” and a “ghost section.”
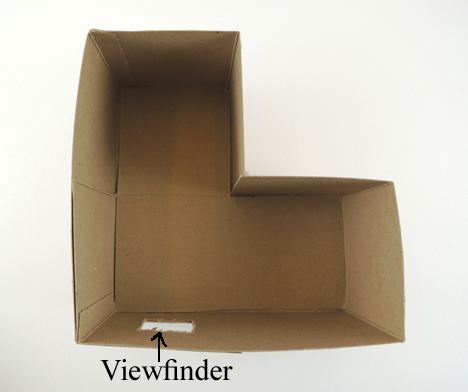
 Next, cut a small square (approximately 1.75″ x 1.75″) in the side of the box that faces the forest section. This is your viewfinder.
 In the book, Arlo gazes through a slipknot, a loop of rope or lacing that allows him to see and travel multidimensionally. In order to replicate that rounded view, we slid a 2.25″ piece of toilet paper tube into the viewfinder as well.
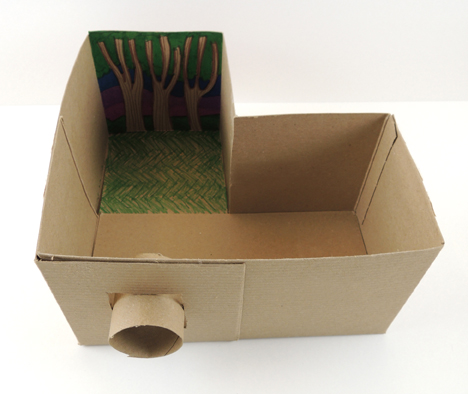
 Now draw a backdrop for the wall opposite the viewfinder. I had the kids decorate a pre-cut piece of paper or cardboard, then we glued it to the inside of the box.
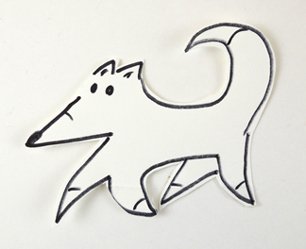
 Next, sketch a ghost on a piece of white card stock. Here’s my tribute to Fox, a spirit from the book (and my favorite character):
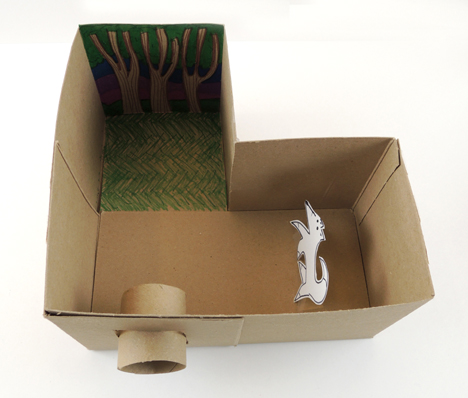
 Tape the ghost in the ghost section of the Pepper’s Ghost box. Though you will probably need to do a little adjusting on the exact placement, try to arrange the ghost in the center of the section. I found this gave the best results.
 Now for the magic! A Pepper’s Ghost illusion is essentially a reflection. For this model, the reflection is caused by a piece of glass or clear polystyrene set at a 45 degree angle in the junction of the L shaped box.
 During my initial test, I used a piece of glass from a 4″ x 6″ picture frame. However, I was a little uncomfortable giving multiple 6-8 year-old kids pieces of glass to take home. Luckily, I found clear polystyrene sheets on Amazon (a set of ten, 8″ x 10″ sheets cost $15). Polystyrene is plastic, lighter weight, doesn’t shatter, and you can cut it down to size with a box cutter or scissors. Testing revealed that the reflection illusion works just as well with polystyrene as glass. Yay!
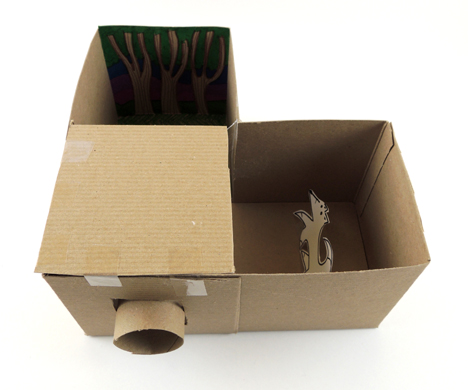
The final piece of the Pepper’s Ghost illusion is the lighting. First, cover the area above the view finder with a square of cardboard…
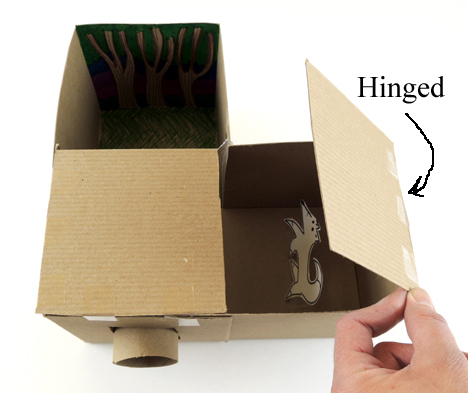
 Then hinge a second square of cardboard over the ghost section. It’s important that this flap open and close. With the flap closed, the ghost will not appear through the viewfinder. But when you lift the flap, the ghost section will illuminate, causing a reflection to appear.
 Ready to see the illusion in action? Close the flap and peer through the viewfinder. Keep gazing through the viewfinder, then lift the flap over the ghost section. Your ghost will magically appear! I also encouraged kids to stick their hands in the forest section and try to grab the ghost. Their fingers passed right through it, of course!
This isn’t the first time the To Be Continued kids have adventured with Arlo Finch and his friends. We read the first book, Arlo Finch in the Valley of Fire earlier in the program (you can see the project we did here). The kids voted unanimously to read the sequel. It did not disappoint. The Arlo Finch books are full of action, intrigue, mystery, and humor. I highly recommend them!

 This is not the first Pepper’s Ghost illusion to appear on Pop Goes the Page. Back in 2020, we posted a kid-friendly version featuring a spirited fox. The illusion is basically a reflection trick, but it’s very effective when done right!
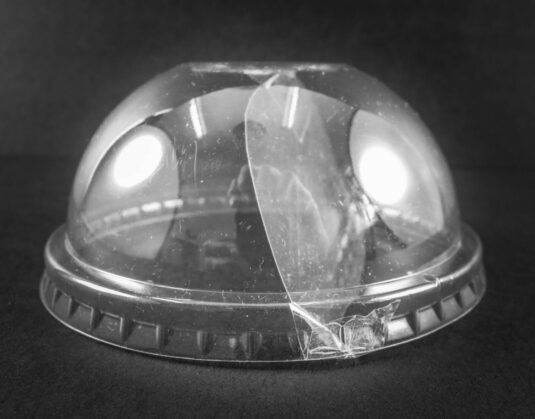

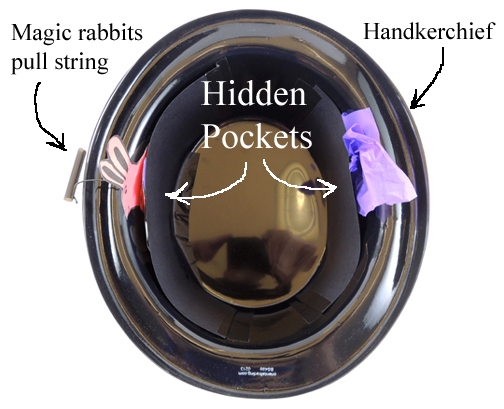 As you can see, the interior of the hat has two hidden pockets. These are made from 2 rectangles of black poster board taped inside the hat. After some testing, we learned that the pockets need to be fairly large (4.25″ x 9.5″) in order for the tricks to works successfully.
 We gave the kids
 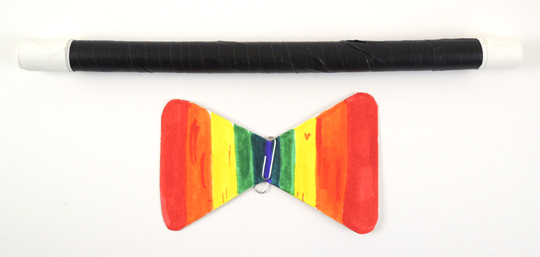 If you’d like a add a third trick to your magic show, we highly recommend the “sticky wand” trick. You’ll find it, and other awesome tricks, in this “
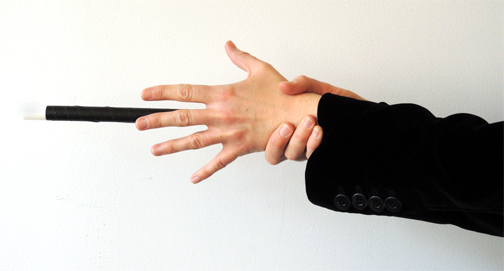
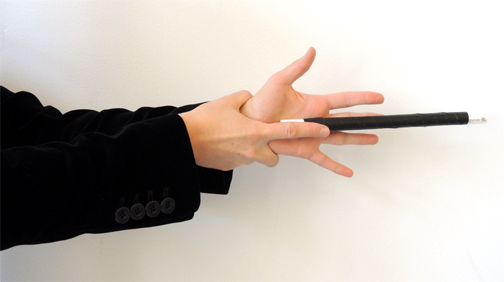 Tell the audience they have magic abilities too. On the count of three, have them audience clap once to “demagnetize” the wand. When you hear the clap, lift your finger to release the wand, and let it fall dramatically to the floor. Then take a big bow!