
Team Colonial Club, Group #7
David Lackey
John O’Neill
Horia Radoi
Description
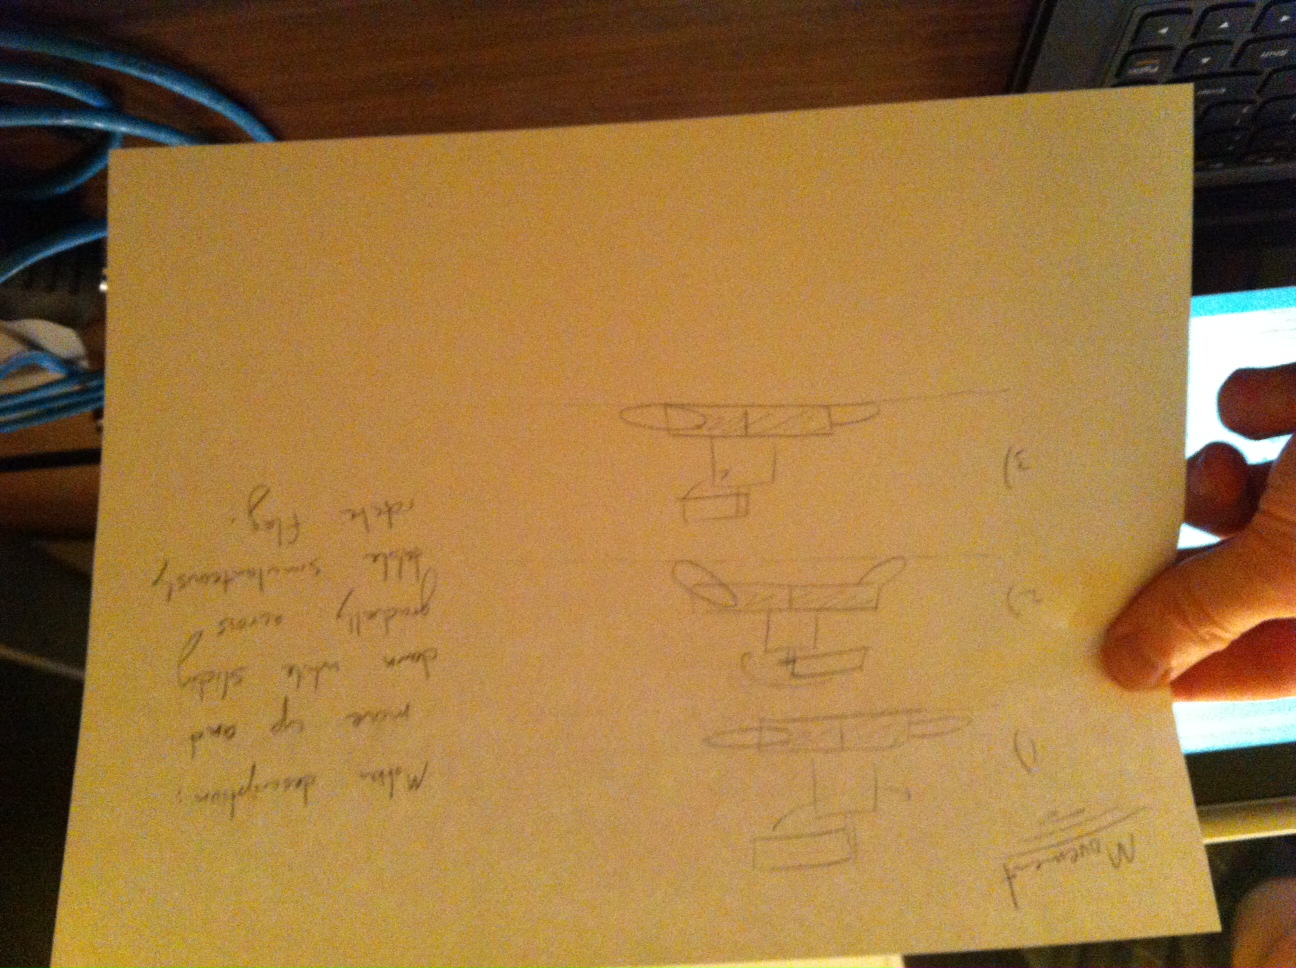
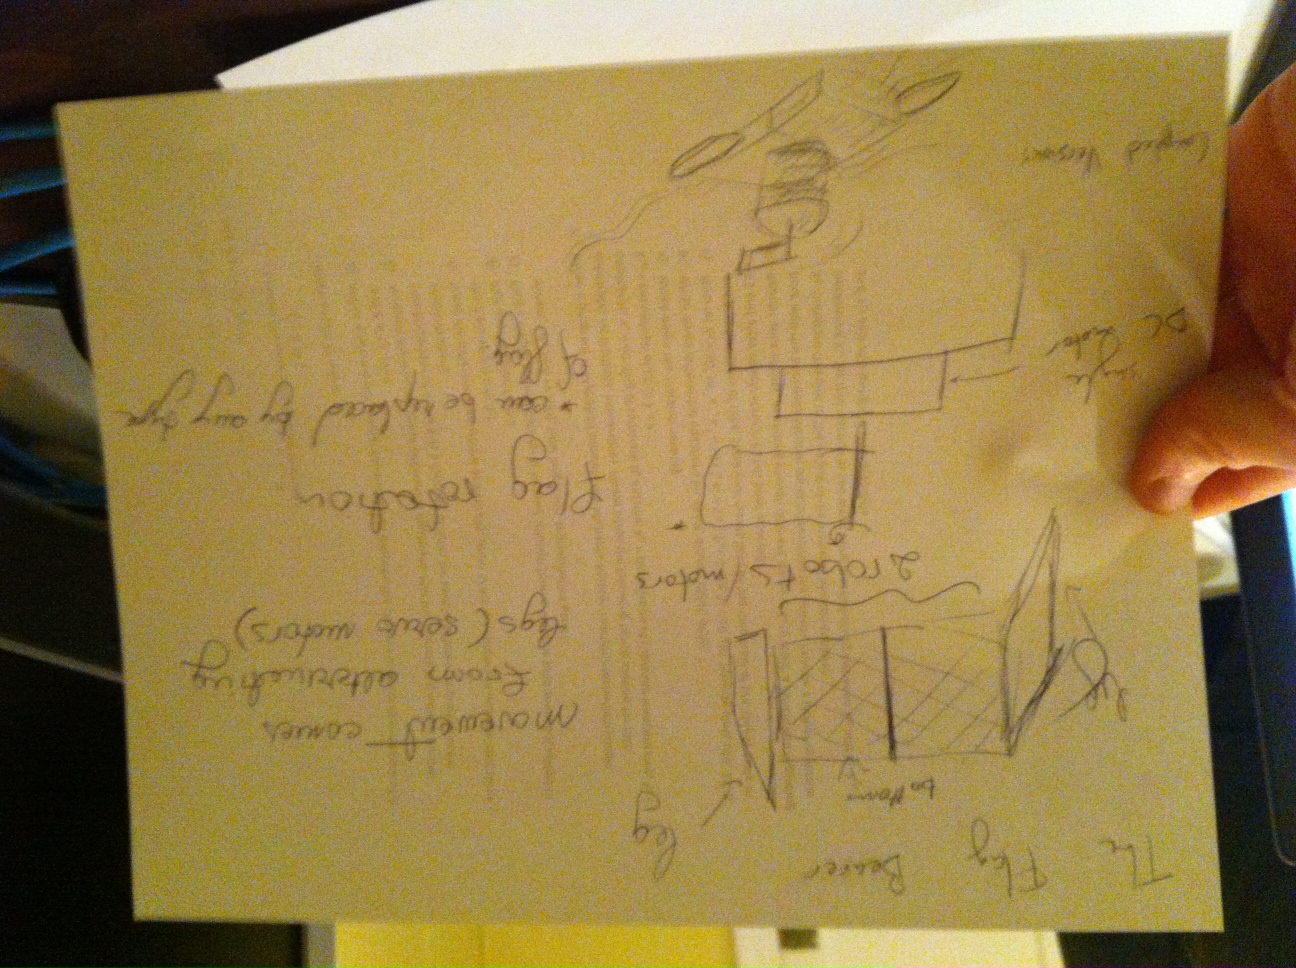
This robot tries to simulate walking using two servomotors attached to opposing sides of the body. It is using friction to thrust itself forward. .
This robot is a precursor to the infamous ATAT, present in the (good) episodes of the Star Wars saga. As opposed to the robot that helped conquer Hoth, our model uses only two legs, on opposing sides, and upon careful calibration, the device can walk. Since our project was struggling with this last step, we decided to add a flag on top of it and call it a marvel of Empire Engineering.
List of Brainstorming Ideas
- oscillating helicopter
- creature that moves until it finds a sunspot / light
- boat that submerges itself when it hears a sound
- tank creature (multiple motors within on tread)
- worm
- creature that travels by rapid, random vibrations
- hovercraft
- robot that quickly rotates a flag
- swimmer
- walks around while spinning a disco ball
- robot that goes slower in the cold
- samurai robot that twirls a staff (we could have two battle)
- tug of war robots, each moving away from one another
Photos of Design Sketches
Final System Media
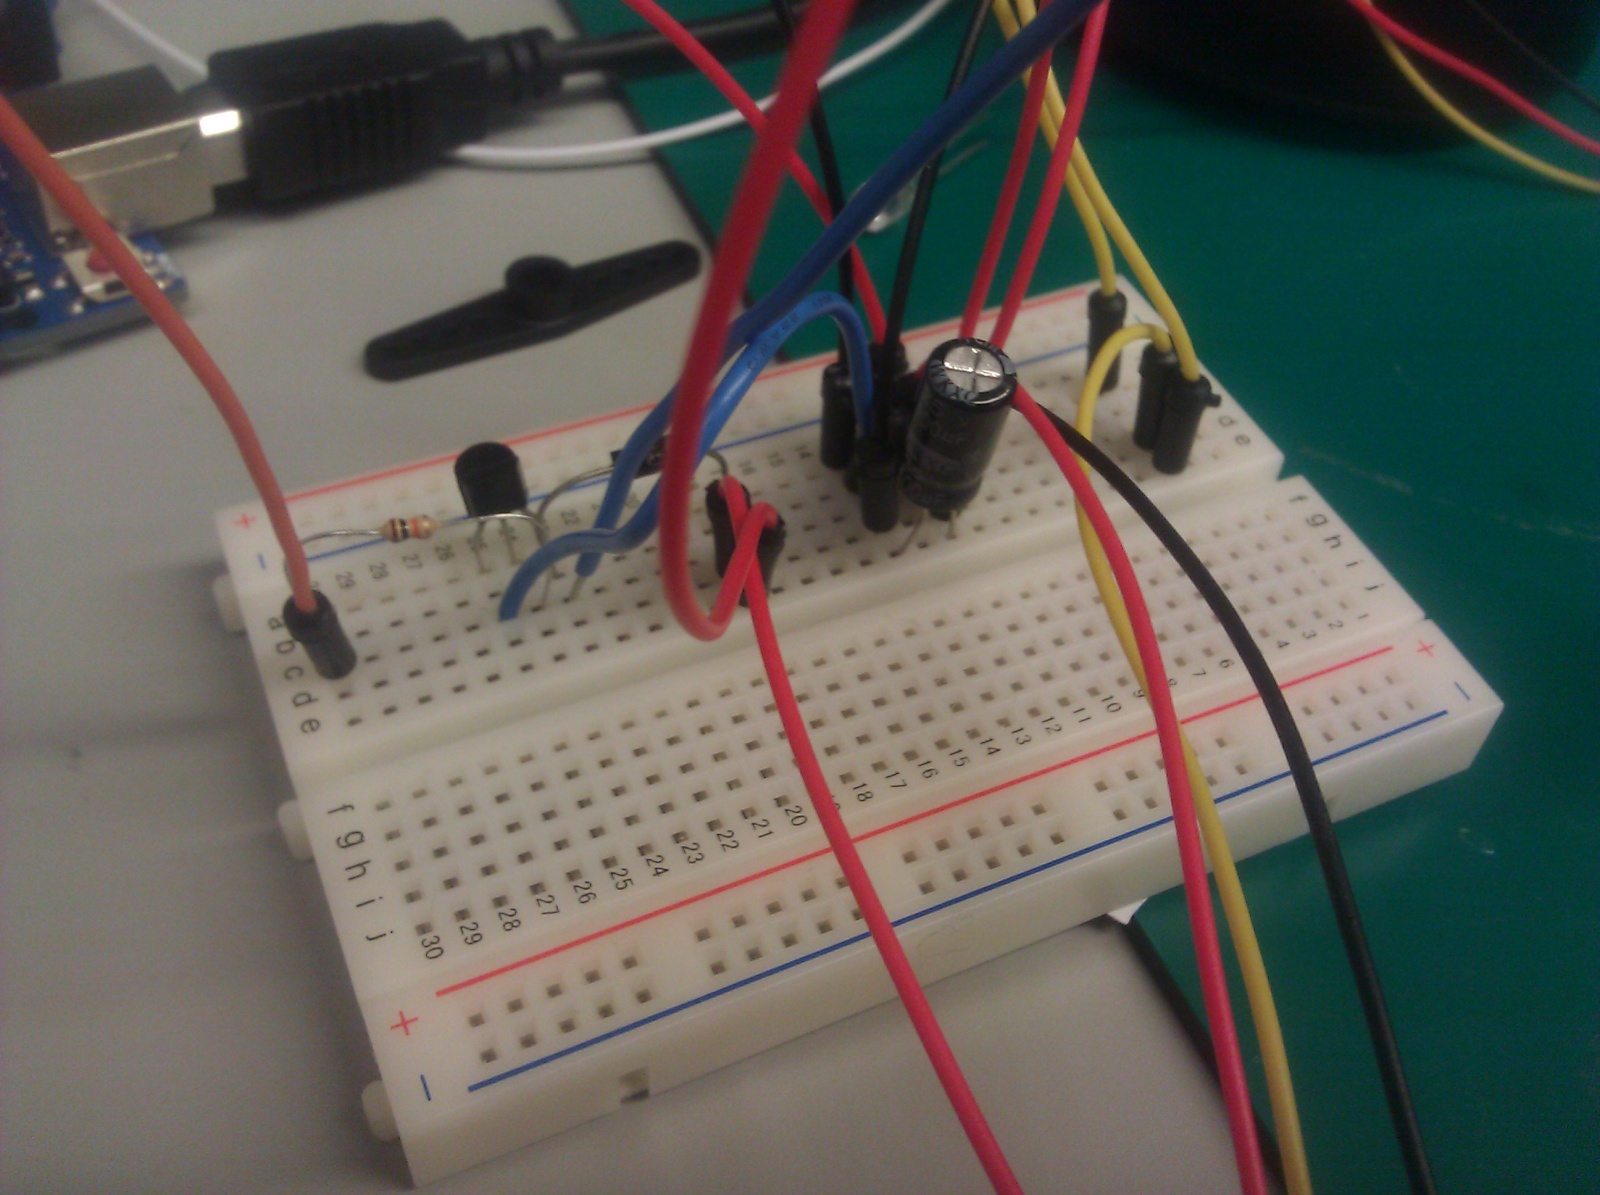
Breadboard
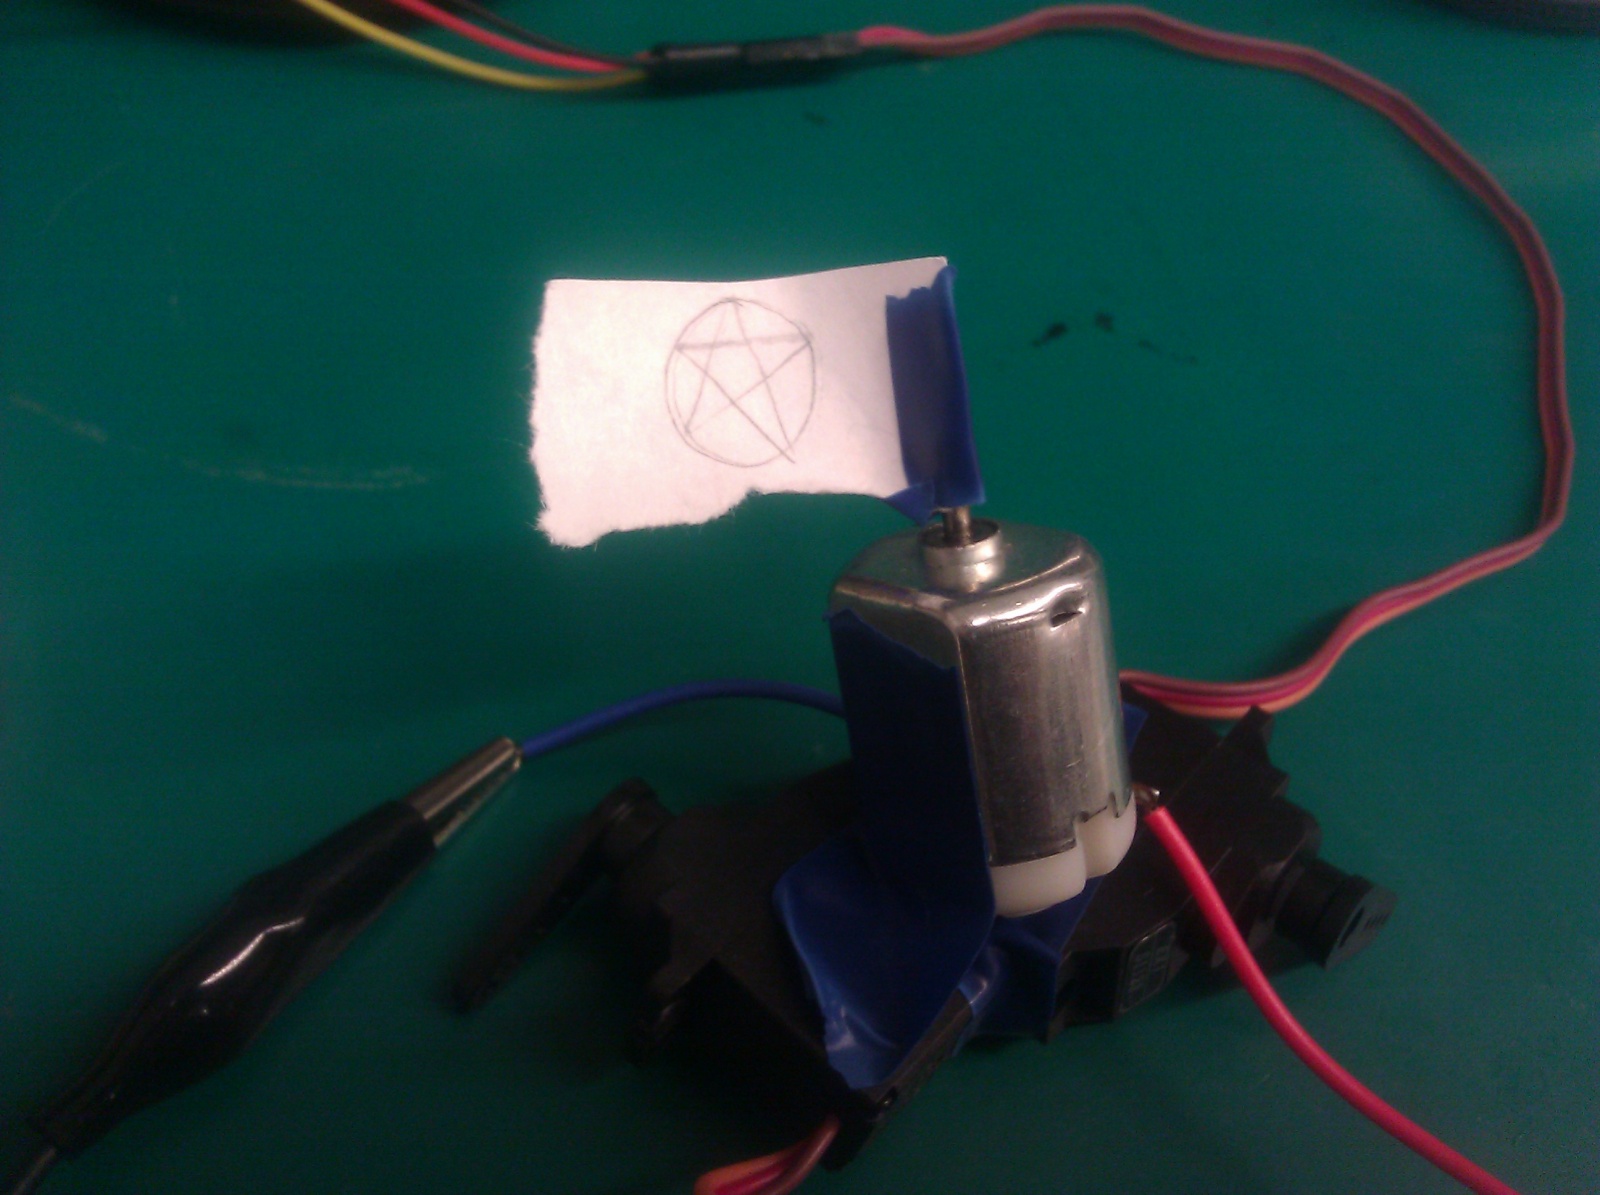
The creature, complete with flag
Creature
Video of Moving Robot Carrying Flag
Moves from point A to point B, ever so slowly…
List of Parts
- 1 arduino + jumper wires + usb connection/power
- 2 servo motors (for legs)
- 1 AC motor
- Electrical tape (to attach pieces together)
- Transistor
- Diode
- Capacitor
- 330 ohm resistor
- Arduino
- Custom flag to represent your team
Recreation Instructions
After acquiring the appropriate materials, wire the DC motor to digital pin 8 as well as two Servo motors to pin 9 (so that they move in conjunction with one another.) Next, tape together the two Servo motors as demonstrated in the video, then orient the DC motor with the pin facing upward and tape it to the two Servo motors (making sure to include your own personalized flag to the top of the DC motor.) Once these all of these components are assembled, upload the attached code and watch your creature strut its stuff!
Source Code
#include

int servoPin = 9;
int motorPin = 8;

Servo servo;

int angle = 0;   // servo position in degrees

void setup()
{
  pinMode(motorPin, OUTPUT);
  servo.attach(servoPin);
}

void loop()
{
  // scan from 0 to 180 degrees
  for(angle = 0; angle  0; angle--)
  {
    servo.write(angle);
    analogWrite(motorPin, 250);
    delay(5);
  }
}