Brian Matejek
Matt Dolan
Ed Kelley
Joshua Prager
Team Name: Name Redacted
Assist the Elderly
-
Device for assisting elderly with limited use of sense to navigate early morning tasks.

-
“Life-alert” style device built into hearing aid. Can register a fall and connect to representative.
Games
-
Interactive game that teaches fundamentals of computer science to young children.
-
Projection based floor game. (probably not within budget)
-
Interactive board game with lights and sensors that add complexity and randomness to the game.
-
Attach flex sensors to trampolene or bouncing castle to provide visual feedback and make it into a game.
-
Augmented visual deprecation exploration exhibit by creating highly intuitive feedback devices. (See this exhibit)
-
Create a collaboration based game in which a group of people are in a room and are given choices and prompts and must make collaborative choices through real world interaction.

Tools
-
Use a sensor (like kinect) to help people interact with objects in 3D and 2D virtually modeled environments or video games more naturally.
-
Teach knot tying with interactive ropes (flex sensors plus led strips).
-
Explore different ways of created faster virtual keyboards.
-
Ways to input text that are not a keyboard.
-
Automating fencing bouts start and end times to help reduce timing uncertainty.
-
Have sensors on a tennis court to determine if the ball is in or out.
-
Interacting with video replays for editing, youtube, etc.
-
Create dynamic music composition layouts for iPad (e.g. Bjork used to create album)
-
Make suitcases that automatically tell you how much they weigh.
-
Measuring concussions using sensors in equipment.
-
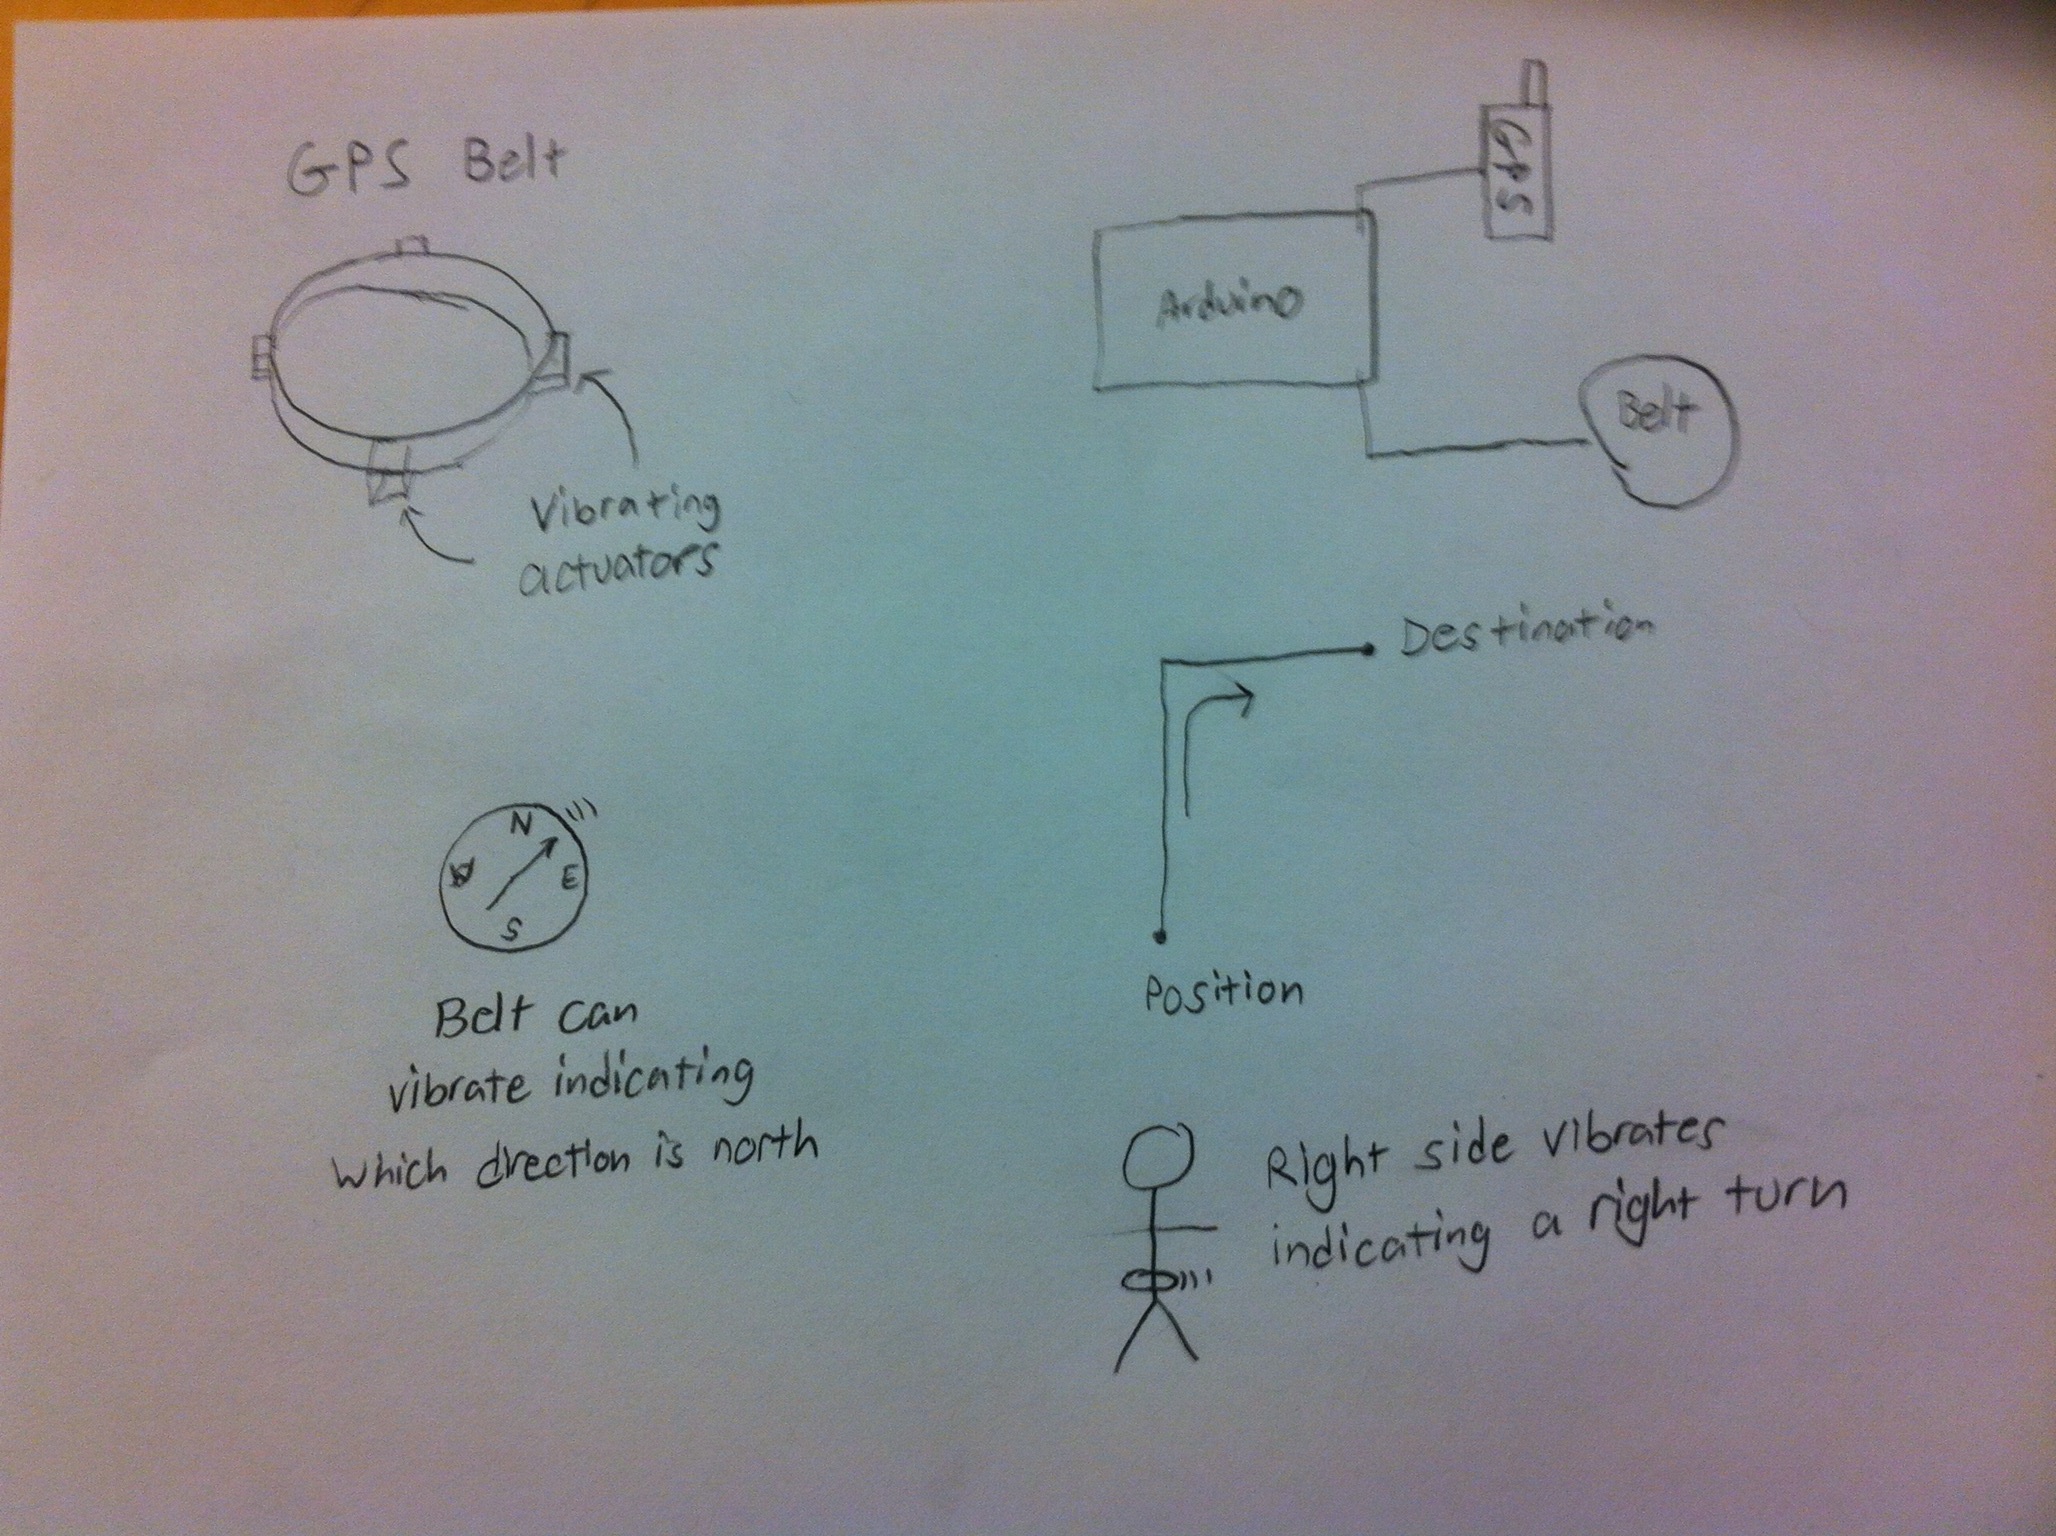
GPS that gives you directions through vibration rather than audio/visual signals.

-
Create a better calculator that allows you to be more accurate and efficient.
-
Control devices through sensors in your shoe.
-
Interactive way to provide feedback on your CPR technique or how to use a defibrillator.
-
Create a sudo-3D display that tracks a person’s head and adjust the display accordingly.
-
Make bike/vehicle tires that automatically warn you when they’re getting low on pressure.
-
Method for preventing DUIs/tracking alcohol consumed.
Improve Home Environment
-
Make a motion based tv remote.
-
Interactive bathroom mirror for getting news and information while you are brushing your teeth.
-
Flower pot that lets you know when it needs to be watered.
-
Interactive chopping board that gives you feedback on what you are cutting.
-
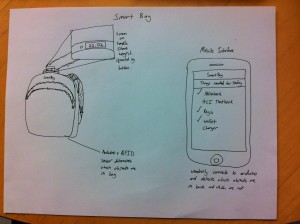
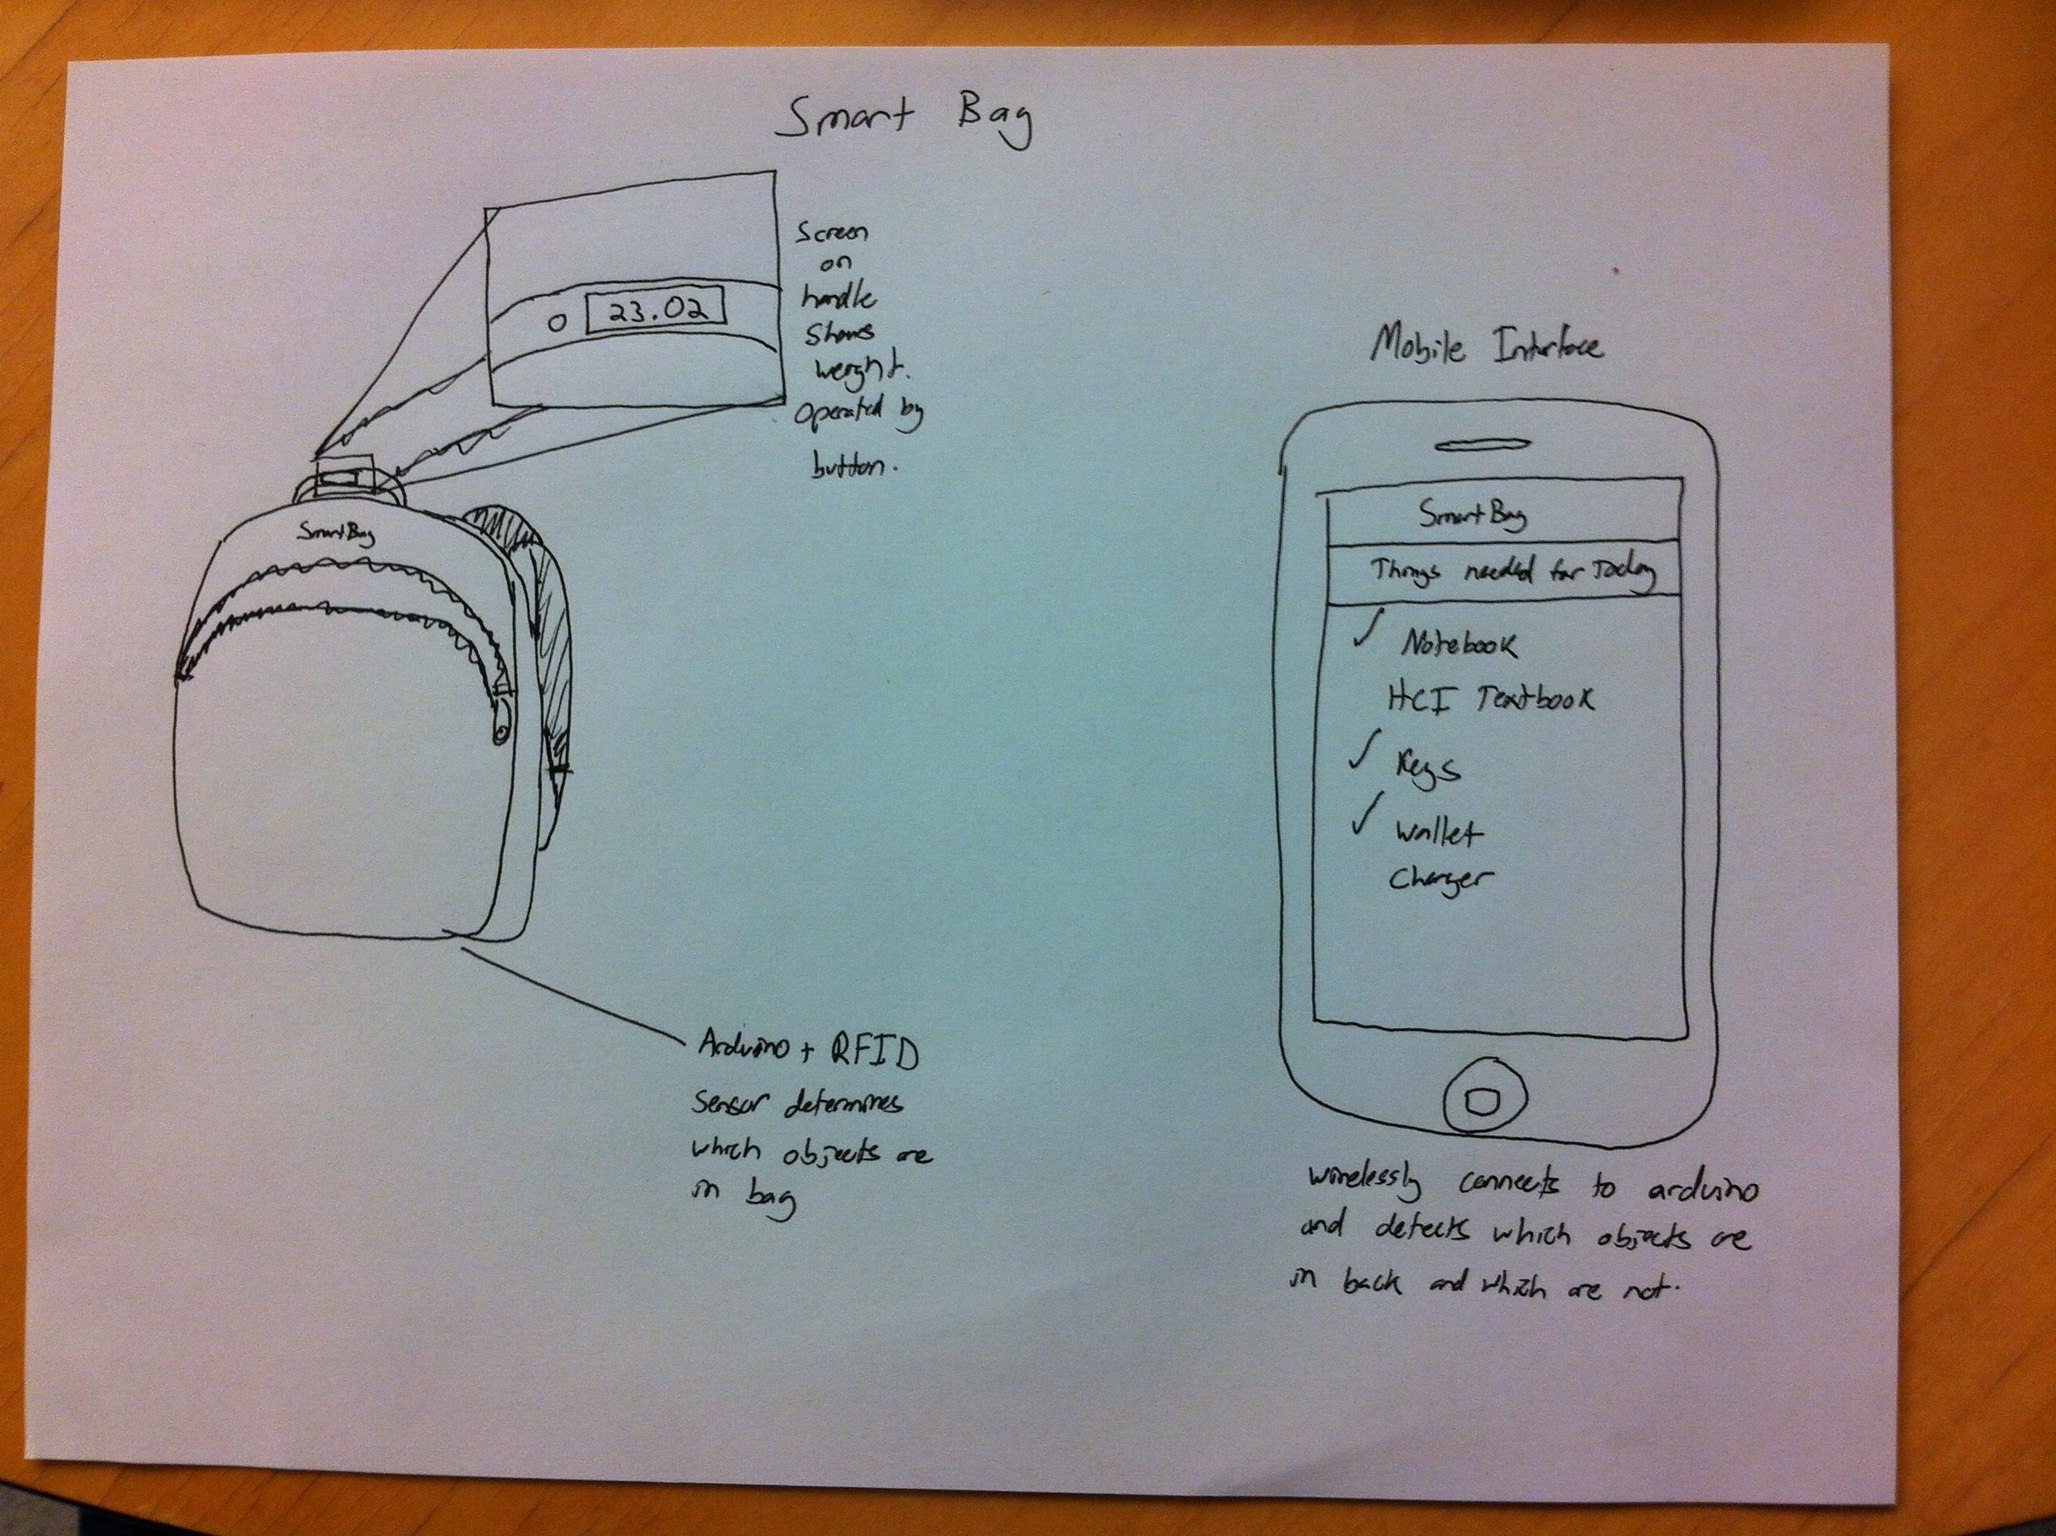
Sensor in backpack to determine weight. Help reduce back injuries in kids. Could quickly tell you if you have everything you need for the day.
-
Use motion sensor to go through motions of a sport action and have the program provide advice and feedback (like personalized coaching without a coach).
-
Interactive movies that bridge the gap between passive entertainment and extremely active video games.
-
Controlling different aspects of fish tank care (feeding, lights, water quality, etc…).
-
Smart shower that lets you know how much water you’ve used and temperature.
-
Wardrobe/pantry that helps you select, locate, clothes/food that you want to wear and put them back.
-
Interactive poker table that deals the cards and calculates bets and the pot.
Services
-
Quick way for waiters to digitally take orders in a restaurant through a handheld device.
-
User interface for virtual restaurant table.
-
Better way of interacting with a vending machine.
-
Faster/better/increased functionality for campus print release stations.
-
Design a cup that tells you how hot your drink is.
Improved Computer UI
-
Create the next generation of computer desktop (essentially rethink the choices that were made with Windows 8).
-
Make an “invisible” keyboard that senses which key you press based only on your hand movements
-
Change the way we download and update by creating a lightweight dynamic game that either helps the computer in some way personalize the information or entertains the user during the process (or both).
-
Create an input device that learns based on your movements and habits and adapts to become more accurate and effective.
School/Work
-
Better way for students to interact with/receive information about class assignments. (Not 100% in the scope of this class)
-
Create a teacher feedback device that shows teachers in real time how interested or confused students are, so they know what teaching techniques worked and what topics need to be more elaborated.
-
Better iClicker (ability to have questions other than multiple choice).
-
Create a type of non-linear presentation which is organized in a more natural mental model.
-
Controlling class/work presentations or lectures using gestures.

Shortlist
-
Device for assisting elderly with limited use of sense to navigate early morning tasks.
-
Interactive game that teaches fundamentals of computer science to young children.
-
Generic keyboard thing.
-
Interacting with video replays for editing, youtube, etc.
-
Smart bag
-
More intuitive GPS
-
Teacher feedback
-
Controlling different aspects of fish tank care (feeding, lights, water quality, etc…).
Project Description
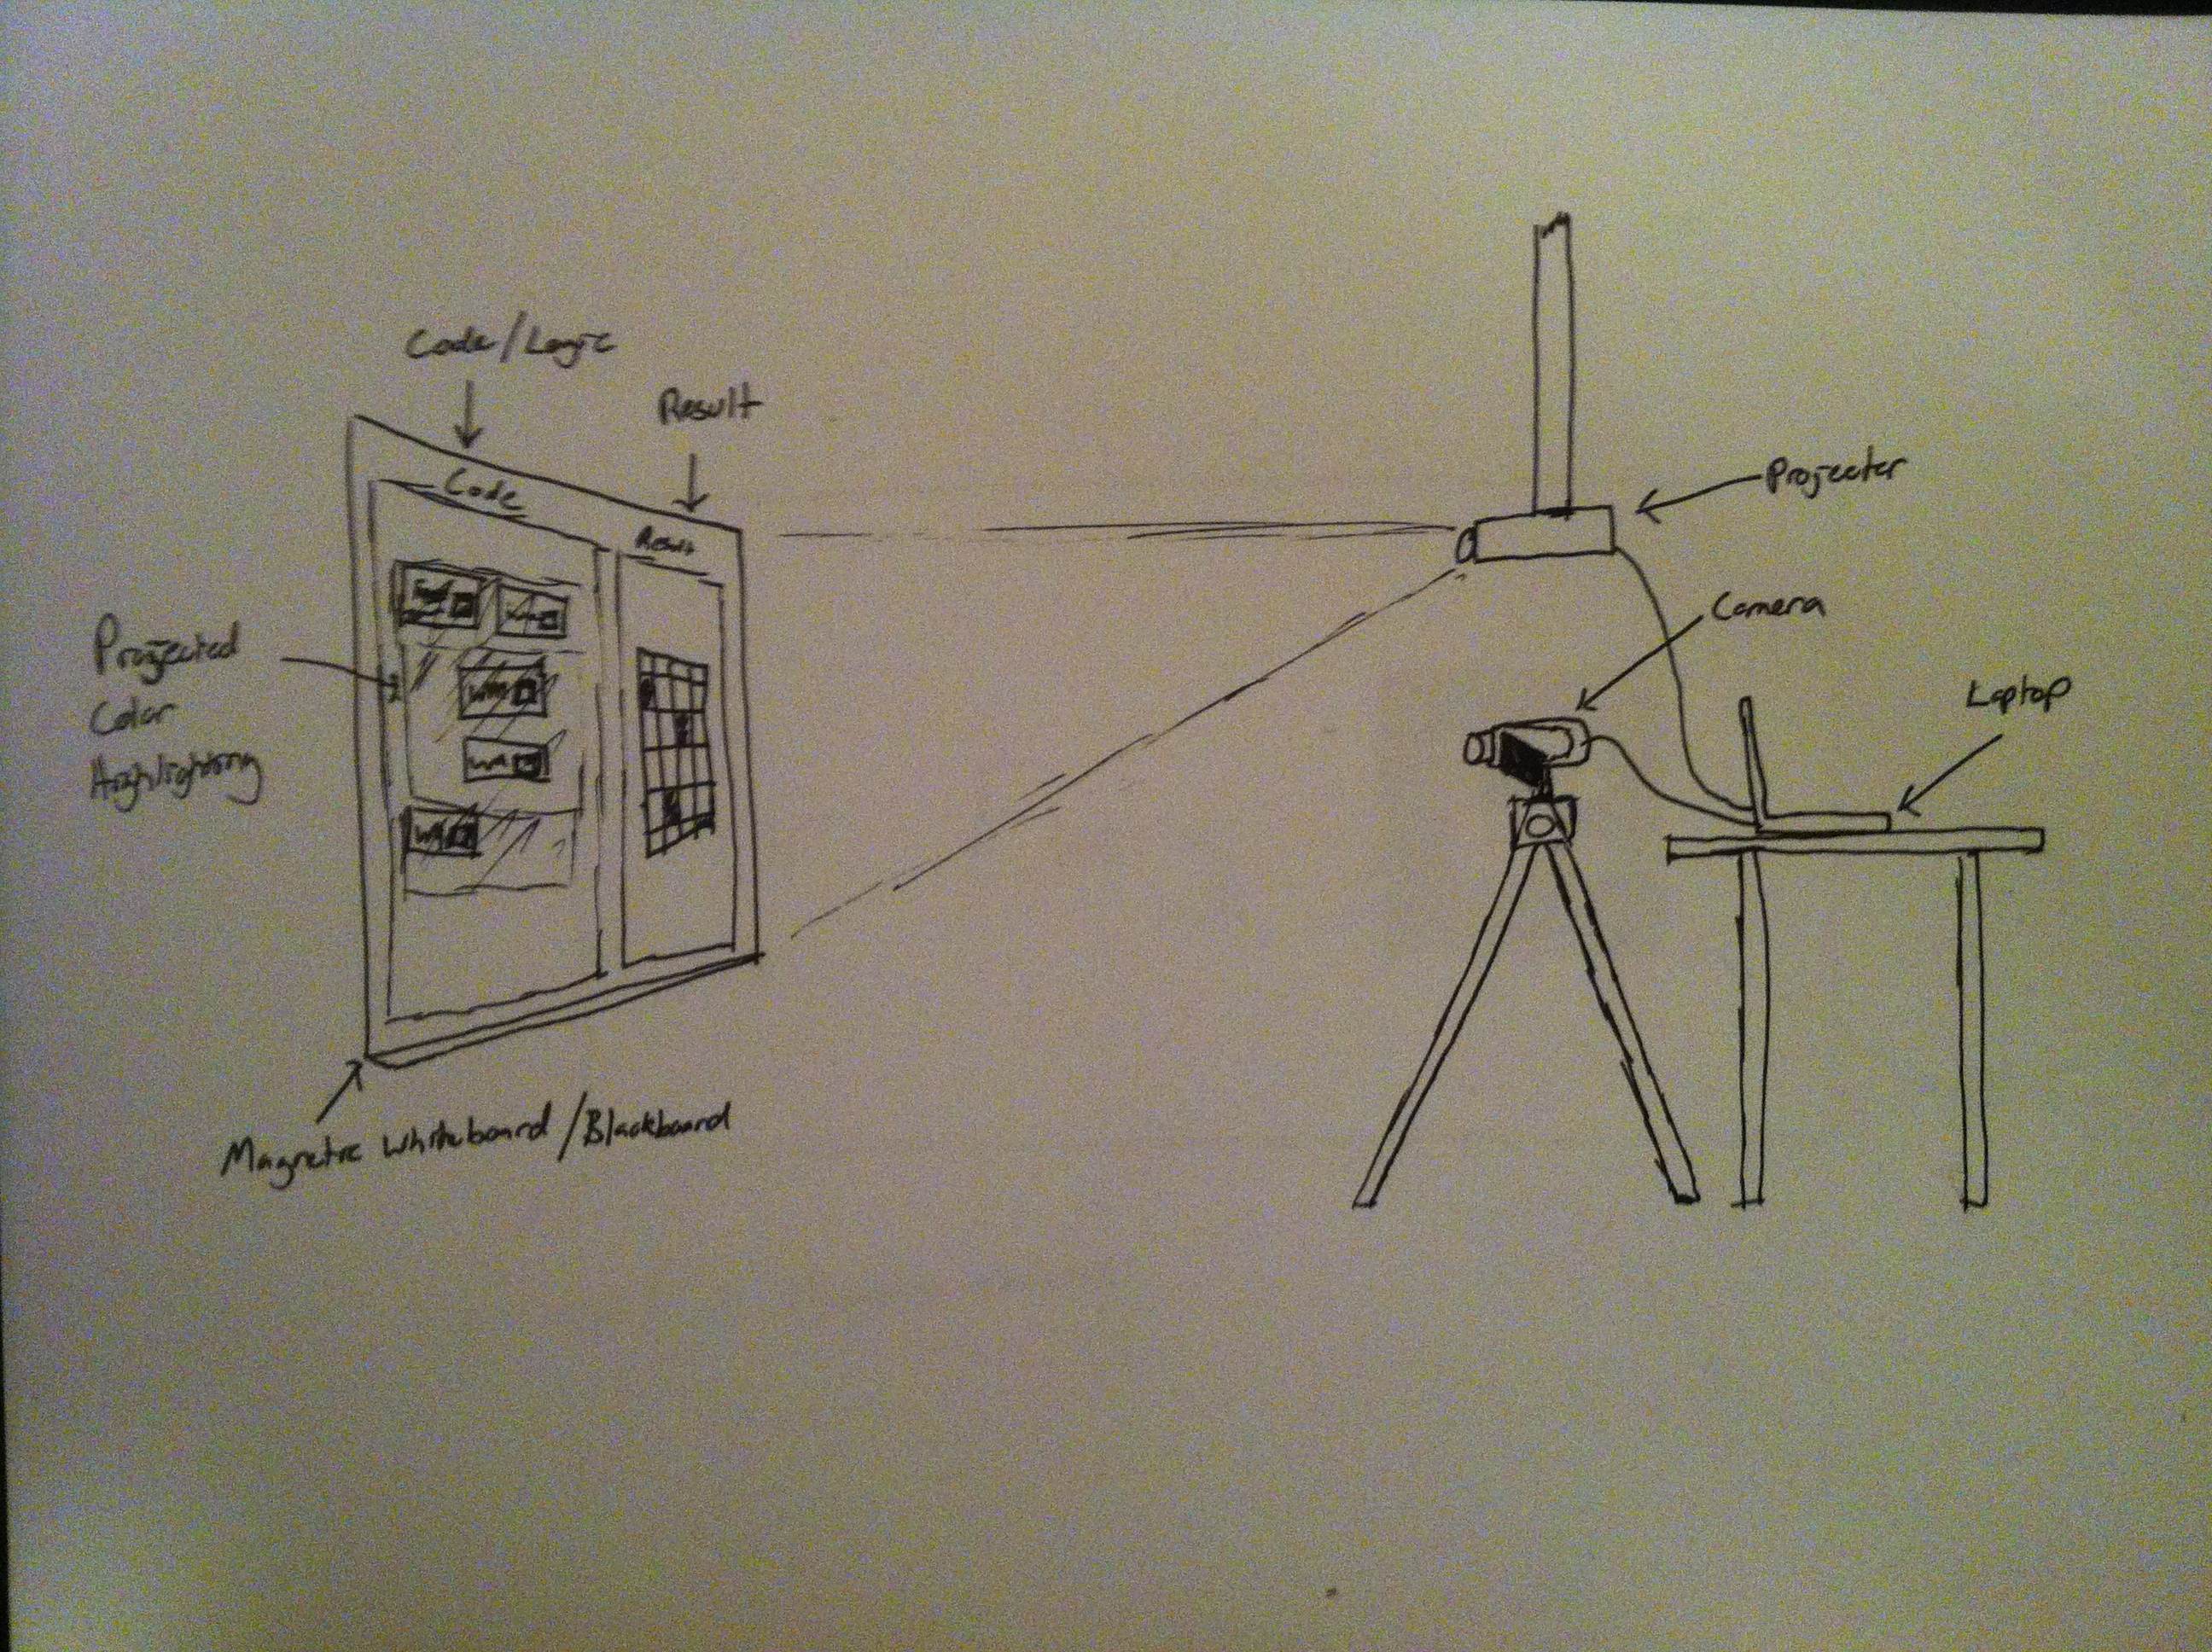
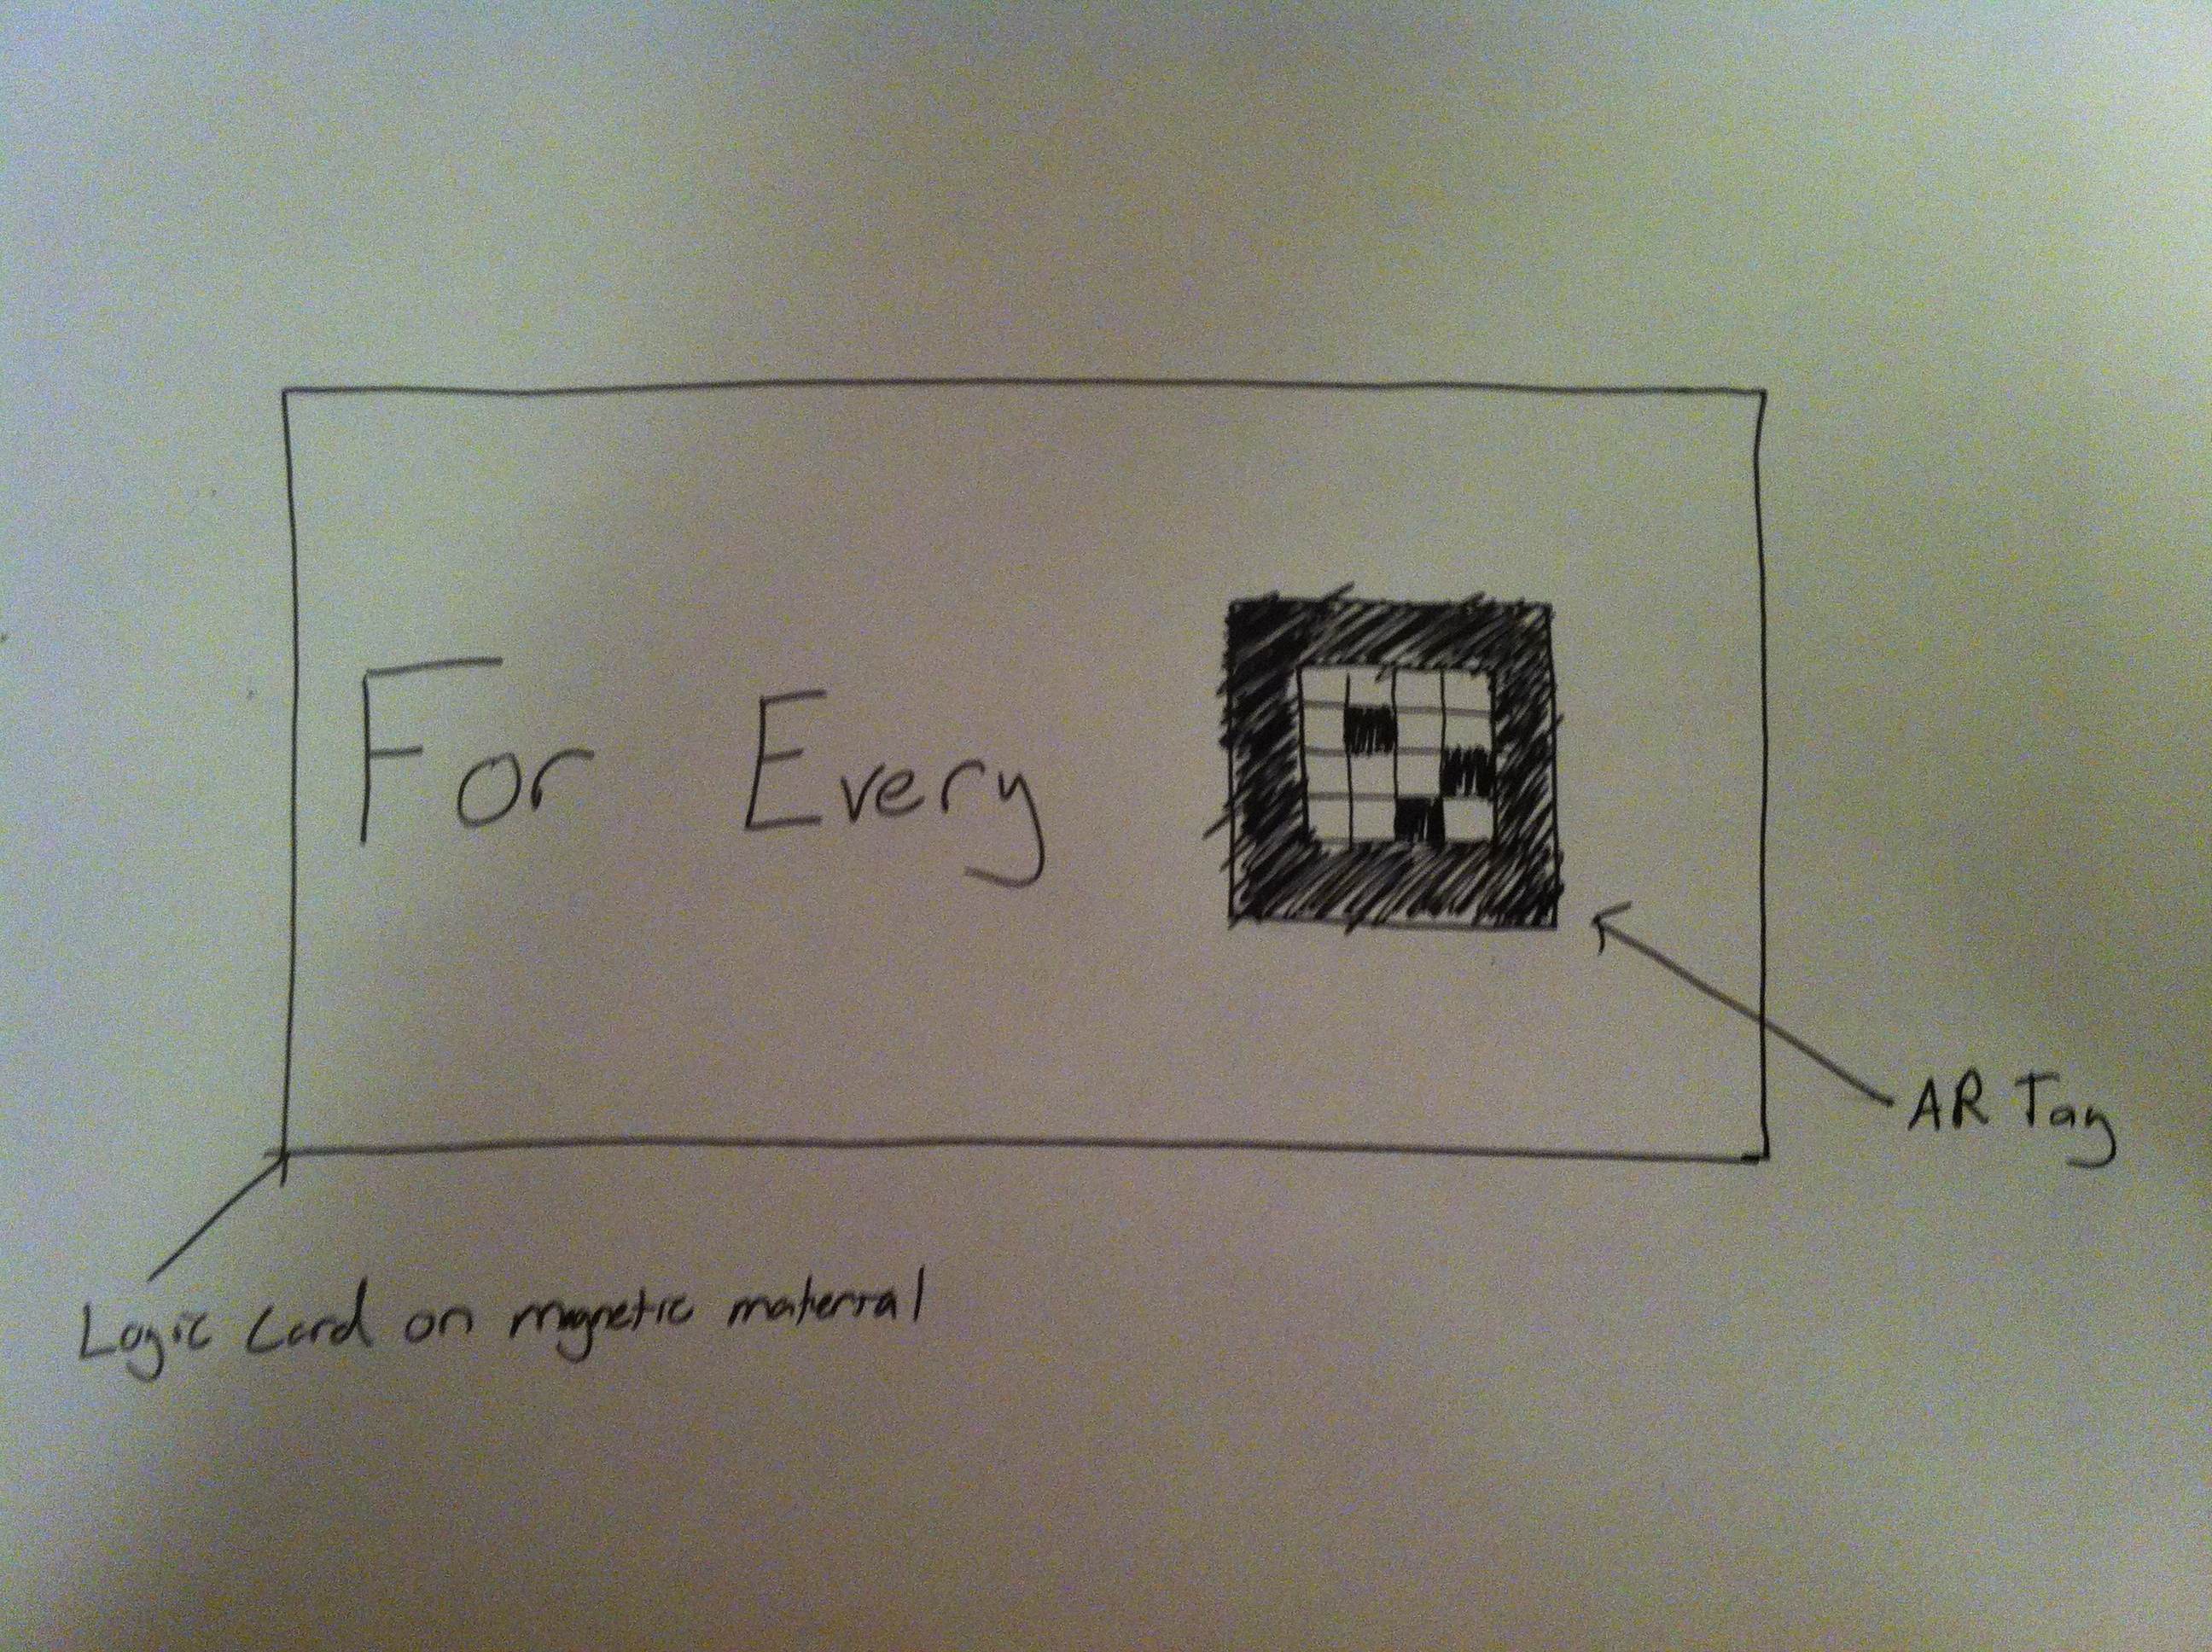
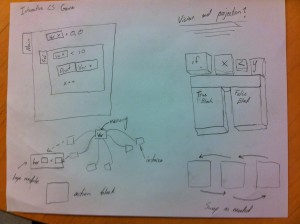
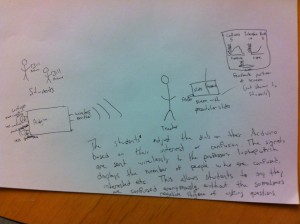
The project that we chose is to create an interactive tactile game or experience that facilitates the early understanding of fundamental computer science topics. Essentially what this means, is some way in which we could expose people, especially children at a young age, to some of the metaphors and early concepts of CS and make it accessible enough. Technologically, we think that the best way to achieve this is an extension of the white board. We hope to combine computer vision with a projector. Students would go up to the board and place tiles up. These tiles would be then read in, executed like any other program, and results would be fed back to the user with visual feedback from the projector.
We chose this project for a few reasons. Firstly, we think that if solves a fundamental problem. In the past decade, there has been an increased push towards understanding and innovating on education. It has long been known that education is the driving force of the future success of not only nations but the world. But still today, many fewer students graduate from high school or college with the skills necessary to work in the tech industry than there are job openings. This tech gap needs to be closed. Learning a programming language has become just as important as learning a second spoken language (if not more important). But besides the importance of the problem, we also chose this project because it is extremely well suited to the skills of the group. We have experience with computer vision and graphics but more importantly we are all recent students in CS. We know what it was like to learn our first languages and we feel like that puts us in a good position to improve the experience.
Target User Group:
The target user group for our project would primarily be younger students who have little to no knowledge of computer science or programming, though it could be generalized to people who lack knowledge of computer science in general. The barrier of entry to learning how to program is perceived as being very high by those unfamiliar with computer science and programming techniques. Sitting down in front of a computer and writing programs in a language completely foreign to them can seem like a very daunting task. Our goal is to lower this perceived barrier by making basic principles of computer science intuitive, engaging, and fun for the learning audience. People gravitate towards and are more comfortable with mediums they are familiar with. A whiteboard is something students are very accustomed to and also provides an easy way to display information visually. Being able to formulate a picture of what is going on inside a block of code instead of just staring at a wall of foreign text is something we think would be very useful in helping people understand what code does and how if functions.
Problem Description & Context:
Currently, there is very little computer science education in middle school classrooms. Students who eventually do learn to code generally start in high school or college. Our goal is to create an interactive, intuitive, and fun way to teach the fundamentals of computer science to middle school students, and others with no formal computer science schooling. Many middle schools are not equipped to teach computer science; they do not have the teachers and/or computer software to teach students how to code in Java or C. Although middle school teachers might understand the fundamentals of computer science, they may not know enough about individual programming languages to teach their students. All of these factors create an environment where computer science is simply not taught. However, it is possible to teach students the fundamentals of computer science without relying on one particular language and fancy computer software. In terms of the availability of the user group, it is entirely possible that students could devote part of class to learning computer science in this fun and interactive way.
Why We Chose this Platform:
Most middle school classrooms do not have computers for every student. However, most have a projector, and most schools have some video cameras. Almost every teacher also has a computer in class, but not every student has their own computer. By connecting the video camera feeds and projector to the computer of the professor, we can run software on the computer that simultaneously parses the video input and outputs the corresponding images that we want. Students will be able to interact with the video camera without having to interact with computers. The projector offers an ideal way to display information to the students and change output simultaneously with the video camera. But beyond practical logistics, we wanted to bring the experience of coding into the physical world. One of the main barriers to entry for early CS students is often the intangibility of the virtual world. It can be hard for students to wrap their head around the ideas of pointers or virtualization. We hope that using physical types and real-time visual feedback, we can target these concepts and make them look and feel more real. Imagine, for example, allocating memory in a virtual heap and then seeing a physical representation of that memory block instantly appear on the board next to the code. Or even imagine how placing tiles in a for loop might help a student understand how iteration works.
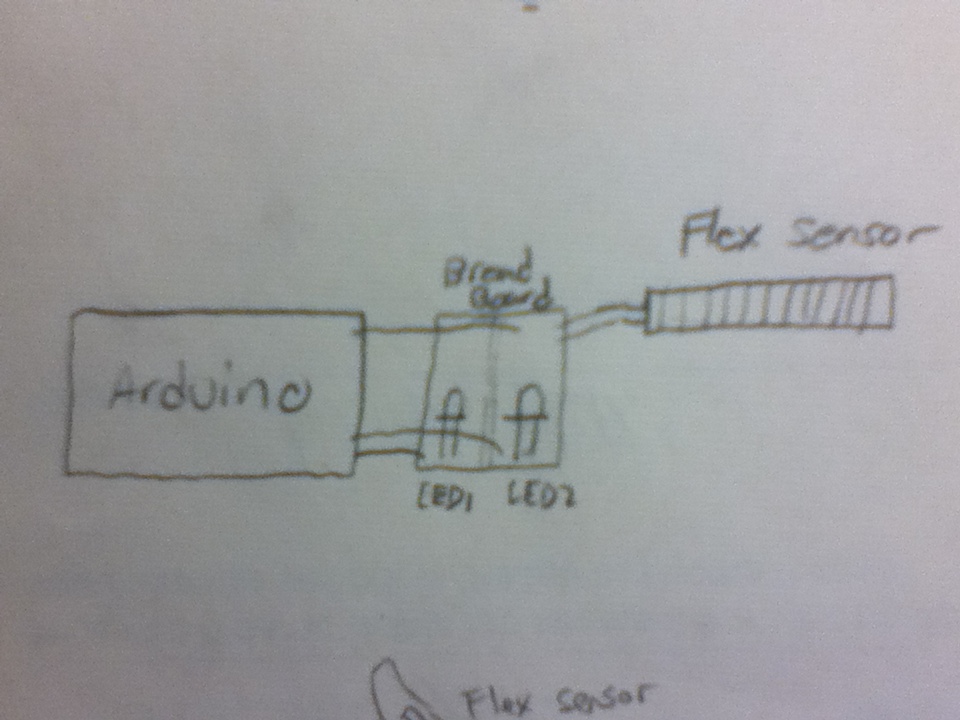
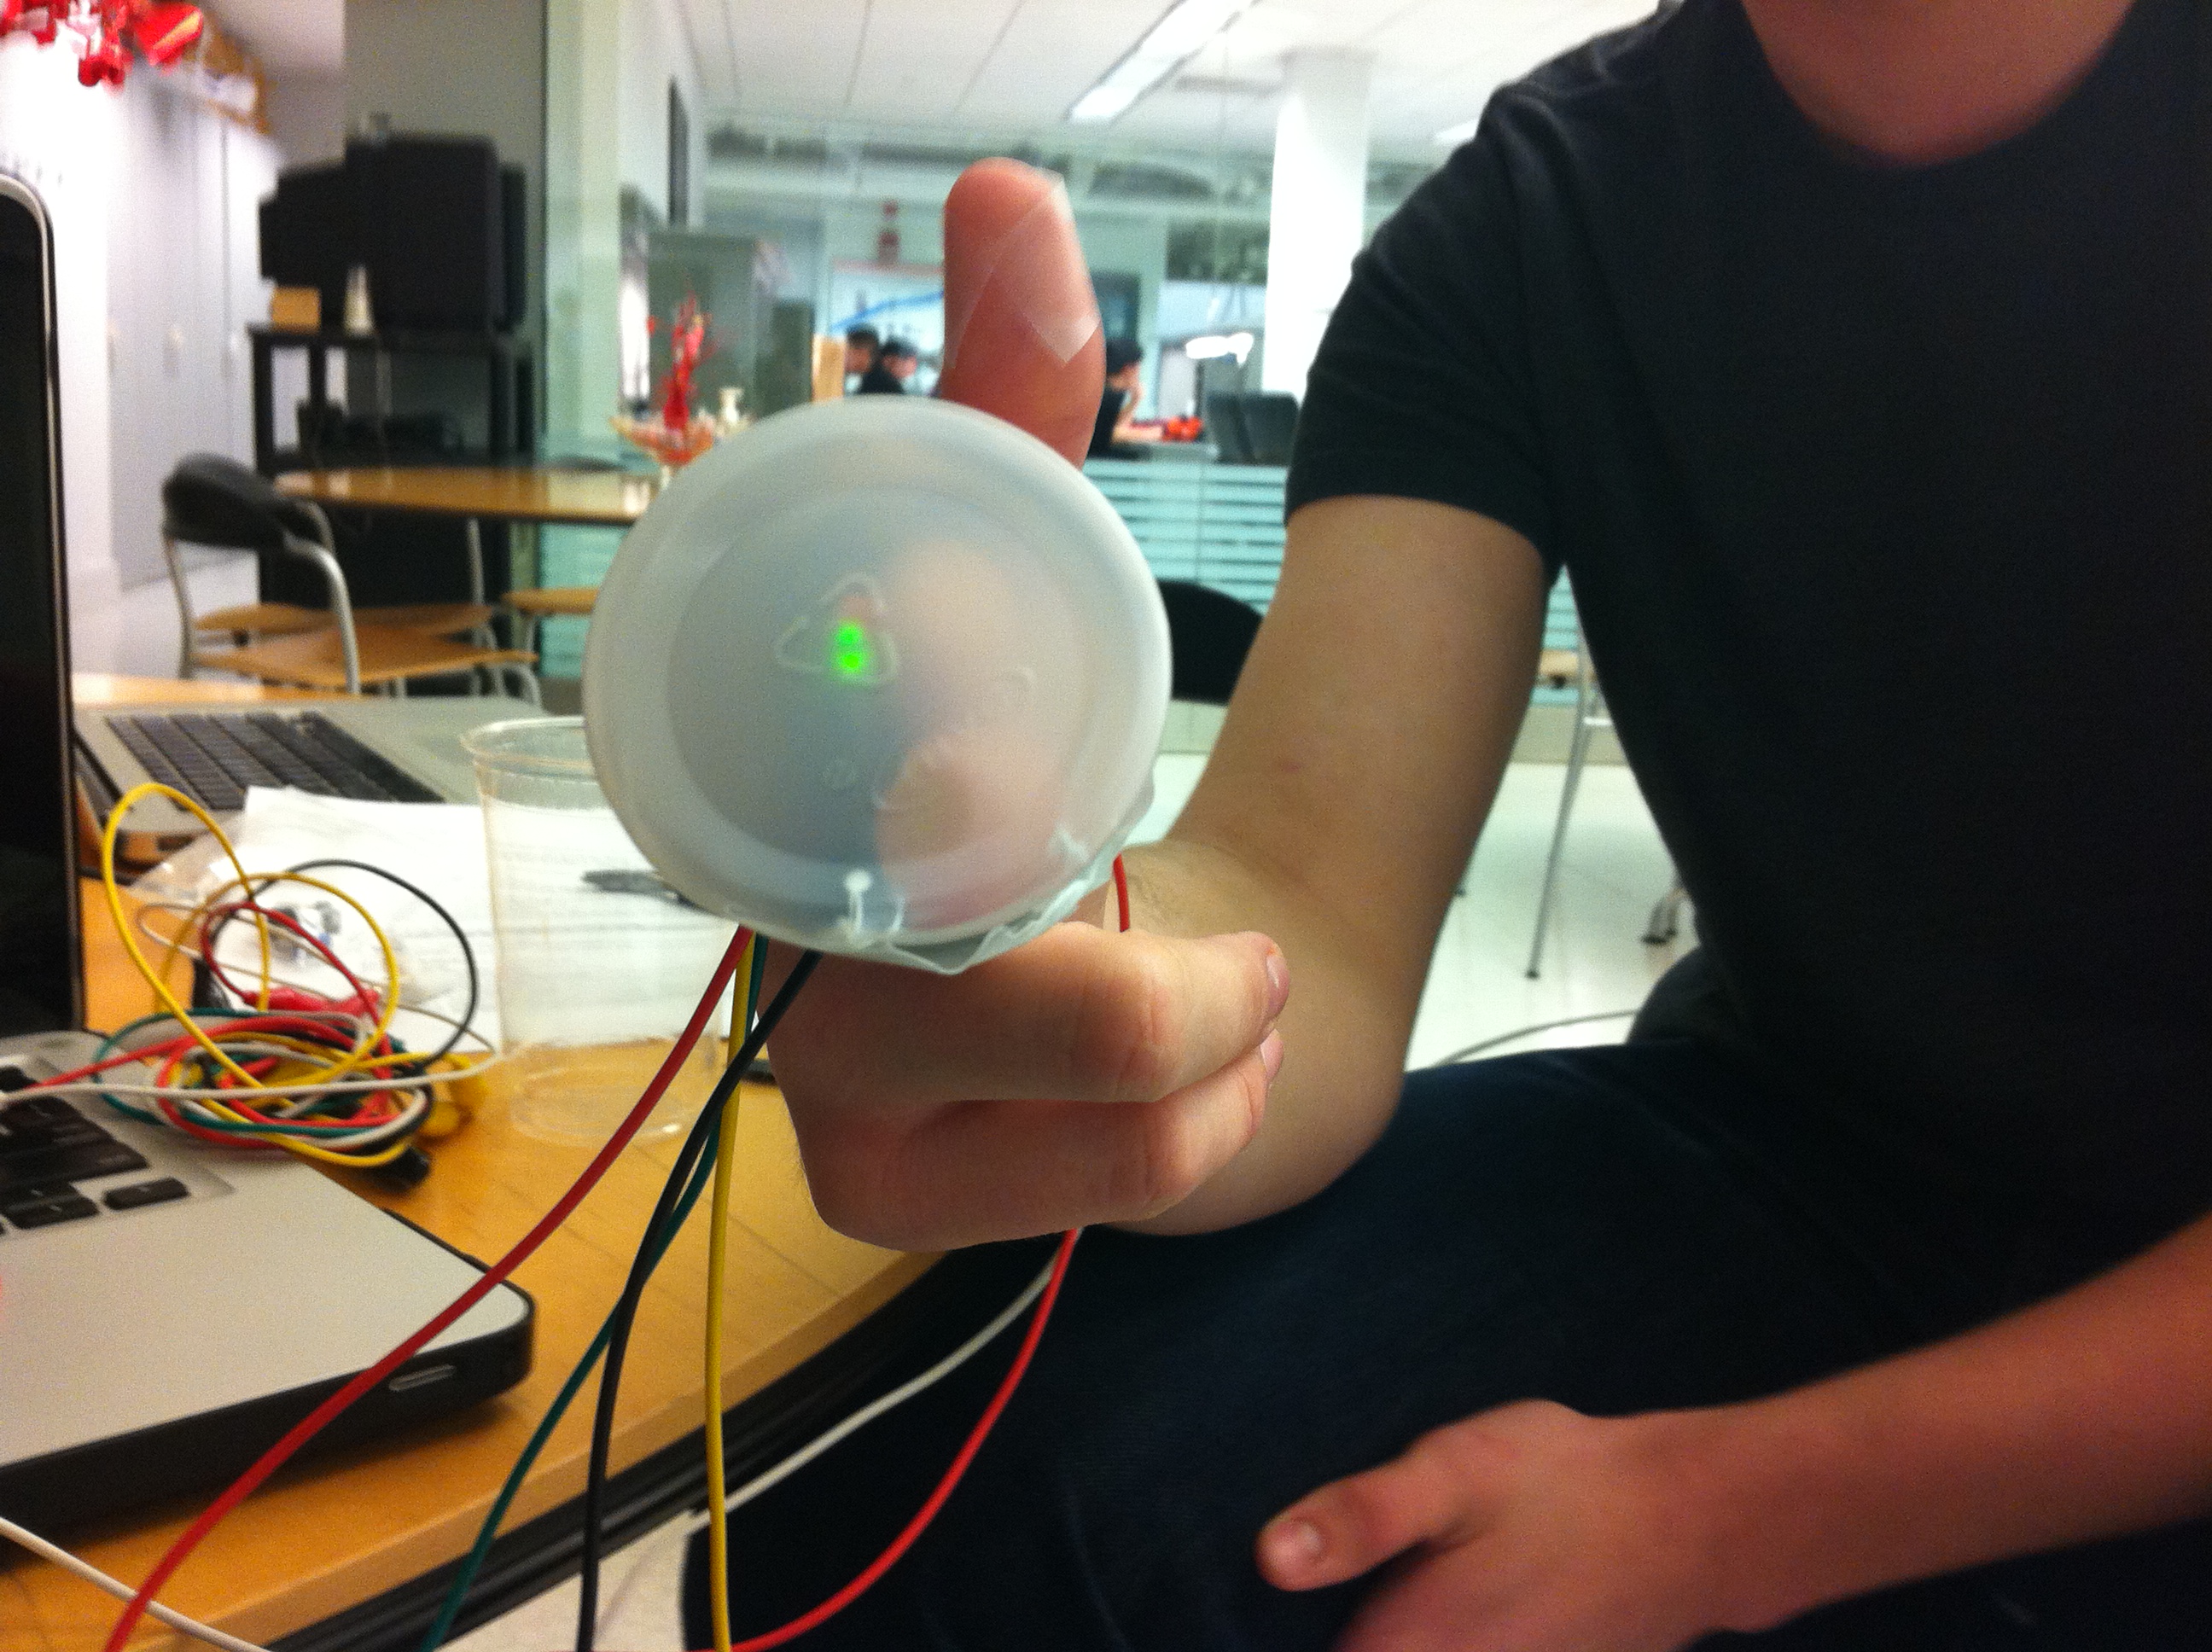
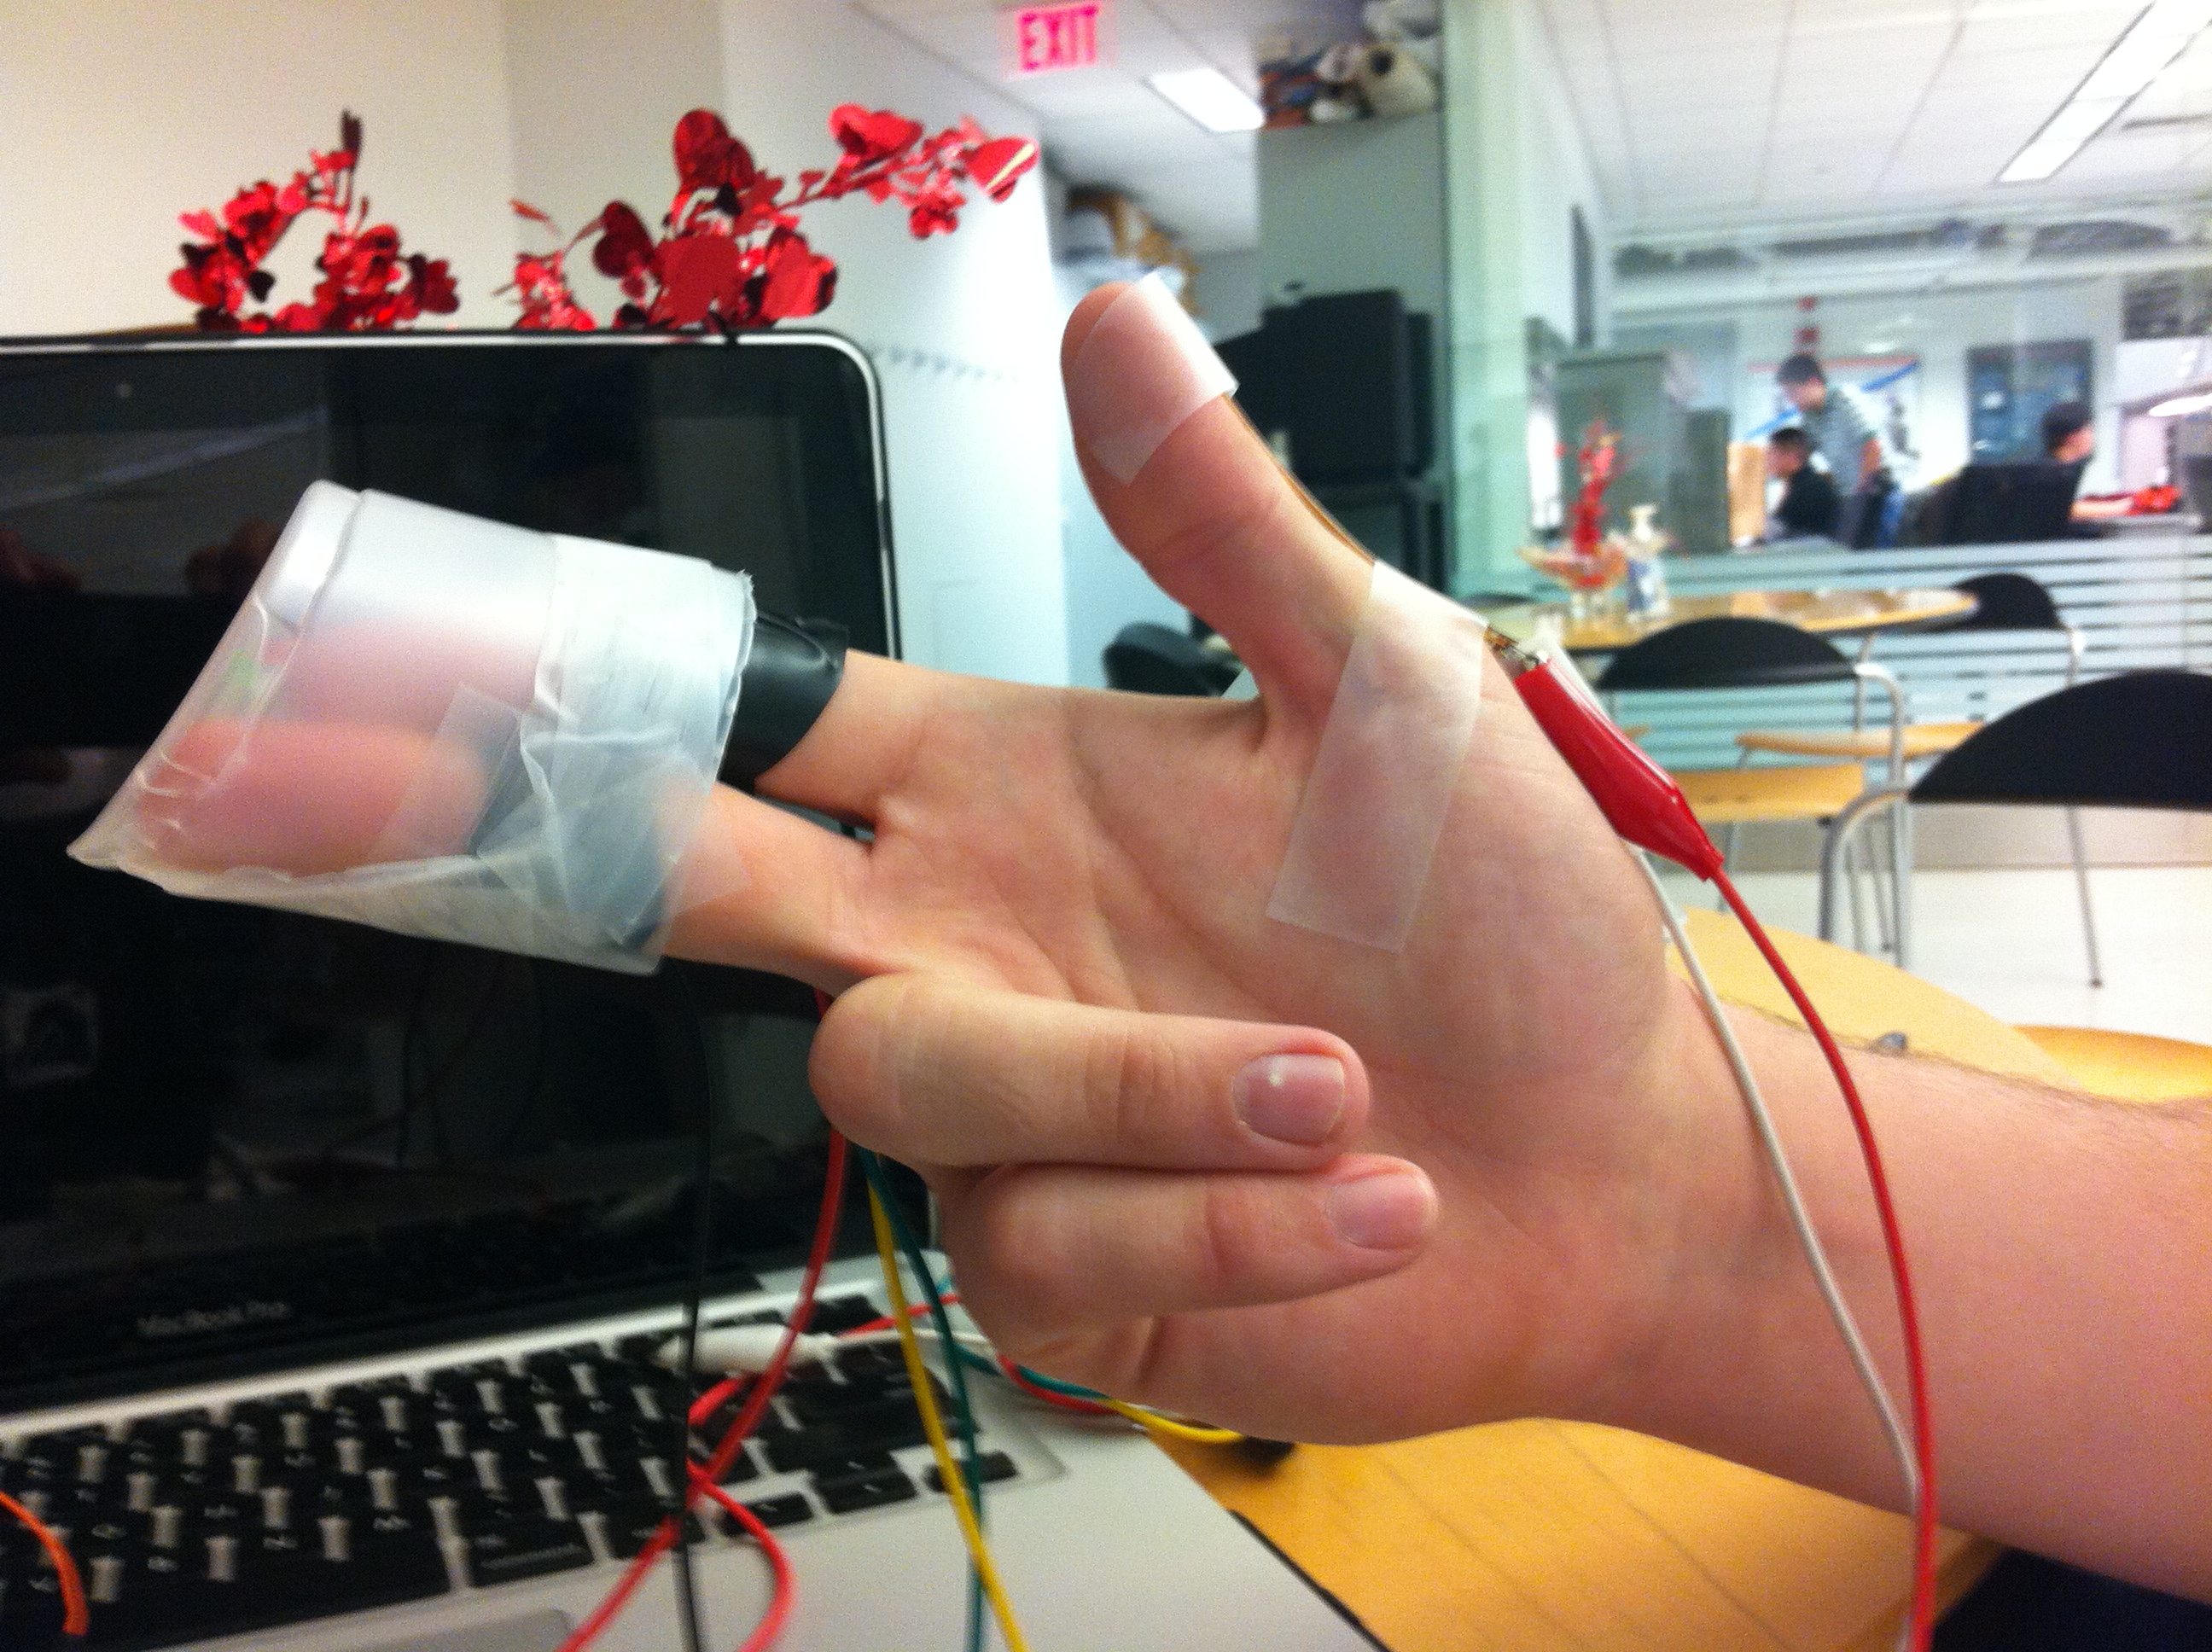
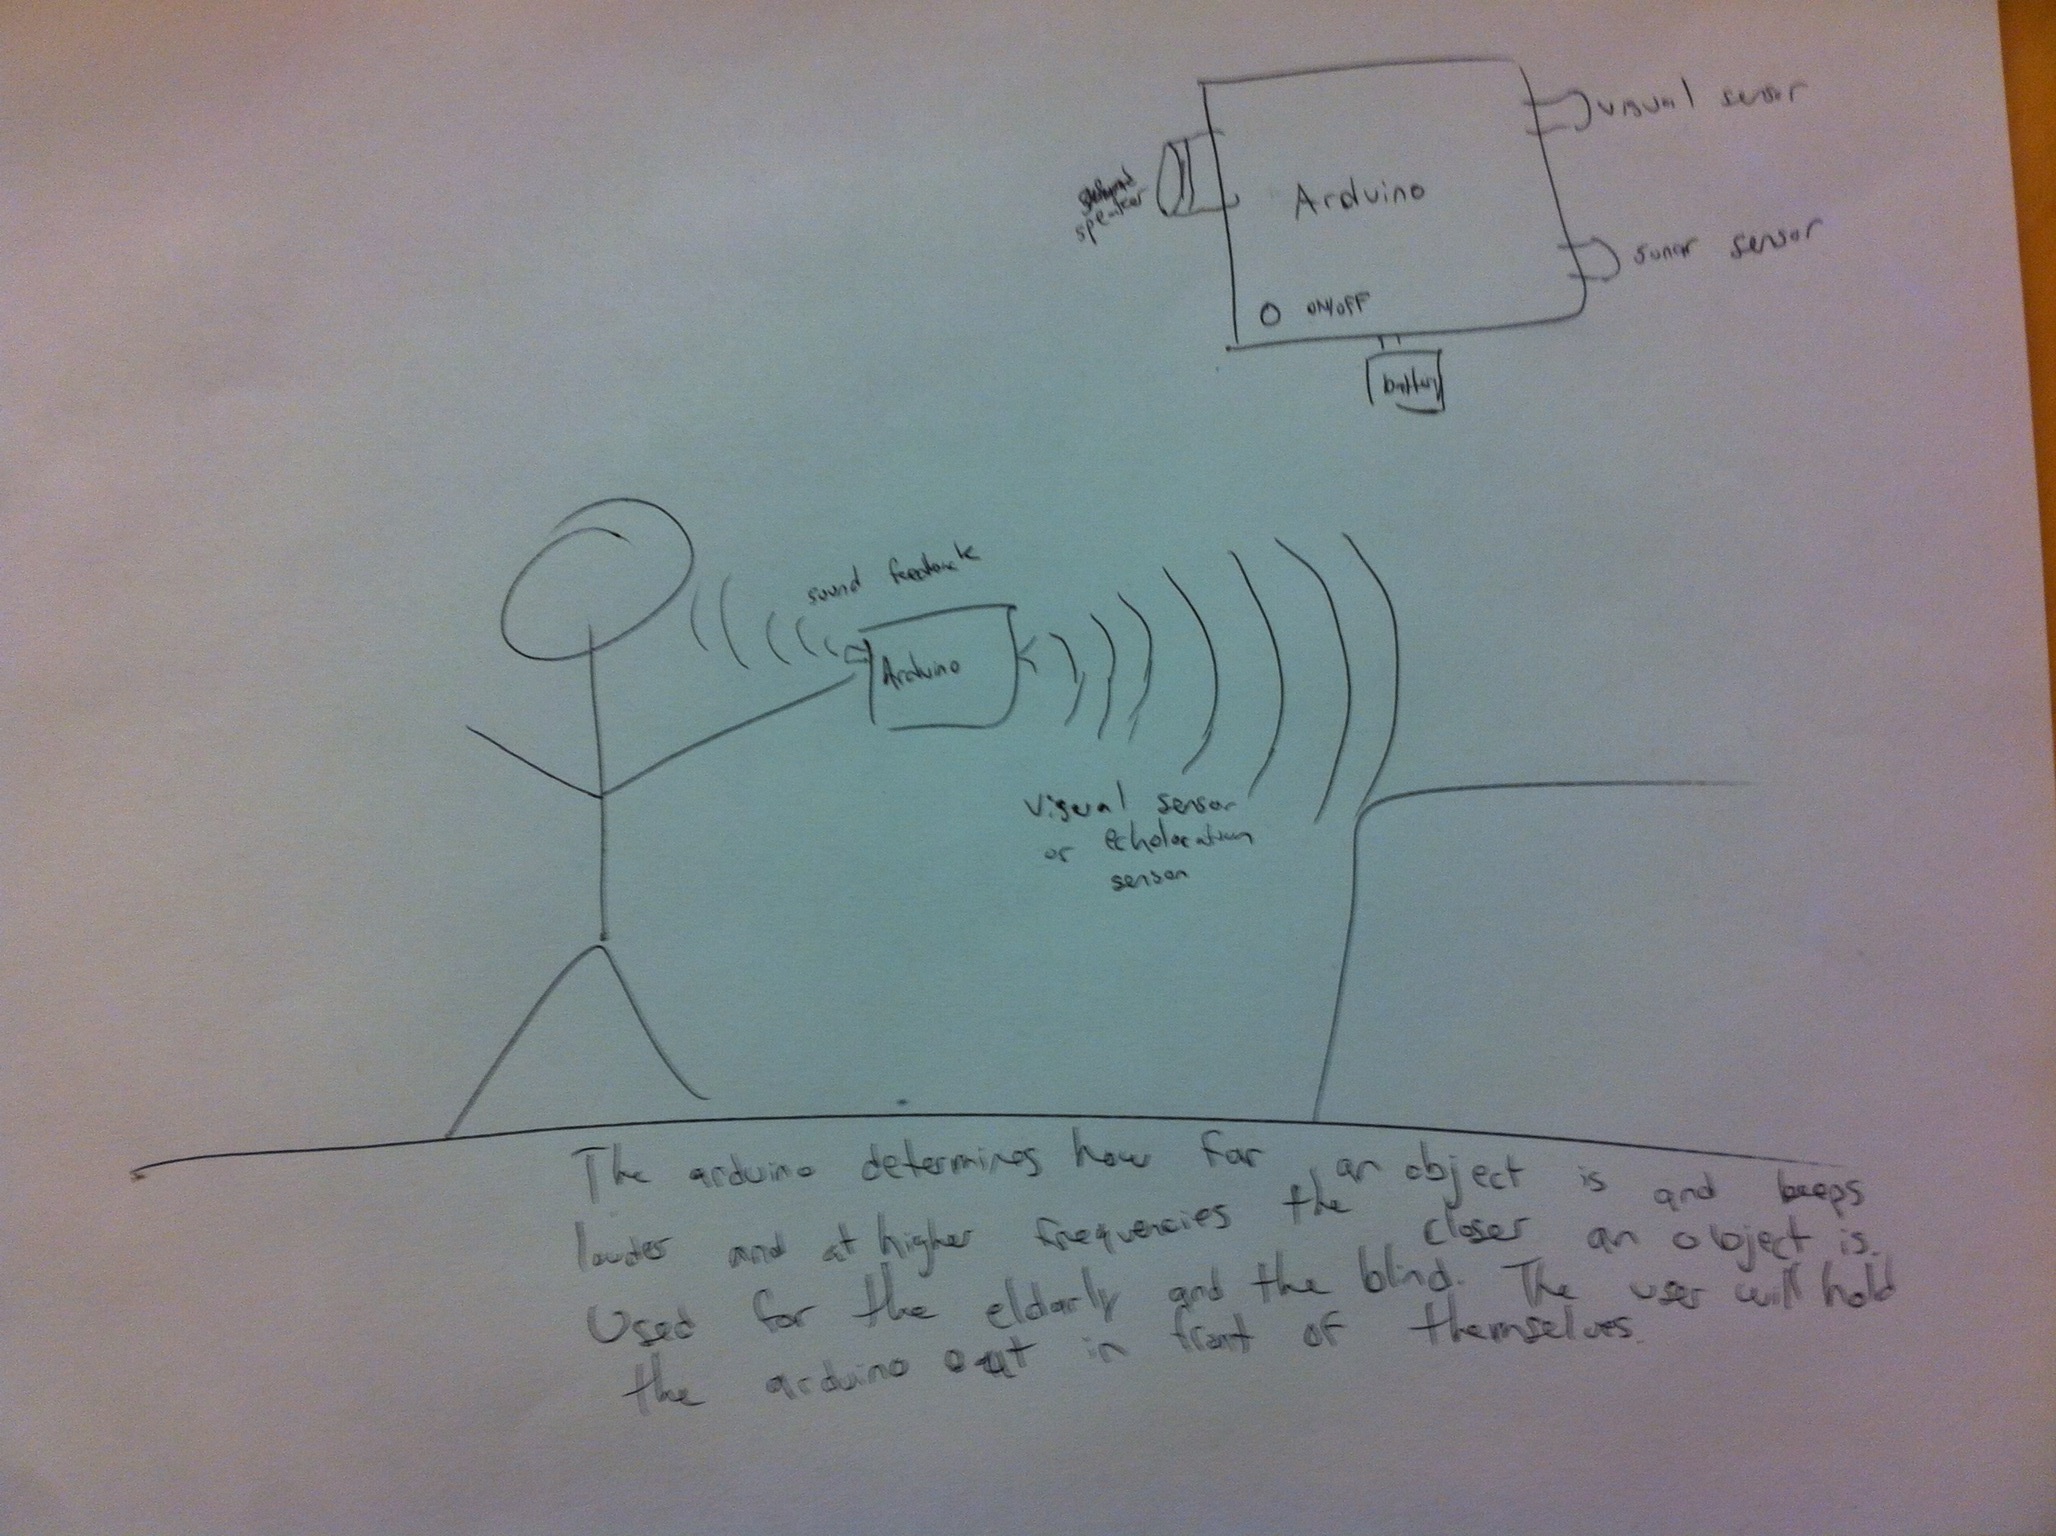
Sketches: