Observations
General Observations:
- Many students already take out their laptops before lecture, but many students still don’t. Some classes don’t discourage/don’t allow laptops.
- Getting into a seat is always a problem for students who are not that early to class.
- Students commonly prepare to take notes before lecture begins.
Specific Observations:
- Transit
- Relatively uneventful, most people are just walking/cycling to class.
- Early(5 – 10 mins before lecture):
- (Networks 10am lecture) Some students were sipping a coffee and relaxing. Lecturer makes some small talk with TAs and students.
- (GSS 201) Lecturer had some remarks about changes to the schedule before the class began, one student was observed to update her calendar. Some students were checking email, others were tweaking their schedule on SCORE, others were reviewing their notes from the previous lecture (on laptop or physical notebook).
- (HCI) Only a few students had their laptops out. Many students were chatting. One student was observed to be reading technology-related news.
- Mid(<5 mins before lecture):
- (GSS 201) Almost all students had their laptops or notebooks out. Laptops and notebooks were balanced unwieldily on the small desks in McCosh seats. One student was folding her note-taking sheet vertically along a letter-sized paper to take her notes in two columns.
- (HCI) Many but not all laptops were out. Students started to have some trouble finding seats that have a good view but do not have blocked entrances and are have elbow space. Students seated near the aisles of CS 104 started having to stand up and let people in.
- (Algo) Some students took out printouts of the lecture slides uploaded beforehand, some students prepare to take notes on physical notebooks, most students don’t. Few laptops were out as the lecturer discouraged it.
- End of lecture –
- (GSS 201) Most students packed up and left, some students stayed behind for questions or administrative issues. A bit of small talk outside the lecture hall, but people quickly dispersed.
- (HCI) Pockets of students started to hang out and chat along the aisles, students in the middle of the lecture hall took a while to get out.
Brainstorming
Ideas:
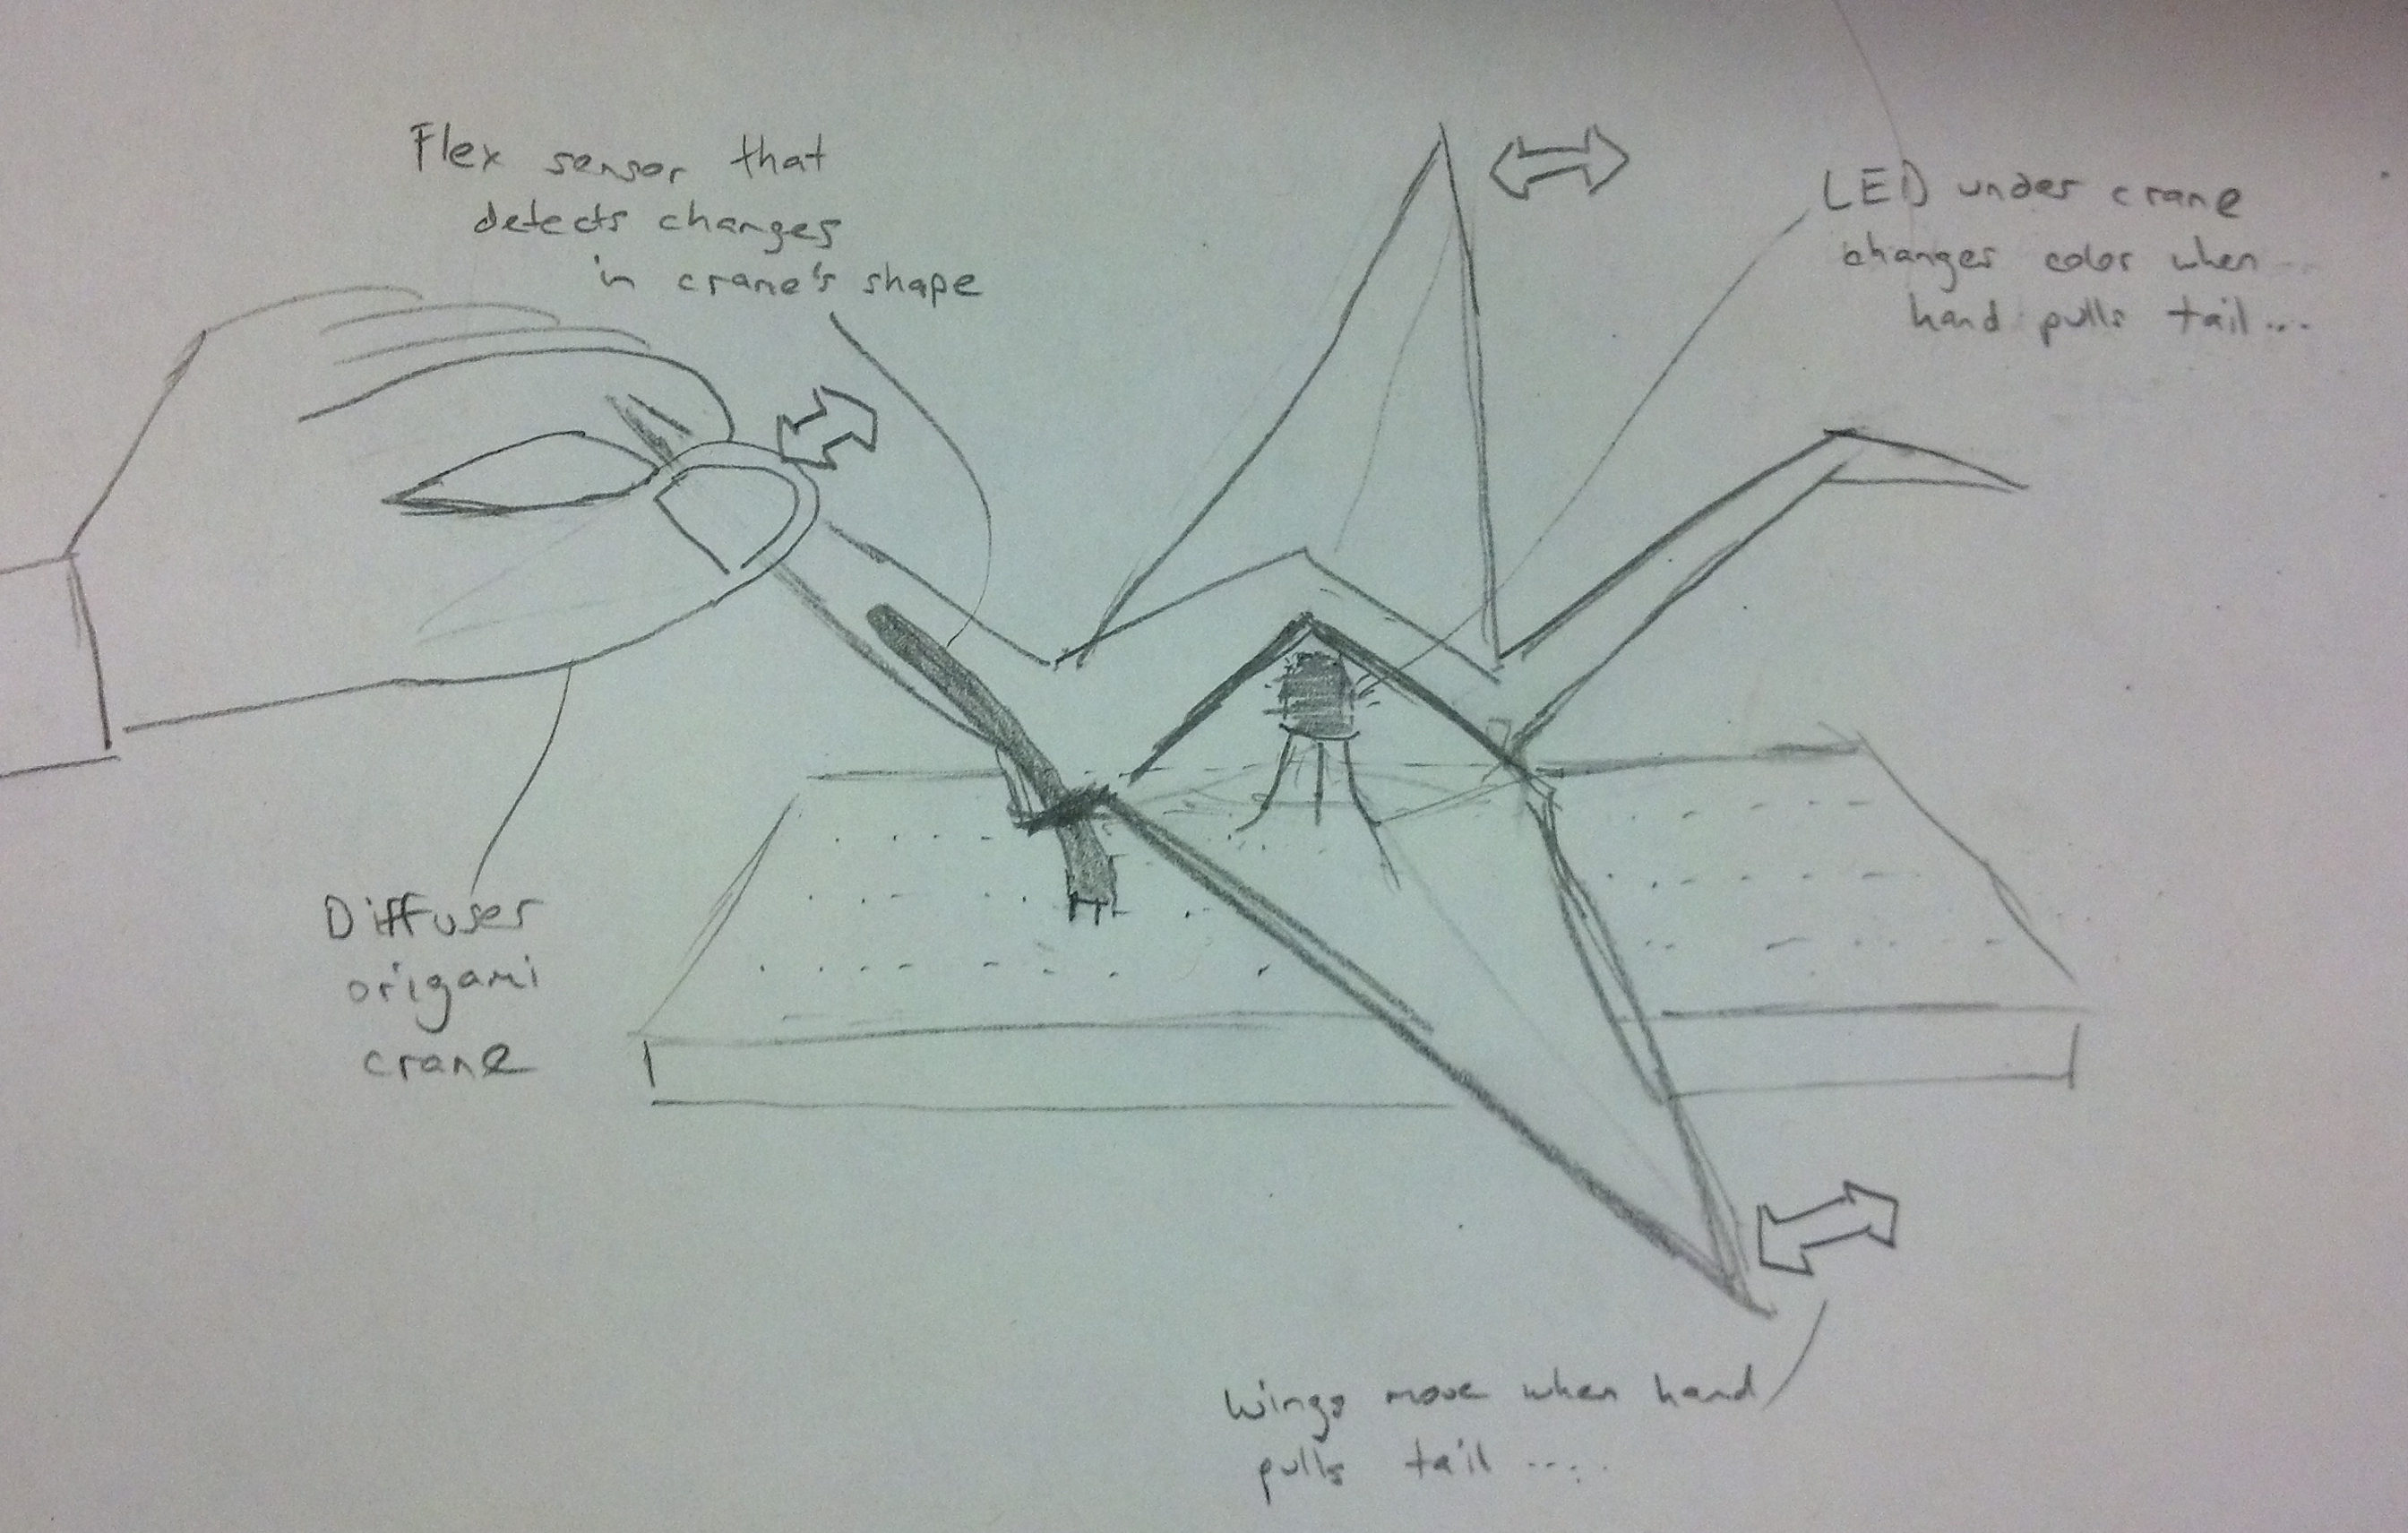
- A way to secure your laptop to the small lecture hall desks and prevents it from falling off.
- A way to organize your notes for you before the lecture, based on timing and your class schedule
- A real-time piazza during lecture – student can indicate a query about a lecturer’s slides in real time.
- A quiz on content from the previous lecture, with an easy method to make quizzes for yourself and share with others.
- Location-based chatroom (same lecture same chatroom)
- Lecture room seat booking system so that you can always sit next to your friends
- Face recognizer (based on princeton profile and students enrolled in class), make it easier to find out more about the person sitting two seats from you and initiate conversation.
- A zipline to drop students into lecture hall seats
- Lecture hall seats that disappear/get out of the way when they are unused.
- Desks that are both lefty and righty friendly
- An visualizer that uses the heat map of the room to generate and display the perfect terrorist attack for maximum casualty in the lecture room, the best escape route, and who’s most and least likely to survive.
- Random trivia somewhat related to the class
- Virtual graffiti wall that every student in lecture can update and display on-screen in real time.
- A bouncing beach ball passed to the lecture hall that counts the number of times it has been bounced, and changes color when someone beats the record of bouncing it the highest.
- An FML for the class.
Ideas chosen for prototyping:
- A way to organize your notes for you before the lecture, based on timing and your class schedule.
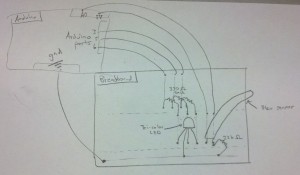
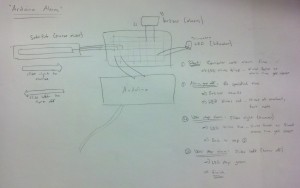
I choose this idea based on the observation that most students eventually begin to prepare to take notes during lecture, so solving this problem would not just save time but also make revision easier since all the notes are in one place.The prototypes are meant to simulate a screen on a laptop.
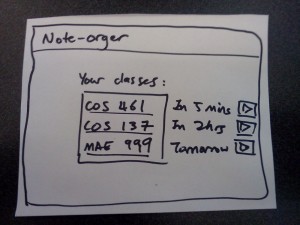
The home page for the user to select the class. The classes and times are populated based on the user’s course information.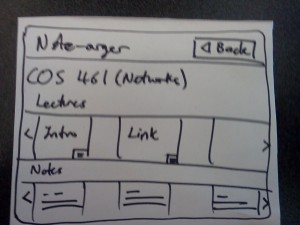
Main screen that the user sees when the class is chosen. Two carousel elements that can slide horizontally for the user to browse different lectures and other course materials.

Once the user clicks on one of the lecture, the user can take notes in the margins of the lecture slides.
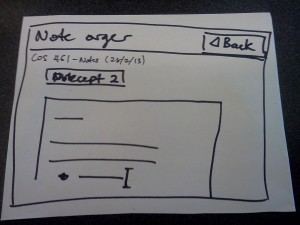
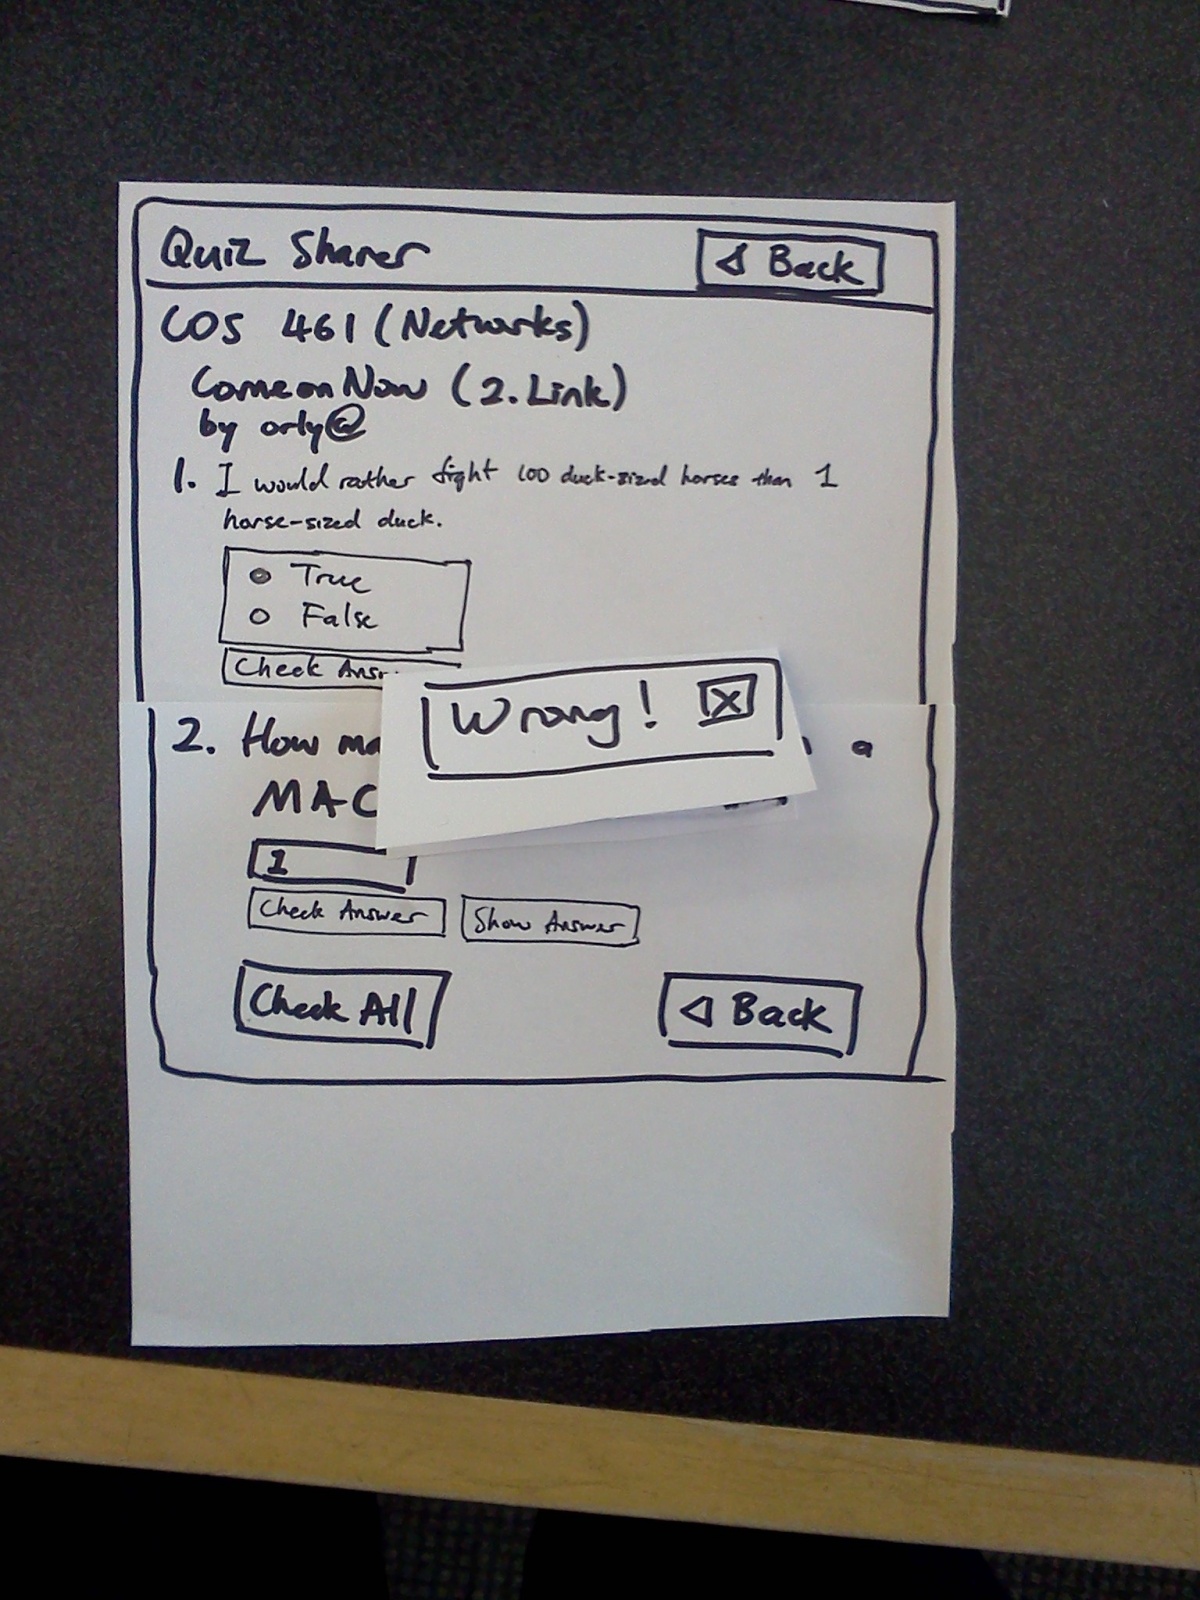
The user also gets to edit other text documents. - A quiz on content from the previous lecture, with an easy interface to make quizzes for yourself and share with others.
I like this one because it is somewhat entertaining, get students’ minds warmed up for lecture, gives lecturer/students a sense of how they are doing, and also provides a basis for discussion.
This prototype is also meant to simulate a laptop screen.
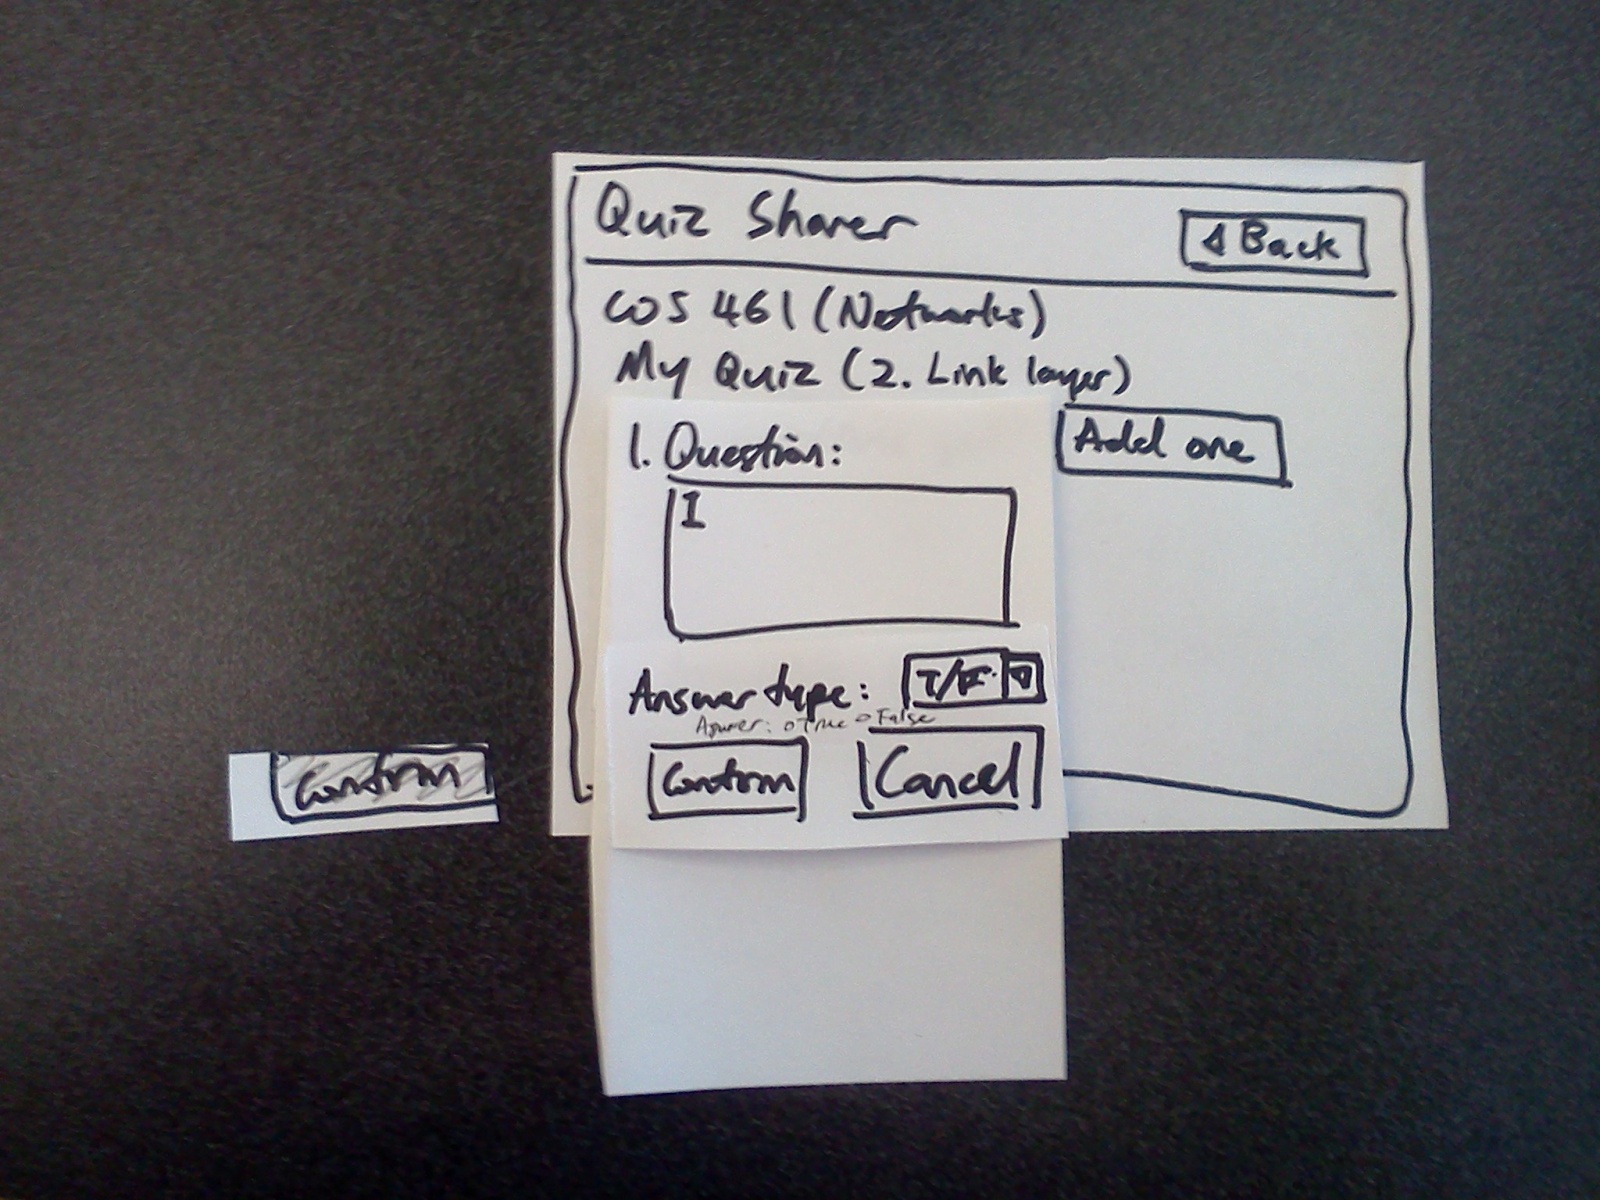
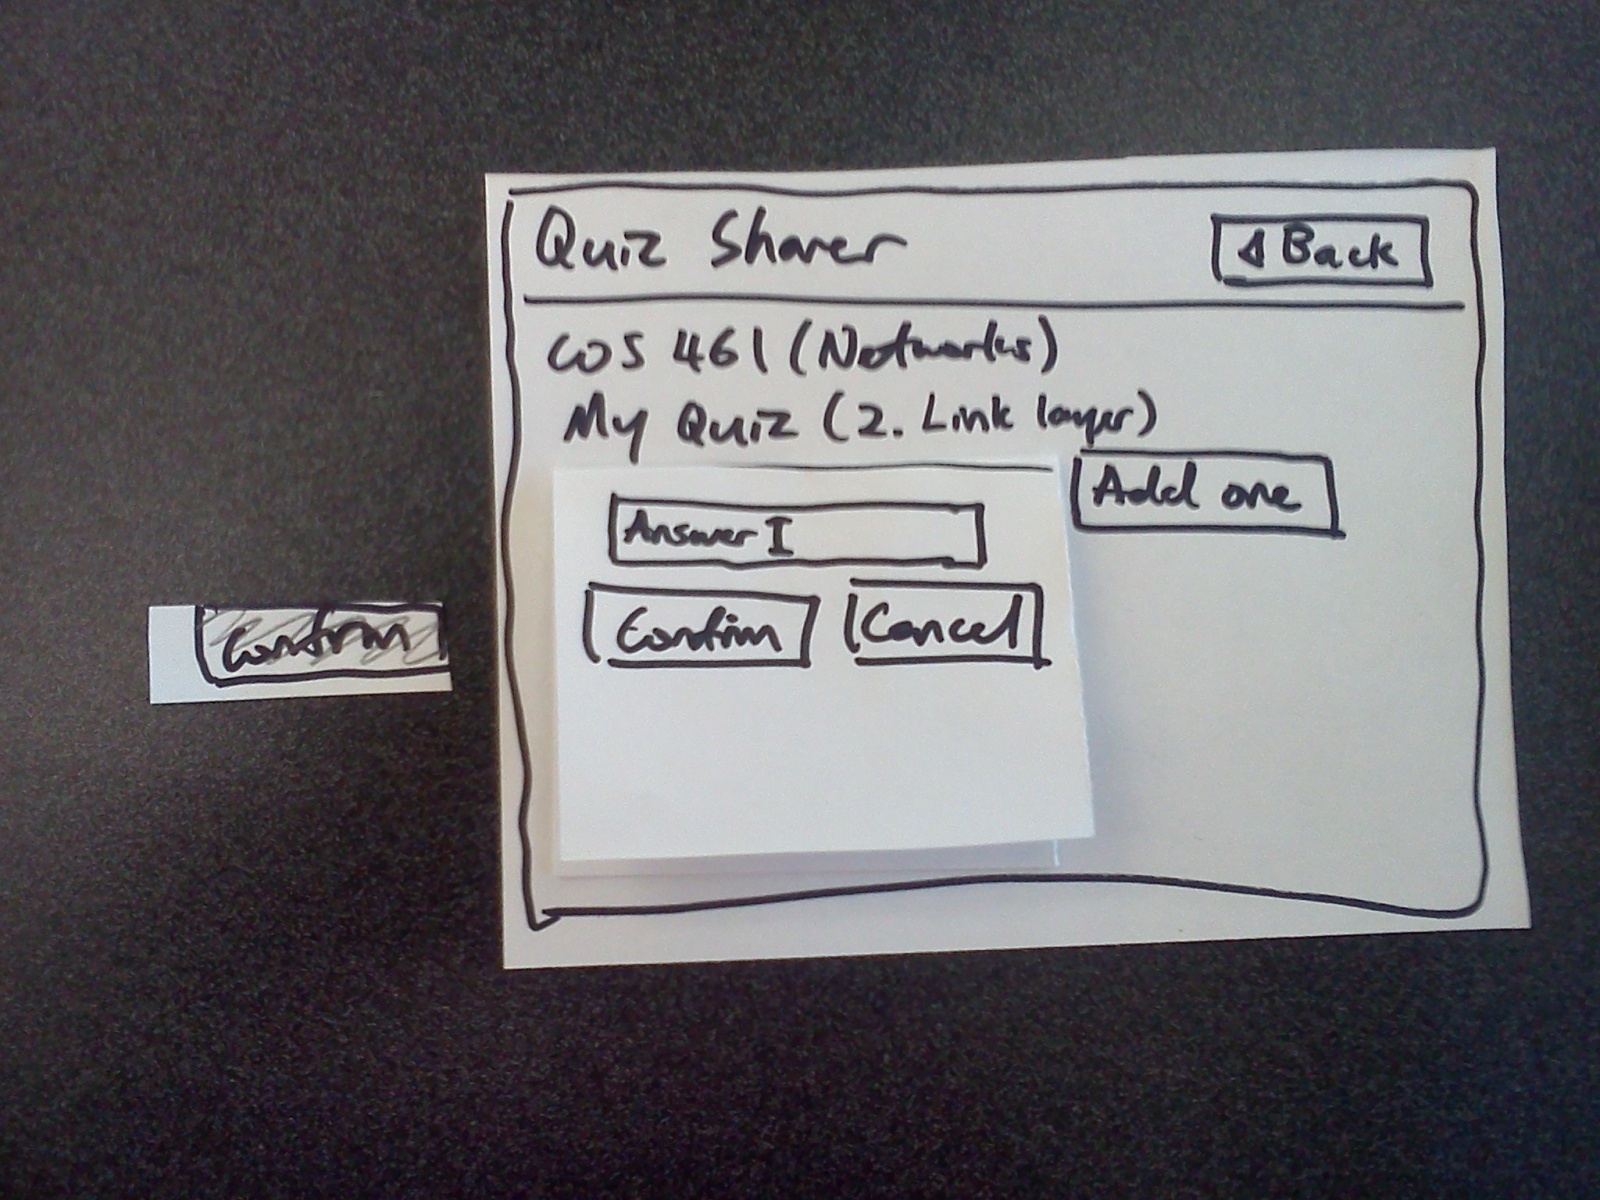
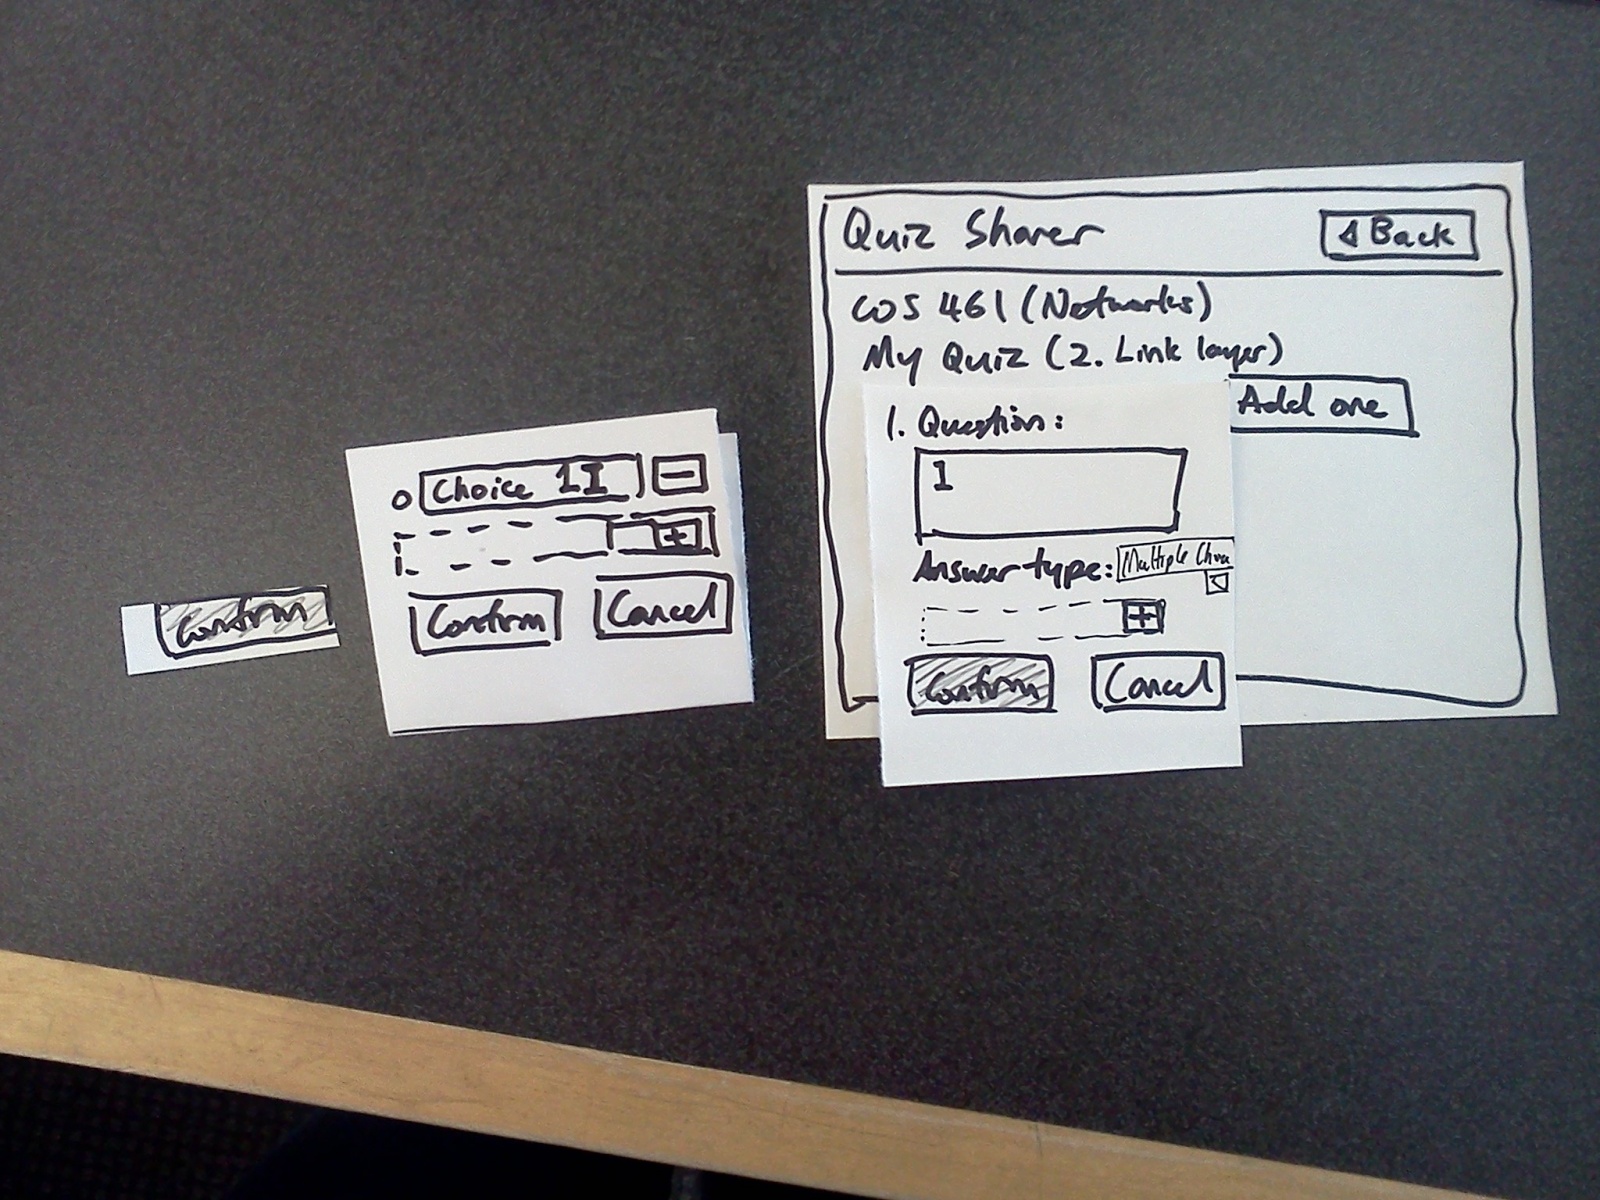
The home page. User gets to select class from dropdown menu, make their own quizzes, or take quizzes that other users have made.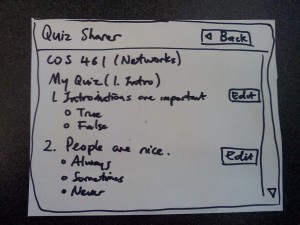
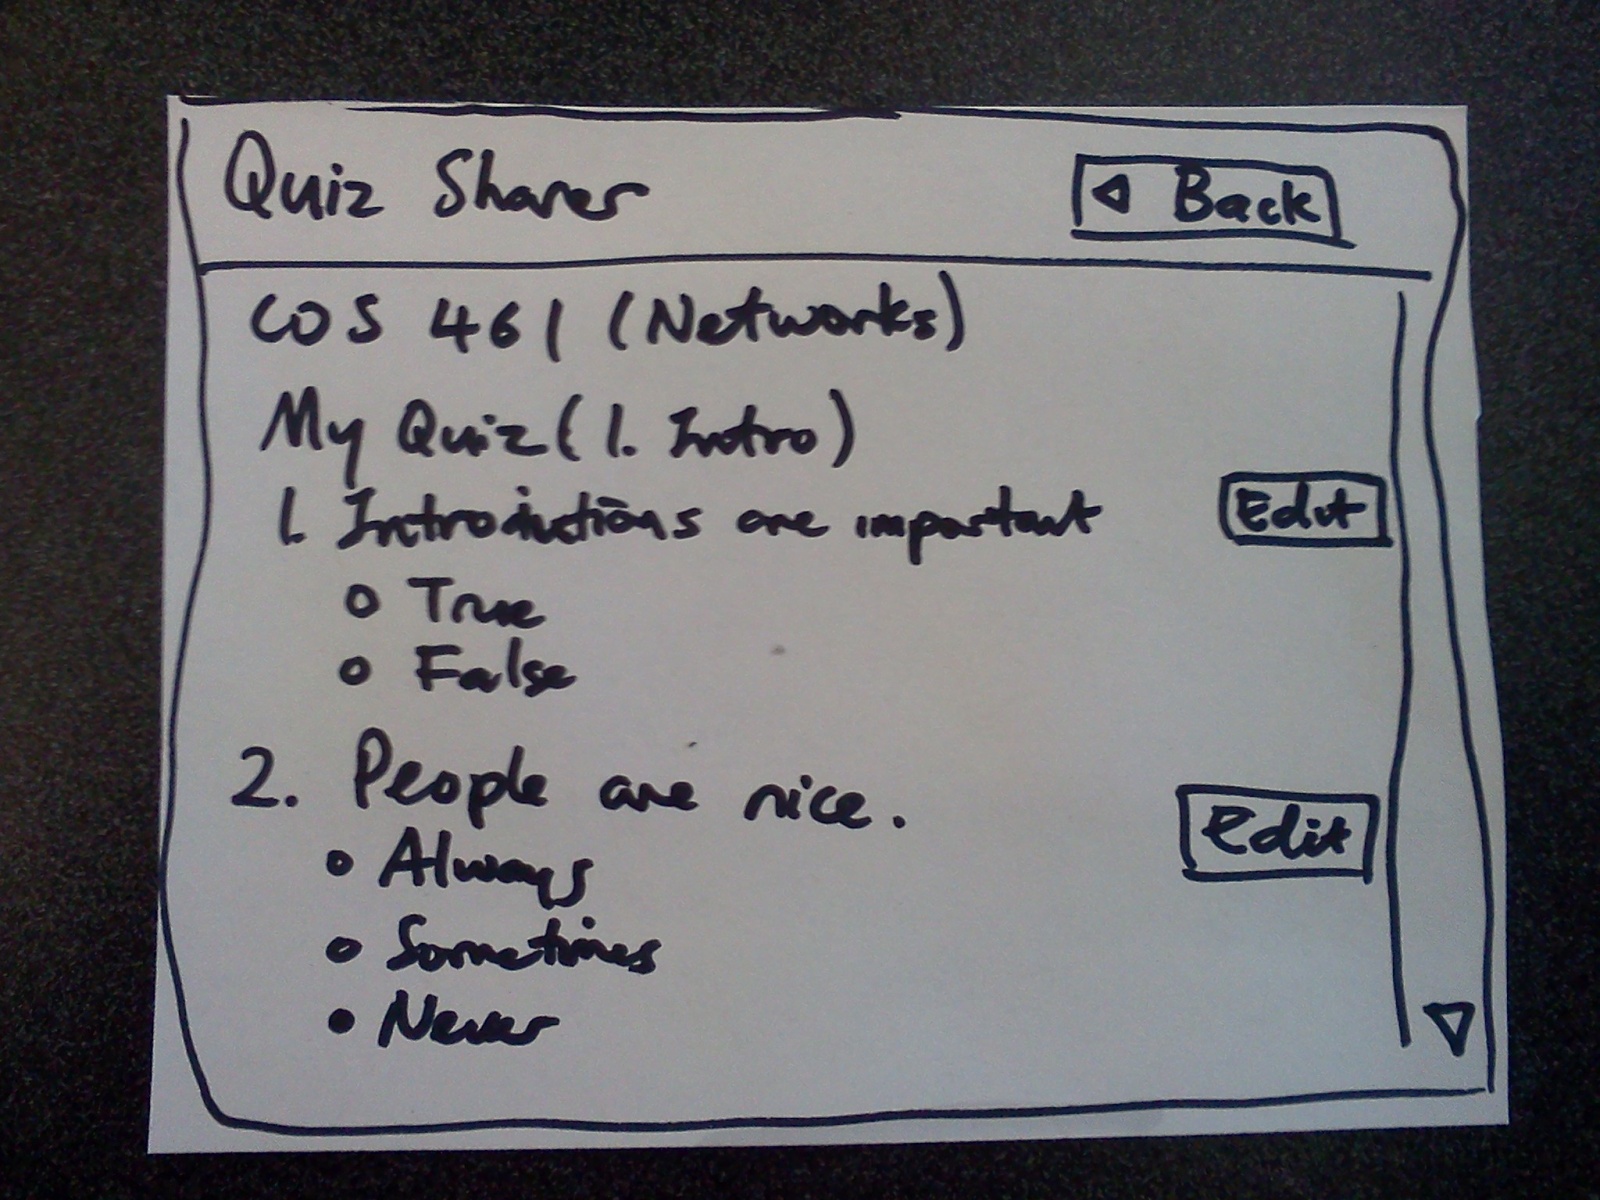
This is a quiz that a user has previously made. The user can edit the questions on the quiz.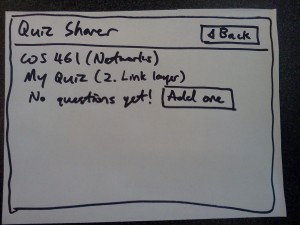
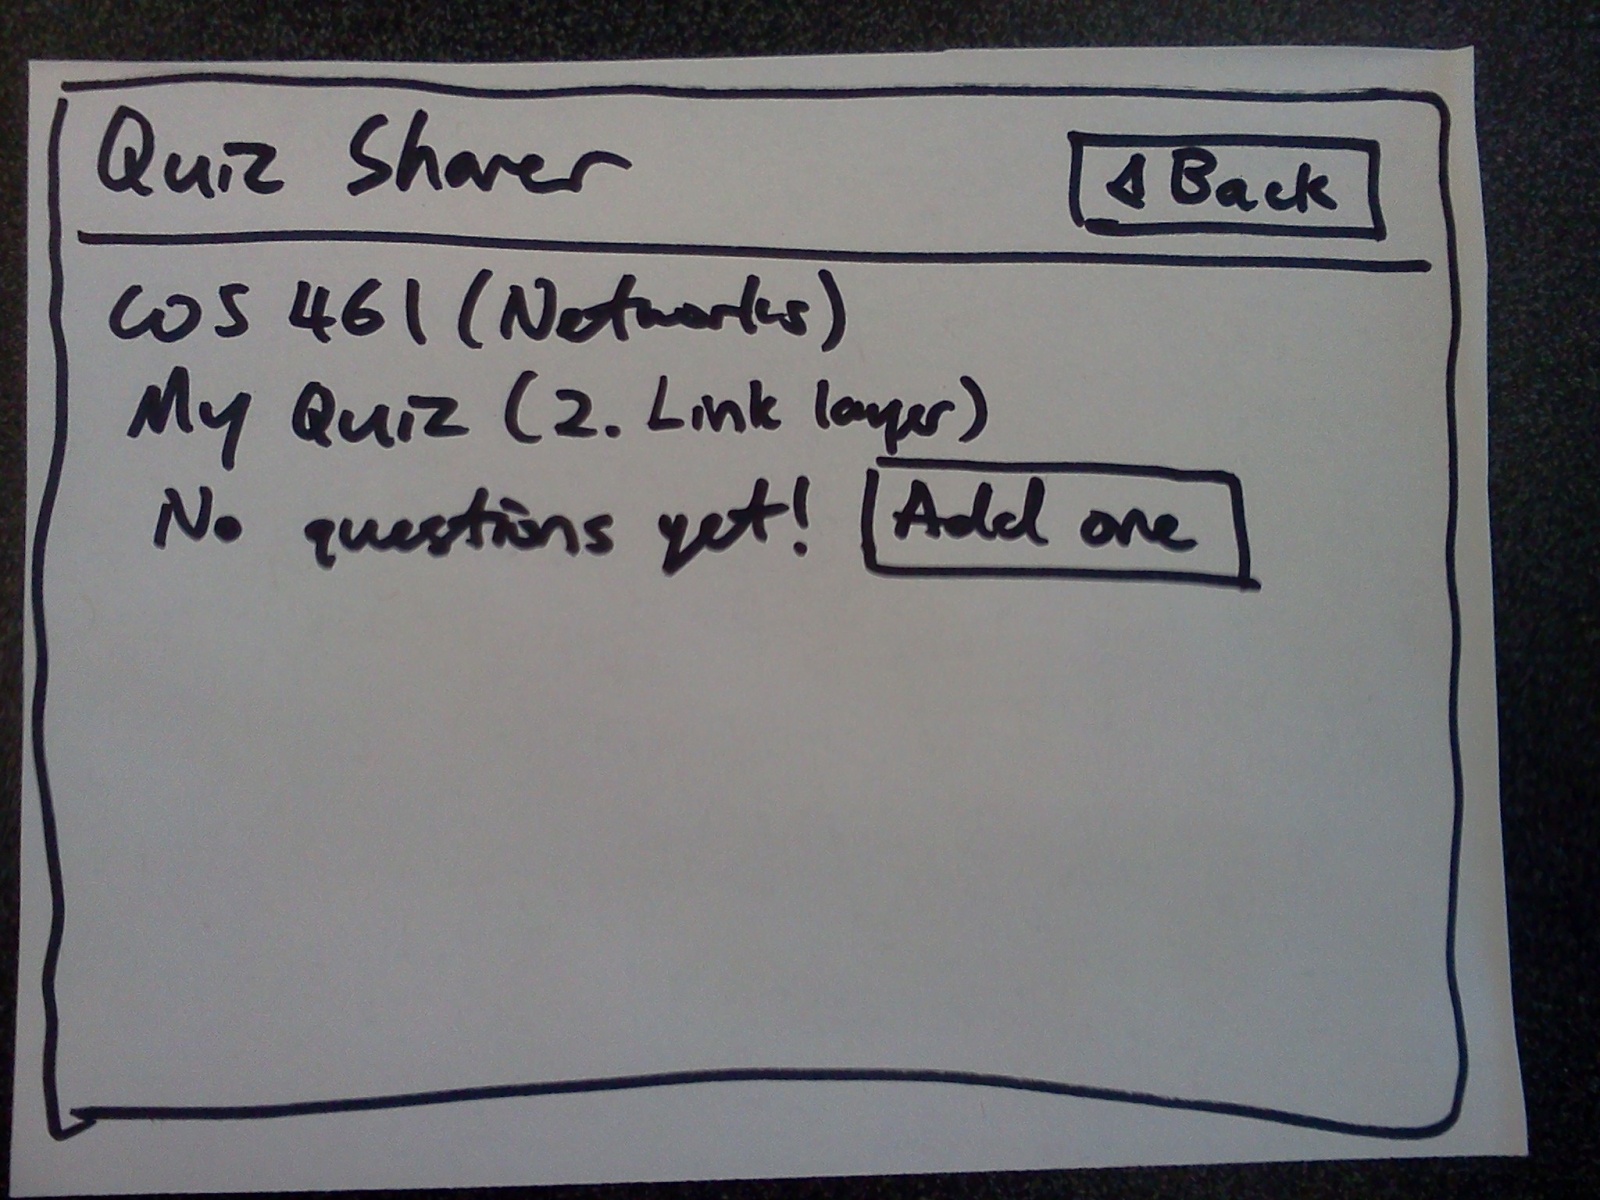
This screen is shown if the user has not made a quiz for a particular lecture yet.
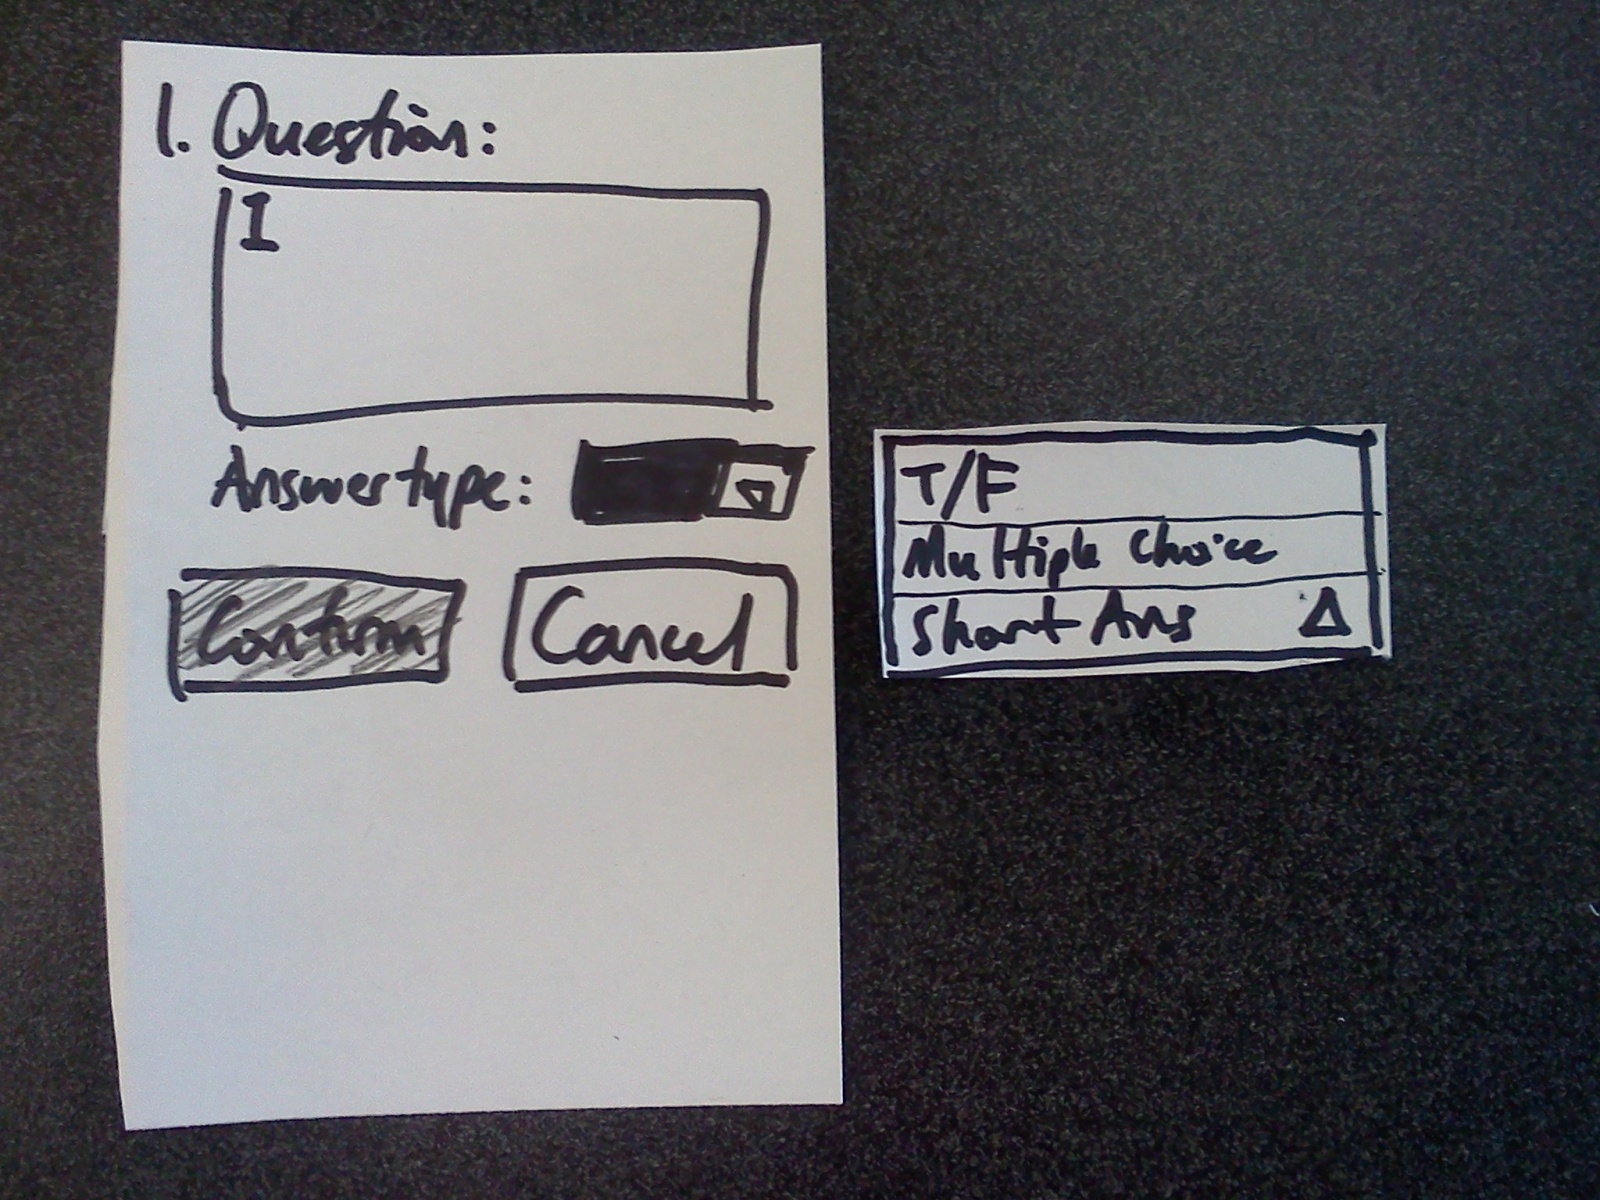
The user can choose to add a True/False question, a Multiple choice question, or a short answer question…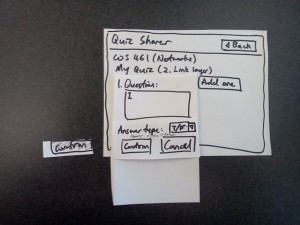
A True/False question like this… (note the confirm button, which would be greyed out if the user has not entered a question yet).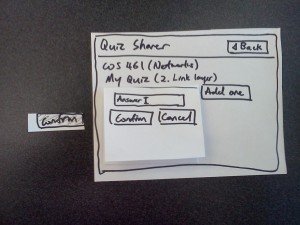
A short answer question like this…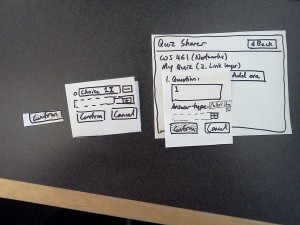
Or a multiple choice question like this. Note the interactive “+” button, which would cause a new choice to appear.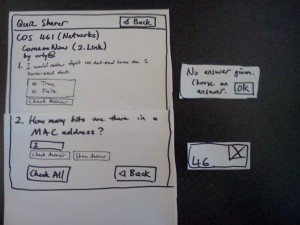
User can also take a quiz that others have set. The user can look at the answer, but only if the user has attempted the question.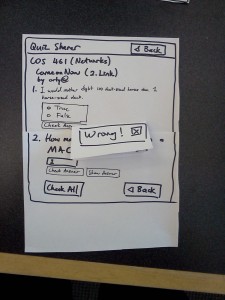
User can also check his/her own answer, and the page would respond with whether the user got it right.


User testing
I chose to perform user testing on the quiz sharing prototype.
Nick (PHY Junior):
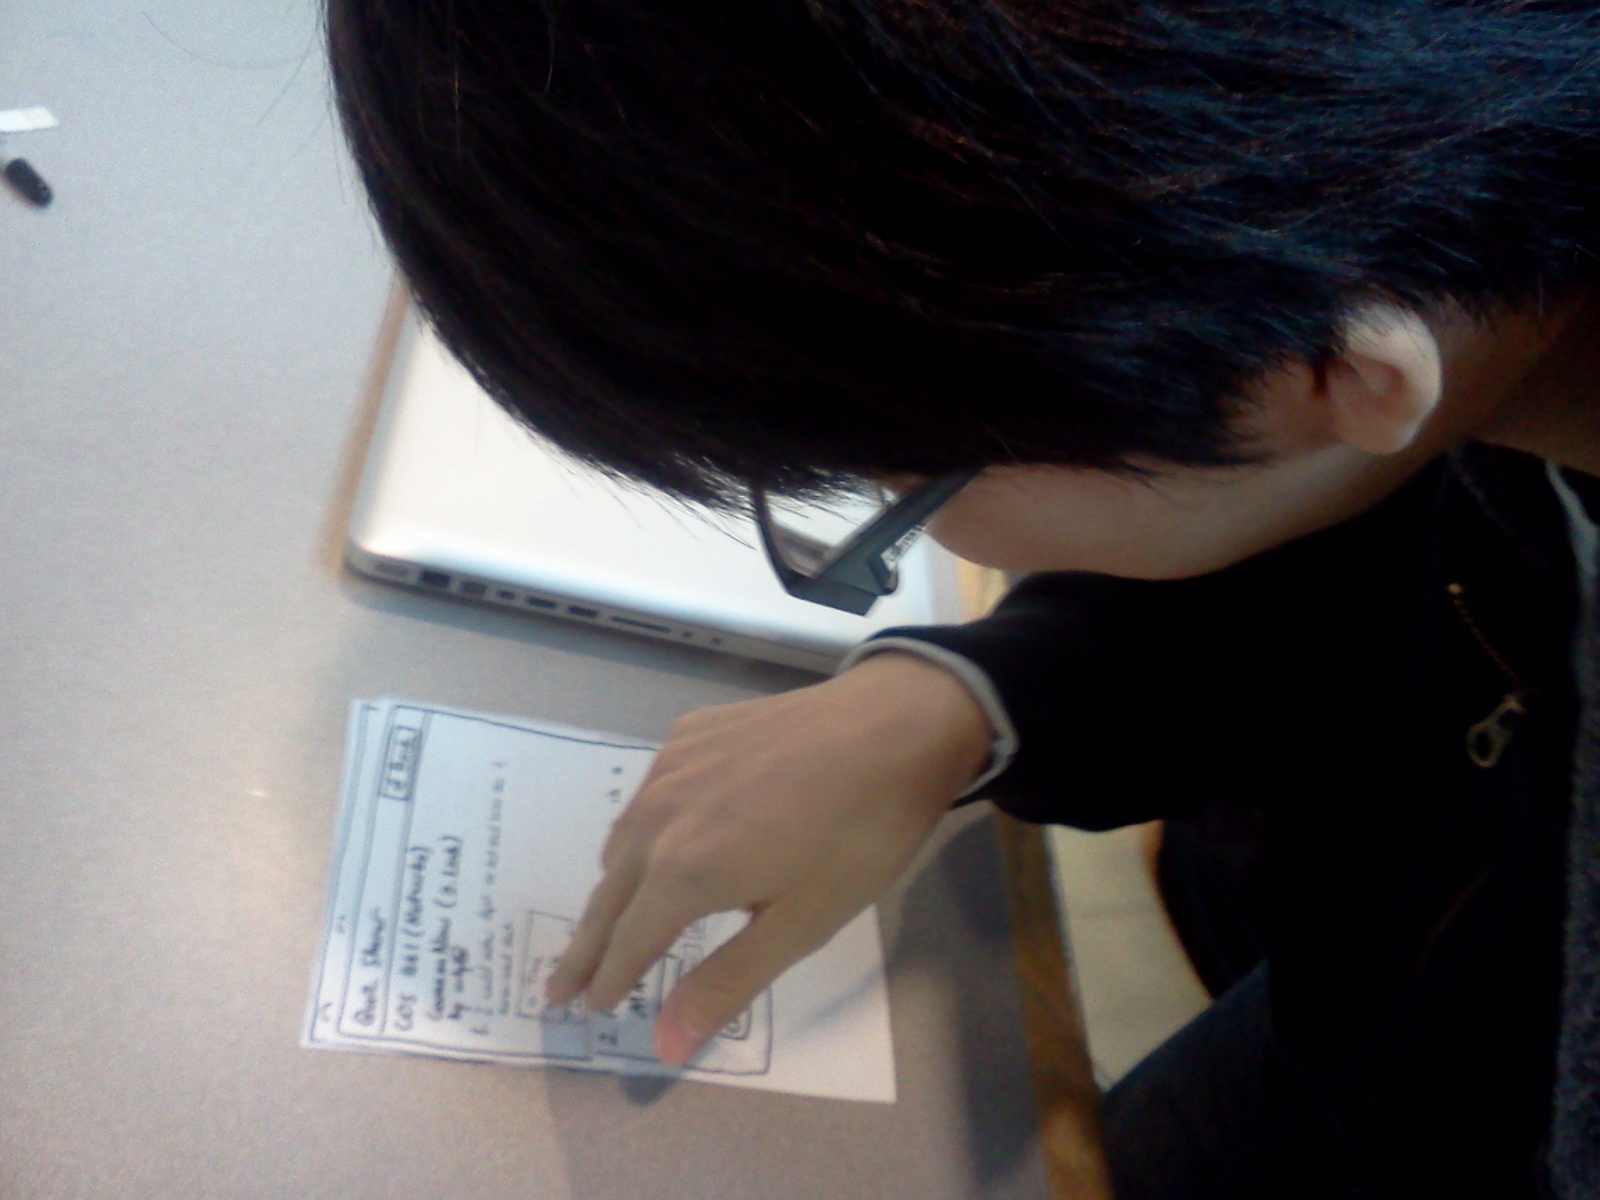
During user testing, the following was observed:
- The purpose of the site is not immediately obvious. Need a help page to explain.
- Need warning if no answer is chosen before user presses “check answer”
- Greyed-out “confirm” buttons are sometimes confusing when no edits have been made
- Requested functionality
- Feedback for the quiz taker, including information such as how others are doing on the quizzes
- Said that it is otherwise efficient, intuitive and simple.
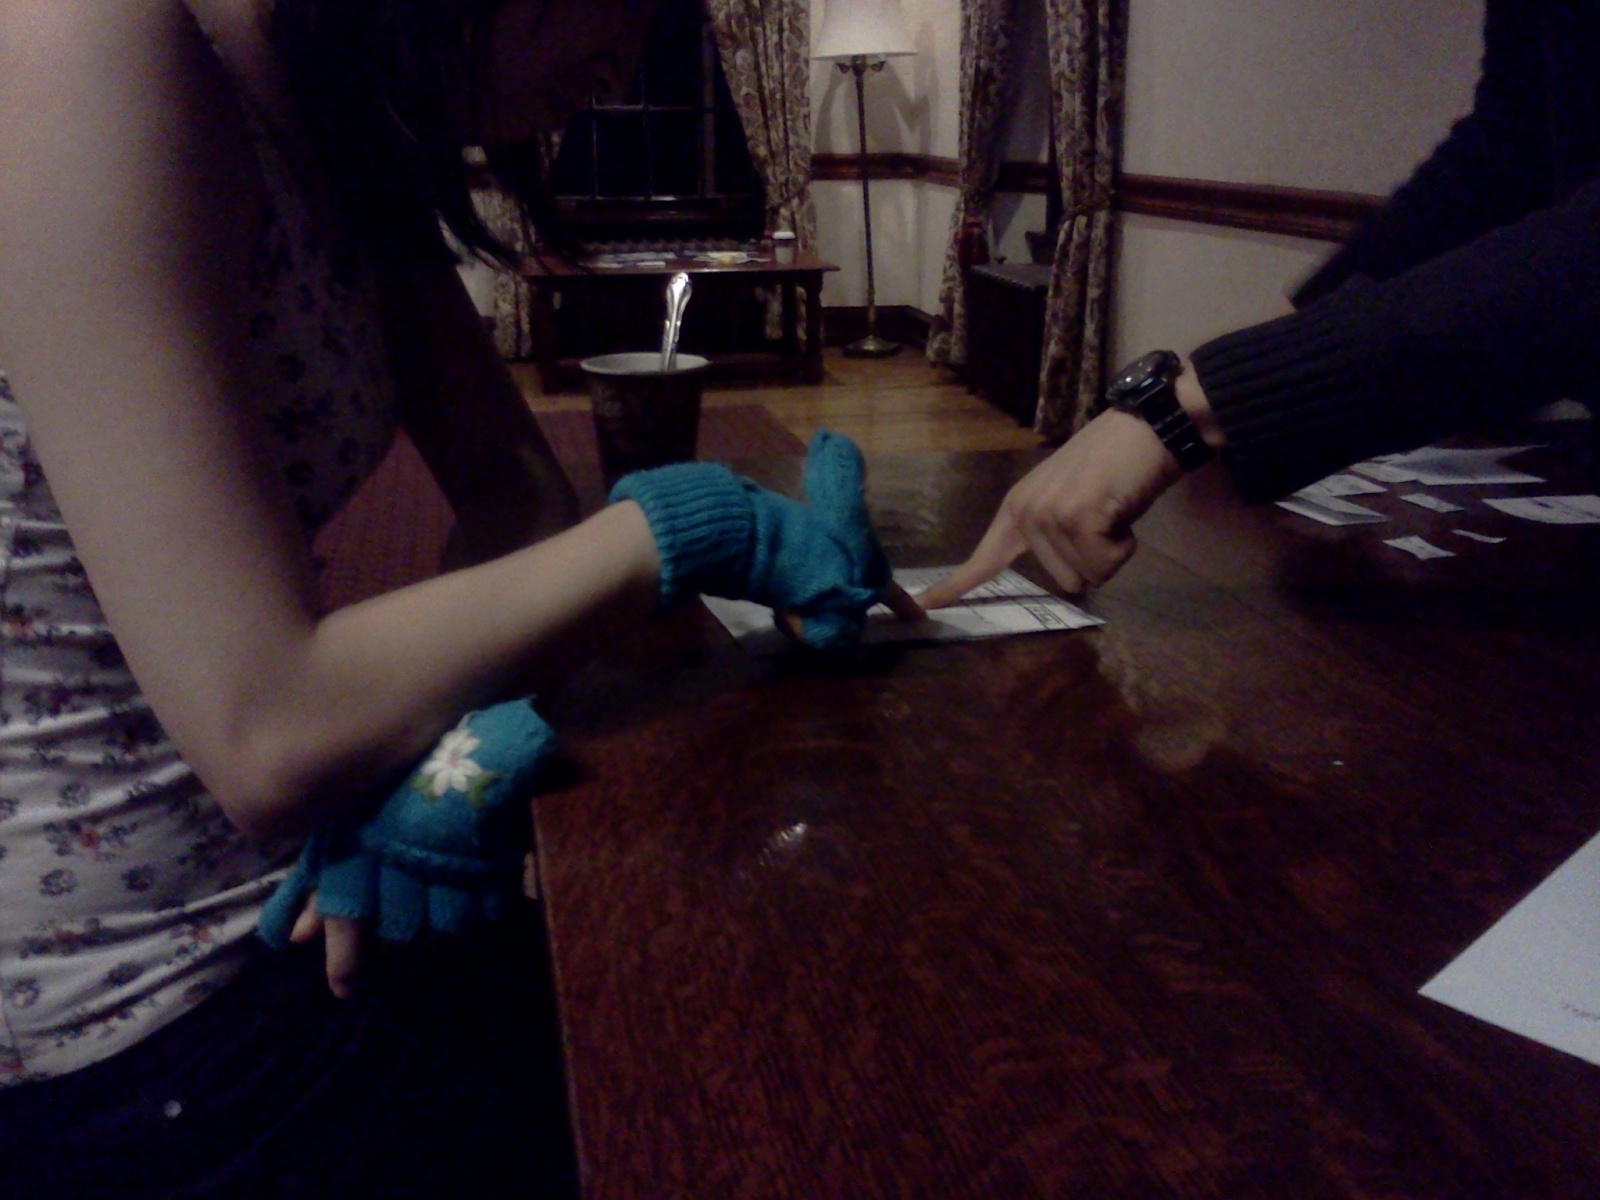
Jana (MOL Freshman):

- Should have a way to provide summary stats for the quiz when the user is done taking the quiz.
- Need to change error message (“Changes will be lost -> Previous answers will be deleted”)
- Need short answer stub
- Requested functionality
- to see how everyone else performed on the quizzes
- to see which quizzes you’ve already taken
- to be able to see quizzes from past year
- Said that she would use it only if other people already made good quizzes.
- Found it easy and intuitive
- Mentioned that the interface is also suitable for touch screens
Elaine (COS Junior):
- Didn’t understand the meaning of “What lecture?” and “Intro” in the left column of the homepage – need to be more explicit that these are quizzes for different lectures. Would be better to rename them to “Lecture 1: Intro”, “Lecture 2: Link Layer”.
- Not clear that tests that are already made (and are in “make test”) are not meant to be answered – In “Make Test” section, answers should be immediately revealed.
- Feedback: “Not bad”