
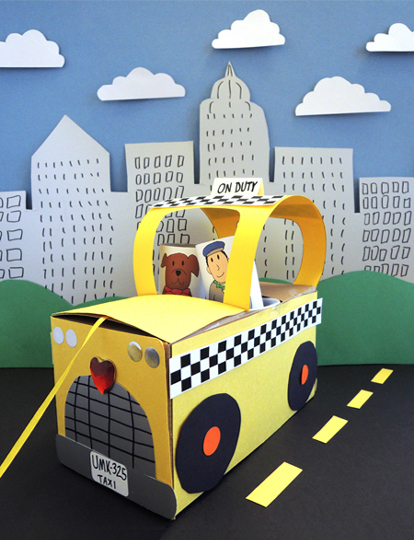
 Need to catch a cab in NYC? No problem! We made some pull string taxi cabs and picked up some passengers in a noisy – and most definitely doggy – traffic jam!
We read The Adventures of Taxi Dog, written by Debra and Sal Barracca, and illustrated by Mark Buehner (Dial Books, 1990). A stray dog’s life is changed forever the day Jim the taxi driver adopts him. Instead of being alone and hungry, Maxi now proudly wears a red bandana and helps Jim with his fares. From Sadie the Broadway singer to a young couple expecting a new baby (any minute!), Maxi loves his new life in New York City!
You’ll need:
- 1 box (mine was 4 ½” X 4 ½” x 9” – a large tissue box works too)
- 2 plastic cups (mine were Walmart brand 5 oz clear plastic)
- A 30″ piece of string or yarn
- Yellow construction paper
- 1 taxi parts template, printed on 8.5″ x 11″ white card stock
- 4 black poster board circles (mine were 2.75″ in diameter)
- 4 orange dot stickers
- 1 taxi cab roof template, printed on 8.5″ x 11″ yellow card stock
- 2 small strips of silver metallic poster board (approximately 1″ x 4.75″)
- 1 rectangle of silver metallic poster board (approximately 2.5″ x 3.75″)
- 4 silver metallic dot stickers
- 4 red dot stickers
- 1 large gemstone
- 2 toilet paper tubes
- 1 taxi driver and dog template, printed on 8.5″ x 11″ white paper
- Scissors and tape for construction
- Markers for decorating
- Hot glue
First, cut a rectangle out of the box’s lid (if you’re using a tissue box, flip it over and cut the rectangle out of the bottom of the box). It might be a little difficult to see in the image below, but my rectangle is cut slightly off center. There is approximately 3″ of space above the cut, and 3.5″ of space below the cut. The shorter, 3″ space will be the taxi’s “backseat,” and the longer, 3.5″ space is the taxi’s “hood.”
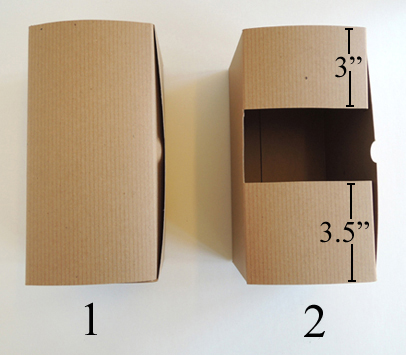 My cut created a 2.5″ x 5″ rectangle, but your cut will vary according to the size of the plastic cups you’re using. You want the cups to rest snugly in the box. Later, these cups will become your taxi riders’ “seats.”
 But DON’T tape the cups to the box just yet! Set the cups aside for a moment and cut the roof from the template. Tape the roof to the box like so:
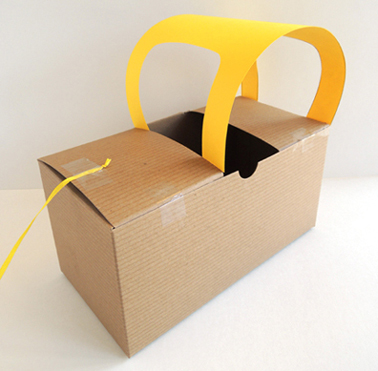
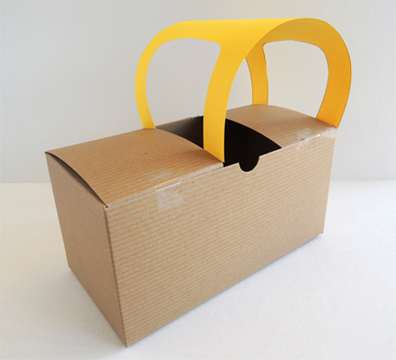 You’ll notice that the front legs of the roof get taped to the “dashboard” of the taxi, and the back legs of the roof get taped to the very back of the taxi box. Next, knot a 30″ piece of string on one end, and tape the knot to the top of the taxi’s hood.
 Now cover the hood, front, back and the sides of the taxi with yellow paper. Tape (or hot glue) the long and short checker strips from the template to the sides and roof of your taxi. Tape (or hot glue) the black poster board circles to the sides of the box for wheels, and add some orange dot sticker hubcaps. Now put the plastic cups back into the taxi, and secure them to the box with tape.
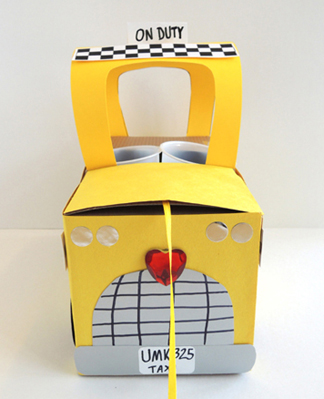
 On to the front of the taxi! We used 4 metallic dot stickers to make double headlights, a strip of silver metallic poster board for a bumper, and a rectangle of a silver metallic poster board for the grill (I rounded the top of my grill and used marker to add grill lines). A large gemstone hot glued to the top of the grill adds a nice pop of color. The “On Duty” sign from the taxi parts template gets folded along its dotted line, then taped to the roof. Finally, I found some old white office file stickers in the art cabinet, which we turned into license plates (or you can use scraps of paper, and tape or glue them to the bumper).
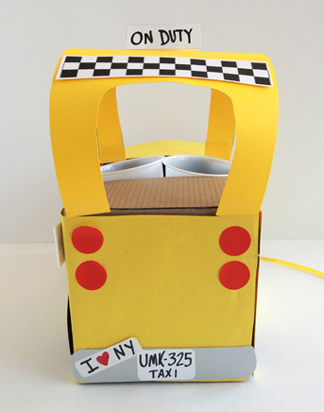
 To the back of the taxi we added: 4 red dot sticker tail lights, a silver metallic poster board bumper, a license plate, and a fabulous “I ♥ NY” bumper sticker (also created out of old office file stickers).
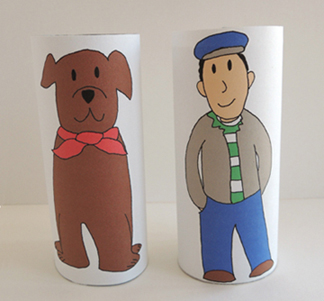
 The final step is to color your driver and dog template pieces, and wrap each of them around a toilet paper tube. Drop them into the plastic cup seats.
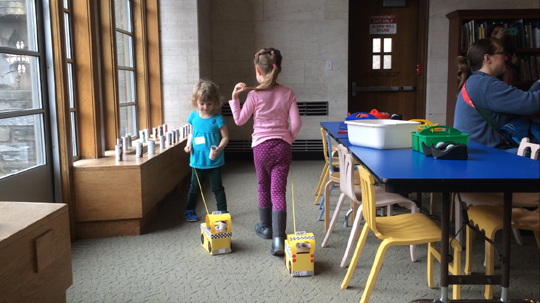
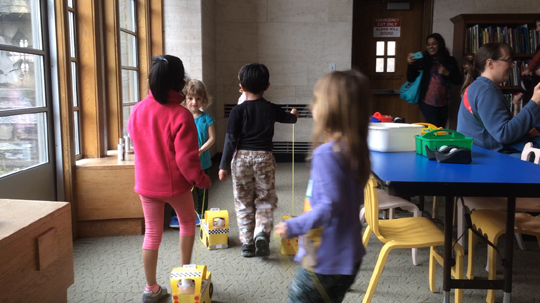
 When the taxis were finished, it was time for our “traffic jam” activity! First, I collected all the dogs and lined them up on a windowsill. When I shouted “GO!” the kids pulled their taxis over to the windowsill, found their dogs, popped them into their taxis, and zoomed away. It sounds simple, but we had a lot of kids at story time that day, resulting in a stupendous traffic jam.
As you can see, the fastest taxi arrived at the dogs first…
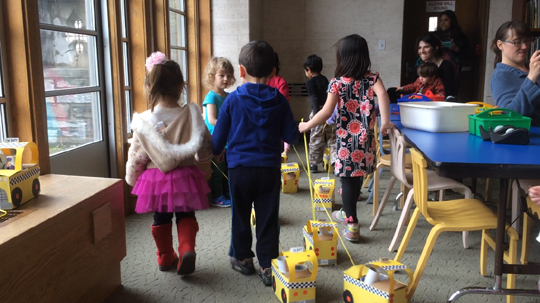
 It was quickly followed by another taxi…
 More taxis started to arrive…
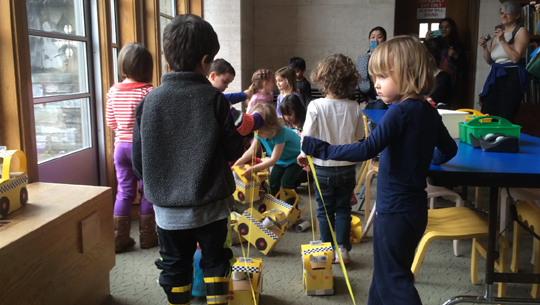
 And more…
 Pretty soon we had a full-on crazy NYC traffic jam!
 I made a sound file that combined honking horns and barking dogs, looped it for 4 minutes, and burned it to CD. I played the CD during the activity, adding to the chaos and fun!