Home Aquarium

home aquarium

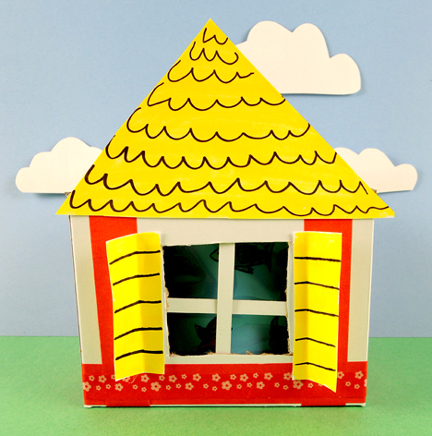
Need an aquarium in your home? How about we just make the whole HOUSE the aquarium? Turn the tab at the top of this house to twirl ocean creatures past your window. Video, of course, at the end of the post!

We read Faucet Fish, written by Fay Robinson, and illustrated by Wayne Anderson (Dutton Children’s Books, 2005). Elizabeth adores fish, and spends quite a lot of time at the local aquarium. Alas, she only owns a guppy, and her parents aren’t keen on getting any more fish. But one day, a trout drops out of the faucet! The faucet fish keep coming, getting larger and larger until a baby beluga emerges in the tub. Only one thing left to do…turn the entire house into an aquarium!

You’ll need:

  • 1 small tissue box
  • A box cutter
  • A square of blue cellophane
  • A selection of construction paper
  • 1 brass fastener
  • 1 snippet of poster board
  • 1 plastic cup
  • 1 strip of white card stock
  • Scissors, tape, and hole punch for construction
  • Markers for decorating
  • Hot glue

The box for this project definitely requires a lid! We used a 4.5” X 4.5” x 6” craft box, but a small tissue box works as well (just flip the tissue box upside down). Use a box cutter to create a small slit in the center of the box’s “roof.” Next, cut a window in the box. Use leftover cardboard scraps to craft window panes, and tape blue cellophane over it.
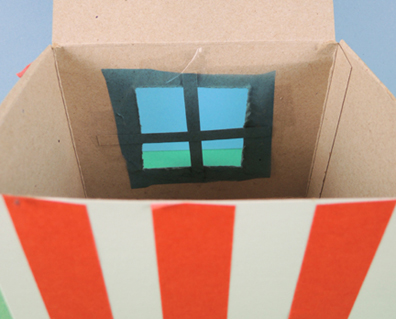
window of aquarium houseNow decorate the outside of your house! We offered construction paper, color masking tape, and patterned tape, but you can also just use markers. One thing to note…the roof is just a triangle of paper attached to the front of the box. It doesn’t extend backwards over the top of the box.

home aquariumNext, decorate a strip of white card stock with ocean creatures. Make sure to measure the strip carefully…it needs to wrap fully around your plastic cup and not extend past the top or bottom. Our strip was 4″ tall x 11″ wide. And can I say what a fine job Katie did with her ocean creatures? Just look at that happy jellyfish!
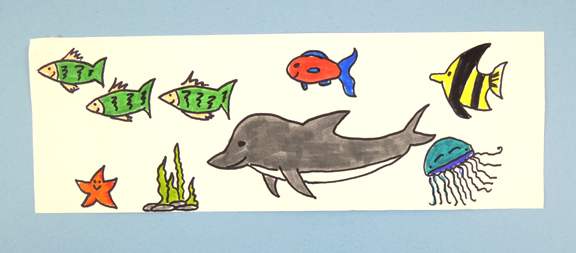
strip of ocean crittersThe final piece of the project is the spinning cylinder. This is a plastic cup attached to the roof of the house with a brass fastener. Two tabs extend from the top of the box, allowing you to easily turn the mechanism:
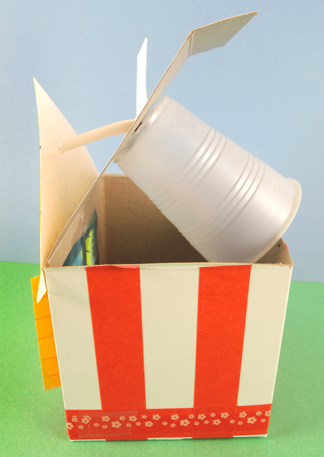
plastic cup attached to houseOur tabs were created with a 0.75″ x 3″ snippet of poster board. Punch a hole in the center, then thread a brass fastener through the hole. Push the ends of the fastener through small slits cut in the top of the box and the bottom of a plastic cup. Unfold the fastener’s prongs inside the cup.

You really want the connection to be strong, so we recommend hot gluing AND taping the head of the brass fastener on the snippet. Hot glue a small square of cardboard over the prongs inside the cup as well:
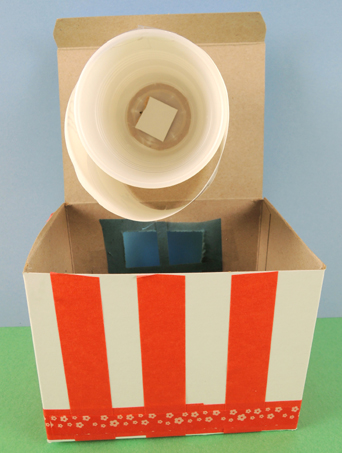
reinforced cup connectionFinally, wrap your strip of ocean critters around the cup. As you can see in the above photo, the cup is tapered, so the strip won’t wrap around it in a perfect circle. No problem! So long as the strip is secured tightly to one point of the cup (we suggest the strip’s seam) it will work. Here’s a shot of the finished mechanism, which is then tucked inside the house. Secure the lid down with tape.
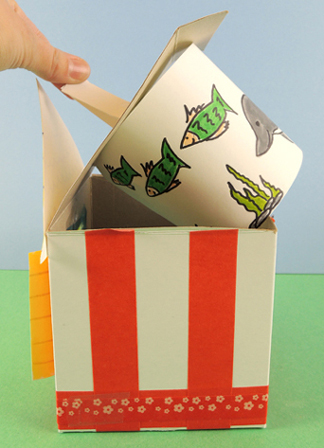
finished aqarium cylindarReady to see this little contraption in action? The colors were a little muted in the video, so I removed the blue cellophane from the window to showcase the ocean critters more clearly. Swim my little friends, swim!

Buckets of Fun

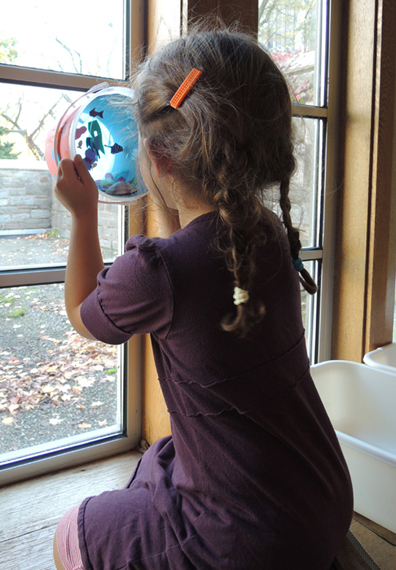
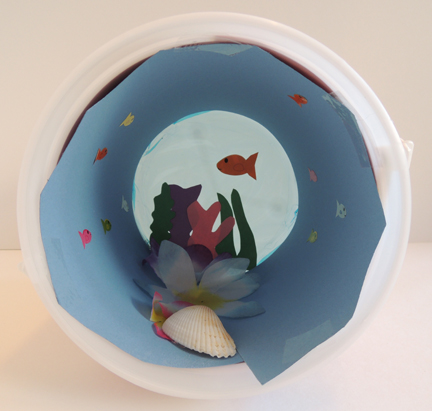
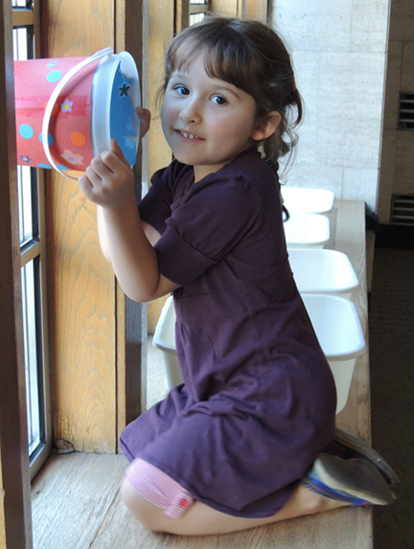
buckets of funA bucket is a very useful thing…but is it entrancing? This bucket is! Hold it up to the light and you will discover it holds an ocean ecosystem full of fun, including fish, coral, a manta ray, a shark, a starfish, and more!

inside of bucketWe read Billy’s Bucket, written by Kes Gray and illustrated by Garry Parsons (Candlewick, 2003). Billy doesn’t want a bike, sneakers, or a computer game for his birthday. He wants a bucket. Yes, a bucket. At Buckets R’ Us, Billy spots a special bucket (“19 shelves up and 78 across from the top”), fills it with water, and begins to report the most astounding things. He sees shrimp, a shark, a sting ray, sea lions, dolphins, divers, and possibly a mermaid! His parents chuckle at their son’s active imagination. Jokingly, they ask if they can use the bucket for some household chores. But Billy warns them that they must never EVER borrow his bucket. The next day, Dad doesn’t heed Billy’s warning and sets off the wash the family car. He quickly discovers that Billy was right. There is something special about the bucket! Now how are they going to get that whale back in the bucket?

You’ll need:

  • A 2.5 quart clear plastic bucket (more on this below)
  • Construction paper
  • A selection of patterned tape
  • A selection of dot stickers and/or other stickers for decoration
  • 1 circle of blue cellophane (approximately 9.5″ in diameter)
  • 1 rectangle of blue poster board (approximately 5.5″ x 18″)
  • 1 sea creatures template, printed on 8.5″ x 11″ white card stock
  • 3 pieces of clear elastic beading cord (no more than 4″ each)
  • A selection of fabric flowers (optional)
  • 1 small seashell (optional)
  • Fish stickers (optional)
  • Scissors and tape for construction
  • Markers for decorating
  • Hot glue

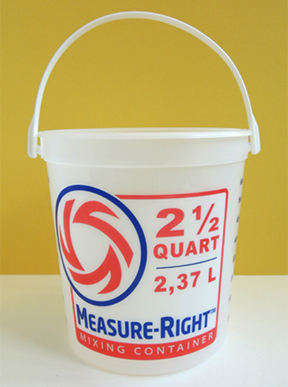
A word about buckets. Size is not important. The most important thing is that the bucket has a clear plastic bottom to allow light through. I found this little 2.5 quart mixing bucket in the paint section of Lowe’s (for other fantastic hardware finds, click here and here). It was perfect.

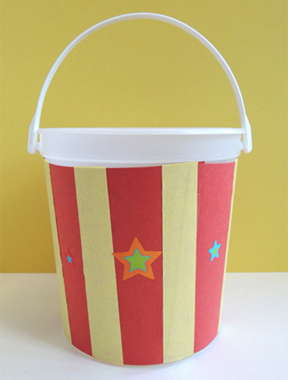
bucket step 1First, wrap the outside of the bucket with construction paper. One long piece of construction paper resulted in ugly gaps at the top and bottom. So we decided to use three, 5.25″ x 7.5″ rectangles of construction paper. It worked great. You can cover your bucket with a single color, or mix it up (we offered orange, red, green, and yellow paper). Once covered, decorate the outside of the bucket with colored masking tape and stickers (or just use markers).

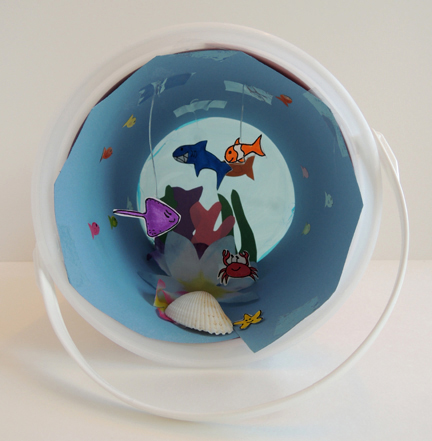
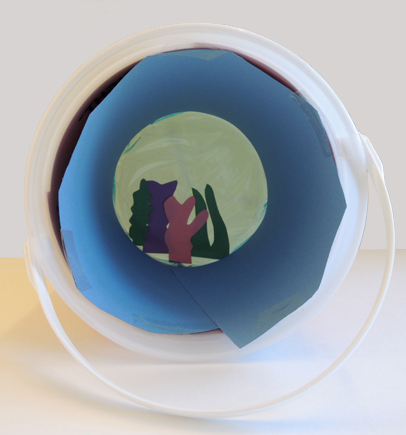
bucket step 3 Now for the ocean inside your bucket! Here’s what a finished interior looks like:

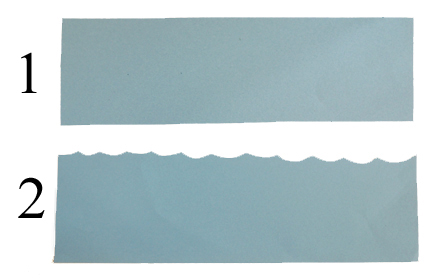
hanging critters Begin by cutting wave shapes on top of a rectangle of blue poster board. Set the poster board aside for a moment.

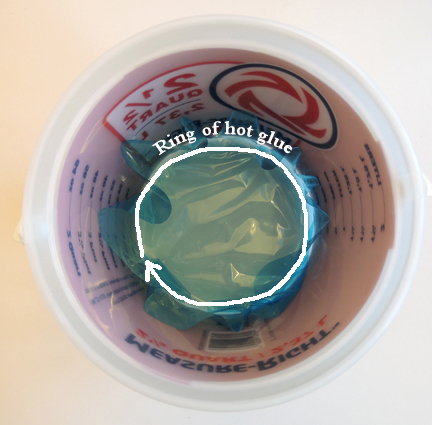
wavesSqueeze a ring of hot glue around the bottom of the bucket (right at the edge, where the bottom meets the sides). White glue or a glue stick works too – it just might take a long time to dry and not dry completely clear.  Press a circle of blue cellophane onto the glue.

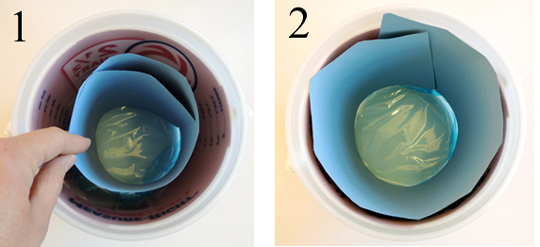
water step 1Loosely curl your poster board and place it inside the bucket. Once it touches the bottom, uncurl it and push it against the sides of the bucket. You want the poster board to trap the edges of the cellophane, leaving a relatively smooth circle of cellophane at the bottom of the bucket.

water step 2Use several pieces of tape to secure the poster board to the interior perimeter of the bucket, right at the top. To add a little background texture, we prepped some coral and sea grass shapes out of construction paper. During the program, kids taped 4 pieces to the blue cellophane.

taped coralThen we hot glued 3 fabric flowers (more “coral”) and a small shell to create the “floor” of the ocean. I offered fish stickers as well (but you can skip this option, or have kids draw fish using markers. Just make sure they do it before they attach the poster board to the interior of the bucket!). I stuck a fish sticker on the cellophane as well.

ocean floorColor and cut the sea creatures from the template (I gave the kids the option of a shark or a dolphin, but you can do both if you like). Tape a piece of elastic beading cord to the back of the fish, the manta ray, and the shark (and/or dolphin). Adjust for height, then tape the other end of the cord to the “roof” of the bucket. The starfish and the crab get taped (or hot glued) to the ocean floor.

hanging crittersFor best results, hold your bucket up to a window with plenty of light. Enjoy!

Fish in a Suitcase

not normanWe read Not Norman: A Goldfish Story, written by Kelly Bennett, illustrated by Noah Z. Jones (Candlewick, 2008). A little boy is terribly disappointed when, instead of a dog or cat, he gets a goldfish for his birthday. However, Norman the fish’s goofiness, appreciation for the boy’s tuba playing, and his friendly presence when there is a scary noise at night wins the boy over. Now, he wouldn’t trade any pet in the world for Norman!

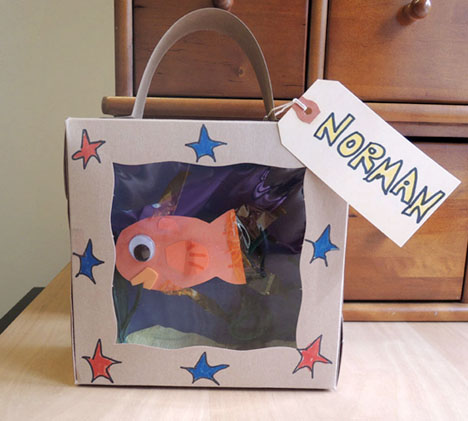
The boy pulls Norman around in a little red wagon, but I thought we’d go even more portable for our story time. Hence, a fish in a suitcase!

You’ll need:

  • 1 box with a window (I used a 7″ x 7″ x 3″ pastry box)
  • Blue construction paper
  • 2 green pipe cleaners
  • 4 pieces of green raffia
  • A selection of crepe paper streamers
  • Small shells (optional)
  • Orange poster board for fish
  • 1 piece of orange self-adhesive foam
  • 1 wiggle eye
  • Hot glue
  • 1 small piece of clear elastic beading cord
  • Markers, yellow cellophane, and golden paper for decorating
  • Scissors and tape for construction
  • 1 tagboard strip for suitcase handle (mine was 12″ x 2″)
  • 1 luggage tag (optional)

The key to this project is finding a box with a window. I had a bunch of pastry boxes left over from another program, but you can find something similar in the bakery section of your local supermarket.

Cut the blue construction paper to fit the back of the box and secure with tape (or a glue stick). Draw in a few bubbles and waves with markers. The “water” is done…time to add some aquarium plants!

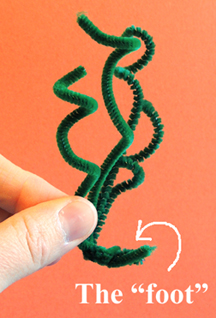
Plant #1: Cut two green pipe cleaners in half. Bunch the four pieces together and twist at the bottom. Give the pieces a little curl if you so desire. Then bend the twisted part into a “foot” and tape it to the bottom of the aquarium.

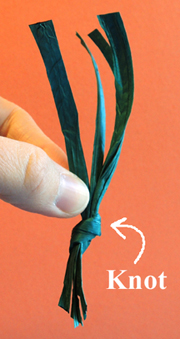
plant 1Plant #2: Knot four raffia pieces together. Tape to the bottom of the aquarium.

plant 2With the plants in place, it’s time for your “aquarium sand.” Crumple up some crepe paper streamers to give them a “sandy” texture, then hot glue them around the plants and the bottom of the aquarium. You can hot glue some little shells on the “sand” as well.

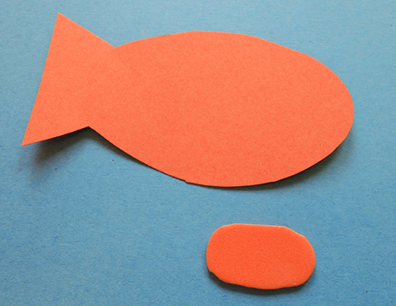
Now for the fish! Cut a fish shape out of orange poster board. To create fantastic fish lips, cut the piece of orange self-adhesive foam into an oval:

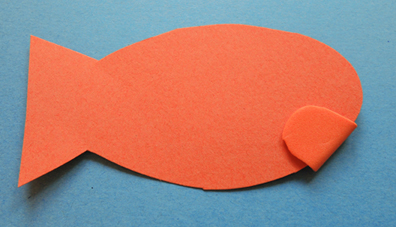
fish lips 1Then peel and stick it on the fish’s mouth:

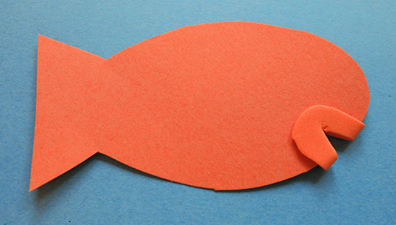
fish lips 2Use scissors to cut a smile!

fish lips 3Secure a wiggle eye on with a dash of hot glue, then tape the elastic beading cord to the back of the fish. Decorate with yellow cellophane, gold paper, and markers. When the fish is complete, dangle it from the elastic cord, adjust for height, and tape the cord to the top/lid of your aquarium. Get the height just right, and your fish will wiggle and sway in a realistic way.

To turn the box into a suitcase, simply add a tagboard handle to the top. Originally, I used hot glue to attach the handles to the box, but they popped off pretty fast. So I would recommend using brass fasteners to really secure it.

With the handle in place, all your suitcase needs is a “luggage” tag. Write your new friend’s name on it and get ready for adventure!