A Box of Puzzles…and Ducks

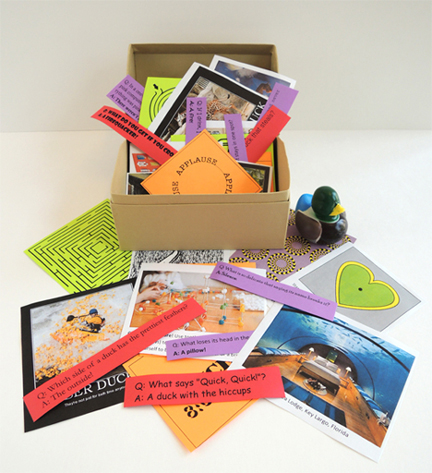
contents of boxInside this box are a number of tantalizing puzzles, mazes, optical illusions, images of unusual hotel rooms, building projects, and…ducks. Can all of these things be some how related? The answer is mostly definitely yes.

This project was part of To Be Continued, our story time program for children ages 6-8. Typically, we do the projects during the program. But unfortunately, the timing on this particular day only gave me five minutes to present the project. To further confound things, it was also the eve of a one month programming hiatus. So I needed something the kids could grab, take home, and discover for themselves. Not unlike the main character in the book!

We read Floors by Patrick Carman (Scholastic, 2011). Ten-year-old Leo Fillmore and his father are the maintenance crew at the Whippet Hotel. But the Whippet isn’t an ordinary hotel. It has a room that’s a giant pinball machine, a roller coaster elevator called the Double Helix, a roof-top duck pond, a Cake Room, a Robot Room, a Pond & Caves room, and a shark head named Daisy. The Whippet is the brainchild of Merganzer D. Whippet, inventor, engineer, architect, and eccentric. Unfortunately, Mr. Whippet has gone missing, the hotel is going haywire, and two mysterious men have been making nefarious inquiries. But things take a turn for the strange when Leo finds a mysterious purple box. Inside is a letter from a lawyer and a clue that can only be from Mr. Whippet. Now Leo, his friend Remi, a duck named Betty, and a talkative robot named Blop have just two days to solve the clues, find more puzzle boxes, explore some of the hotel’s strangest rooms, and save the Whippet.

You’ll need:

  • 1 box
  • Different color printer paper
  • Puzzle box templates (located at the bottom of this post)
  • A piece of curling ribbon
  • Scissors for construction
  • 1 rubber mini-duckie (optional)

Any old box will do, but I decided to splurge and purchase these super-sturdy papier-mâché treasure boxes from Discount School Supply (a set of 12 is $21). My idea was that once kids were done with the activities inside the box, they could decorate the outside with art supplies at home. Here’s what my boxes looked like:
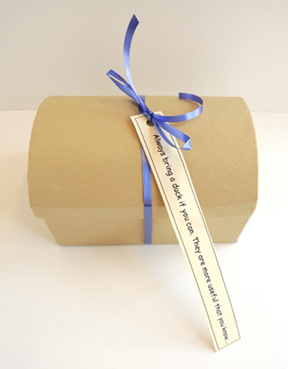
exterior of boxThe tag says “Always bring a duck if you can. They are more useful than you know.” That’s a quote from the book. It’s a very valuable piece of advice given to Leo when he finds the first box. Here’s an image of the full contents of the box:

contents of boxIn the book, Leo and his friend Remi have to follow cryptic clues, solve a number of riddles, and learn that things are not always as they seem. To replicate this experience for the story time kids, I grabbed mazes, optical illusions, and riddles from the internet.
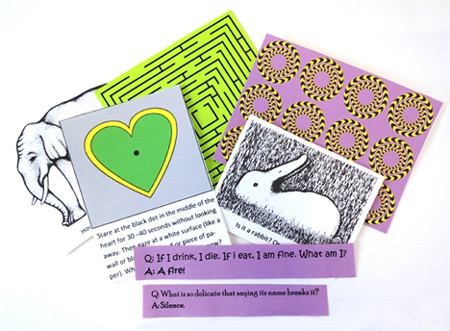
mazes, optical illusions, riddlesI also scanned some Thinklers (i.e. visual riddles) from the book Thinklers! by Kevin Brougher (Missing Piece Press, 2000).
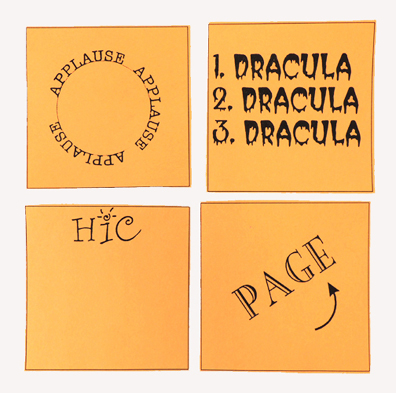
thinklersSince Merganzer engineered the Whippet himself, I included suggestions for a couple building projects involving things like gumdrops, marshmallows, toothpicks, toilet paper tubes, and card stock.
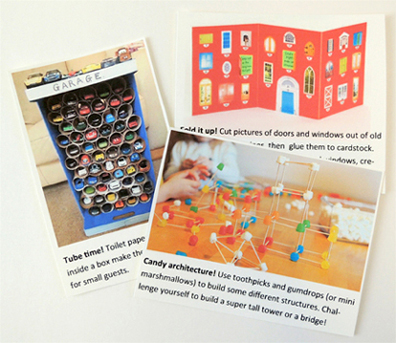
building activitiesThe rooms at the Whippet Hotel are fantastical and amazing. So I did a Google search for unusual real-life hotel rooms. And I found them. Oh yes I did. You must check out the ICEHOTEL in Sweden. Wow.
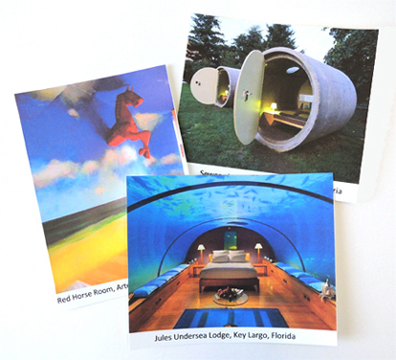
unique hotel roomsMr. Whippet is obsessed with ducks, and Betty the duck saves the day more than once. So I rounded up some duck jokes, duck memes, and other miscellaneous duck items.
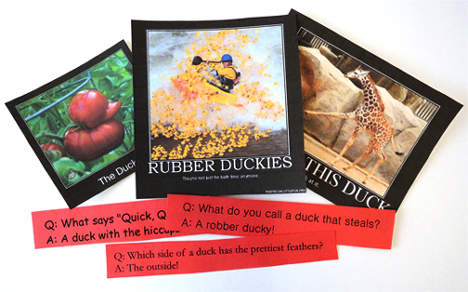
duck memes, jokesI topped everything off with a rubber mini-duck. I found these on Amazon (12 for $6.87).
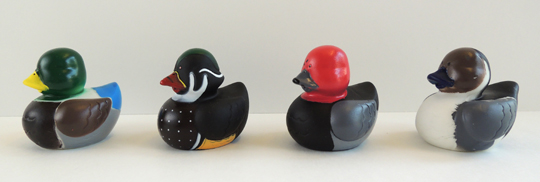
ducksReady to put together a box? Here are the templates you’ll need to reproduce everything.

The box tag template for the exterior of the box (you’ll need a hole punch too).

The box contents template 1 consists of 3 pages of duck memes, building activities, optical illusions, and images of unique hotel rooms. Since the images are in color, print them on white paper (card stock works great).

The box contents template 2 consists of 4 pages of Thinklers, mazes, riddles and duck jokes. I recommend printing each page on a different color paper. Also, to economize a little, I repeated the duck jokes and riddles twice on a single page.

Have fun! And may the duck be with you, always.

Click Clack Awesome

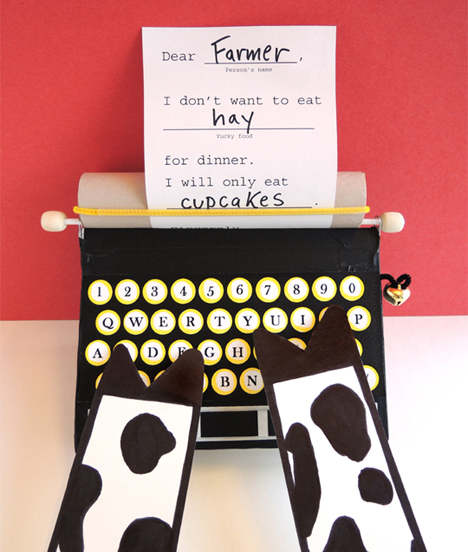
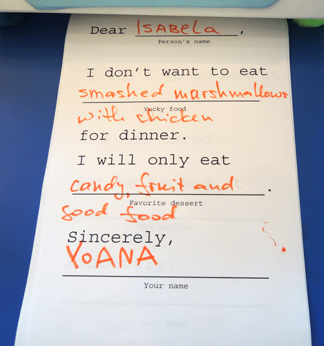
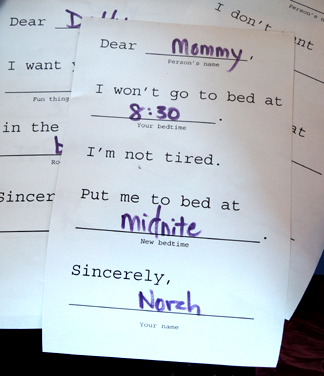
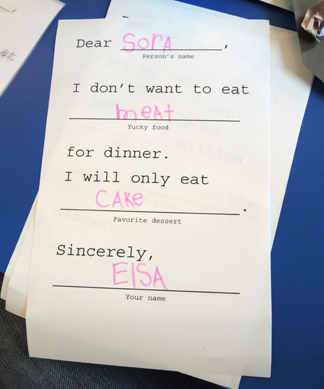
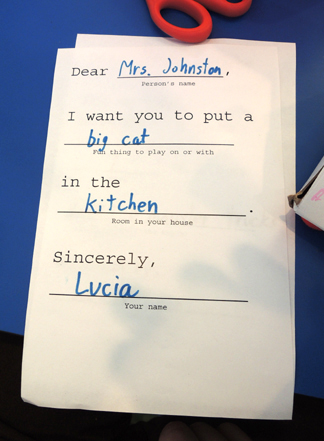
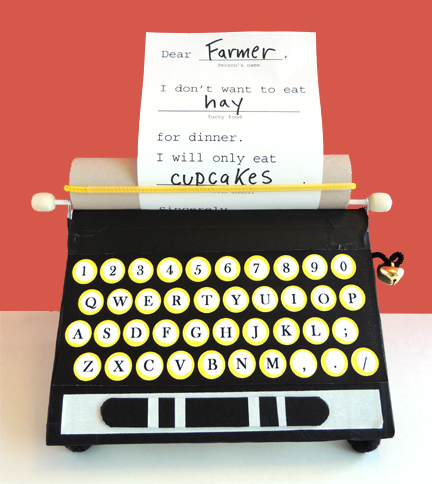
click clack awesome againCows that type? Yes indeed. You can too, using this awesome box typewriter and funny Mad Lib letters!
We read Click, Clack, Moo: Cows That Type, written by Doreen Cronin, and illustrated by Betsy Lewin (Simon & Schuster, 2000). It’s cold in the barn at night, and the cows have had enough. They type a note to Farmer Brown requesting electric blankets. When he doesn’t comply, the cows go on strike. No milk! The hens are cold too and soon it’s no milk, no eggs at the farm. Infuriated, Farmer Brown types a note demanding milk and eggs, reminding the protesting parties that they are, after all, cows and hens. The cows hold a meeting, and a counteroffer is made. The typewriter in exchange for electric blankets. Done! Farmer Brown delivers the blankets, but the typewriter appears to be missing. Until a note arrives from the ducks. They want a diving board.

You’ll need:

  • 1 box (mine was 4 ½” X 4 ½” x 9”). A large tissue box works great too
  • A box cutter
  • 2 paperclips (mine were 1.75″ long)
  • A selection of color masking tape
  • 2 jumbo craft sticks (mine were 6″ long)
  • 1 typewriter keyboard template, printed on 8.5″ x 11″ white card stock
  • 1 paper towel tube, cut down to 8.5″ long
  • 1 piece of construction paper
  • 1 balloon stick, cut down to 10.25″ long (a wooden dowel works too).
  • 2 wooden beads
  • 1 pipe cleaner
  • 1 drinking straw
  • 4 pom-poms (mine were 1″ in diameter)
  • 1 typewriter letters template, printed on two, 8.5″ x 11″ sheets of paper
  • Scissors and tape for construction
  • Markers for decorating
  • Hot glue

Optional bell:

  • A small piece of pipe cleaner (approximately 4″ long)
  • 1 jingle bell

The majority of this project will be demonstrated using a white craft box, but I’ll show you how a regular old tissue box (the long, rectangular kind) can be adapted too!

finished typewriter with paperWe’ll start with the craft box. Use scissors to cut the tabs off the box, then cut diagonally down each side like so:
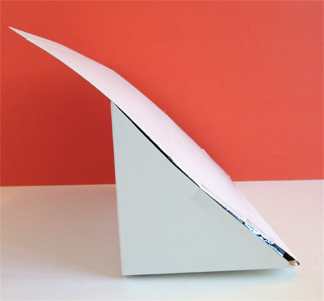
typewriter box step 1Push the tall, right-hand side of the box against the diagonal sides, and secure with tape.

typewriter box step 2Fold the overhanging section over the back of the box, trim down the resulting flap, then tape the flap to the back of box.

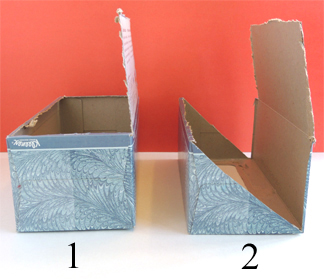
folding the boxIf you’re using a tissue box, follow these steps. Flip the tissue box over so the opening for the tissues is resting on top of the table. Then, use a box cutter to cut a hinged top like so:

tissue box step 1Now use scissors to cut diagonally along the sides of the box:

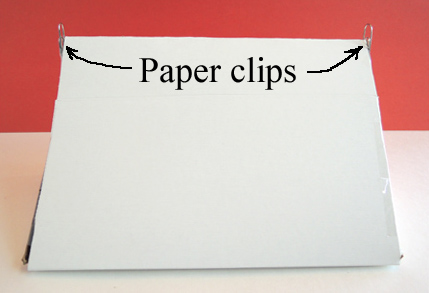
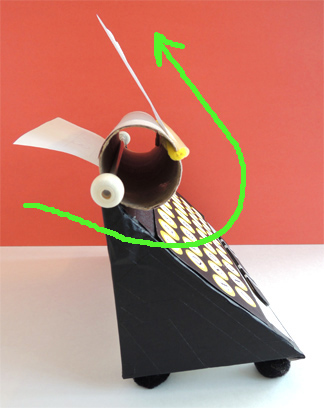
tissue box step 2Follow the exact same steps as the craft box to finish (i.e. fold the overhanging piece over the back of the box, trim it, and secure with tape). Done! Now turn the slanted part of the box towards you, and tape a paper clip to both sides of the box.

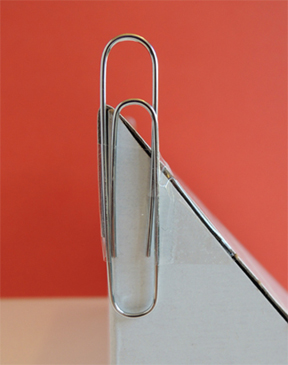
paper clip placementThe orientation and placement of the paper clip is important. The end of the paper clip with the double curves needs to be sticking upwards like this.

typewriter paper clip

Later, the upper parts of the paper clips will hold the axle of your typewriter’s “cylinder” (i.e. the round thing that your typewriter paper wraps around).

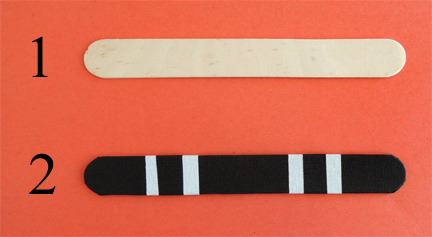
Decorate the back, sides, and front of the typewriter with color masking tape (or just use markers). Decorate a jumbo craft stick as well (the stick will eventually become your typewriter’s “space bar”). I used color masking tape for the space bar you see in the image below, but markers work great too!

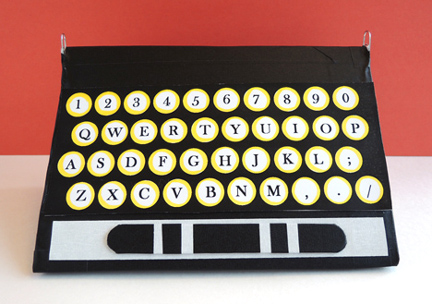
space barColor and hot glue (or tape) the typewriter keyboard template to the front of the typewriter (if you don’t like the all white template, here’s one with a black background). Note: the keyboard template doesn’t go all the way to the top of the box. That’s good! You want it to be at least 1″ below the top of the box (otherwise, the keyboard will get covered by the cylinder). Finally, hot glue (or tape) the craft stick space bar to the bottom of the box.

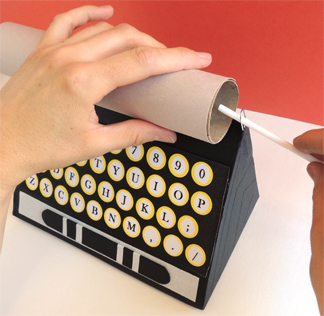
typewriter keyboardOK! Now for the cylinder! Wrap an 8.5″ paper towel tube with construction paper (we used gray paper). Then thread a 10.25″ balloon stick through the first paperclip, the paper towel tube, and the second paper clip.

threading paper clipThe cylinder is now secured on its balloon stick axle, which is in turn held in place by the 2 paper clips.

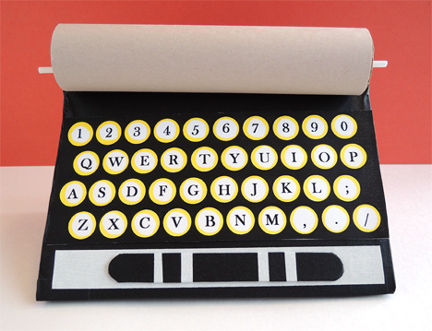
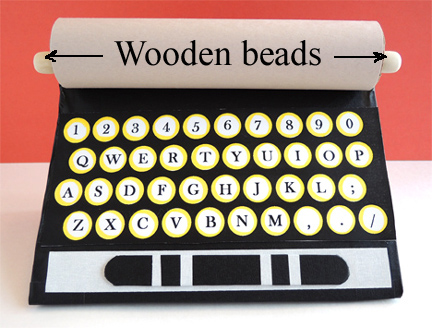
typewriter balloon stickWe slid 2 wooden bead on the ends of the balloon stick to keep it in place (masking tape or scotch tape on the ends of the sticks works too!).

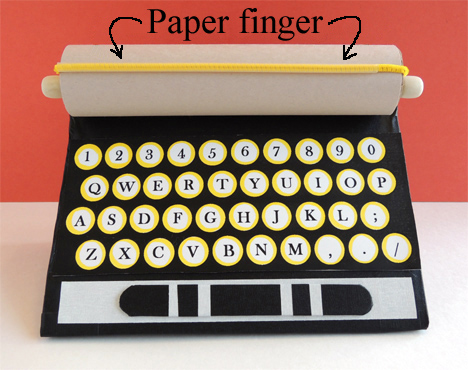
typewriter wooden beadsYour cylinder now needs a “paper finger,” (i.e. the little mechanism that keeps the paper from flopping over). Believe it or not, it took us FOREVER to figure out how to make this simple and workable with easy-to-use materials. The winners? A drinking straw and a pipe cleaner. I only had clear drinking straws in the art cabinet, so it’s a little hard to see it in the photo below. You’ll definitely need it. The smoothness of the straw allows the paper slide easily!

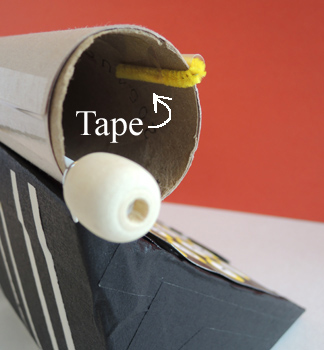
attached paper fingerThread a pipe cleaner through a drinking straw. Bend the ends of the pipe cleaner inside the cylinder and secure with tape. The paper finger shouldn’t be super tight against the cylinder – leave a little wiggle room for the paper!

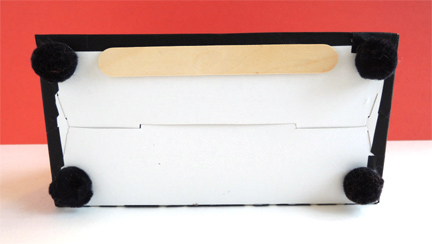
attached pipe cleanerAlmost there! Flip your typewriter on its back, and hot glue 4 pom-poms on each corner. Hot glue a jumbo craft stick to the front of the box. This will add some weight to the front of the typewriter, and act as a counterbalance the cylinder.

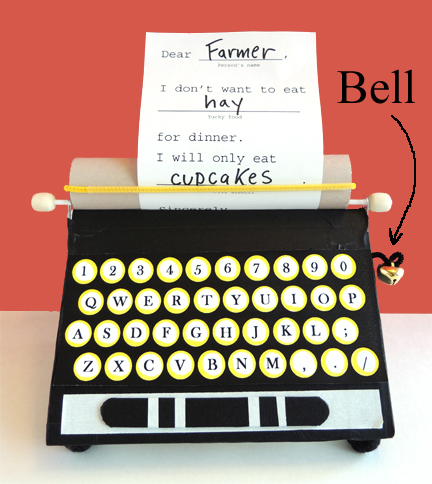
underside of typewriterYour typewriter is finished!

finished typewriterReady to load some paper? Starting from the back, slide an 5.5″ x 8.5″ piece of paper under the cylinder, then curl and tuck the paper under the paper finger. Tug it upwards a little, and you’re done!

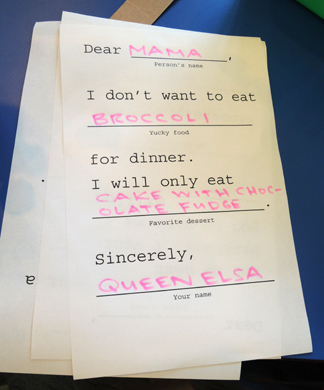
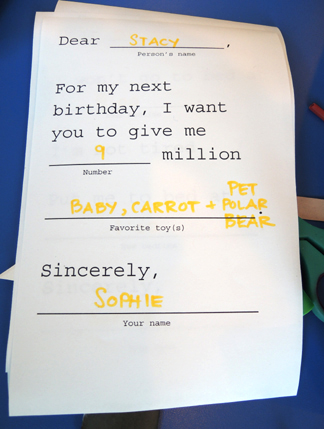
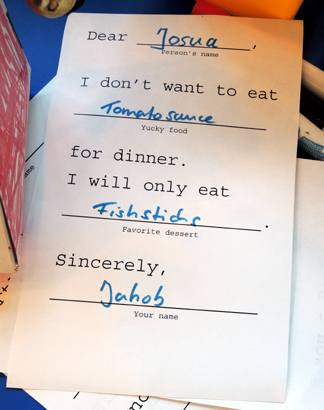
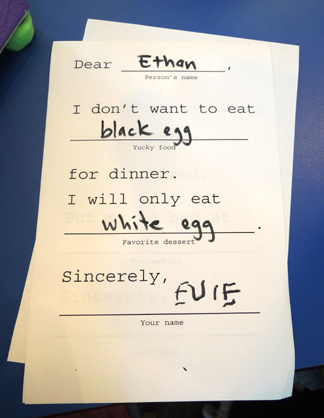
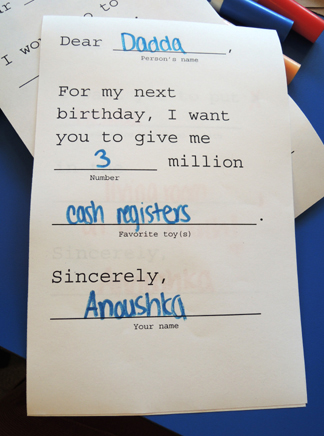
typewriter paperYou can put a blank sheet of paper in your typewriter, or you can use the Mad Libs we created on our typewriter letters template. I recommend the Mad Libs. The kids and their caregivers had quite a bit of fun filling them out! I managed to catch a couple at story time.

letter 1letter 2letter 3letter 4letter 7letter 8letter 5letter 6

letter 9One last thing! You’ll notice that the finished typewriter has a bell. The bell is optional, but I have to say, it was pretty cute. There are a couple ways to attach it.

finished typewriter with bellFirst, thread a jingle bell through a 4″ piece of pipe cleaner, then curl one end of the pipe cleaner to keep the bell from sliding off.

Then you can either:

  1. Tape the uncurled end of the pipe cleaner to the upper right-hand corner of the typewriter before you hot glue the keyboard on.
  2. Peel the upper right-hand corner of the keyboard back, tape the uncurled end of the pipe cleaner to the typewriter, and re-adhere the corner of the keyboard.
  3. Tape the pipe cleaner to the side of the typewriter.

At our story time, we went with option 1, and attached the bell early in the project. For option 1 or 2, just make sure that the keyboard completely covers the uncurled end of the pipe cleaner. Otherwise, the pipe cleaner could snag your typewriter paper (or poke your fingers) as you’re loading it on the cylinder.

Ghostbusters

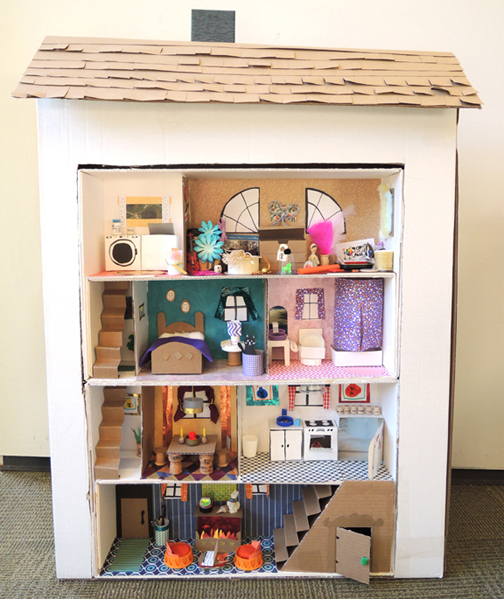
ghostbustersWhat do you do when your dream house is haunted? Call in a professional ghost remover of course! We decorated a ghost box, whipped up 4 tissue paper ghosts, and then went a-ghost huntin’ in this custom 4-story cardboard house.

exterior house 1I hid each kid’s ghosts in various locations in the dollhouse and then invited him/her to find them and tuck them back in his/her ghost box!
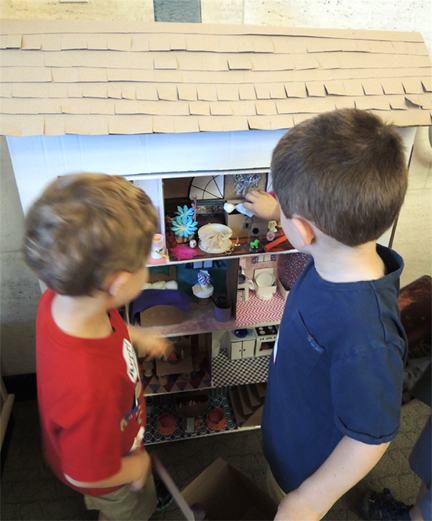
ghost in atticWe read Ghosts in the House by Kazuno Kohara (Square Fish reprint edition, 2010). A girl (and her cat) move into a new house but…oh my…the house is haunted by ghosts! The girl, however, happens to be a witch and quickly begins catching the ghosts. After a spin in the washing machine, the ghosts happily become curtains, tablecloths, and cozy blankets. This book was in the holiday section of my local library but it’s so sweet and fun, it really should be read year-round!

You’ll need:

  • A box (mine was 4 ½” X 4 ½” x 9”)
  • Brown masking tape (or a selection of color masking tape)
  • 2 small pieces of mirror board (approximately 1″ x 1.75″ and 1.25″ x 1.25″)
  • Black permanent marker
  • Box decorating materials – I offered embossed foil paper, patterned paper, construction paper (blue, black, gray, purple, orange, pink), mirror board, small feathers, fabric leaves, white 6″ doilies, foil star stickers, and fabric flowers.
  • 12 squares of white tissue paper (approximately 6.5″ x 6.5″)
  • 4 pieces of white yarn (approximately 6″ long)
  • 1 ghost house (more on that below!)
  • Scissors, tape, and glue stick for construction
  • Markers for decorating
  • Hot glue

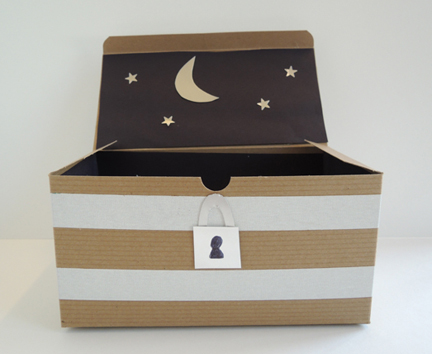
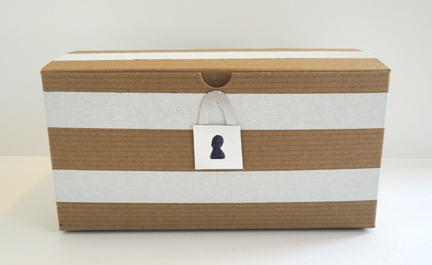
Begin by decorating a box for your ghosts to live in. The exterior should be quite minimal (the interior is where you go a little wild). I went for an old-fashioned steamer trunk with a padlock:

box closedIf you’re using a patterned tissue box, you might want to cover it with construction paper or paint first. Then use brown (or color) masking tape to create lines on the outside of the box.

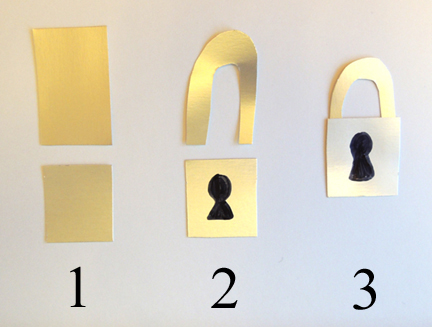
To make a padlock, cut a rectangle of mirror board into an upside-down U shape. Use a black permanent marker to draw a keyhole on a square piece of mirror board. Hot glue (or tape) the U shape to the back of the keyhole square. Attach the padlock to the front of the box with hot glue (or tape).

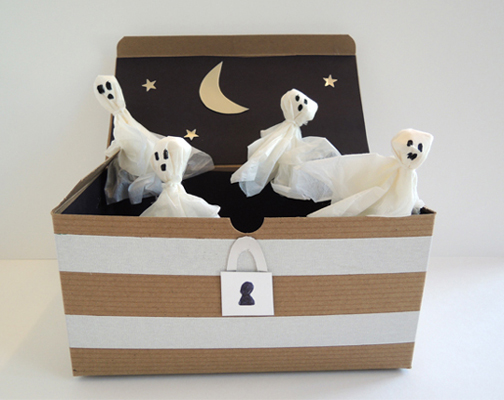
padlockThe exterior of the box is finished, now for the interior! I decided to go for a classic “night sky inside a box” for my ghosts. I lined the inside of the box with black construction paper, added foil stars, and finished the look with a crescent moon.

box openSome kids replicated this look, but others used embossed foil paper, patterned paper, small feathers, fabric leaves, white 6″ doilies, and fabric flowers to whip up some amazing ghost domiciles.

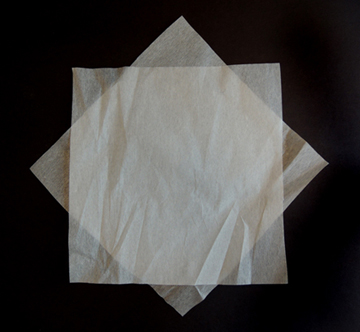
With the box finished, it’s time for the ghosts! Take 2 squares of white tissue paper and lay them flat on top of each other like so:

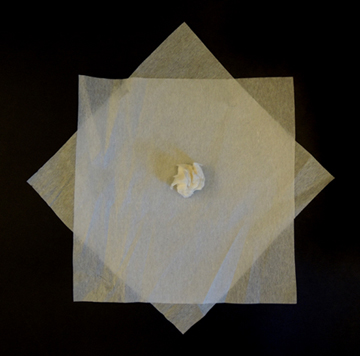
ghost step 1Then crumple a third tissue square and place it in the middle of the flat squares.

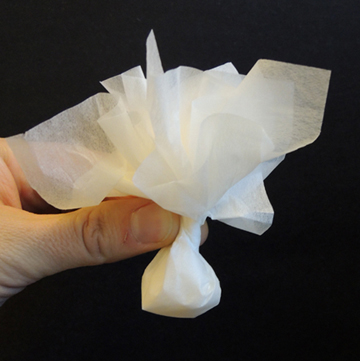
ghost step 2Bunch the flat squares around the crumpled tissue and pinch tightly,

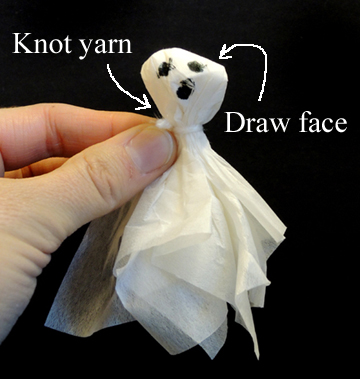
ghost step 3Flip the tissue bunch over and knot a piece of yarn around it to created your ghost’s neck. Trim off any excess yarn and use marker to draw a face. Repeat these steps until you have 4 ghosts.

ghost step 4You have a box, you have ghosts, now for the house! If you’d like to keep it super simple, hide the ghosts in different locations in a room, classroom, or library. You could even turn off the lights and use a flashlight for an extra spooky ghost hunt. However, if you’d like recreate our ghost house, read on!

My colleagues in Firestone Library know to call me if they’re about to dispose of any large or unusually shaped boxes (you can read more about our library-wide recycling program here). So this dollhouse began as a tall, 6″ x 33″ x 41″ box. I also had a couple old archive boxes to use up (you can see more of them in action in this post and this post).

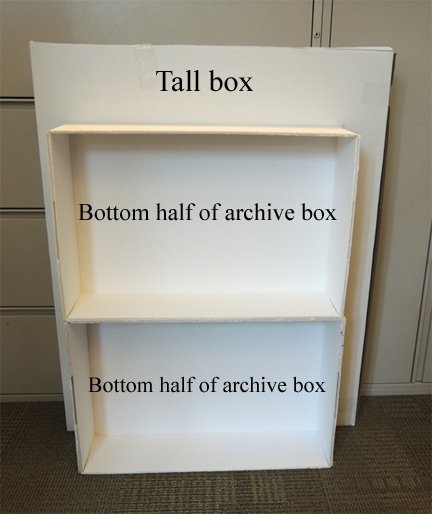
just the boxFirst, Katie and I measured where the stacked archive boxes hit the tall box, and then cut a big hole in the tall box for the archive boxes to slide into. The leftover cardboard was used to make the roof (to which I added some tagboard shingles and a cardboard chimney).

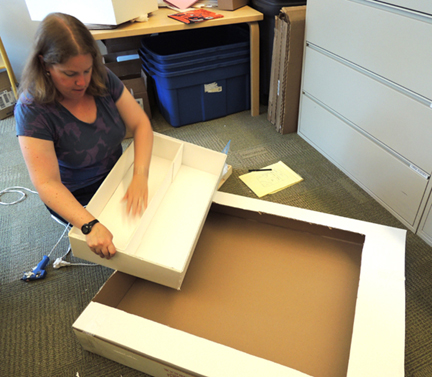
Next, we sliced one of the archive box’s lids in half and hot glued the halves inside the two archive boxes. This created four “floors” in our ghost house. We finished by hot gluing the archive boxes inside the tall box, and added a few pieces of packing tape for good measure.

gluingTo keep the house upright and sturdy, we hot glued a 5.5″ x 17″ x 25.5″ box to the back as a base. We reinforced the connection with lots of packing tape too. We knew it was going to get bumped and bashed by the ghost hunters!

baseNext, Katie used pieces of corrugated cardboard to create the walls that divided the rooms, and tagboard to make the staircases. You can see the whole thing evolving here. And this is only the beginning of the mess we made that day. Oh yes it is.

dana and katie With the basic elements in place, we decorated the interior. For hours and hours. Katie’s son even stopped by at the end of the day to get in on the fun (my favorites are the laptop in the living room and the Angry Birds artwork in the kitchen). But rather than go into excruciating decorating details, here are photos of the different rooms of the house, as well as some ghosts demonstrating various hiding places.

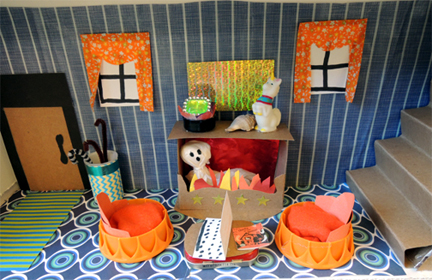
Living Room

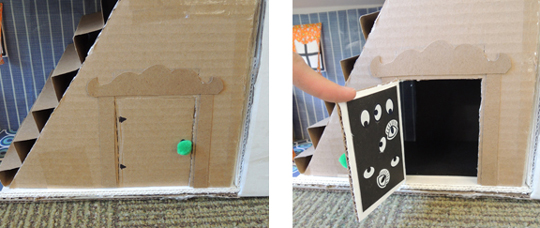
ghost in living roomDark closet under the “grand” staircase (spooky eye stickers courtesy of Katie’s son)

closet under the stairsSmall Staircases

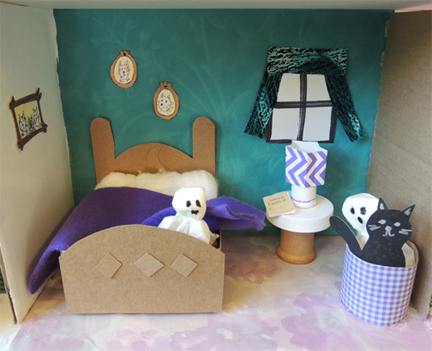
ghost on stairsBedroom

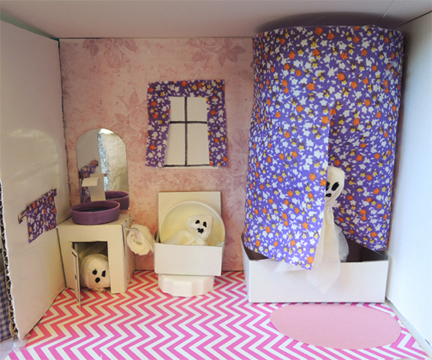
ghosts in bedroomBathroom

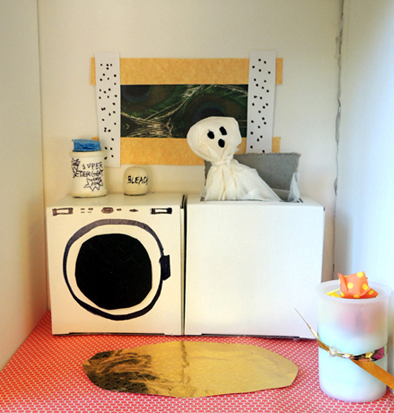
ghosts in bathroomLaundry Room

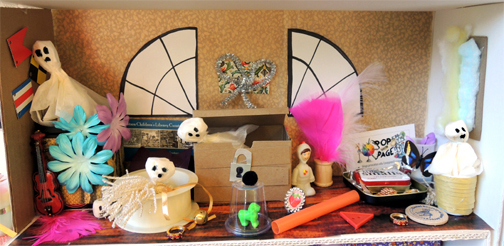
ghost in laundry roomAttic (complete with Amityville windows)

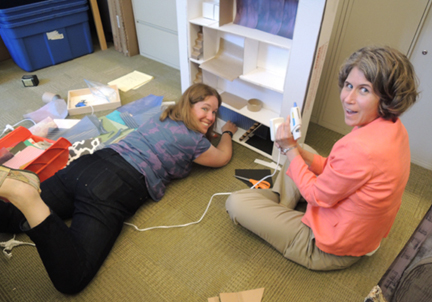
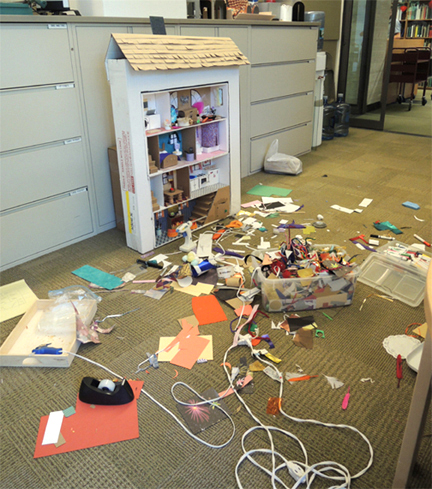
ghosts in the atticAnd here is a photo of the tremendous mess we made during the building of the ghost house. Oh yeah.

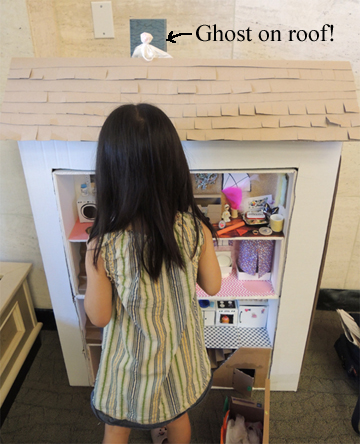
tremendous messDuring story time, kids could play the ghost hunting game as many times as they liked. I came up with some pretty creative new places to hide ghosts (like the overhead light fixture in the kitchen, and the roof).

ghost on roofAt the very end of story time, interested parties put their names in a hat and the winner took home the ghost house! If, however, you’re still yearning for more dollhouses and miniatures, mosey on over here to see some truly spectacular Harry Potter creations.