 Start your day out right with some toasted bread, butter, jam, and a delicious beverage. Thanks to your magic magnetic knife, preparing breakfast has never been easier (especially when there are hidden paperclips in your essential ingredients)!
 We read Hooray for Bread, written by Allan Ahlberg and illustrated by Bruce Ingman (Candlewick, 2013). One morning, a lovely loaf of bread is born. The story follows the loaf of bread as it progresses, slice by slice, throughout the day. Breakfast for the baker’s wife, a sandwich for the baker’s boy, a snack for the ducks in the park, afternoon tea, and so on until the last crumb serves as a meal for a mouse. Hooray hooray for bread!
You’ll need:
- 1 “toaster” box (mine was 4 ½” X 4 ½” x 9”)
- A box cutter
- 2 rectangles of white poster board for bread slices (mine were 5″ x 6.5″)
- 2 jumbo paperclips (approximately 2″)
- 1 wooden coffee stirrer
- 1 pipe cleaner
- 2 rectangles of self-adhesive foam (approximately 1.5″ x 2″)
- A selection of color masking tape
- A selection of self-adhesive foam shapes
- 4 small pom-poms (mine were 1″ in diameter)
- 1 large rectangle of white poster board for “place mat” (mine was 11″ x 15″)
- A selection of patterned tape
- 1 paper plate
- 1 square of white paper towel (mine was 5.5″ x 5.5″)
- 3 paper cups
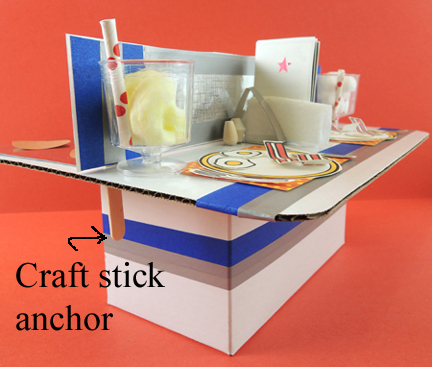
- 1 jumbo craft stick (mine was 8″ long)
- 1 button magnet (mine was 3/4″)
- 1 piece of aluminum foil (approximately 2.75″ x 5.5″)
- 2 squares of yellow self-adhesive foam for “butter” (approximately 1.5″ x 1.5″)
- 2 rectangles of purple cellophane for “jam” (approximately 3″ x 4.5″)
- 2 small paperclips (approximately 1.5″)
- Scissors and tape for construction
- Markers for decorating
- Hot glue
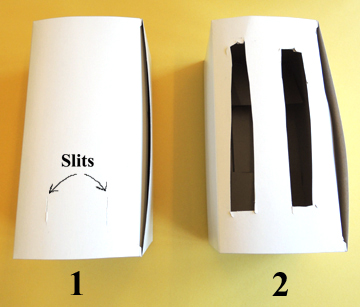
 Begin with the toaster! Use the box cutter to cut two slits in the top of the box. Then use scissors to enlarge the slits into rectangular toaster slots.
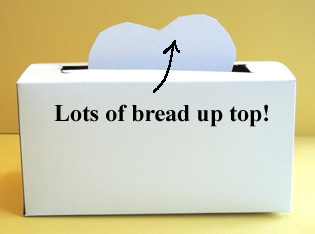
 Next, cut bread shapes from the 2 pieces of white poster board. Make sure the top of the bread extends well past the top of the toaster. Otherwise, your bread will fall into the toaster and you’ll have to constantly fish it out (and even with a fake toaster, I hate to see kids thrusting anything that looks like a knife into anything that looks like a toaster)!
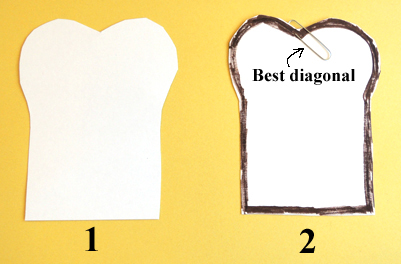
 Use markers to draw crusts on your bread, and then slide a jumbo paperclip diagonally on each slice (this will create a nice, semi-horizontal surface for the magnet to attach to).
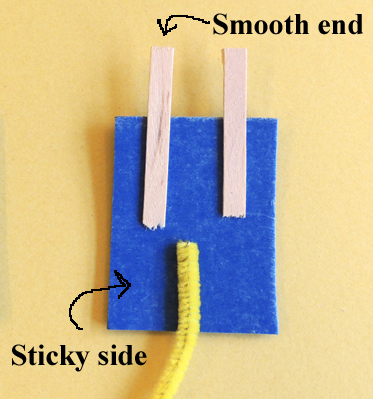
 To create the toaster cord and plug, break both ends off a wooden coffee stirrer (each piece should be about 1.5″ long). Then, peel the backing off a rectangle of self-adhesive foam. Press the coffee stirrer pieces AND the pipe cleaner onto the sticky backing (making sure the smooth ends of the coffee stirrer are sticking out) like so:
 Peel the backing off the second rectangle of self-adhesive foam and press it firmly on top of the first rectangle. Use scissors to cut the rectangles into a plug shape.
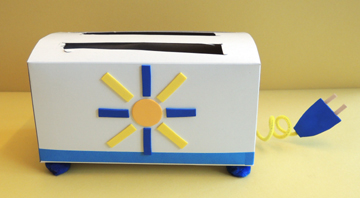
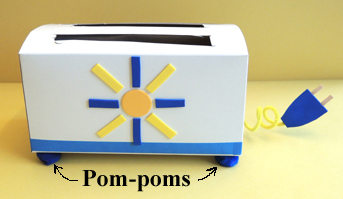
 Curl the pipe cleaner “cord” around a marker to make it spiral, then tape it to one end of the box. Decorate your toaster with color masking tape and self-adhesive foam shapes. Finish by hot gluing four pom-poms on the bottom of the toaster for “feet!”
 Your toaster is complete – time to set the table!
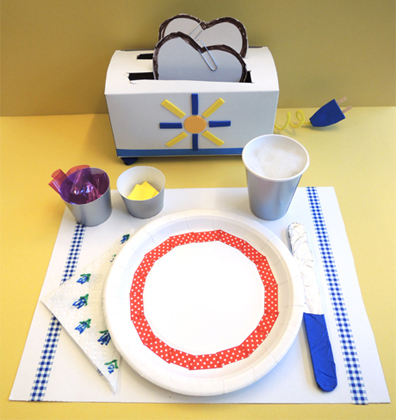 Use markers and patterned tape to decorate your place mat, plate, and napkin. Two of the paper cups will hold your butter and jam, so you’ll need shorten these cups with scissors (my butter cup was approximately 1.5″ tall, and my jam cup was 1.75″ tall).
I hot glued the plate, napkin, and the two shortened cups to the place mat to make it easier to carry. I left the “beverage” cup and the knife unglued (and filled the beverage cup with polyester fill “milk” or “soy milk”).
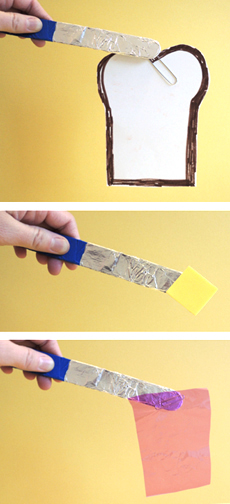
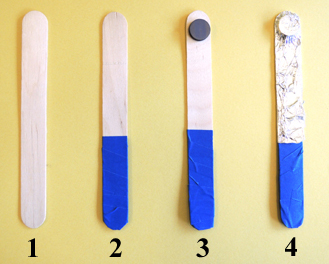
To make the magic knife, wrap the bottom of a jumbo craft stick with color masking tape. Then hot glue a button magnet to the top of the craft stick (I did this step in advance to save time). Wrap the upper section of the stick with aluminum foil.
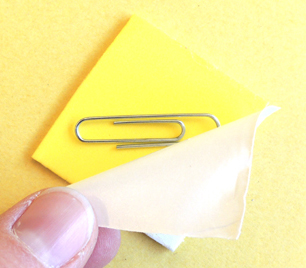
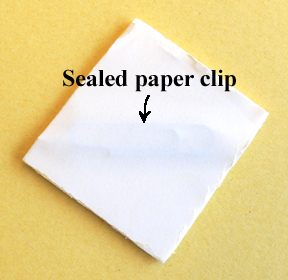
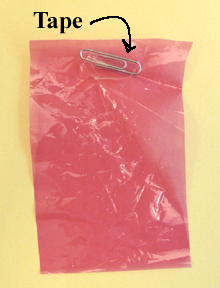
 The final step is to prepare your butter and jam for the magic knife! Peel the backing off the yellow self-adhesive foam square, but don’t pull it all the way off! When you’re about halfway peeled, press the small paperclip onto the sticky back of the adhesive.
 Then re-attach the backing to the foam square, sealing the paperclip in.
 To create jam, simply tape a small paperclip to the purple cellophane.
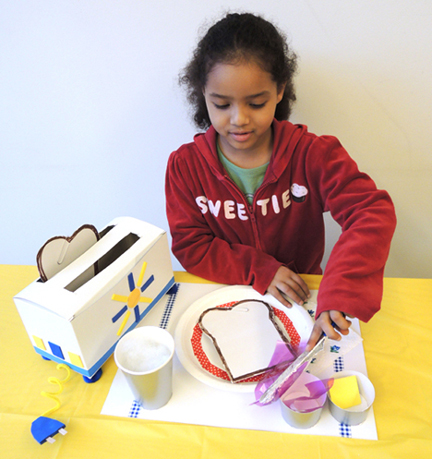
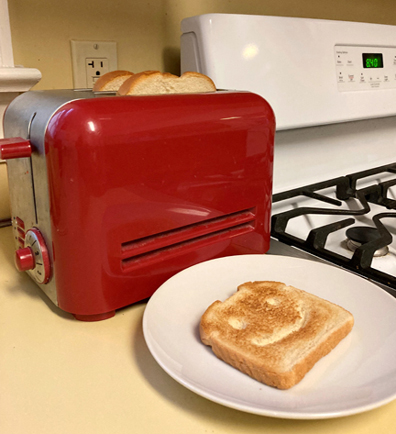
 Ready for breakfast? Place the butter and jam in their cups, then use the magic knife to fetch the bread from the toaster, carry it to the plate, and load on the toppings!

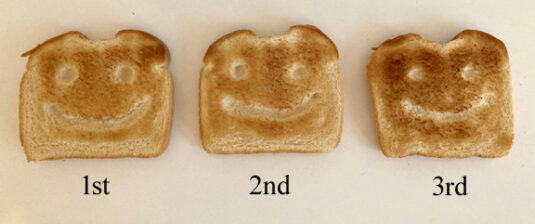 The answer is basically no. Above you can see 3 slices of toast cooked on the 1st, 2nd, and 3rd settings on my toaster. The design appears about the same. Or…maybe I did the experiment so I would have an excuse to eat three yummy slices of toast that morning? Hmmmmm. Totally not telling.
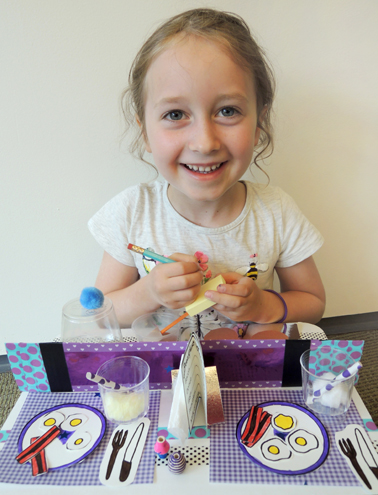
 If you like, you can use
 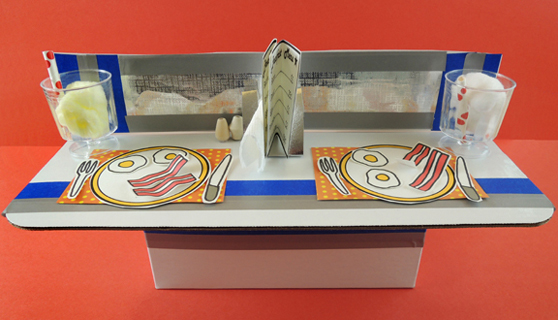 The plates, utensils, food, and menus are on the template. We used
 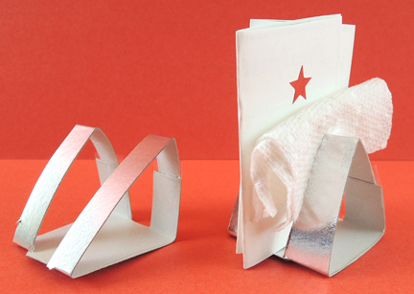 Basically, these are triangles of silver
 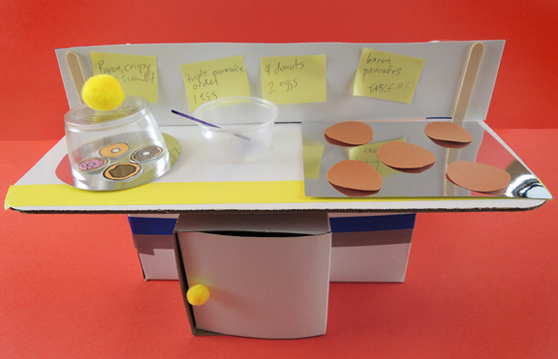 The donut dome is a plastic cocktail cup that has been cut down to 1.5″ and has a small pom-pom hot glued on top. There’s mirror board plate underneath it, and a mirror board griddle as well. There’s also a plastic sample cup mixing bowl with spatula (that’s a bit of silver mirror board taped to a mini craft stick). The pancakes are construction paper. Oh, and we included a fridge made out of a little box, but that’s totally optional.
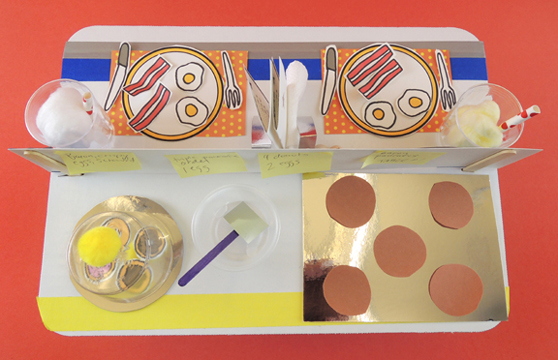 Miniature food sets are REALLY popular at story time. Sometimes, I hear about kids who are still playing with their sets months – sometimes years! – after story time (specifically our
 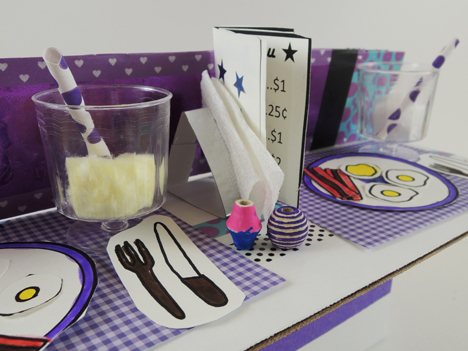 Look at the gorgeous purple decor! The carefully detailed salt and pepper shakers! The purple stripes on the bacon!
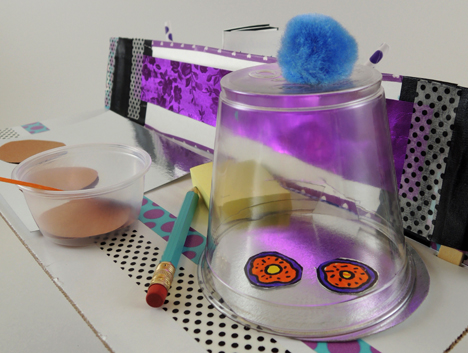 Which are only surpassed by the purple donuts. And then the black polka dots! LOVE.