Top Secret Fooj

foojA recent re-reading of Chitty-Chitty-Bang-Bang inspired today’s post! This highly entertaining and action-packed book was written in 1964 by Ian Fleming. Yes, THE Ian Fleming. Who knew the book would lead us on a mission of the chocolate variety?

Chitty-Chitty-Bang-Bang follows the adventures of the Pott family and their fabulously magical car, Chitty-Chitty-Bang-Bang. At one point in the story, some gangsters force the Pott twins, Jeremy and Jemima, to assistant in the robbery of Le Bon-Bon, the world’s most famous chocolate shop. The clever children manage to save the day, and, as a reward, the shopkeepers reveal the secret recipe for their famous fudge (which they pronounce “fooj”). The recipe is included at the end of the book (click the image to enlarge it).

recipe in book

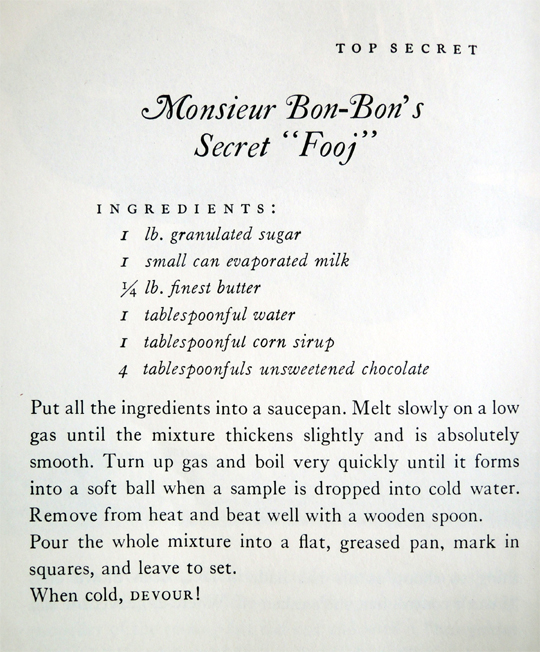
From Chitty-Chitty-Bang-Bang. Random House, 1964.

So…what does the famous fudge taste like? Does the recipe hold up after 51 years? Katie decided to test drive it in her kitchen. Take it away Katie!


With my trusty sous-chef son by my side, we gathered and set out all of the ingredients for the “fooj.” There were only a handful of items needed to make the fudge and most we had on-hand in our pantry. We did have to purchase corn “sirup” (we went with the clear corn syrup, not dark) and a bar of unsweetened chocolate (from Ghirardelli, yum!). We also had to figure out a few measurements, like how many ounces are in a tablespoon (the answer is 0.5 ounces).

We took a wild guess at how much evaporated milk to use because the recipe called for one small can, so we used a 5 ounce can rather than the 12 ounce. Trusting our guts and confirming measurements courtesy of Google, we set forth to make our own batch of fudge.

adding milk
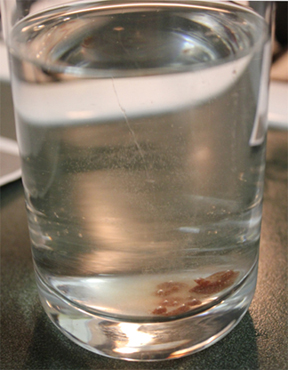
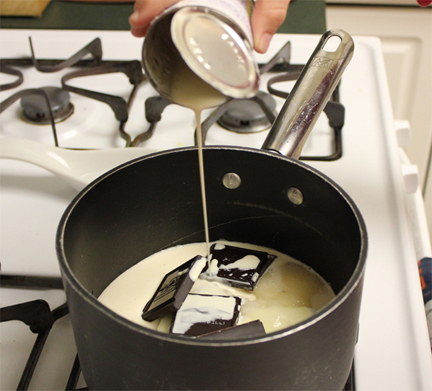
We followed the recipe exactly as it was written. It took some time to slowly melt all of the ingredients together, but this step probably would have been faster if we hadn’t used frozen butter. It didn’t take long for the mixture to start boiling, and we were careful to not let the chocolate burn on the sides of the pot. Incredibly, the fudge did form into little balls when dropped into a glass of cold water! I was skeptical of this description listed in the recipe, but was amazed when we watched it happen.

water test
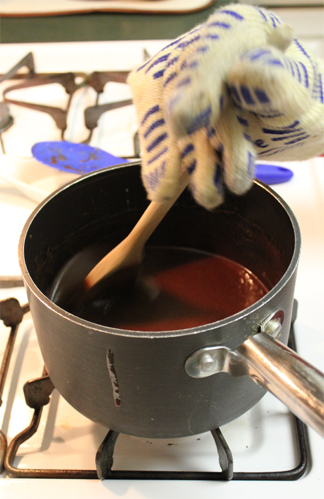
We even beat the boiling hot fudge mixture with a wooden spoon instead of the silicone mixing spoon we had been using earlier.

wooden spoon Once we decided it had been appropriately beaten, we poured the concoction into a greased pan to cool. I used a toothpick to draw lines and mark the fudge into small squares. This is when I had my first inkling that something was not quite right. The marks immediately disappeared. I figured the fudge just needed to harden and then I could redraw the square lines.

scored fudge
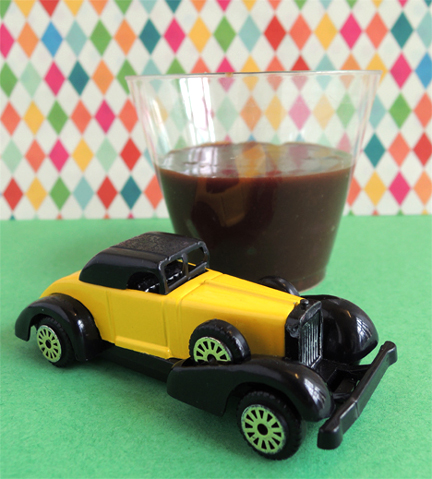
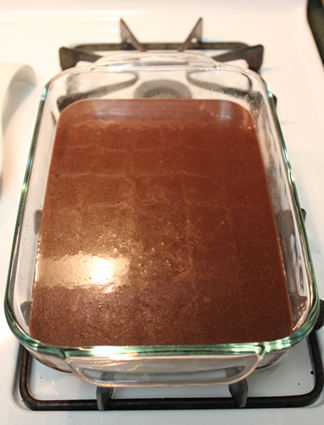
However, the fudge never hardened. It remained a gloopy, runny mess. I put the fudge into the freezer to see if that would help the hardening process. Freezing it worked great, but then the fudge was rock solid and nearly impossible to cut. Once it cooled, it was back to its original state.

Cue sad music. Fudge failure.

However, the fudge didn’t completely go to waste. We asked a number of kids to try the fudge to let us know what they thought of it. Here’s what they said:

Boy, age almost 9: I think it looks like fudge. It tastes good, really good! Can I have more?

Girl, age 10: I think the fudge kind of looks like brownie batter. Mmm, it’s good!

Boy, age 8: The fudge does not look like fudge. It’s not square. It’s flat and round, like a pancake. It tastes sweet, but it doesn’t really taste like fudge. It tastes like a Hershey chocolate bar.

Girl, age 9: It tastes like chocolate. I can’t tell if it’s milk chocolate, but I like that it is creamy. It doesn’t look like normal fudge, but I like it!

Monsieur Bon-Bon’s Top Secret “Fooj” recipe remains a secret because somewhere between the written page to my kitchen, the recipe got lost in translation. In an effort to discover what I may have done wrong, I again consulted Google and learned from experienced bakers that making fudge can be quite a difficult task. It has to be boiled to a certain temperature after slowly melting the ingredients together, and it has to be beaten for an exact amount of time before pouring it into a pan. Apparently I failed at one or both of these steps.

Perhaps the fudge needed to be shaken, not stirred.

Creative Cookies

creative cookiesWhat could be better then stepping into a warm, fragrant kitchen and whipping up a tasty batch of cookies? Especially when the cookies magically appear in our one-of-a-kind story time oven!

cookie in ovenWe read Ginger Bear by Mini Grey (Knopf Books for Young Readers, 2004). Horace and his Mum make cookies, but the consumption of Horace’s ginger bear is continually delayed by trifling matters such as the cookie being too hot, the hour being too close to dinner, and Horace’s freshly brushed teeth. So Horace puts the cookie on his pillow for tomorrow. That night, Ginger Bear wakes up and marches to the kitchen. A few simple ingredients, some delicious toppings, and Ginger Bear creates a massive cookie circus! The revelers are having a grand time when they are intruded upon by Bongo the Dog, who really, really likes cookies. You can imagine what happens next. Ginger Bear just manages to get away, and realizes that he needs to find a safer place to live. The next morning, Horace awakes and Ginger Bear is gone. The clever cookie has found a new home in a pastry-shop window, where, as star of the elaborate displays, he will never be eaten!

You’ll need:

  • 4 rectangles of felt, any color (approximately 5.5″ x 8.5″)
  • 1 pencil
  • A selection of fabric tape (optional)
  • 1 cookie template, printed on 8.5″ x 11″ white card stock
  • A 6.75″ x 14.5″ piece of tagboard for cookies (brown poster board works too!)
  • Cookie decorating supplies (we used self-adhesive foam shapes, a selection of patterned tape, and dot stickers
  • A corrugated cardboard base (mine with 9.75″ x 13.75)
  • Tin foil to cover the cardboard base
  • 1 magic oven (more on this later!)
  • Scissors for construction
  • Markers for decorating
  • Hot glue

First, your oven mitts! Stack 2 rectangles of felt on top of one another, then place your hand on top of the stack (thumb out, fingers close together). Use a pencil to trace the outline of a mitt around your hand. You don’t want the mitts to be too snug, so make sure to leave plenty of room! Use scissors to cut your tracing from the stacked felt.

mitt step 1Now run a line of hot glue along the inside perimeter of the mitt (like you’re “stitching” the felt pieces together with hot glue). Make sure, of course, to leave the bottom of the mitt unglued so you can stick your hand in later. Next, attach a piece of fabric tape along the bottom of the mitt for decoration. Repeat the above steps with the second set of felt rectangles to make a second mitt.

finished mittIf you are attempting this project with a large number of kids, I have a helpful hint to share. Gluing pairs of mitts for close to 20 kids takes some time. To avoid long waits at our hot glue stations, I devised a number system not unlike the “Now Serving” mechanism at delis or bakeries. First, everyone cut their mitts from felt. Then, we handed out a number card to each child, as well as the materials for the next phase of the project – tagboard cookies and decorating supplies.

During the cookie decorating, we called out numbers. When your number was “up,” you paused your decorating and brought your mitts to a hot glue station. We glued your mitts, let you choose from a selection of fabric tape, and then sent you back to your table to resume decorating. Then we called the next number. The system worked like a charm!

numberMaking the cookies is quite simple. Cut the cookie shape from the template, then trace its shape onto the rectangle of tagboard (or brown poster board). You could also use brown construction paper for your cookies, but it helps to use a material like tagboard or poster board to gives the cookies some thickness. We made 3 cookies per kid. We offered markers, self-adhesive foam shapes, patterned tape and dot stickers as cookie decoratives, but you can also just use markers.

cookiesTo finish the project, wrap a corrugated cardboard base with tin foil to create a “baking tray.” Place the cookies on the tray, slip on your mitts, and you’re done!

You can stop here, or you can add a magic oven activity. We happened to have a big box and some cardboard scraps on hand (the scraps were left over from this project), so we made a magic oven.

magic ovenOur box was 18.5″ wide x 18.75″ high x 16″ deep. I cut an oven door in the front, and then Katie added a cardboard shelf inside of the oven, a flat range on top (with 4 paper plate burners), and a splash guard on the back. She tricked it out with red cellophane “heat,” tin foil highlights, and beverage lid knobs faced with large silver embossed foil seals. The over door handle was a paper towel tube wrapped in foil and attached to the door with brass fasteners.

The “magic” part of the oven was a small door, cut in the back. This is where I would sneak the cookies in, making them appear magically on the shelf.

magic doorI borrowed a call bell from the library’s circulation desk to act as the oven’s “timer.” During the story time activity, kids wrote their names on the backs of their cookies, then piled the cookies in a big tub next to the oven. Then they sat in a semi-circle around the oven, wearing their mitts and holding their trays.

I would grab a cookie from the tub, silently read the name on the back, and sneak it into the oven. Then I would shout “Dan! Your cookie is ready!” and briskly ding the call bell. Dan would run forward, open the oven, hustle his cookie out, and run back to his place in the semi-circle. We kept going until all the cookies were claimed!

magic oven in use

Breakfast is Served

breakfast is servedStart your day out right with some toasted bread, butter, jam, and a delicious beverage. Thanks to your magic magnetic knife, preparing breakfast has never been easier (especially when there are hidden paperclips in your essential ingredients)!

magic knifeWe read Hooray for Bread, written by Allan Ahlberg and illustrated by Bruce Ingman (Candlewick, 2013). One morning, a lovely loaf of bread is born. The story follows the loaf of bread as it progresses, slice by slice, throughout the day. Breakfast for the baker’s wife, a sandwich for the baker’s boy, a snack for the ducks in the park, afternoon tea, and so on until the last crumb serves as a meal for a mouse. Hooray hooray for bread!

You’ll need:

  • 1 “toaster” box (mine was 4 ½” X 4 ½” x 9”)
  • A box cutter
  • 2 rectangles of white poster board for bread slices (mine were 5″ x 6.5″)
  • 2 jumbo paperclips (approximately 2″)
  • 1 wooden coffee stirrer
  • 1 pipe cleaner
  • 2 rectangles of self-adhesive foam (approximately 1.5″ x 2″)
  • A selection of color masking tape
  • A selection of self-adhesive foam shapes
  • 4 small pom-poms (mine were 1″ in diameter)
  • 1 large rectangle of white poster board for “place mat” (mine was 11″ x 15″)
  • A selection of patterned tape
  • 1 paper plate
  • 1 square of white paper towel (mine was  5.5″ x 5.5″)
  • 3 paper cups
  • 1 jumbo craft stick (mine was 8″ long)
  • 1 button magnet (mine was 3/4″)
  • 1 piece of aluminum foil (approximately 2.75″ x 5.5″)
  • 2 squares of yellow self-adhesive foam for “butter” (approximately 1.5″ x 1.5″)
  • 2 rectangles of purple cellophane for “jam” (approximately 3″ x 4.5″)
  • 2 small paperclips (approximately 1.5″)
  • Scissors and tape for construction
  • Markers for decorating
  • Hot glue

toasterBegin with the toaster! Use the box cutter to cut two slits in the top of the box. Then use scissors to enlarge the slits into rectangular toaster slots.

toaster slitsNext, cut bread shapes from the 2 pieces of white poster board. Make sure the top of the bread extends well past the top of the toaster. Otherwise, your bread will fall into the toaster and you’ll have to constantly fish it out (and even with a fake toaster, I hate to see kids thrusting anything that looks like a knife into anything that looks like a toaster)!

bread up topUse markers to draw crusts on your bread, and then slide a jumbo paperclip diagonally on each slice (this will create a nice, semi-horizontal surface for the magnet to attach to).

bread steps To create the toaster cord and plug, break both ends off a wooden coffee stirrer (each piece should be about 1.5″ long). Then, peel the backing off a rectangle of self-adhesive foam. Press the coffee stirrer pieces AND the pipe cleaner onto the sticky backing (making sure the smooth ends of the coffee stirrer are sticking out) like so:

plug 
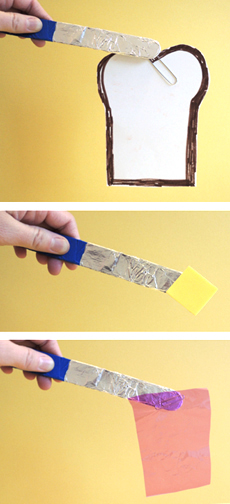
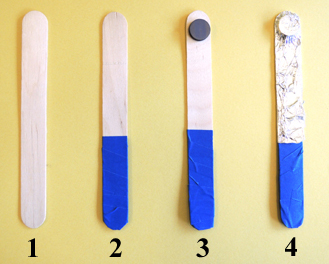
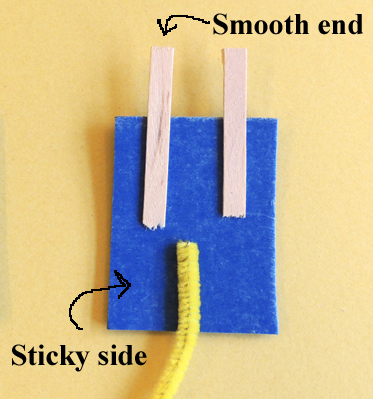
Peel the backing off the second rectangle of self-adhesive foam and press it firmly on top of the first rectangle. Use scissors to cut the rectangles into a plug shape.

finished plugCurl the pipe cleaner “cord” around a marker to make it spiral, then tape it to one end of the box. Decorate your toaster with color masking tape and self-adhesive foam shapes. Finish by hot gluing four pom-poms on the bottom of the toaster for “feet!”

finished toasterYour toaster is complete – time to set the table!

breakfastUse markers and patterned tape to decorate your place mat, plate, and napkin. Two of the paper cups will hold your butter and jam, so you’ll need shorten these cups with scissors (my butter cup was approximately 1.5″ tall, and my jam cup was 1.75″ tall).

I hot glued the plate, napkin, and the two shortened cups to the place mat to make it easier to carry. I left the “beverage” cup and the knife unglued (and filled the beverage cup with polyester fill “milk” or “soy milk”).

To make the magic knife, wrap the bottom of a jumbo craft stick with color masking tape. Then hot glue a button magnet to the top of the craft stick (I did this step in advance to save time). Wrap the upper section of the stick with aluminum foil.

knife steps The final step is to prepare your butter and jam for the magic knife! Peel the backing off the yellow self-adhesive foam square, but don’t pull it all the way off! When you’re about halfway peeled, press the small paperclip onto the sticky back of the adhesive.

butterThen re-attach the backing to the foam square, sealing the paperclip in.

sealed paperclipTo create jam, simply tape a small paperclip to the purple cellophane.

jamReady for breakfast? Place the butter and jam in their cups, then use the magic knife to fetch the bread from the toaster, carry it to the plate, and load on the toppings!