 Most people don’t put the words “dentist” and “fun” in the same sentence, but here at Pop Goes the Page, you’ll find that fun is indeed possible with this neat-o set of dentist tools and peppy patient!
We read Doctor De Soto by William Steig. Doctor De Soto is a mouse dentist who works on creatures both big and small. He draws the line, however, at patients who snack on mice. But when a truly miserable fox shows up at the office begging to be let in, Doctor De Soto and his wife (who also happens to be his assistant) decide to treat him. During the procedure, it becomes quite apparent that the fox intends to eat them when he feels better. So Doctor De Soto and Mrs. De Soto come up with a clever plan to outfox the fox.
For the patient, you’ll need:
- 1 box for the head (mine was 4” x 4” x 4”)
- A box cutter
- 2 rectangles of white card stock for upper and lower teeth (approximately 1.25″ x 4″)
- 4 rectangles of red poster board for gums (approximately 1″ x 4″)
- 12 rectangles of white card stock for molars (approximately 1″ x 1.25″)
- 1 rectangle of red construction paper for tongue (approximately 1.5″ x 4.5″)
- 1 triangle of white poster board (mine was roughly 5.5″ x 5.5″)
- Black, red, yellow, brown or red construction paper for hair
- 2 jumbo pom-poms (mine were 2″)
- 1 Styrofoam packing peanut
- 2 black dot stickers
- 2 squares of white card stock for ears
- Scissors and tape for construction
- Markers for decorating
- Hot glue
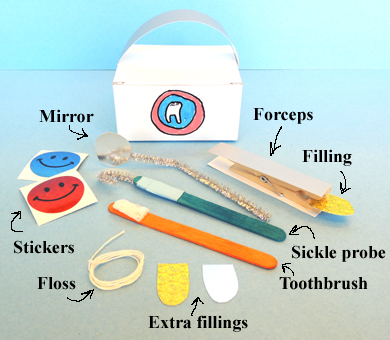
For the dental tools, you’ll need:
- 1 box for the dental bag (mine was 2” x 4” x 4″)
- 1 rectangle of silver poster board for handle (mine was 1.5″ x 6.75″)
- 1 wooden clothespin
- 2 small rectangles of silver poster board for the forceps (approximately .75″ x 3.75″)
- 1 sparkle stem
- 2 craft sticks (mine were 4.5″ long)
- 1 Styrofoam packing peanut
- A selection of color masking tape
- 2 small rectangles of mirror board for silver fillings (approximately 1″ x 1.25″)
- 2 small rectangles of gold paper for gold fillings (approximately 1″ x 1.25″)
- 1 small circle of mirror board (mine was 1.25″ in diameter)
- 1 piece of string for floss (mine was 17″)
- Some reward stickers
- Tape and scissors for construction
- Markers for decorating
- Hot glue
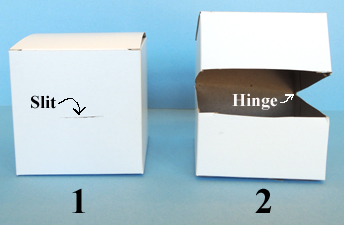
We’ll begin with your patient! Use the box cutter to cut a slit in the front of the box. Carefully inset scissors into the slit and cut three sides of the box. Leave one side intact as the “hinge.”
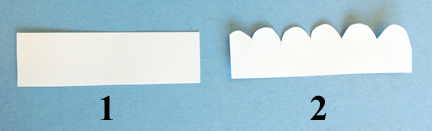
 Prepare the upper and lower teeth by cutting “tooth bumps” on the card stock rectangles like so:
 Then hot glue the upper and lower teeth inside the mouth.
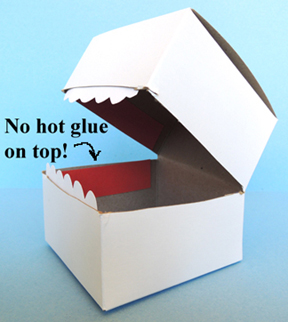
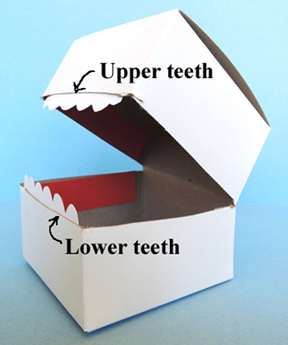 This is also a good time to hot glue the red poster board “gums” inside the mouth. Since you’re basically creating a pocket for the teeth, only glue three sides of the gums. The top of the gums should remain glue free.
 To create the tongue, round one edge of the construction paper rectangle and hot glue (or tape) inside the mouth.
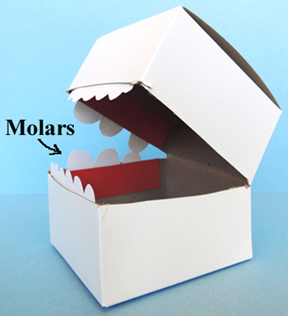
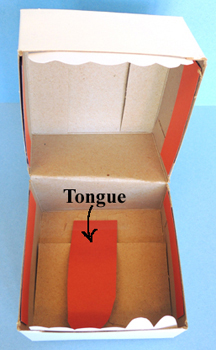 To make “molars,” round the edge of each white card stock rectangle, and slide them into the upper and lower gum pockets.
 The mouth is done, now for the rest of your patient! Let’s revisit “Mr. Smiley” before we get started…
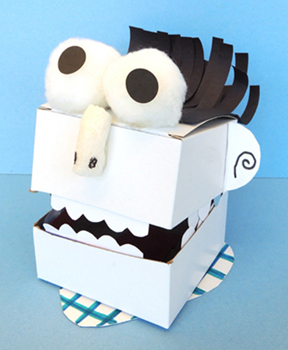 Use construction paper fringes to create hair and tape it to the top of the box. Hot glue two jumbo pom-poms on the top of the box for eyes and a Styrofoam packing peanut on the front for a nose. Stick the black dot stickers to the pom-poms for pupils, use markers to add nostrils to the nose, and shape ears out of white card stock squares and tape them to the sides of the box.
The final touch is your patient’s white poster board “shirt.” We tried a number of different shapes and determined that a triangle with rounded edges looked best:
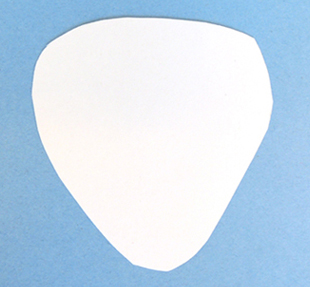 Well, this image depicts an uneven, lopsided, yet somewhat rounded triangle. But you get the idea. Color the triangle with markers, then hot glue the head to the top. Done!
Now for your delightful dental tools. I actually had to look one of these up. I mean, who knew that the “little hook thingee they scrape your teeth with” is called a sickle probe? Thank you, Wikipedia.
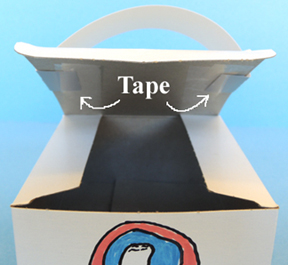
 Bag: Decorate the box with markers. Then tab the ends of the poster board handle and tape it to the underside of the lid.
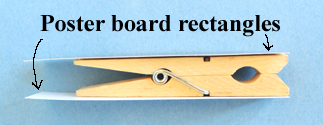
 Forceps: Hot glue the 2 poster board rectangles to the sides of the wooden clothespin.
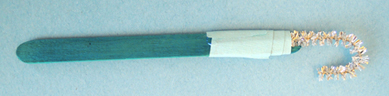
 Sickle probe: Cut a 3″ segment off the sparkle stem, then curve it into a hook and tape to the end of a craft stick. You can use color masking tape or scotch tape.
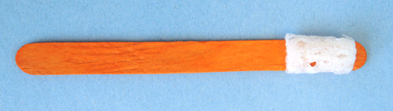
 Toothbrush: Snip a small piece off a Styrofoam packing peanut, then hot glue it to a craft stick. Bonus…when the Styrofoam moves across the card stock teeth, it really does sound like a toothbrush!
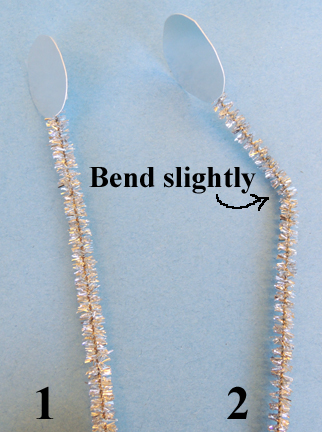
 Mirror: Tape a 5.75″ piece of sparkle stem to the mirror board circle. Bend the sparkle stem slightly.
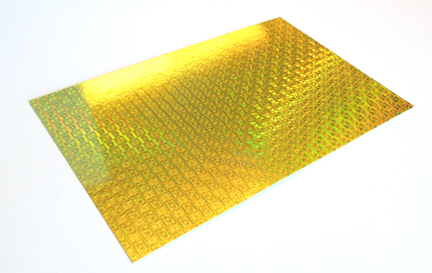
 Dental fillings: Round one edge of the silver mirror board and gold paper squares. A quick word about the gold paper squares. I unearthed this from the art cabinet:
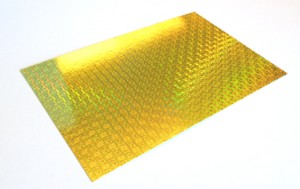 It’s gold hologram paper mounted on thin cardboard. If you don’t have this stuff, you can improvise with metallic crayon or markers on card stock. Just make sure to use paper that’s thick enough to withstand being played with repeatedly.
The final two pieces of the dental kit are floss (I used string, but real floss would be even cooler) and some much-appreciated reward stickers.
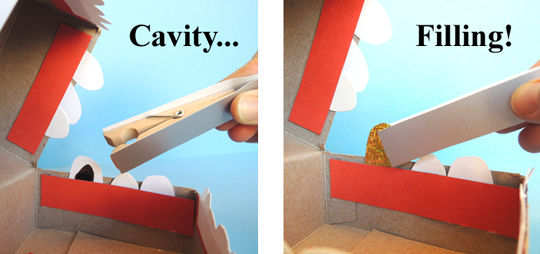
Ready for your check up? Not only can you examine, floss, and brush to your heart’s content, you can also remove cavities! Use black and brown markers to draw a cavity on a molar:
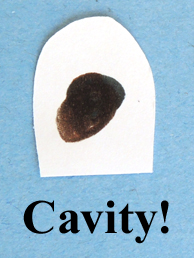 Then insert the molar back into gums. After a quick examination with the mirror and sickle probe, use your forceps to remove the cavity and replace it with a sturdy new filling.
 Good job! Reward your patient with a sticker, and send ’em the bill!

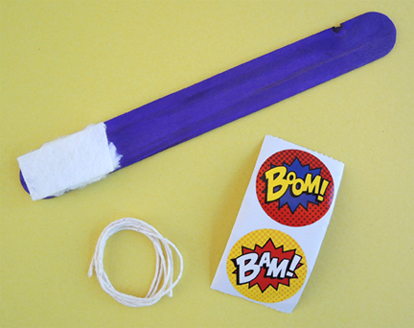
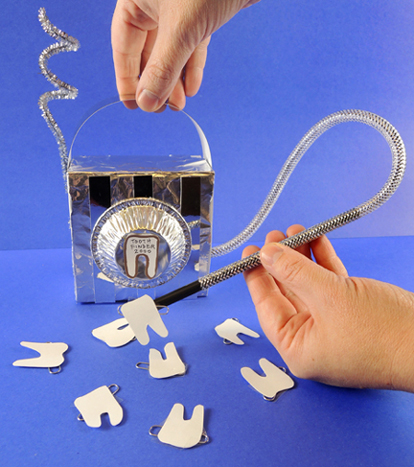 Lose a tooth? No problem! Our magnetic Tooth Finder 2000 will locate your missing teeth in a jiffy! We also added a little alphabetical deduction game to the mix, as well as a magnetic tooth fairy wand variation.
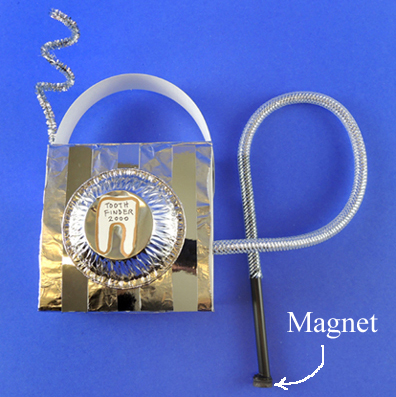 Cut several teeth from card stock, then tape paperclips to the back. Wave the machine’s wand over the tooth, and it will magnetically connect! We came up with a spelling game as well. To play, write different letters on the teeth, then see if kids can can pick out a particular word or their name from the pile.
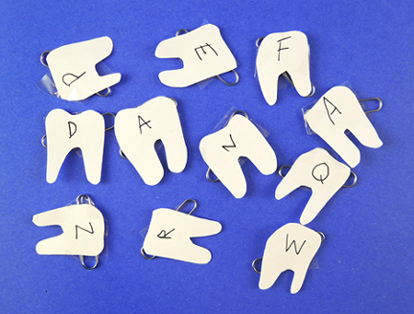 If you’d like to skip the tooth finding machine and go even simpler, cut a star out of card stock, decorate it with markers, then tape it to a drinking straw. Tape or hot glue a mini button magnet to the back of the star and you have your very own magnetic tooth fairy wand!
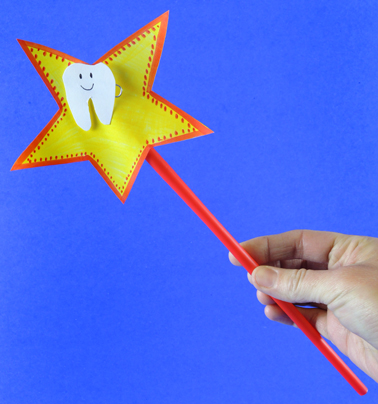
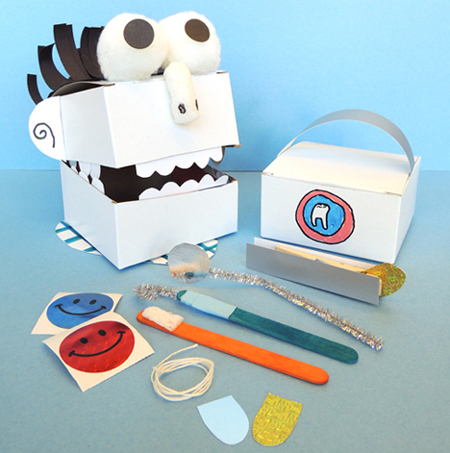
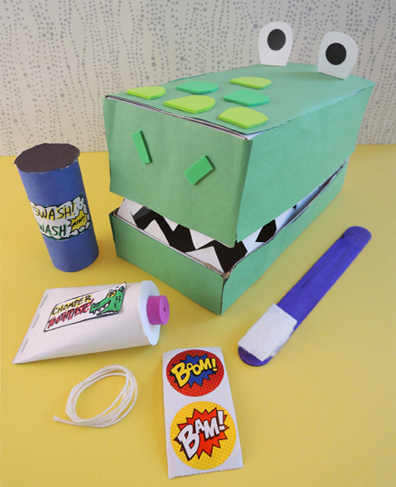 Help your crocodile keep that winning smile with a toothbrush, toothpaste, floss, mouth wash, and reward stickers! This project was designed by our own Miss Marissa, who, I’m delighted to report, is officially on her way to being a Youth Services Librarian!
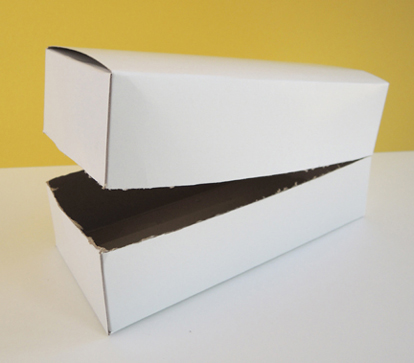 Cover the box with green construction paper. Cut strips of pointy teeth from white card stock and attach the strips to the upper and lower parts of the mouth. We also added some self-adhesive foam nostrils and reptilian bumps, but you could simply draw these on with markers. Finally, cut a pair of eyes from white card stock, tab the bottoms, and attach them to the top of your alligator’s head with tape or glue. We used black
  Next, open the alligator’s mouth and attach a red construction paper tongue. I recommend gluing or taping the tongue to the upper part of the mouth hinge like so:
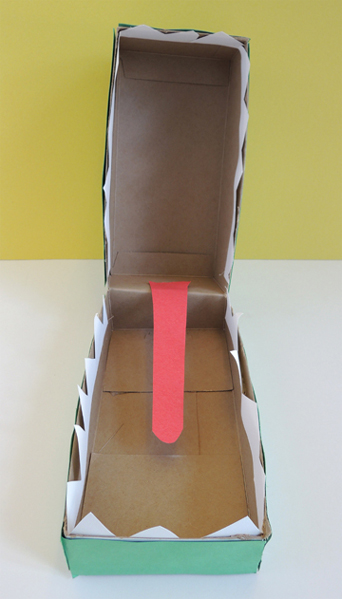 Kids have pretty small hands, so Marissa added a handle to the back of the box to make it easier for them to hang onto the box. The handle was a tagboard strip, tabbed on the ends and hot glued (or taped) to the back of the box.
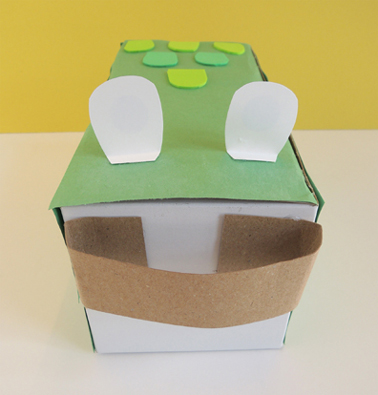 Your crocodile is done, now for the dental hygiene accoutrements! To make the mouth wash, wrap a toilet paper tube with construction paper. Tape a circle of construction paper to the top as a lid. Draw a label for the mouthwash, then tape (or glue) it to the tube.
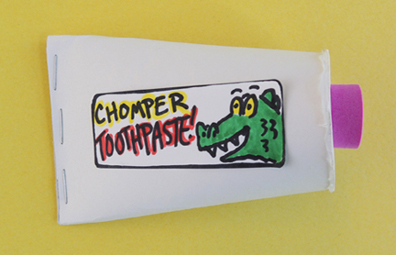
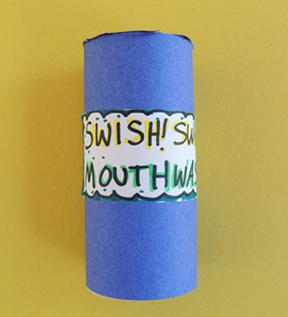 To make the toothpaste, wrap a toilet paper tube with white paper and hot glue a circle of white card stock on one end. Hot glue a foam bead in the center of the paper circle. Flatten and staple one end of the tube. Draw a label for the toothpaste, then tape (or glue) it to the tube.