
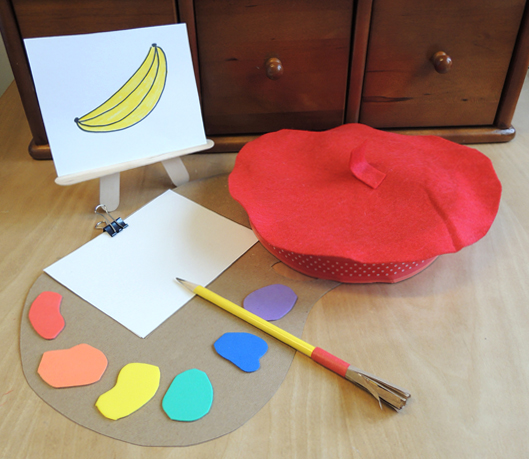
 Painter’s palette? Check. Set of canvases? Check. Sturdy easel? Check. Brand new paintbrush? Check. Super sweet beret? Check! You’re fully prepared for some adventures in art!
We read I’ve Painted Everything! by Scott Magoon (Houghton Mifflin, 2007). Hugo the elephant is an artist who is about to encounter a massive existential problem. He’s painted everything. After hundreds of painting, there is nothing left to paint, and Hugo is out of ideas. Hugo’s friend Miles convinces him to take a trip to Paris. As the two friends explore the city, Hugo is artistically influenced by the things he sees (and the concepts are cleverly conveyed with elephant puns). But he still doesn’t know what to paint. Finally, at the top of the Eiffel Tower, Hugo has an inspiration! Rushing home to Cornville, he climbs to the top of the fire department’s tower and views his familiar world from a completely different perspective. All Hugo had to do was change the way he looks at things. From different mediums to fresh perspectives, Hugo will never run out of ideas again!
You’ll need:
- 4 plain craft sticks (the larger ones work best – mine were .75″ x 6″)
- 1 small triangle of card stock (with 2″ base and 3″ sides)
- 1 small strip of card stock (approximately 1.5″ x 4″)
- An 8.75″ x 13″ piece of tagboard (or brown poster board)
- A box cutter
- 1 piece of 8.5″ x 11″ white card stock
- 1 small binder clip
- 9 squares of self-adhesive foam in various colors (approximately 1.5″ x 1.5″ each)
- 1 sharpened pencil
- A small piece of brown paper lunch bag (approximately 2″ x 3″)
- A large strip of poster board for beret band, any color (approximately 1.5″ x 22″)
- A selection of color masking tape
- A selection of patterned tape
- A circle of felt, any color (approximately 9.5″ in diameter)
- A small piece of felt for top of beret (approximately 1.75″ x 2″)
- Scissors for construction
- Markers for decorating
- Hot glue
The easel is the trickiest part of this project, so we’ll start there! It’s a slight modification on a craft stick easel I spotted in FamilyFun magazine many years ago. They used regular-sized craft sticks, but I found the larger craft sticks much easier to work with, and much sturdier. FamilyFun also used color craft sticks for their easel, but I used plain wooden ones so the kids could decorate them with markers.
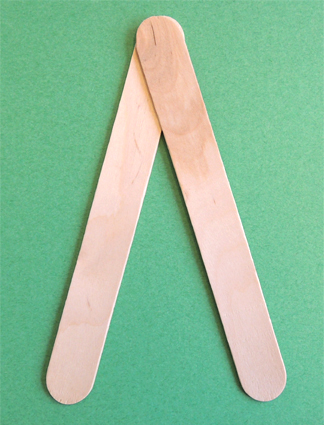
Since we had quite a few pieces to this project, I decided to prep all the easels in advance. Everything else the kids assembled themselves. To make an easel, hot glue the tops of two craft sticks together like so:
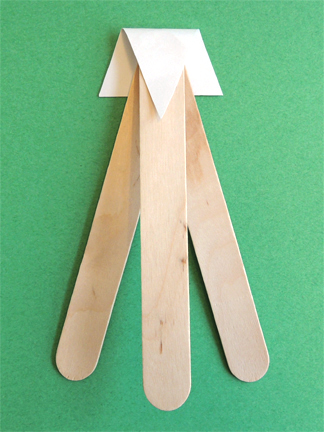
 Next, hot glue the base of a card stock triangle behind the tops of the sticks. Then fold the top of the triangle downward. This is the “hinge” of your easel.
 Hot glue a third stick to the underside of the hinge. The top of the third stick should be just about even with the tops of the other sticks. If you put the stick too far up, the hinge won’t bend!
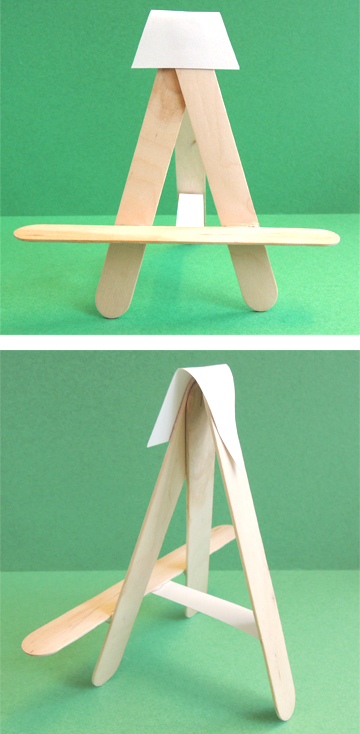
 Stand your easel upright and turn it around (it should now look like the image below). Hot glue a craft stick to the front of the easel to create a rack for your canvas.
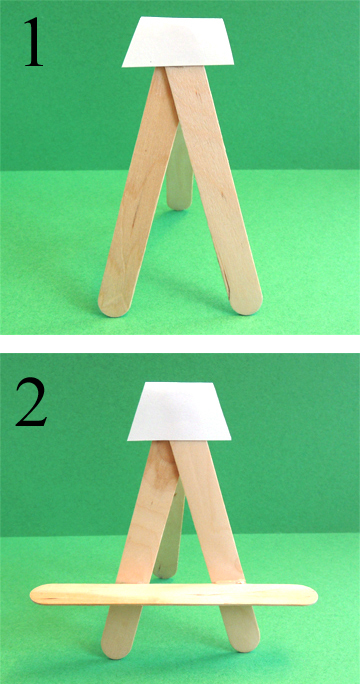 Finally, to keep your easel from collapsing, hot glue one end of a small strip of card stock to the underside of the rack. Fold, then hot glue, the other end of the strip to the back leg of the easel. Here are two views of the completed easel:
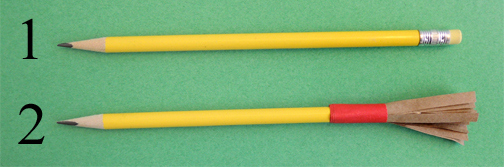
 Now for your painting tools! To make a paintbrush, fringe a small piece of brown paper lunch bag, then wrap it around the eraser end of a pencil. Secure in place with color masking tape.
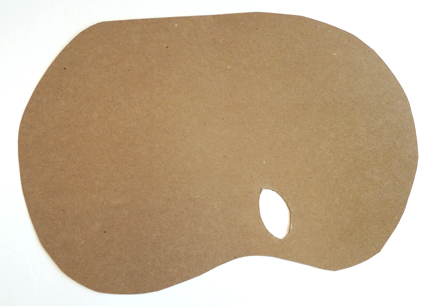
 To make a painter’s palette, cut a palette shape out of tagboard (or brown poster board). As you can see, my palette looks like a fat, lopsided lily pad that’s about 8.5″ tall x 12.25″ wide. Use a box cutter to cut a 1.5″ oval-shaped thumb hole near the bottom.
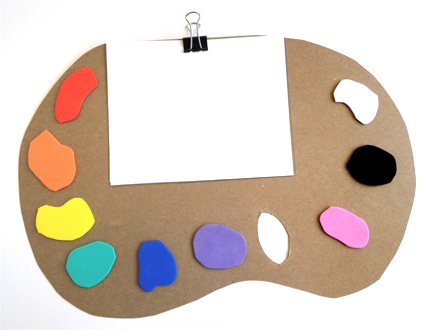
 Cut an 8.5″ x 11″ piece of white card stock into quarters (these are your “canvases,”) then use a binder clip to attach them to the top of the palette. Cut 9 squares of self-adhesive foam into irregular paint splotches, then peel and stick them around the palette (you can also skip the foam and use markers).
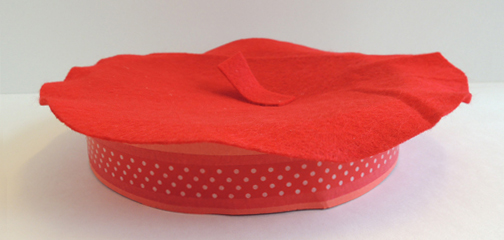
 Lastly, your beret! Decorate a long strip of poster board with color tape, patterned tape, and/or markers. Circle it around your head and staple it closed. Hot glue a circle of felt to the top of the hat band. Don’t forget to hot glue a little felt piece to the center of the beret!
 Once we had all our tools, we embarked on our art adventure! I asked the kids to scatter to different areas of the gallery and sketch things onto their canvases using the pencil end of their “paintbrushes.” They could sketch something they saw in the gallery, or they could sketch something from their imaginations.
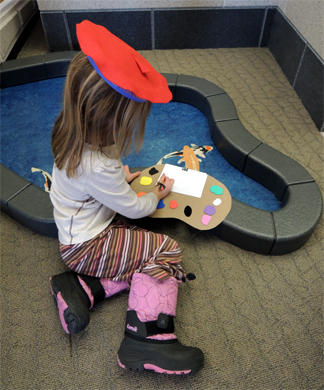
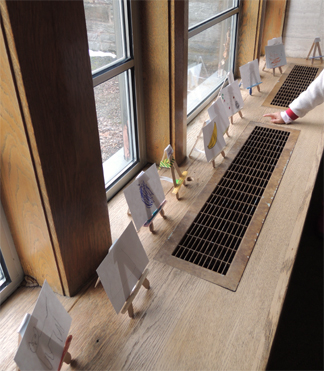
 After about 10 minutes, the kids came back to the craft tables and used markers to color their sketches. Then, each kid selected his/her favorite work of art and displayed it on his/her easel at our “art exhibit.”
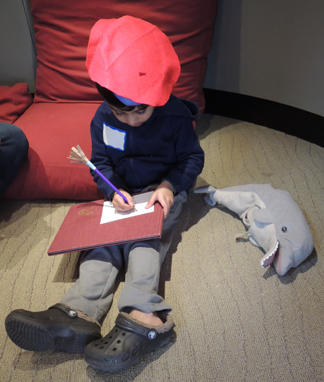
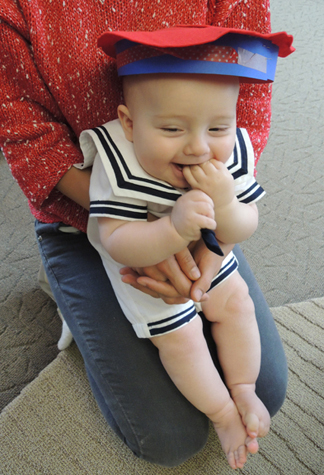
 The kids loved this project (and I made sure to cut extra canvases for them to take home)! But for me, the best part was seeing them in the berets. They looked so darn cute wearing them. But this little artist takes the prize! Oooo look at those baby toes!
 Ready for more forays into fine art? Check out some Pop Art, learn to draw like an Old Master, or perhaps you’d like to take a stab at Impressionism?