
 Move over Charlie Bucket! How would YOU like to own your very own candy factory that produces amazing candies, sweets, and chocolates?
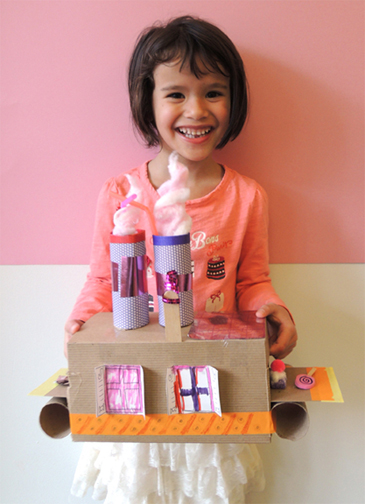
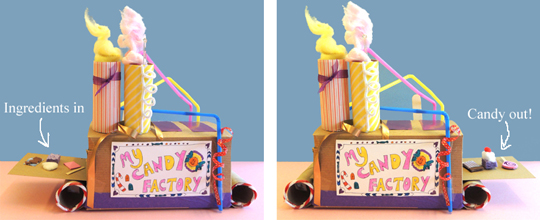
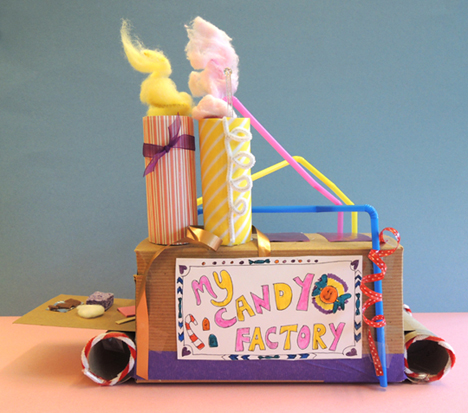
 In addition to its fanciful decor and delectable goodies, this candy factory has a working conveyor belt. Ingredients go in, delicious candy comes out!
 We read If I Owned a Candy Factory, written by James Walker Stevenson and illustrated by James Stevenson (Greenwillow, 1989). A little boy imagines what he would do if he had a candy factory. First, he would write a letter to all his friends and ask “What kind of candy do you like best?” and “What day is your birthday?” On their birthdays, kids are invited to the factory to get their favorite kind of candy…gumdrops, red lollipops, licorace, etc. Eventually, the candy factory would open its doors so all the kids around the world could come and enjoy a treat! It doesn’t get any sweeter than that.
You’ll need:
- 1 box (mine was 4 ½” X 4 ½” x 9”)
- 1 box cutter
- 6 toilet paper tubes
- A selection of color masking tape
- 1 strip of tagboard (mine was 3.75″ x 14″)
- 1 jumbo craft stick (mine was 1.75″)
- 1 factory template, printed on 8.5″ x 11″ white card stock
- A selection of patterned paper
- Cotton balls (I offered white, blue, yellow, and pink)
- An assortment of pipe cleaners
- A selection of embossed foil paper or plain foil paper
- A selection of drinking straws
- A selection of craft ties
- A selection of metallic (and/or regular) ribbon
- 1 medium square of brown stiffened felt
- 2 small pieces of tin foil
- 1 wooden coffee stirrer
- 3 small squares of self-adhesive foam – all the same color
- 2 tiny squares of kitchen sponge
- 1 mini pom-pom (mine was 0.5″)
- Scissors and tape for construction
- Markers for decorating
- Hot glue
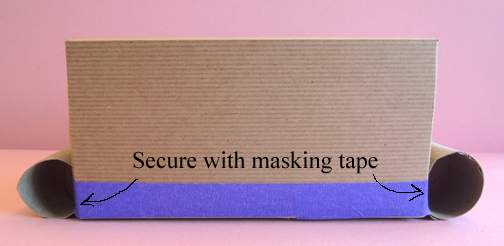
Begin by using a box cutter to create openings in the short sides of the box (my openings were approximately 3″ x 4″).
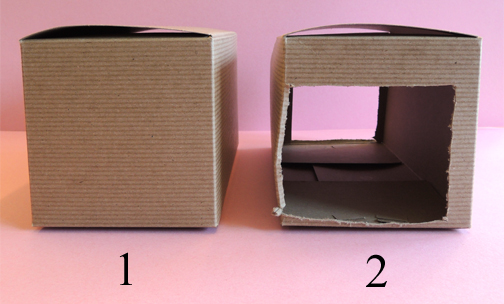 Now use color masking tape to secure toilet paper tubes to the outside of each opening. Wrap the tape all the way around the bottom of the box to make the tubes extra secure.
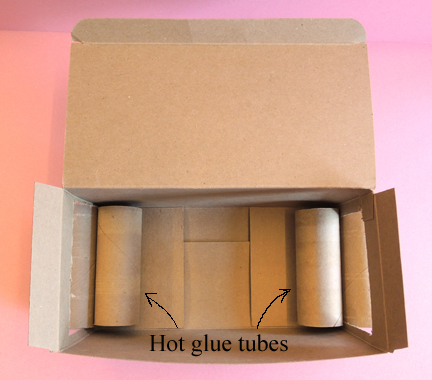
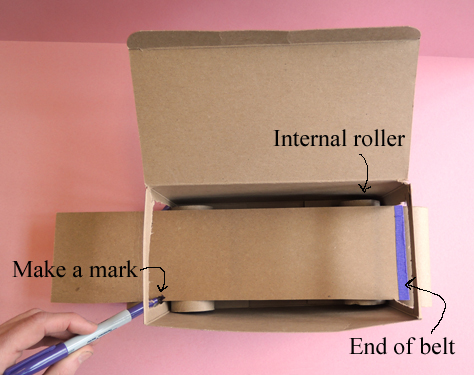
 Next, hot glue additional toilet paper tubes on the inside of the box. These are the “internal rollers” for the conveyor belt, and will help keep the belt steady and on track.
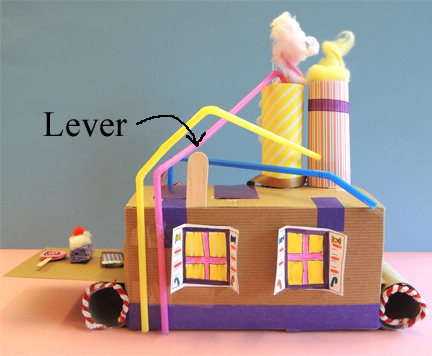
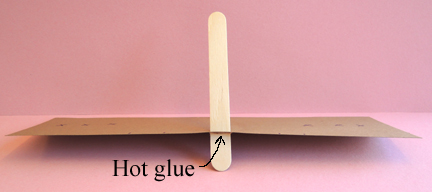
 We will now pause this project to say a few words about the moveable conveyor belt. The belt is actually a strip of tagboard with a craft stick attached to it. The craft stick acts as the “lever” that moves the tagboard strip back and forth.
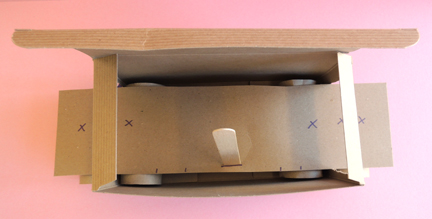
 Here’s what the conveyor belt looks like inside the factory (minus the candies of course – we’ll get to that step later).
 The size and length of your conveyor belt will vary according to the size of your box (my box was 9″ long and my conveyor belt was 14″). Your conveyor belt must be long enough to make the ingredients “disappear” into the factory and reappear as finished candies on the other side. It also needs to stay on the rollers and not fall into the box.
So we played around with a few conveyor belt prototypes and here’s what we finally came up with.
First, place the belt into the factory, letting it rest on top of the toilet paper tube rollers. Now slide the belt all the way to the left until the right side of the belt reaches the beginning of the right-hand “internal roller.” Make a mark on the left side of the belt.
It was hard to get a good shot of this step, so I marked the end of the belt with purple masking tape to give it more visibility. In the photo, it sort of looks like the end of the belt and the mark are inside the box. They’re not. They’re definitely outside the box.
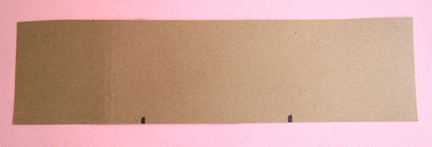
 Repeat on the other side. The result will look like this. A belt with two marks on it.
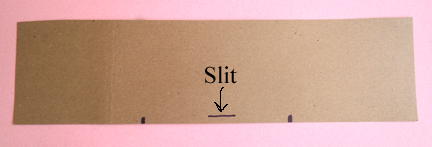
 Now use the box cutter to make a slit right between the two marks. The slit needs to be wide enough for your jumbo craft stick to slide into snugly.
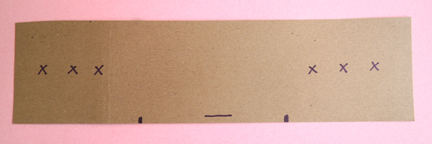
 Make 3 “x” marks on each end of the belt. This shows kids exactly where they need to place their candy in order to get the factory illusion to work.
 Insert the jumbo craft stick into the slit. You might want to add a little hot glue at the base to make it extra secure.
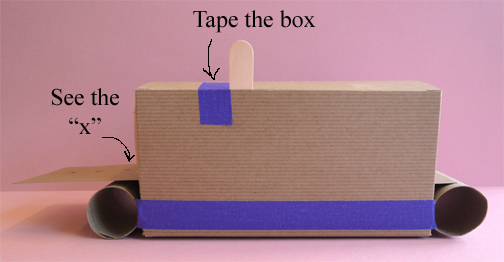
 Place the belt back inside the factory. The craft stick should be poking out of the place where the box’s lid tucks into the box.
We noticed that the belt was still in danger of coming off the rollers (especially if you get over-enthusiastic and whip it back and forth). So we added one more security measure.
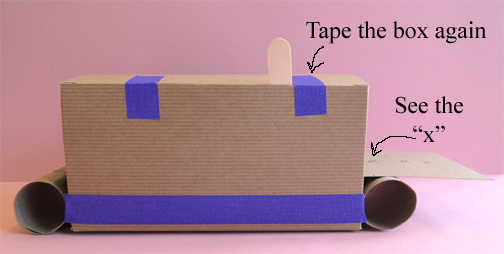
Move the craft stick all the way to the left, until you see the last “x” on the belt. Put a piece of tape to the left of the craft stick to keep it from going any further.
 Repeat on the right side.
 The belt is secure, time to decorate the factory! Color the sign and windows on the template and tape or glue them to the factory. Wrap 2 toilet paper tubes with patterned paper and hot glue them to the roof of your factory as smoke stacks.
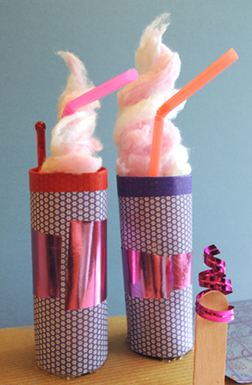
If you’d like smoke to come out of your stacks, pull a cotton ball apart, then push a pipe cleaner through it. Tape one end of the pipe cleaner inside the smoke stack.
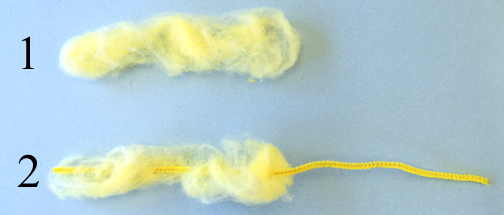 One artistic mother and daughter team made delicious swirl smoke using two cotton balls twined together. Is this not completely awesome?
 Other decorative touches included foil paper “solar panels,” drinking straw pipes going in random directions, pipe cleaners for “icing” and/or candy cane flourishes, and some craft ties and ribbon. I also offered some glittery plastic cocktail stirrers (located in the paper goods section at Target).
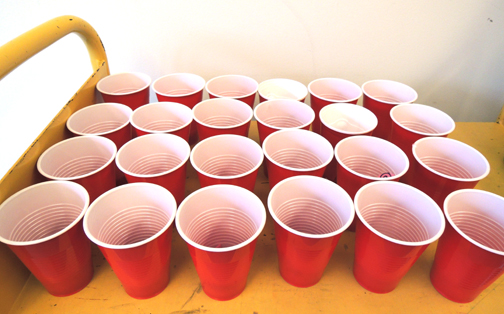
 The factory is all set. It’s finally time to manufacture some candy! We prepped all the little bits needed for this part of the project in advance, then put them in plastic cups so each kid would have everything at his/her fingertips.
Here are the cups, sitting on my trusty story time project book cart (which you might remember seeing in an oh-so-unusual format in my very first post).
 Remember, you’re making 6 candy items for your conveyor belt. The “raw ingredient” set (pictured below on the left) and the “finished product” set (pictured on the right).
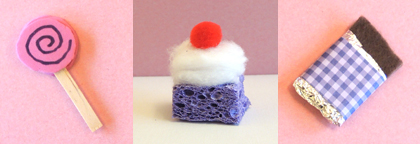
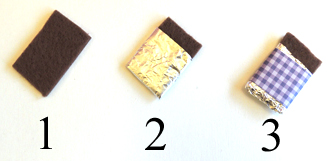
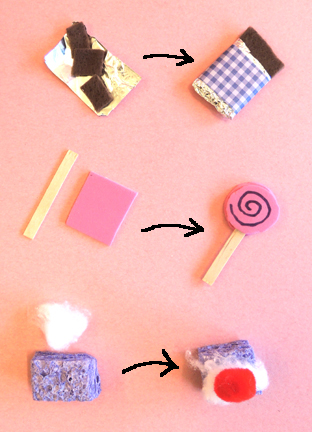 CHOCOLATE BAR: For the “raw ingredients,” hot glue three tiny squares of stiffened brown felt to a small piece of tin foil. For the “finished” chocolate bar, wrap a small rectangle of stiffened brown felt with tin foil (leave a little chocolate peeking out the top). Then use patterned paper to create a label for your chocolate bar.
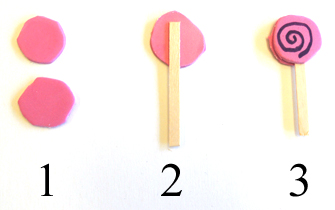
 LOLLIPOP: The “raw ingredients” are a square of self-adhesive foam and a small piece of a coffee stirrer. For the “finished” lollipop, cut 2 matching circles from self-adhesive foam. Peel the back off 1 circle and stick a piece of a coffee stirrer to it. Peel and stick the other circle and press it on top of the first circle. Add lollipop swirls with a Sharpie marker.
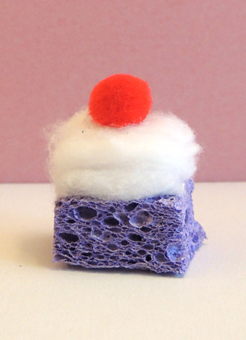
 CAKE: For the “raw ingredients,” use a small square of sponge and a bit of cotton ball. For the “finished” cake, hot glue a bit of cotton ball on top of a small square of sponge, then hot glue a mini pom-pom cherry on top.
 All that remains is hot gluing the candy to the conveyor belt (even though some kids decided to leave their candy loose). Remember to put the ingredients and the finished candy on the belt in the right order. We had some chocolate squares emerge as lollipops at first, but after a little trial and error, the kids worked it out.
And there you have it. You are now the proud owner of a candy factory! Just don’t eat too many sweets, or this might have to be the subject of your next story time!