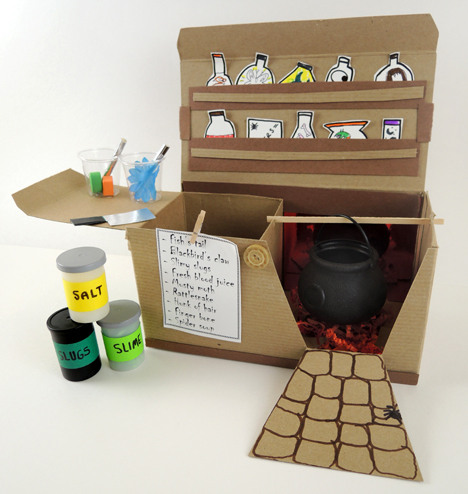
From the well-stocked shelves, to the bubbling cauldron, to the secret storage space…this kitchen is ready to concoct some scintillating brews. It also folds down into a snappy little travel case, complete with your shopping list clipped to the outside!
 We read One Witch, written by Laura Leuck, and illustrated by S.D. Schindler (Walker & Company, 2003). A witch visits her ten sets of (unusual) friends to gather ingredients for the ultimate brew. She cooks it up, sends out invitations via bat, and a massive party ensues – including a special bowl for you! This is a fantastic counting book, plus a real family favorite. My kids asked me to read this book to them year round!
You’ll need:
- 1 large tissue box
- 1 small tissue box
- Poster board
- A selection of construction paper
- 1 wooden coffee stirrer
- 1 mini cauldron (or paper cup)
- 1 ingredient bottles template, printed on 8.5″ x 11″ card stock
- 2 plastic sample cups
- 2 snippets of drinking straw
- 2 buttons
- 1 small rubber band
- 1 spooky shopping list template, printed on 8.5″ x 11″ paper
- Scissors, tape, and glue for construction
- Markers for decorating
- Hot glue
We used our standard craft boxes for this project, but I’m also going to show you how to build it with large and small tissue boxes. Here’s a bird’s eye view of the project:
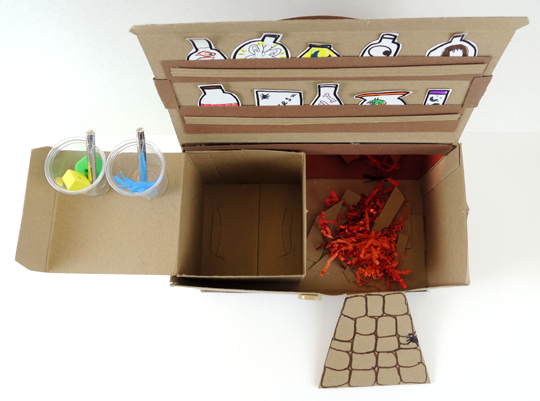 As you can see, it’s a box within a box. The left side of the kitchen is the unfolding countertop/secret storage area, the the right side is the fireplace for the cauldron (which we stoked with brown poster board logs and red paper crinkle, but construction paper works too). The front of the fireplace is a V-shaped door that folds down. Use markers to create the stones for your hearth.
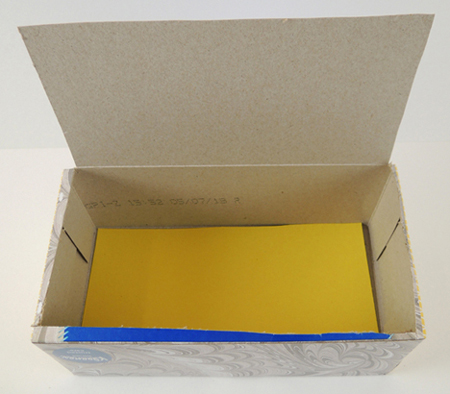
If you want to make the project with tissue boxes, the key is to flip the tissue boxes upside down and cut the bottoms into lids. Here’s the large box:
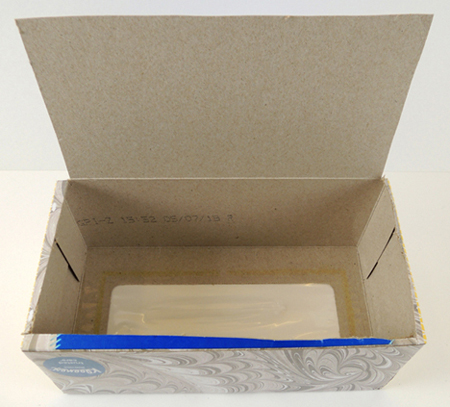 The issue, of course, is you have a big hole in the floor of your kitchen. No problem! Just glue or tape a piece of poster board over the hole (shown here in yellow):
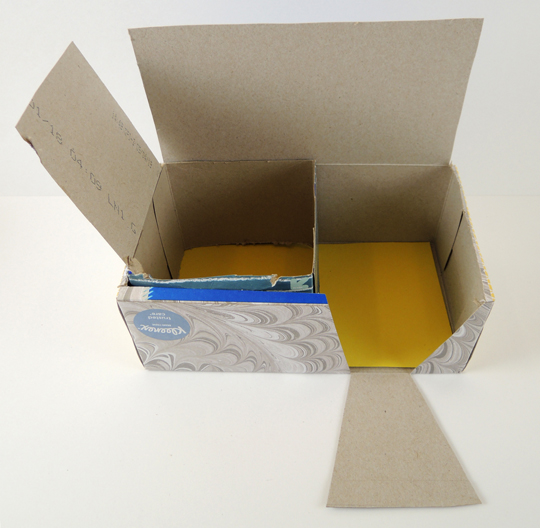
 To make the unfolding countertop/secret storage space, flip a small tissue box, cut the bottom to make a hinged lid, cut the box down to the proper height, then attach it inside the large box. Cut the V-shaped hearth door and you’re set!
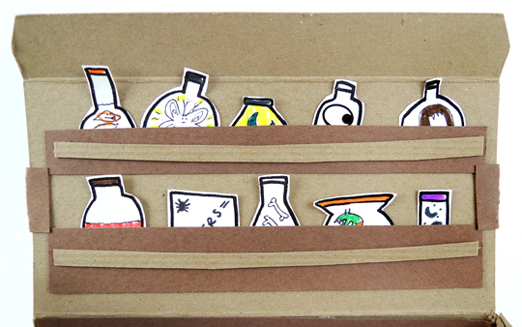
 The shelves along the back of the kitchen are basic poster board pockets. Cut and color the various bottles in your template to stock your kitchen:
 In the secret storage are little plastic sample cups for mixing, snippets of drinking straws, plus (optional) ingredient bottles repurposed from old-school film canisters. We filled ours with fabric flowers, foam beads, and green paper crinkle. I also added little cleavers I cut from silver mirror board.
 But my FAVORITE item in the kitchen is the cauldron. We used plastic mini cauldrons, but you can also fashion a cauldron from a paper cup. To hang the cauldron, cut little notches in the sides of the boxes, then slide a wooden coffee stirrer into the notches.
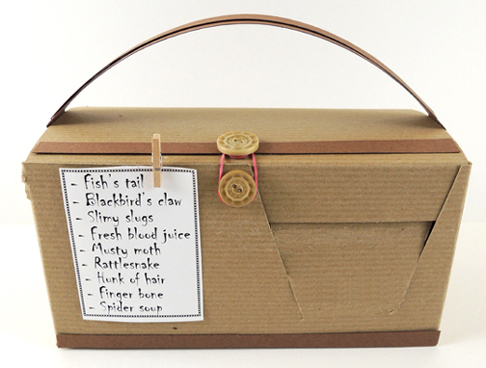
The outside of the box gets a poster board carrying handle, as well as a shopping list you can either tape or clip to the front:
 The box does get a little heavy. In fact, our lid kept popping open. So we added extra support in the form of two buttons, which we hot glued to the lid and body of the large box. Wrap a rubber band around the buttons, and you’re set!
A week after this project, we ran into one of our story time kids. She wants you to know that “THIS IS MY FAVORITE TOY AND I PLAY WITH IT ALL THE TIME I MAKE SOUPS THAT I FEED MY BROTHER!”
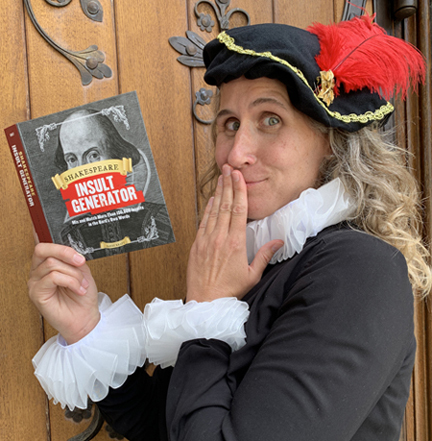 Prepare to “Insult, exult, and all at once” (As You Like It, Act 3, Scene 5). Because today we’re reviewing the epic Shakespeare Insult Generator from Becker & Mayer! Wither you stub your toe on a rock, or are trading barbs with your bitter rival…if your situation requires a fiery oath or stinging retort, you are in good hands with the Bard!
 Retailing for around $9 on Amazon, this little spiral-bound volumes includes 162 Shakespearean words. The pages are divided into three sections (the top and middle sections are adjectives, the bottom section is a noun). The sections can be quickly flipped to create 150,000 original insults.
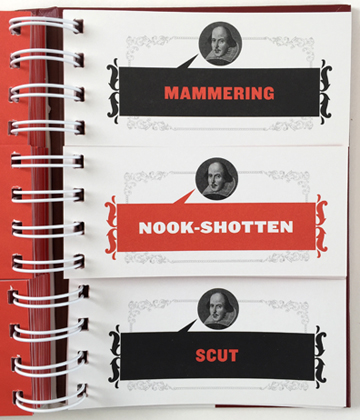 The cool thing is when you flip each section, the word is defined on the back. So if you are wondering what a “scut” is, it’s actually “the short, erect tail of a deer.”
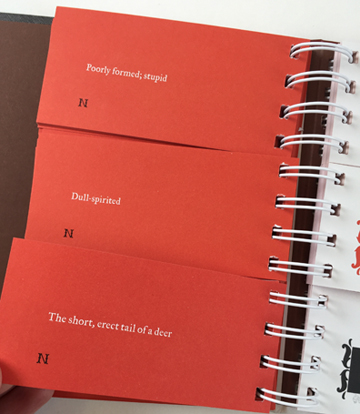 In addition to being visually pleasing, the book comes with a fascinating and humorous introduction. Among other things, you learn that words marked with a feather icon means they were most likely invented by Shakespeare. Words marked with an “N” are ones he only used once (also referred to as “nonce” words). As you can see in the above photo, all three words are nonce. Amazingly, of the 162 words in the book, 22% were invented by Shakespeare, and 64% are nonce! That’s some amazing word-smithery, that is.
 Storms can be very scary, but this story time project lets YOU be in charge of the clouds, rain, and lightning!
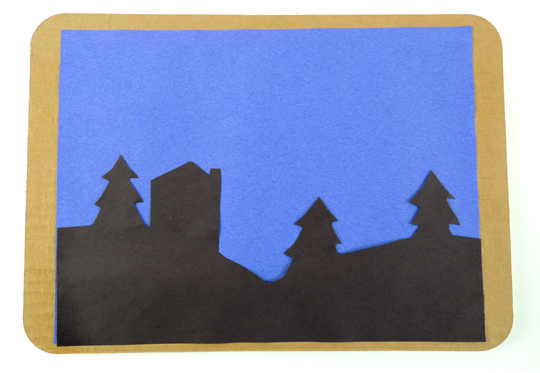 First, glue a piece of blue construction paper to a corrugated cardboard rectangle (we used 9.75″ x 13.75″
 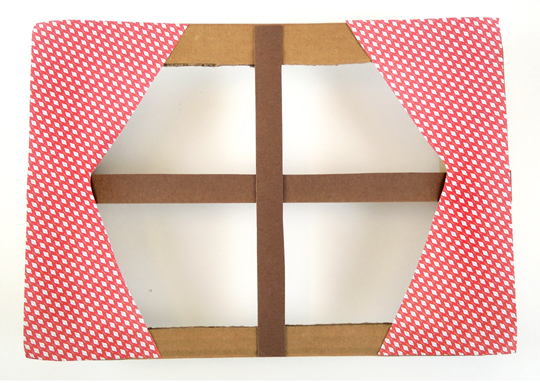 Use a box cutter to cake a window in the second corrugated cardboard rectangle. Then glue or tape 2 strips of poster board to the front of the window (definitely use poster board, construction paper is a little too saggy). Add a pair of optional window curtains. Then flip the front piece over…
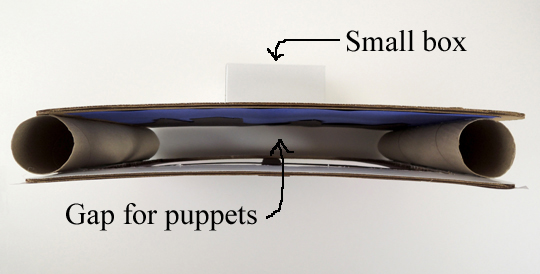
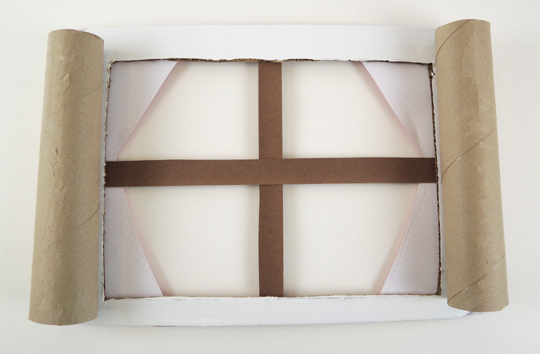 Shorten 2 paper towel tubes so they fit inside the sides of the window, then hot glue them firmly in place (we reinforced the connection with tape as well). Hot glue the tubes to the back piece of the theater. Now there is a gap between the front and back of the theater. This is where you drop your stick puppets! We also hot glued a small box to the very back of the theater to keep it more steady (our box was white, sorry, it’s a little hard to see in the photo!).
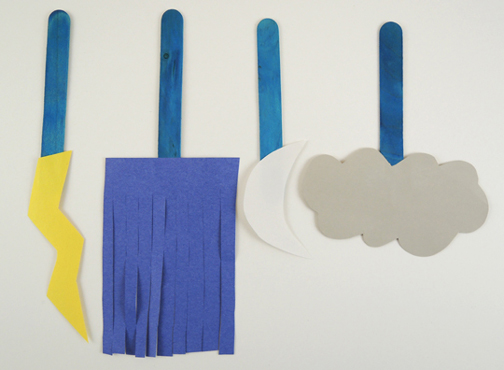
 To make the stick puppets, cut a lightning bolt, fringe of rain, crescent moon, and storm cloud from construction paper, then glue or tape them to the bottom of a jumbo craft stick (ours were 8″ long).
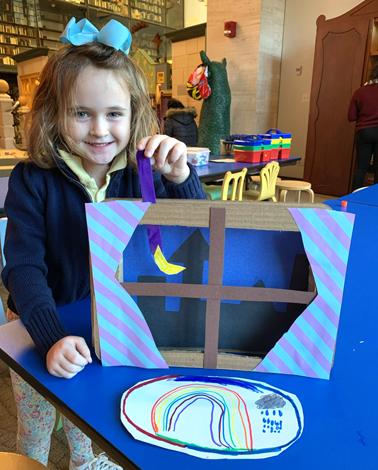
 To operate the theater, simply drop the puppets into the gap and narrate the story as storm clouds move in, rain comes, lightning strikes, and the skies finally clear to reveal the moon!

 We read One Witch, written by Laura Leuck, and illustrated by S.D. Schindler (Walker & Company, 2003). A witch visits her ten sets of (unusual) friends to gather ingredients for the ultimate brew. She cooks it up, sends out invitations via bat, and a massive party ensues – including a special bowl for you! This is a fantastic counting book, plus a real family favorite. My kids asked me to read this book to them year round!
 As you can see, it’s a box within a box. The left side of the kitchen is the unfolding countertop/secret storage area, the the right side is the fireplace for the cauldron (which we stoked with brown poster board logs and red
  The issue, of course, is you have a big hole in the floor of your kitchen. No problem! Just glue or tape a piece of poster board over the hole (shown here in yellow):
 To make the unfolding countertop/secret storage space, flip a small tissue box, cut the bottom to make a hinged lid, cut the box down to the proper height, then attach it inside the large box. Cut the V-shaped hearth door and you’re set!
 The shelves along the back of the kitchen are basic poster board pockets. Cut and color the various bottles in your template to stock your kitchen:
 In the secret storage are little plastic sample cups for mixing, snippets of drinking straws, plus (optional) ingredient bottles repurposed from old-school film canisters. We filled ours with