The Four Little Pigs

the four little pigsLet’s see. There’s a pig in a house of straw, a pig in a house of sticks, a pig in a house of bricks, and a pig on a sailboat. Wait…what?!? A fourth little pig? On a sailboat?

We read Ziggy Piggy and the Three Little Pigs by Frank Asch (Kids Cab Press, 1998). Once there were four little pigs. Ted, Fred, Ned, and Ziggy. Carefree Ziggy invites his brothers to the beach for a swim, but finds them madly fortifying their houses of straw, sticks, and brick. The Big Bad Wolf is in town, and Ted, Fred, and Ned don’t have time to play. So Ziggy goes to the beach by himself. The Big Bad Wolf huffs and puffs and chases Ted, Fred, and Ned to the beach, where they pile onto Ziggy’s raft. But when the Wolf attempts to blow the raft to bits, Ziggy hoists the sail and the four brothers sail away to safety.

We made oatmeal container pigs, and then went searching for sailboat ride tickets in houses of straw, sticks, and brick. You had just a few seconds to find your ticket before the Big Bad Wolf appeared. Story time finished with a ride on a perfectly pig-sized sailboat!

You’ll need:

  • 1 oatmeal container
  • Pink construction paper
  • White construction paper
  • A square of white poster board (approximately 6″ x 6″)
  • A pair of wiggle eyes
  • 1 pink jumbo pom-pom
  • 2 small circles of self-adhesive foam
  • Scissors and tape for construction
  • Markers for decorating

For the game, you’ll need:

little pig

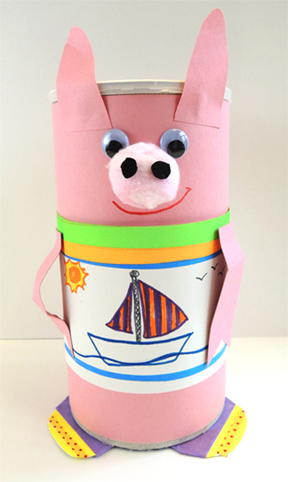
To make a pig, wrap an oatmeal container with pink construction paper. The pig’s “shirt” is a 5″ x 18″ piece of construction paper decorated with markers. Cut a pair of “sneakers” out of poster board, decorate them with marker, then hot glue the sneakers to bottom of the oatmeal container. Use extra pink paper to make ears and arms. We offered a selection of patterned tape to liven things up, but you can also just stick with markers.

To make the face, hot glue the wiggle eyes to the oatmeal container (or draw eyes with markers). Hot glue a pink jumbo pom-pom on for the nose, and use 2 self-adhesive foam circles for nostrils. In the above photo, however, you’ll notice the pig has a pink cotton ball nose. So why do I suggest a jumbo pom-pom? THIS is why…
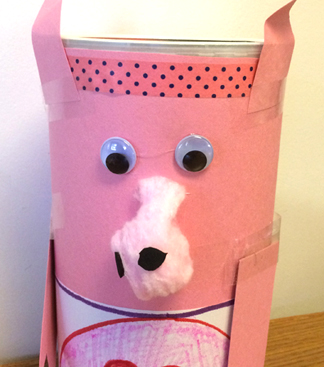
uh oh noseAs time passes, the cotton ball sloooowly unfurls, leaving your pig with a droopy nose. Definitely use a pom-pom.

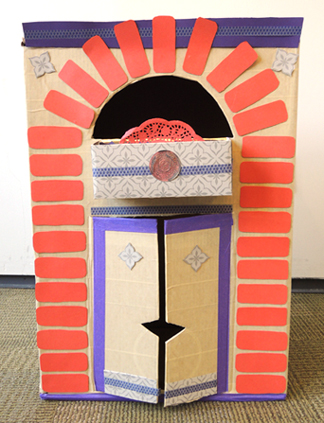
And now for the game, which requires a set of 3 houses, a Big Bad Wolf, and sailboat. Marissa and I snagged three big boxes from the recycle bin, charged up our hot glue guns, and started building. In addition to the decor in the front, there is a small door cut into the back of each box. This is so later, during the game, I could sneak the sailboat ride tickets into the houses undetected.
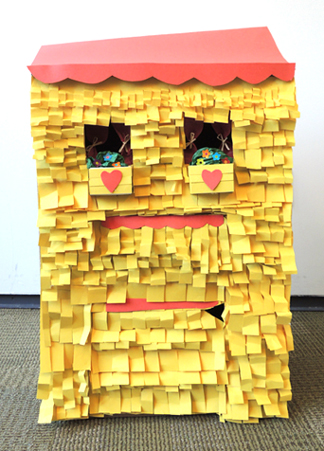
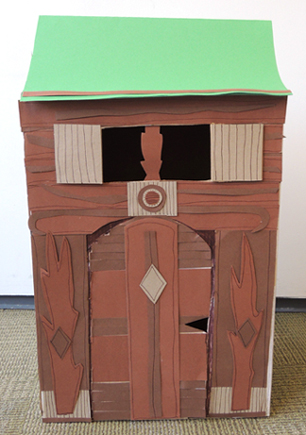
house of strawhouse of stickshouse of bricksI drew a Big Bad Wolf on a piece of poster board, and taped him to a piece of PVC pipe. I tried to make him look not too scary. Not sure if I succeeded.
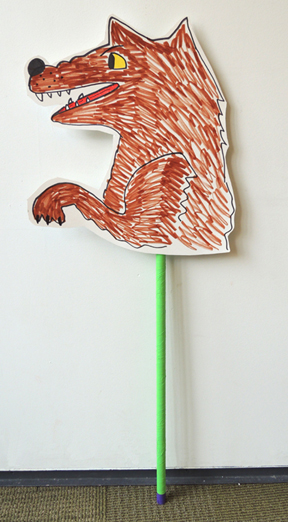
wolfFinally, the sailboat. It doesn’t have to be elaborate. Seriously. A shoe box pulled on a string will work great. I just happen to have this awesome sailboat my Dad made for me.
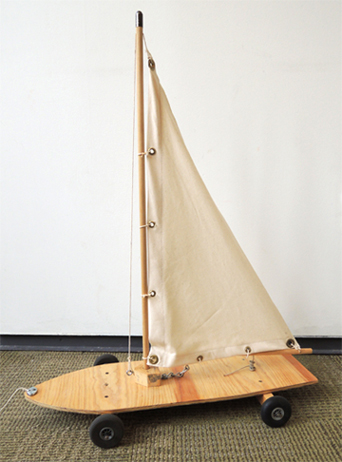
sailboatOriginally, it was used at a Treasure Island event. One of the student groups at the event (Students United for a Responsible Global Environment, to be precise) wanted to demonstrate wind power. So I asked my Dad (hi Dad!) if he could build a sailboat that would roll down a table, propelled by a fan. It worked great!
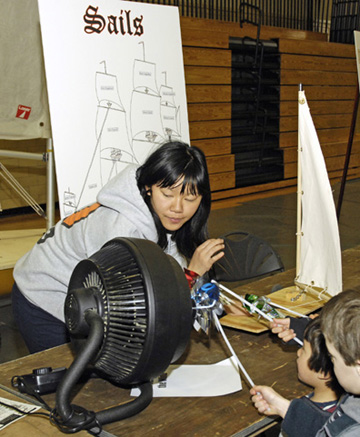
sailboat at treasure islandOn windy days, we bring the sailboat out of the attic and take it outside. In a brisk breeze, you really have to run to keep up with it!
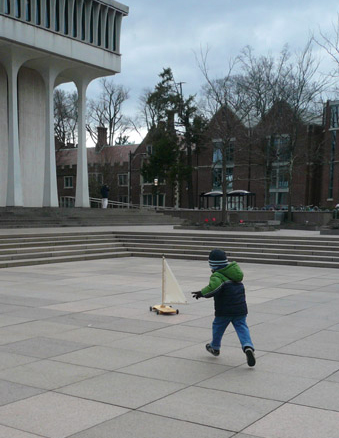
chasing the shipBut back to pigs. Here’s how we played the Ziggy Piggy game. I lined up the three houses and asked the kids to sit down in front of them. Then one kid covered his/her eyes while I hid a sailboat ride ticket inside one of the houses. When I shouted “Go!” and the kid had 10 seconds to find the ticket before the Big Bad Wolf rose from behind the houses. Sometimes I had to slow the count, but in the end, everyone won.
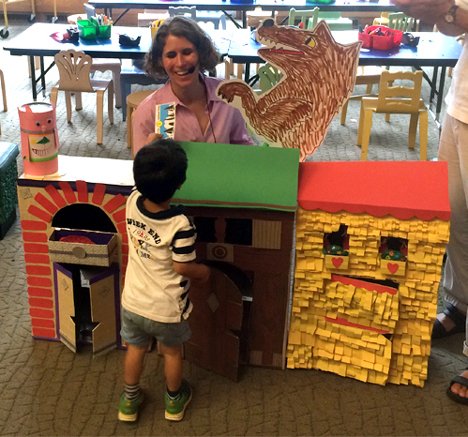
ticket and the wolfMarissa and I then ushered the kids and their pigs out to the library’s main lobby, where we sat in two groups. Marissa was “Dock 1.” This is where all the pigs gathered. Some distance away, I was “Dock 2,” where all the kids gathered. Between the two docks was the sailboat, rigged up on a loooong string. One by one, Marissa would call out a kid’s name and place his/her pig on the sailboat. The kid would come and stand next to me. Once I confirmed that their pig had a ticket, I would reel in the string, causing the sailboat to whizz over to the kid!

sailing pigWhen story time was over, we drew names to see who was going to take the 3 houses home. The winners are the little girls posing at the start of this post. They were super thrilled!

Across the Puddle

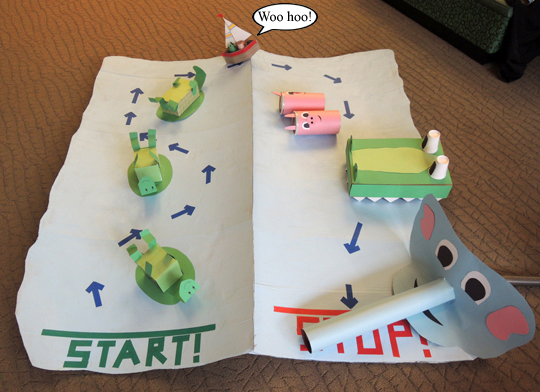
woo hooPrepare to embark on an epic journey through a variety of obstacles. Weave in and out of topsy-turvey turtles, dodge two plump pigs, avoid the chomping alligator, and face off with a vacuum cleaner elephant. It’s the world’s biggest puddle…can your little boat make it?

We read The Puddle by David McPhail (Farrar Straus Giroux, 1998). One rainy day, a little boy decides to sail his toy boat. He finds a truly enormous puddle, but unfortunately, a frog hijacks his boat. The boy can’t chase after the frog – he’s promised his mother he’ll stay out of puddles. The frog crashes the boat into a turtle just as an alligator shows up and offers assistance. The alligator retrieves the boat, but it’s a wee bit crushed. In the meantime, a pig arrives for a swim and is being quite messy about it when an elephant appears and drinks the entire puddle. This prompts all the animals to yell at her to put the water back. So she does. Quite forcefully. By this time, the sun comes out, the puddle dries up, and the boy heads home for a hot bath. What a day!

You’ll need:

  • 1 small box (I used a 4” x 4” x 4” box – a small tissue box works too)
  • 2 rectangles of (mine were 3″ x 12″)
  • A section of color masking tape
  • 2 toilet paper tubes
  • A selection of construction paper
  • A selection of multicultural construction paper
  • A selection of patterned paper
  • 1 wooden dowel
  • 3 foam beads
  • 1 sails template, printed on white 8.5″ x 11″ paper
  • Hole punch
  • 1 piece of string or yarn (approximately 27″)
  • 1 puddle obstacle course (more on this later!)
  • Scissors, tape, and stapler for construction
  • Markers for decorating
  • Hot glue

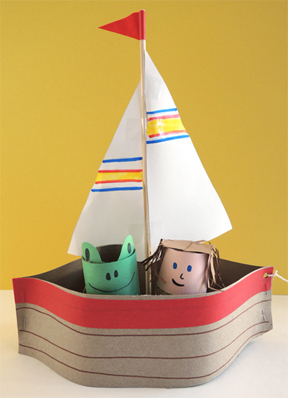
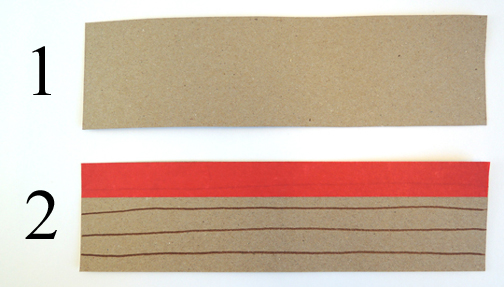
boat with passengersWe’ll begin with the boat! The first steps are exactly the same as this Noah’s Ark balancing game. Cut the lid and tabs off your box (if you are using a tissue box, cut the entire top off). Your box should now be about 3″ tall. Set it aside for a moment. Next, use a marker to draw horizontal lines on 2 rectangles of tag board. This creates the “boards” of your ship. For a bit of color, run a piece of color masking along the top of each rectangle (or just use markers).

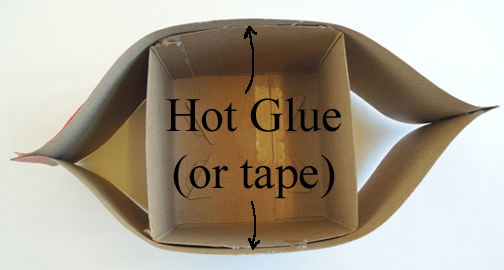
sailboat step 1Place both rectangles on top of one another, staple the short ends together, and slide them over the box. Secure them in place with tape or hot glue. This step is really important! If the sides of the boat aren’t attached to the box, the sides will pop off when you yank the boat’s pull string later.

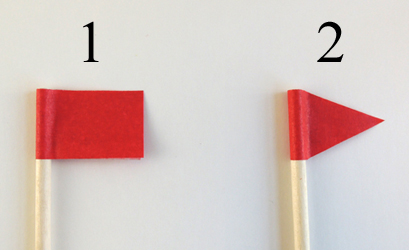
sides of boatNext, wrap a 4″ piece of color masking tape around the top of a wooden dowel, then snip the tape with scissors to create a triangular flag.

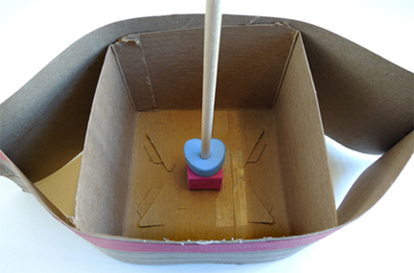
sailboat flag stepsPush 3 foam beads on the opposite end of the dowel, then hot glue the foam beads to the bottom of the boat. This is your ship’s mast.

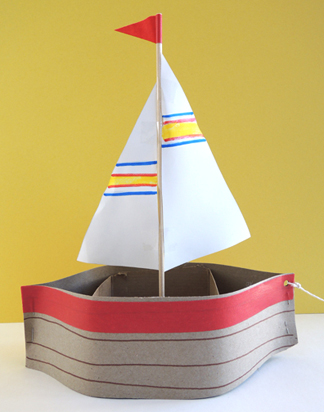
hot glued mastColor and cut the sails from the template, then tape them to the front and back of the mast (we made the sails short so they wouldn’t pull the dowel over, feel free to discard the template and make your own sails if you like). Finally, punch a hole in the front of the boat and knot a piece string through it. Here’s the finished boat with the flag, the sails, and the pull string in place:

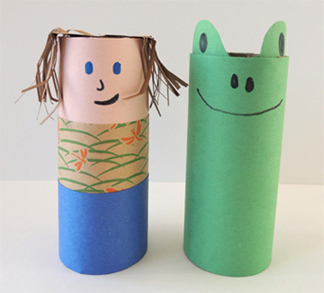
finished boatWe made 2 crew members (a person and a frog) using multicultural, construction, and patterned paper. Here’s Marissa’s self portrait, with a froggie friend:

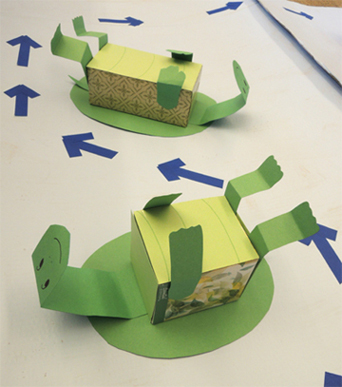
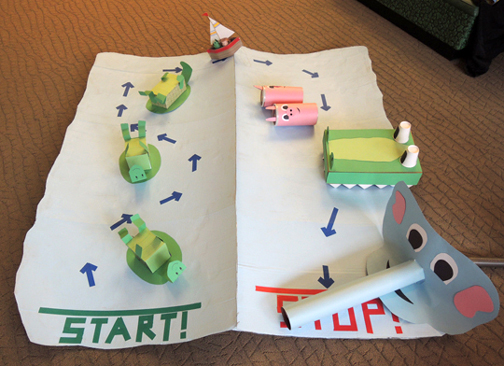
marissa and frogNow for the obstacle course! We snagged 2 huge pieces of cardboard from the recycle bin, and painted them light blue. Interestingly, the paint warped the edges of the cardboard upward, creating “waves.” While the paint was drying, we crafted some animal obstacles. The turtles are tissue paper boxes with green poster board shells, arms, legs, tails and heads.

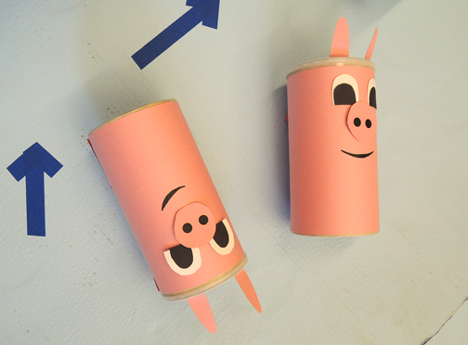
turtlesThe pigs are large oatmeal containers wrapped with pink construction paper.

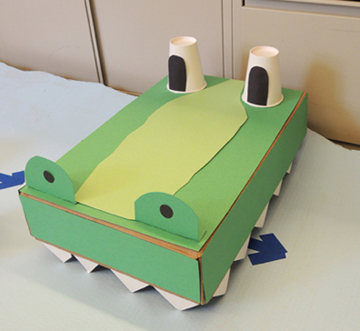
pigsThe alligator is the lid of a copy paper box covered in green poster board, with paper cup eyes and poster board teeth.

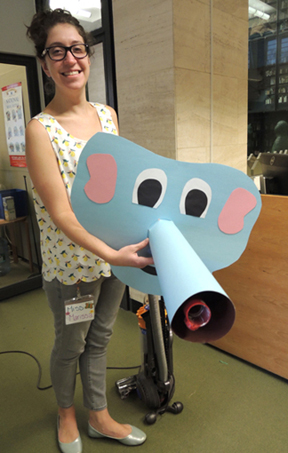
alligatorThe elephant’s face and nose was constructed out of light blue poster board, and a vacuum hose was inserted in the trunk.

vacuum elephantAfter placing all the obstacles on the cardboard, I used blue masking tape to make directional arrows. I decided not to glue any of the obstacles down (I’d rather have kids send them flying than trip over them).

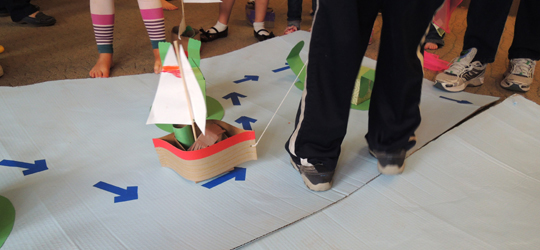
directional arrowsTo run the course, kids had to navigate their boat through the turtles, ride over some waves, and avoid the pigs (which were rolling all over the place as kids walked on the warped cardboard). Next came chomping alligator (which consisted of Marissa moving the box lid up and down and saying “Chomp! Chomp!” – we’re super high tech here.) Here’s a boat on course:

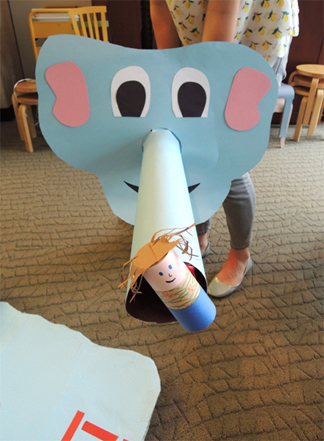
on courseRight before the finish line, the boats had to pass by the vacuum elephant. That was my job. I would make the elephant suck a toilet paper tube character right out of the boat, and then the kids had to pull it off the end of the vacuum nozzle! Fun!

captured personIMPORTANT! Some kids are afraid of vacuums. I asked vacuum-averse kids to turn their name tag stickers upside down. That was my signal to turn off the vacuum while they completed the obstacle course. It worked great!

Tin Foil Regatta

tin foil regattaHoist the sail and glide down a tin foil waterway! You can race another boat, or simply bob along at your own pace. This project was designed for a story time at my community pool. The project had to be simple, creative, and appeal to a wide age range. Since there were 50 kids at the program, the project also needed to be inexpensive and easy to assemble, with minimal adult assistance.

We also needed a super fun book. And I knew just the one to read!

We enjoyed The Old Pirate of Central Park by Robert Priest (Houghton Mifflin, 1999). In an apartment in New York City, an old retired pirate builds a model of his former ship. Excited, he take the ship to the Central Park Sailboat Pond. The Laughing Dog sails the waves beautifully, and the Pirate is delighted. But then a retired Queen arrives with her ship, the S.S. Uppity Duchess. The Queen’s ship races around the pond, being rude and swamping other boats. When the Pirate tries to put a stop to the rampage, the Queen’s ship opens fire! The Laughing Dog fires back and the “infamous battle of Central Park” begins (very funny, you must read it). Finally, in need of a nap, the Queen declares an end to the battle and proposes a truce. The Queen and the Pirate shake hands and peace returns to the pond. Now the Queen and the Pirate are friends, they enjoy the sailboat pond together – the two “Old Retirates” of Central Park.

You’ll need:

  • 4 wine corks
  • 4 craft sticks (mine were 4.5″ long)
  • 1 wooden bead
  • 1 wooden coffee stirrer
  • 1 triangle of white construction paper (mine was 6.5″ tall)
  • A selection of color masking tape
  • Hole punch
  • Scissors
  • Markers for decorating
  • Roll of tin foil
  • Hot glue

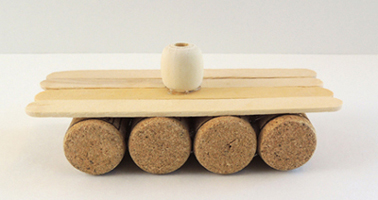
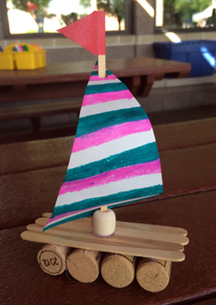
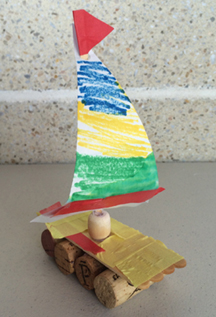
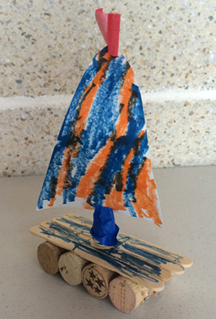
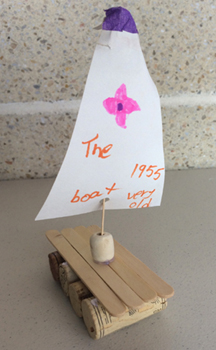
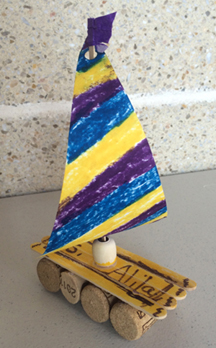
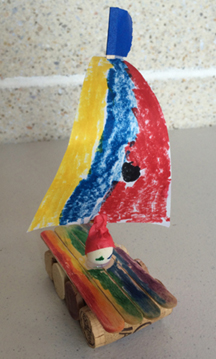
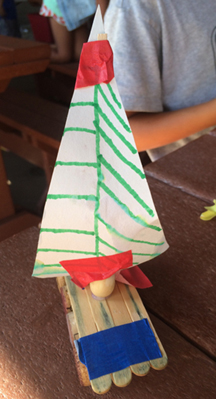
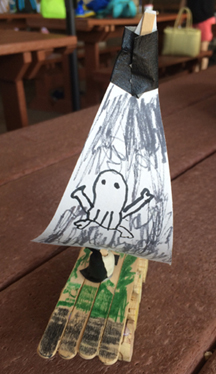
Begin by hot gluing 4 corks together. Then, hot glue 4 craft sticks on top of the corks. Finish by hot gluing a wooden bead to the center of the craft stick deck. Your boat’s base should now look like this:

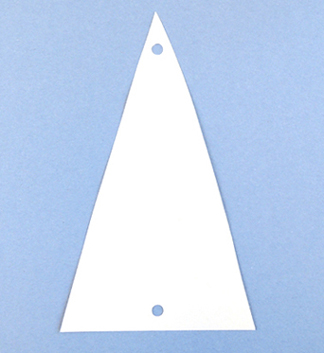
boat bodyWe prepped 50 of these boat bases in advance of the program. We also prepped the sails by punching holes in the top and bottom of a triangle of white construction paper.

holes punched in sailI made a dozen extra sails in case some ripped, got dunked the water, got lost in the fray, or someone made a coloring mistake and wanted to start again (and all four things happened at the program, multiple times!).

Insert a wooden coffee stirrer into the hole of the wooden bead. If necessary, stabilize the coffee stirrer with hot glue or color masking tape. Make sure to have extra stirrers on hand, in case the first one you grab doesn’t fit into the bead’s hole.

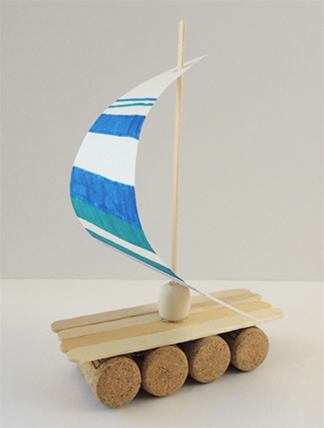
sailboat mastDecorate the sail with markers, then slide it onto the coffee stirrer

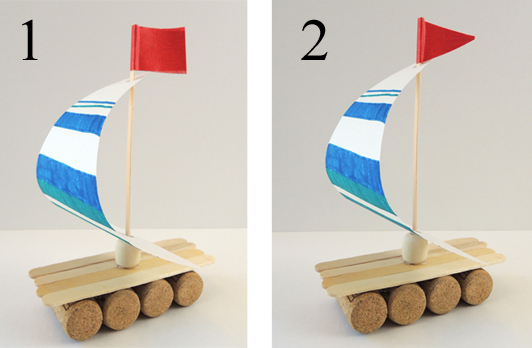
sail on mastTo make the sailboat’s flag, wrap a section of color masking tape around the top of the coffee stirrer. You can leave your flag square, or trim the sides with scissors to make it triangular.

flag stepsYour boat is finished! I managed to snap a few photos of boats at the program. Look how much personality they have!

We also had this fantastic non-boat creation…a pair of fish made out of tin foil and color masking tape. Awesome.

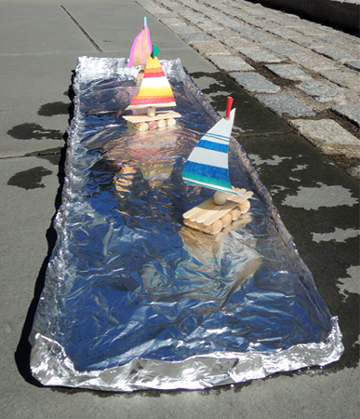
fishNow for the waterway! The waterway idea is from FamilyFun magazine (they called it “The Tinnissippi River.” How cute is that?). Basically, you use a whole lot of tin foil to make a long, high-sided tray (I recommend doubling up the tin foil to make it extra strong). Then you fill the tray with water. Our waterway was 10-12 feet long. I didn’t get a good photo of the waterway during the program, so I recreated a shorter version of it for this post:

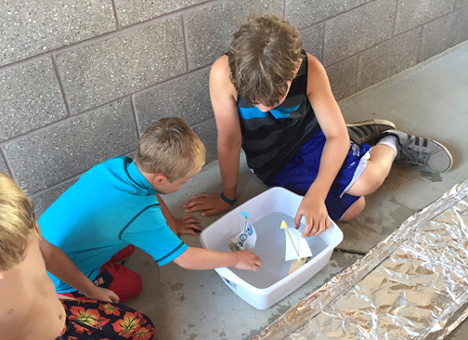
full tin foil sheetAlas, our waterway sprung a leak during the pool program. But quick-thinking Katie filled up several dish tubs with water. The kids were just as happy to float their boats in the tubs, so if you don’t want go the tin foil route, just grab a couple dish tubs and set sail. Or haul that old baby pool out of the garage and fill it up!

tub alternativeIf you want to turn this activity into a riveting regatta, give the kids drinking straws and instruct them to use the straws to blow their boats down the waterway. First one to the end wins!