 It’s garden season and the peas are plumb and ripe for pickin’. Unfortunately, Mr. Rabbit is on a mission to score a succulant snack! We made bunnies, baskets, and pea plants and then headed to our story time garden to catch that naughty nibbler in the act!
 We read Pickin’ Peas, a classic Southern folktale retold by Margaret Read MacDonald, and illustrated by Pat Cummings (HarperCollins, 1998). A little girl plants and carefully tends a pea garden. When the peas are nice and plumb she starts to pick them, singing as she goes (“Pickin’ peas. Put ’em in my pail.”). Mr. Rabbit, hiding in the row behind her, starts to eat the peas, singing as well (“Pickin’ peas. Land on my knees!”). Eventually, the little girl catches on to rabbit’s tricks and nabs him. But with some quick thinking, a song, and a dance, the rabbit manages to escape for further culinary daring-dos.
You’ll need:
- 1 small box (mine was 4” x 4” x 4”) – a small tissue box works too!
- 1 strip of tagboard for the basket handle (mine was 2″ x 14.5″)
- Brown masking tape
- A selection of patterned tape
- 1 toilet paper tube
- Brown construction paper
- 2 eye stickers
- 1 pink dot sticker
- 1 small white pom-pom (mine was 0.75″)
- 1 green pipe cleaner
- 1 rectangle of green construction paper (approximately 3″ x 3.5″)
- 3-4 mini pom-poms (mine were 0.25″)
- 1 small plastic cup (mine was 3oz.)
- 1 pea garden game (more on that later!)
- Stapler, scissors, and tape for construction
- Markers for decorating
- Hot glue
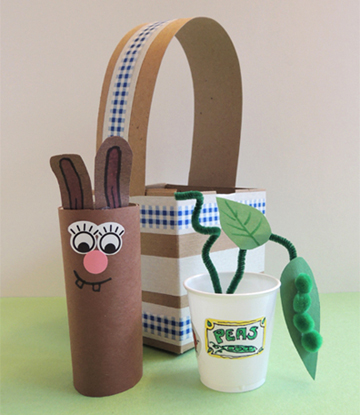
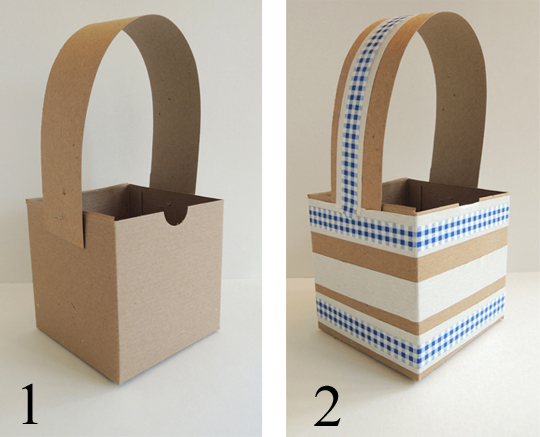
There are three parts to this project: the basket, the rabbit, and the pea plant. We’ll start with the basket! Cut the tabs and lid off the top of a small box. If you’re using a tissue box, simply cut the top off. Attach a tagboard (or poster board) handle. Use brown masking tape and/or patterned tape to decorate the basket (or, just use markers!).
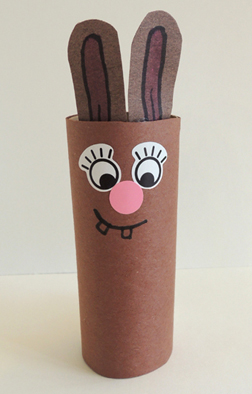
 Next is the rabbit! Wrap a toilet paper tube with brown construction paper, then add eye stickers and a dot sticker for the nose (or just use markers to create eyes and a nose). Tape a pair of brown construction paper ears to the inside of the tube. Hot glue on a white pom-pom tail, And don’t forget to draw a smile! The final step: write your name on the back of your rabbit so you can identify it later, during the garden game.
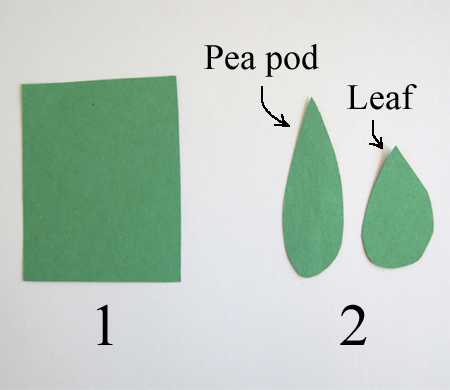
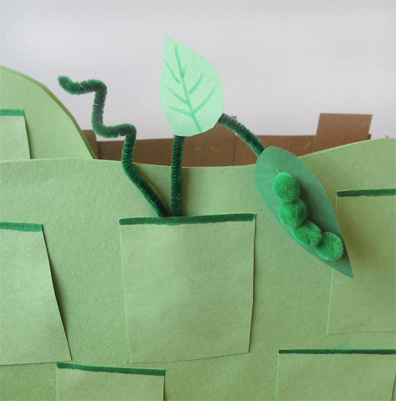
 Lastly, the pea plant. First, cut a pea pod and a leaf from a 3″ x 3.5″ rectangle of green construction paper. Here’s what mine look like:
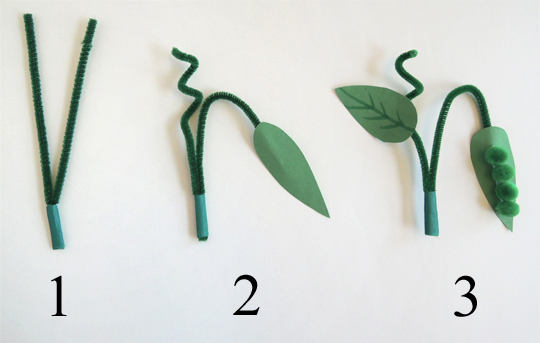
 Use markers to draw some veins on the leaf. Write your name on the back of the leaf as well (so you identify it later, during the garden game).
Cut a pipe cleaner in half. Bunch the two halves together and tape the bottoms together tightly with masking tape (I used green tape, but any color will do). Curve the right pipe cleaner downward and tape the pea pod to it. Corkscrew the left pipe cleaner and tape a leaf to it. Finish by hot gluing 3-4 mini pom-poms to the pea pod (I used green pom-poms for my plant, but during story time, we let kids choose any colors they liked).
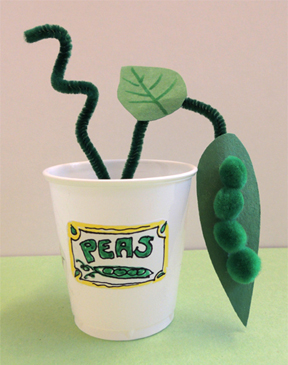
 Your pea plant also gets a “pot.” This is a 3oz plastic cup. I had some old office labels in the art supply cabinet, so I made “Peas” labels for the kids to color in. You can tape your pea plant inside the pot like this:
 Or…you can wait, leave the pea plant detached from the pot, and play our garden game!
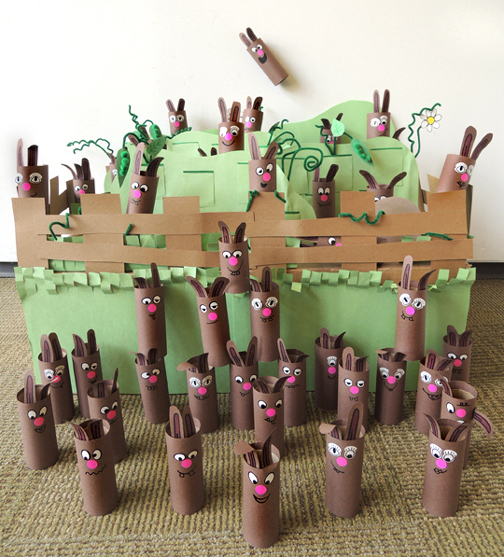
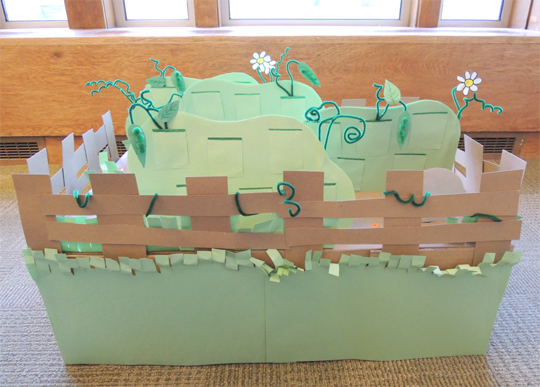
Our garden started as a low, flat box. We added 4 shrubs, tall grass, rocks, daisies, a smattering of flower stickers, pipe cleaner pea vines, a tagboard picket fence, and 3 oatmeal container rabbit holes. Here’s an image of the garden from the front:
 And here’s a birds-eye view so you can see how the shrubs are staggered and where the 3 rabbit holes are located:
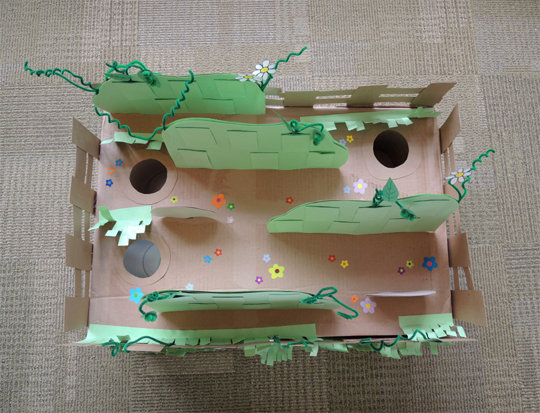 We knew the shrubs and rocks were going to get bumped pretty hard, so Katie attached them to jumbo craft sticks and slid them into slits she cut in the box.
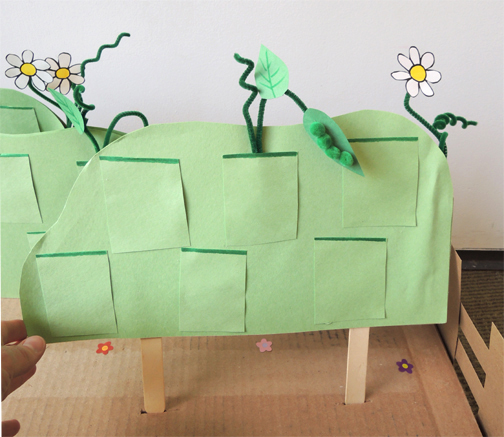 You’ll notice that the shrubs have little pockets on them. This is so you can slide your pea plant into the pocket, and lo! It is now “growing” in the garden.
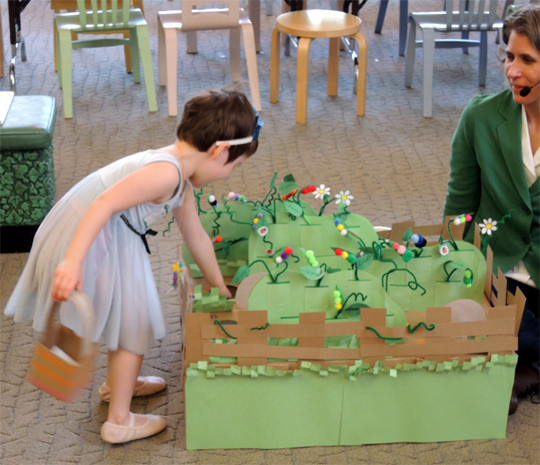
 To play the game, we had every kid “plant” their pea plant in a pocket. Next, I collected all the rabbits. One by one, I hid a rabbit somewhere in the garden – in holes, behind rocks, in the tall grass, etc. – then I called out the name written on the back of the rabbit. The rabbit’s owner jumped up, ran over to the garden, and tried to find the rabbit before it “ate” any peas!
 After everyone had caught their rabbit, the kids returned to the garden to “pick” their pea plants and tape them inside their pots. Since the kids’ names were written on the backs of the pea plant leaves, every plant was returned to its rightful owner.
Rabbits ruled this story time, but what happens when vegetables strike back? Click here to find out!

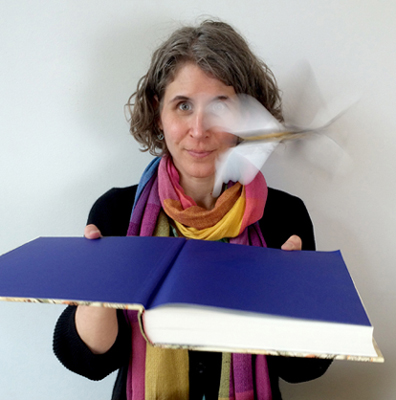 Recently, while in Brooklyn, I wandered into a little toy store called Matt & Juliette. There, I discovered some neat-o wind-up butterflies by Seedling. The clerk at the toy store explained that some people like to put the butterflies inside birthday cards. When the recipient opens the card, the butterfly flutters out. If it works for cards, I thought, it’ll totally work for books! I immediately purchased a pair to test out. They retail for $3 each and come in 4 different colors and styles.
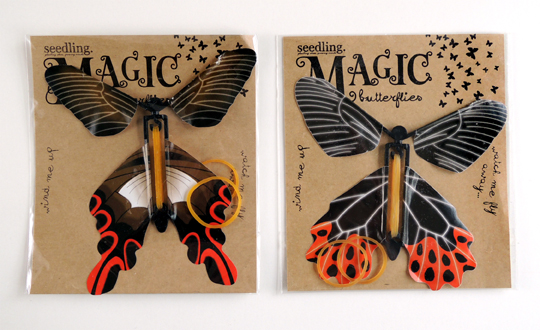 As you can see, the toy is pretty simple. You hold one half and twist the other half. This motion winds the 2 rubber bands, which ultimately propel the toy skyward.
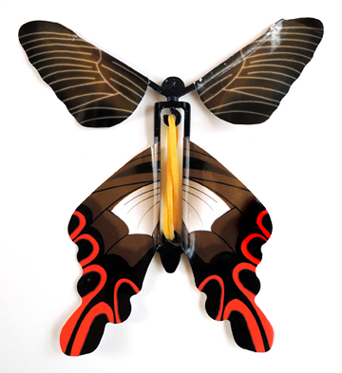 The directions warned that winding the rubber bands too tightly could cause them to snap. This is true. Over the course of 20 test flights, we broke 2 rubber bands. But there are two spare rubber bands in each package, so no problem! Alas, one of the plastic hooks on the smaller butterfly snapped within 5 minutes, rendering the toy useless, but the other one held out just fine. Ready to see a butterfly in action?