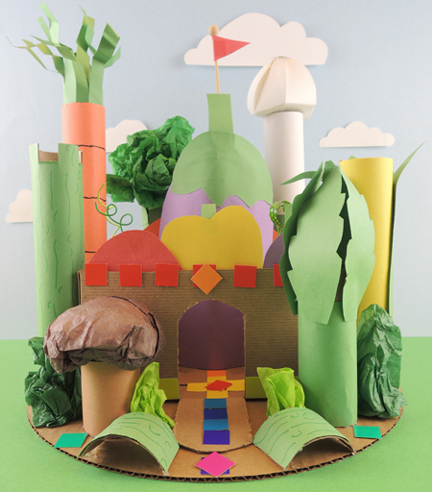
 Craft a castle packed with phytochemicals! Behold towers of corn, asparagus, and carrot. Admire the eggplant and pepper wall fortifications. Stride through the cucumber slice gates. Vegetables have never looked so noble!
We read Scarlette Beane, written by Karen Wallace and illustrated by Jon Berkeley (Dial Books, 2000). Scarlette Beane was born with special green fingertips. When she turned 5, her Grandfather gave her a vegetable garden. She eagerly gardens with her twinkling green fingers and WOW! Overnight, Scarlette’s garden blooms with massive vegetables! The entire village shows up with bulldozers, forklifts, and chainsaws to enjoy soup served out of a concrete mixer. However, the Beane’s house is so tiny, everyone must eat in the garden. That night, Scarlette has an idea. She plants seeds, and, with a flash of her green fingers, an enormous vegetable castle grows in the Beane’s meadow! So of course, they move in and live happily ever after.
You’ll need:
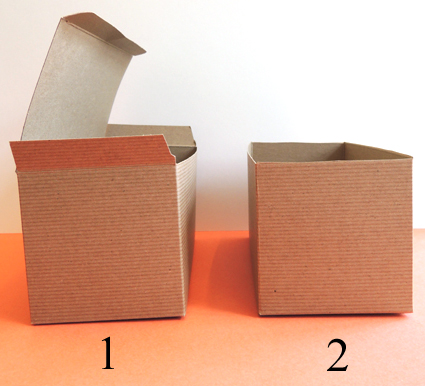
- 1 large box (mine was 4.5” X 4.5” x 9” – a large tissue box works too)
- 1 box cutter
- 1 corrugated cardboard base (I used a 14″ cake circle)
- Paper towel tubes
- Toilet paper tubes
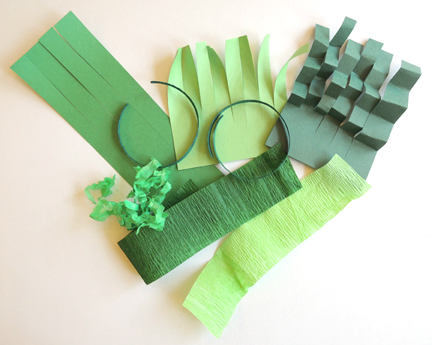
- Construction paper in assorted vegetable colors
- Green tissue paper
- 1 onion dome template, printed on 8.5″ x 11″ white card stock
- Optional: green craft ties & twisteez wire
- Scissors, tape, and glue for construction
- Hot glue
The nice thing about this project is that you can decide what, and how much, to add to your castle. I’ll instruct you in everything we made at our story time, and then the agricultural architect in you can decide how much to add to your own castle.
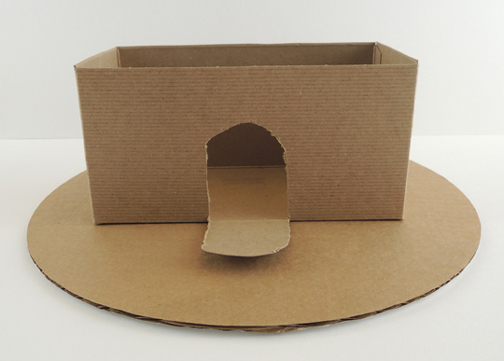
For starters, cut the lid off a large box (if you’re using a tissue box, cut the top off). Use a box cutter to cut a drawbridge in the front of the box. Hot glue the box to a corrugated cardboard base.
 And now for the giant vegetables! Here they are, in no particular order.
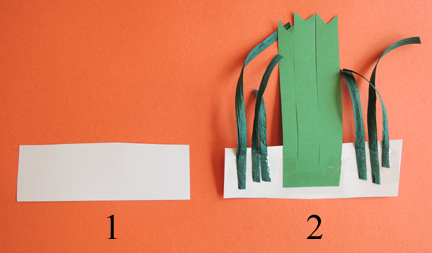
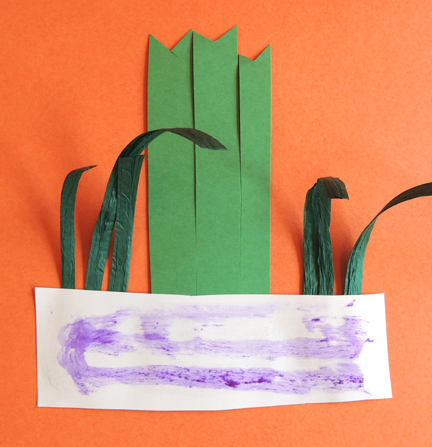
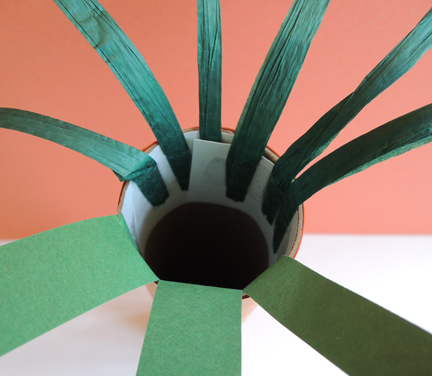
ASPARAGUS
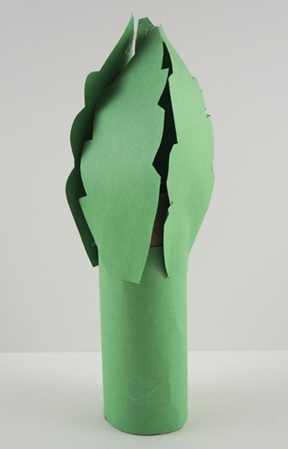 We used a toilet paper tube, but if you want a taller stalk, cut a paper towel tube to the desired height. Wrap the tube with green construction paper. Cut 4 serrated leaves out of green construction paper, and tape (or hot glue) them close to the top of the tube. Pinch the tips of the leaves together, then secure them with tape or hot glue.
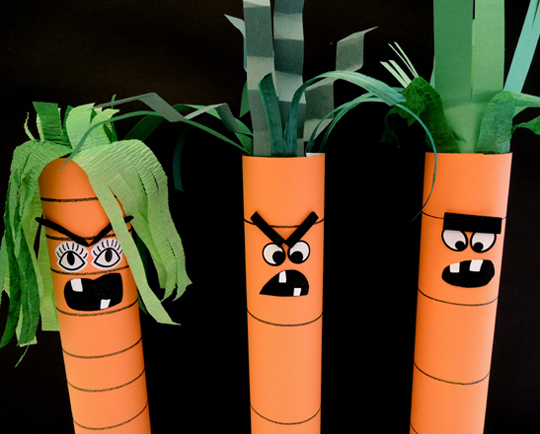
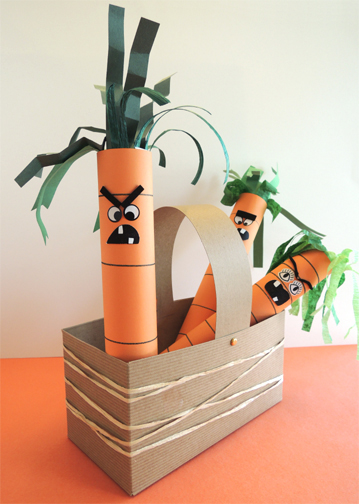
CARROT
 Cut a paper towel tube to the desired height, then wrap it with orange construction paper. Add a little green construction paper fringe to the top. Drawing black lines around the carrot are optional!
BROCCOLI
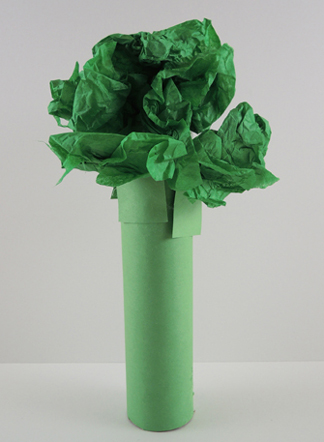 Cut a paper towel tube to the desired height, then wrap it with green construction paper. Crumble up a piece of green tissue paper and hot glue it to the top of the tube. To make the broccoli’s “floretes,” crumble up 4 smaller pieces of tissue paper, then hot glue them to the tops of four, 1.5″ x 2.25″ pieces of green construction paper. Tape or hot glue the floretes close to the top of the tube.
CORN
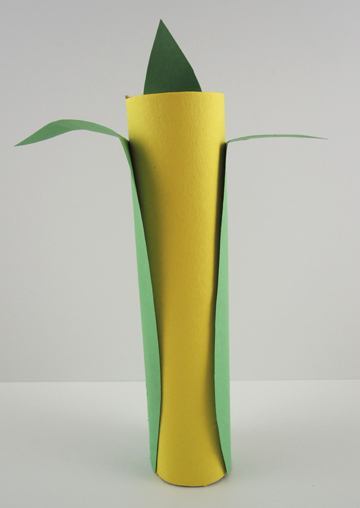 Cut a paper towel tube to the desired height, then wrap it with yellow paper. To make the corn’s “husk,” wrap a piece of green construction paper 3/4 of the way around the tube. Cut three points in the top of the green paper. Attach the husk with glue or tape, leaving the front of the corn exposed.
CUCUMBER
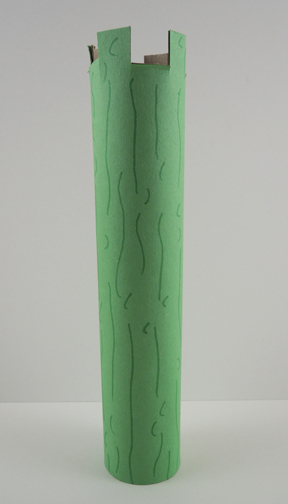 Cut a paper towel tube to the desired height, then wrap it with green construction paper. We cut castle parapets in the top as well. Use a green marker to draw cucumber lines and bumps.
CUCUMBER GATES
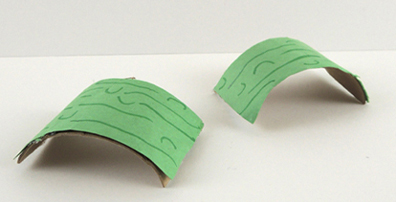 Cut a 1.5″ ring off the top of a toilet paper tube. Cut the ring in half and cover the tops of both sections with green construction paper. Use markers to draw cucumber lines and bumps.
MUSHROOM
 Cut a toilet paper tube to the desired height, then wrap it with brown paper. To make the mushroom’s cap, crumble brown tissue paper and wrap another piece of tissue paper over the crumbles. Squish the tissue paper to make a cap shape, then hot glue the cap to the top of the tube.
GREEN ONION
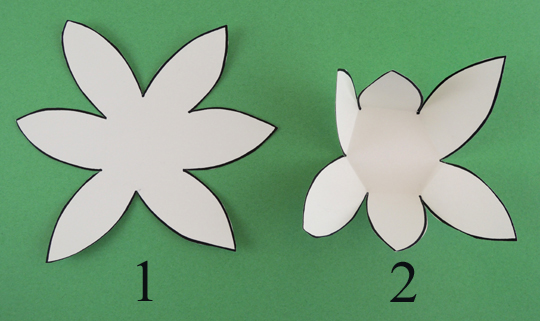
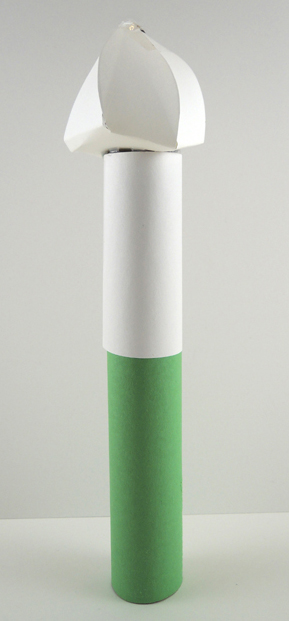 Cut a paper towel tube to the desired height, then wrap it with green construction paper. Next, wrap the top half of the tube with white paper. To make the bulb of the onion, cut the onion dome from the template. As you can see, it resembles a flower with multiple points. Fold each point inward toward the center of the template, then open it back up again.
 Gather two of the points over the center of the template and tape the tips together. Repeat with the remaining sets of points until you have 3 sets altogether.
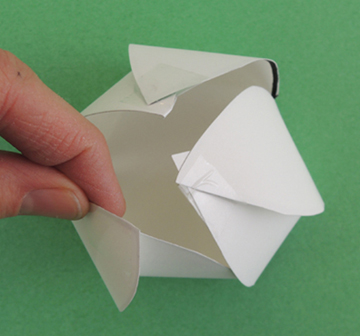 Gently push the 3 sets together over the center of the template, and tape together.
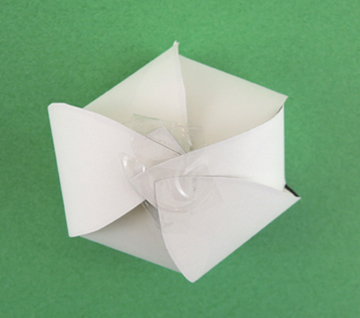
Whilst creating this onion bulb, you might need to do a little curling, pushing, and adjusting to get the dome just right. But don’t sweat it if it’s a little lopsided. It’s going to look awesome no matter what! Hot glue it top of the tube.
When you’ve completed all your vegetables, hot glue them to the castle walls and the base. We added some construction paper eggplant, peppers, and tomato slices to the perimeter, as well as some green tissue paper bushes. Optional but fun: green craft ties and Twisteez wire “vines,” and cardboard mosaic squares (ordered from Discount School Supply – a pack of 10,000 squares costs $12).
The final touch is a little flag! We used rock candy sticks and construction paper, but a drinking straw or a wooden coffee stirrer would work too. However, to obtain a castle flag at our story time you had to play giant carrot hide and seek.
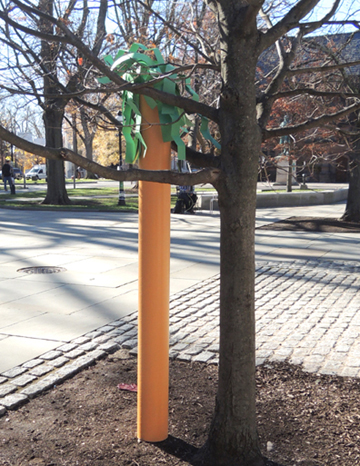
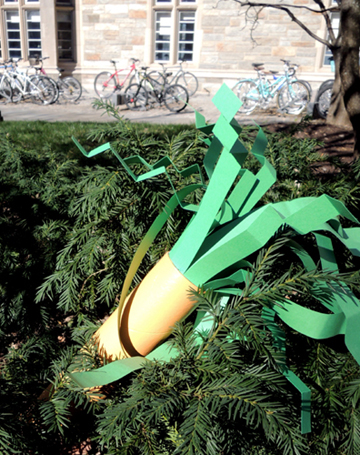
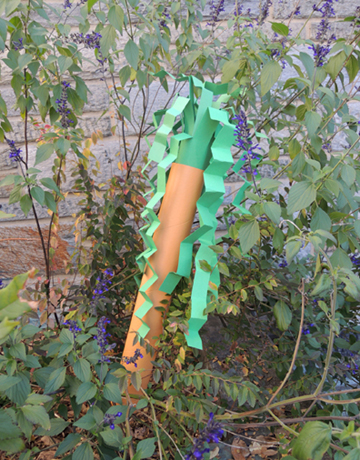
I had been hording 4 big tubes in the office (from 24″ – 72″ tall!), and Marissa just happened had some spare orange paint at her house. We hid the giant carrots around our library’s plaza. Behold carrot in a tree…
Carrot, reclined in tall grasses…

Carrot, in bushes (those bushes are also the site of reported Sasquatch sightings)…
 Carrot, frolicking amidst flowers…
Once the kids found all four carrots, they won a flag. Three cheers for giant vegetables!
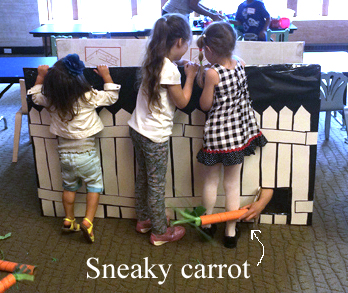

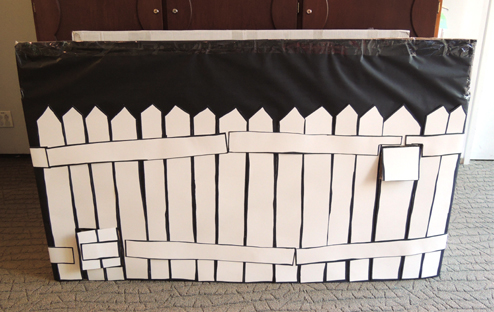
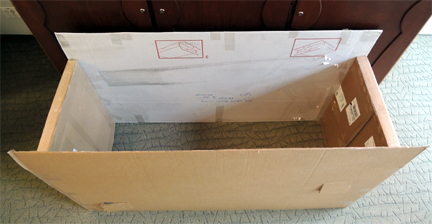
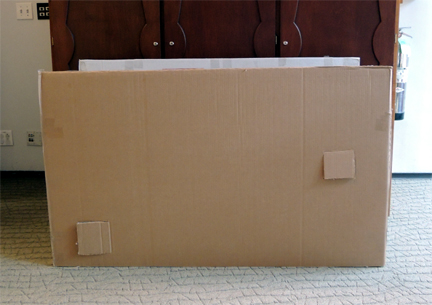
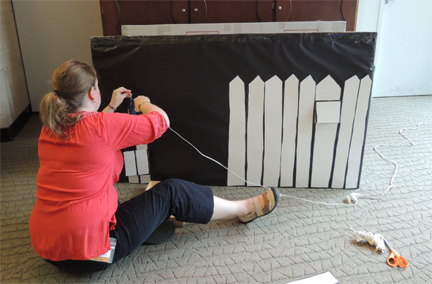
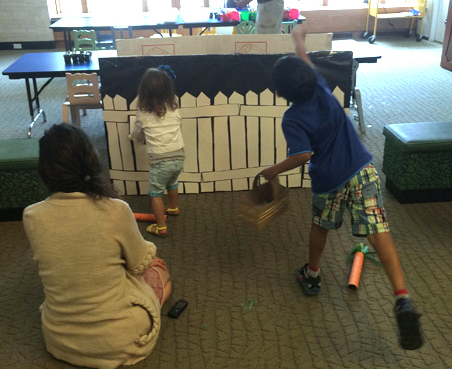
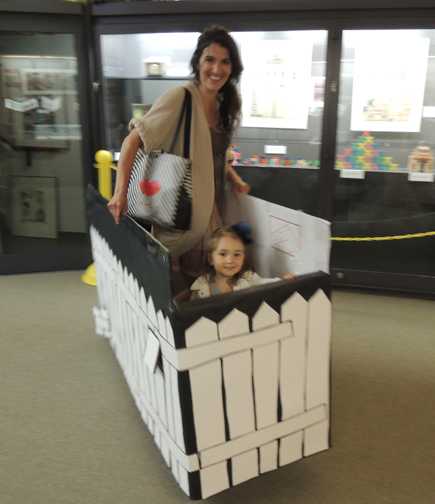
 Off to Crackenhopper Field! The field doesn’t have to be fancy. In fact, in can just be an empty box, bin, or paper grocery bag. But since we had a couple large, flat boxes on hand (and because I’m never one to “rein it in”) we built a fenced field with two little doors for carrots to sneak in and out of.