Roll out the red wagon…this little fox is going to market! We made tissue box wagons, grabbed our shopping lists, and headed to the market to play a vegetable matching game. Sporting fox ears and tails, naturally.
We read Red Wagon by Renata Liwska (Philomel Books, 2011). Lucy the fox has a new red wagon and a big job to do. She must take her mother’s list to market and buy some groceries. Lucy sets off with her animal friends, and while they do eventually bring the veggies home, they also have adventures as the red wagon transforms into a boat, covered wagon, caravan, train, rocket ship, and construction vehicle. After Lucy’s big day, the red wagon serves one final purpose…a place to take a nap!
You’ll need:
- 1 large tissue box
- Red and white construction paper
- 1 wheel assembly for the wagon (more on this below)
- 2 drinking straws (our were 10″ long)
- An 16.5″ piece of string
- 1 small rectangle of tagboard (approximately 1.25″ x 2″)
- As many veggies templates as you need, printed on 8.5″ x 11″ card stock
- 1 set of veggie market signs, printed on 8.5″ x 11″ card stock (color version here)
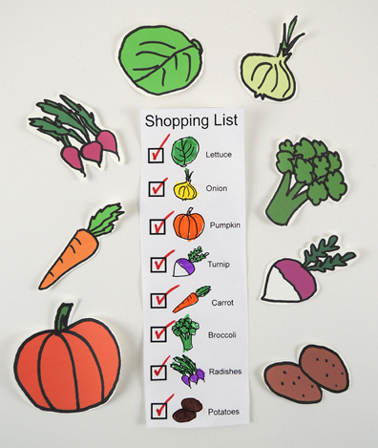
- As many shopping lists as you need, printed on 8.5″ x 11″ paper
- Red poster board
- Scissors, stapler, glue, and tape for construction
- Markers for decorating
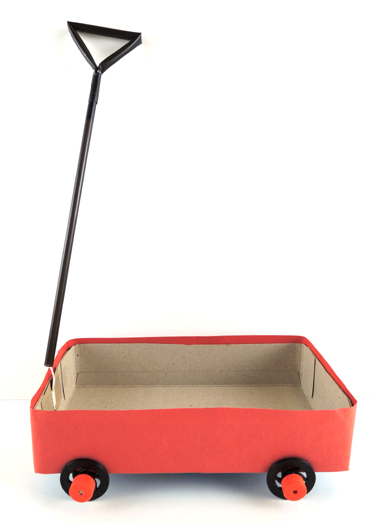 We’ll begin with the little red wagon! Cut a large tissue box down to 1.75″ inches tall, then wrap with red paper. You can go with our standard wheel assembly (instructions here), or hot glue shortened paper towel tubes the bottom of the box to suggest wheels, and drag the wagon on the fixed tubes.
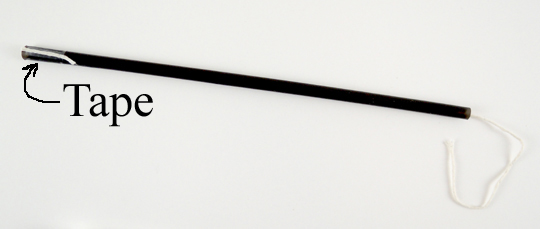
For the wagon’s handle, you can use a simple pull string, or you can make a drinking straw handle like we did. To make our handle, thread an 16.5″ piece of string through a drinking straw. Pull 1″ of string out of the straw, fold it down, and tape it to the side of the straw. The other end of the string should extend, unattached, from the opposite end of the straw.
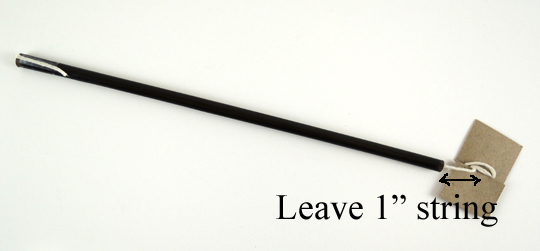
 Next, cut two notches the center of a 1.25″ x 2″ piece of tagboard. This is the anchor for your wagon handle. Wrap the string around the notches in the tagboard, but don’t wrap all the string around it! Leave 1″ of string between the tagboard and the end of the straw. This will allow the handle to move left and right while you’re pulling your wagon.
 Bend a second drinking straw into 3 sections, pinch the ends together to form a triangular grip on the handle, then tape the ends of the straw firmly together.
 Fold and slide the taped section of the handle into the open end of the first straw. Cover the taped string with colored masking tape if you like (I used black in the photo below).
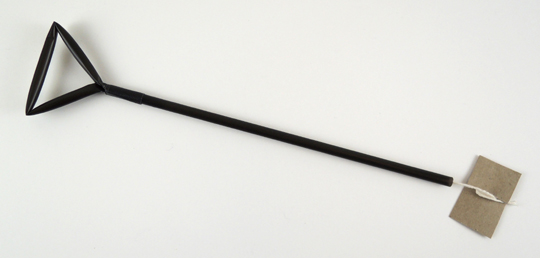
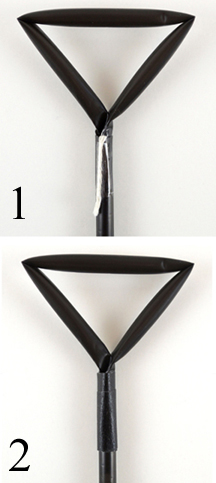 Here’s what a finished wagon handle looks like. A drinking straw handle, a 1″ gap of string, and a tagboard anchor wrapped with the remaining string.
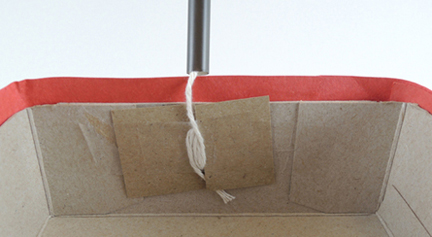
 Tape the tagboard anchor to the front interior of the wagon. Done!
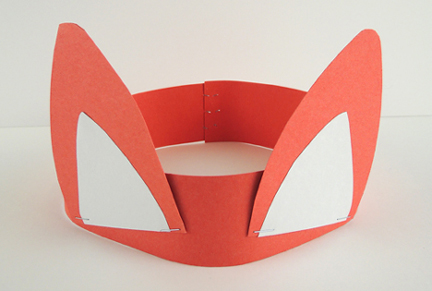
 To make your fox costume, circle a strip of red poster board around your head, then staple it. Cut a pair of fox ears from red poster board, and add white construction paper ear interiors. Staple the ears to the headband. We attached our ears close to the front of the headband, and tilted them upwards slightly. Somehow, that just looked more foxy.
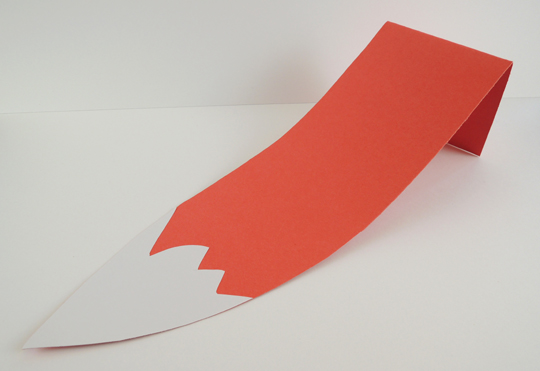
 Next, cut a 6″ x 22″ rectangle of red poster board into a fox tail shape. Glue a little brush of white construction paper on the end of the tail, and tab the top. The tab slides inside the waistband of your pants (if you’re wearing a dress, punch two holes in the top of the tail, thread string through them, and tie the string around your waist).
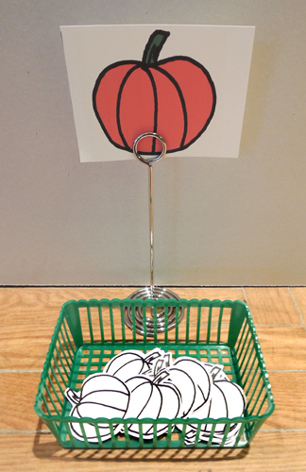
 Your wagon and costume are finished…now to market! The matching game is very simple. Print the market signs, then put each sign next to the corresponding veggies from the template. I used 8″ table card holders (which you first met in this sneaky math post), and had little plastic baskets for the veggies. We had eight market stops in total, all scattered around the library’s main lobby.
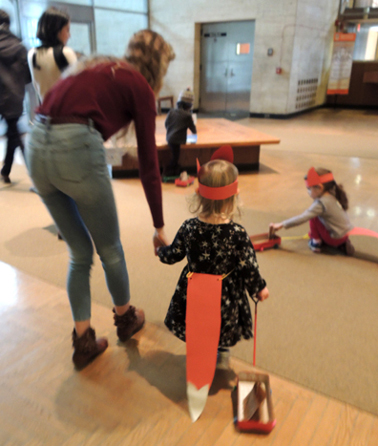
 Then we gave each kid a shopping list. You’ll notice the lists are all slightly different. This was to avoid everyone rushing to the same area at once, like some sort of vegetable / woodland creature version of Black Friday. We also gave kids little shopping bags (basically, a brown paper lunch bag cut down to 4″). Following their lists, the kids located the matching sign, loaded the vegetable in their wagons, and checked it off their shopping lists.
 Once they had all their vegetables, they pulled everything back to the project area to color the vegetables and customize their paper bags!

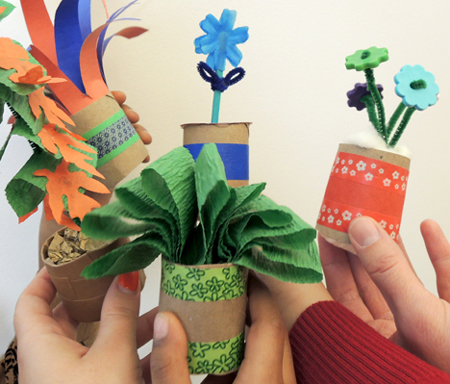
 When the wagons were assembled, kids popped their potted plants in and we circled the library’s lobby. Everyone was invited to trade at least one pot with Katie (and we pre-made a number pots for this purpose).
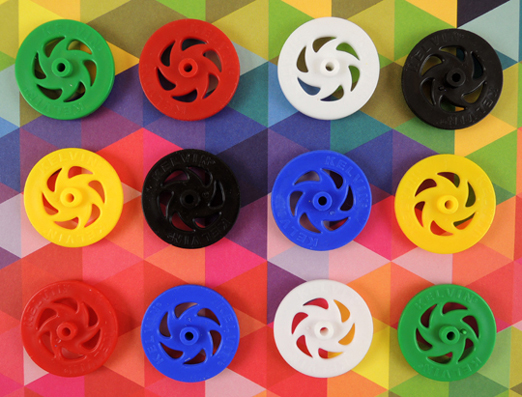 You’ve seen them in various projects that roll, toddle, and race. For anything ambulant, we highly recommend these fantastic plastic wheels, sold by Kelvin Educational. This post also includes instructions on how to make an official Pop Goes the Page wheel assembly for all your vehicular needs!
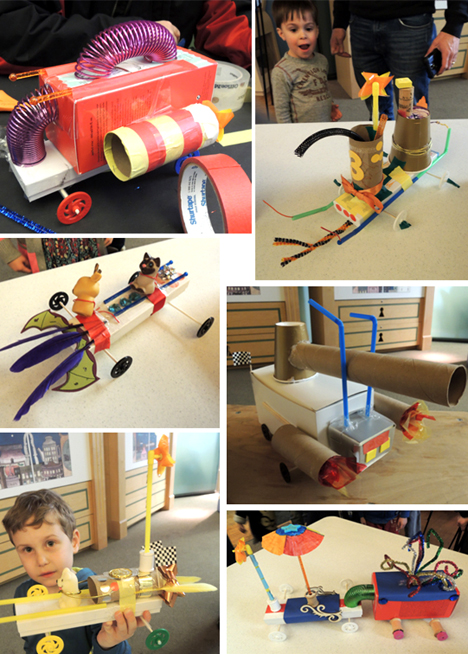 To make a wheel assembly, tape two, 4″ plastic straws to the bottom of a box. Then thread two, 6″ wooden rod “axles” through the straws. We used BBQ skewers cut down to the proper size with pruning shears (and don’t forget to cut off the pointy end of the skewer!). Here’s what a finished wheel assembly looks like:
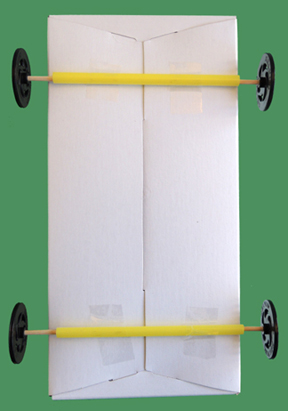 The wheels can be purchased from Kelvin Educational. Black wheels are product #990168 ($10 for 100); and color wheels are #990169 ($11 for 100). Warning! Sometimes, the wheels slide off the ends of the skewers. To remedy that, we hot glue
  Pig
Pig 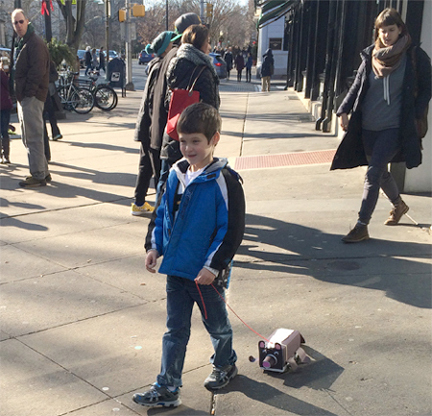 Hitting the streets with your
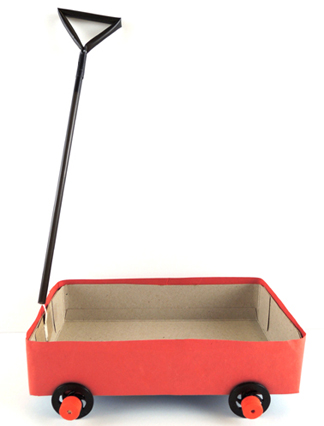
 An
An 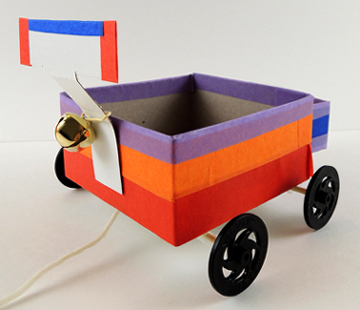 A
A