Erica Portnoy (eportnoy@)
Bonnie Eisenman (bmeisenm@)
Mario Alvarez (mmcgil@)
Valya Barboy (vbarboy@)
Bottle Organ RockBand:
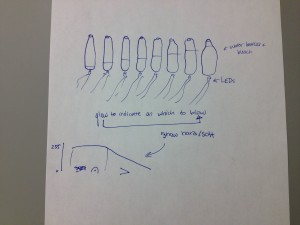
The Bottle Organ RockBand is a musical tutorial: it lights up the bottle that you should blow in next, teaching you to play a song (specifically, Mary Had a Little Lamb)! We were inspired to do this project by little kids’ instructional pianos, whose keys light up to teach people to play simple songs. Three of us play the flute, so the bottle organ was a natural and cheap choice of instrument. Also, we thought that light would diffuse really well through a water-milk mixture, making the instructions easy to follow (and it would look cool!). We thought the diffusion of our LEDs through the fluids worked really well. We also liked the fact that the different notes were different colors, because it makes the tutorial easier to follow. Finally, we’re proud of the tuning of the bottles. Originally we had hoped to build a larger-scale organ to span an entire octave, but because of the limited number of LEDs we could not do that. We also thought about making it more interactive (using the SoftPot to adjust tutorial speed, having a user compose a song and the tutorial play it back, etc.) We ultimately decided, however, that it would be more beneficial to focus our efforts on making the output device, because adding sensors would yield only minimal gain. Another limitation is that currently our song is hardcoded, so it can only play one song at a time. That being said, the notes themselves are in a separate array that our code reads in and parses, so giving it any other song would be easy. Finally, one major design flaw we had was that the bottles were standing very close to our electronics. If we were going to do this again, we would keep our bottles in some container, safely away from our Arduino. Overall, we are pleased with the result. We even did a user test!
Sketches:
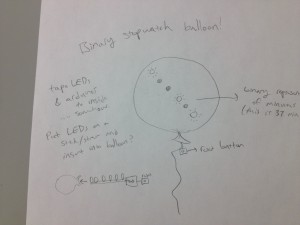
Binary Balloon Stopwatch – counts seconds by giving the binary number via lit-up LEDs. Didn’t work because we don’t have helium, and have too few LEDs.
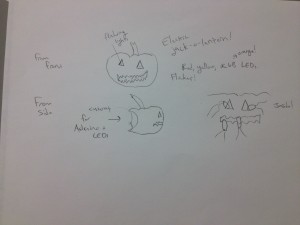
Diffusing light through a pumpkin so that it looks like a flame – ultimately cool but kind of worthless…
A video of our final result:
Showing various people playing our final product, and the making of our Bottle Organ!
List of materials:
- 1 Arduino
- 2 220 Ohm resistors
- 2 47 Ohm resistors
- 1 USB cable
- 8 alligator clips
- 9 wires
- 1 breadboard
- 4 LEDs
- 4 plastic bottles, filled with a water and a few drops of milk
- Online tuner
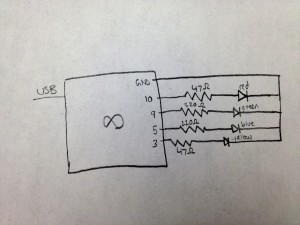
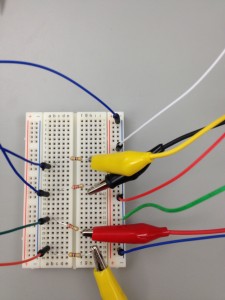
Once you have the necessary materials, start by building the circuit, following the diagram included. The circuit should be 4 LEDs and resistors in parallel, with all connecting to the ground on the Arduino. We used weaker resistors for the weaker LEDs, to make them all closer in brightness. Using alligator clips to connect to the LEDs is useful for positioning them beyond the breadboard. Each LED is then placed under a corresponding plastic bottle so that the light diffuses upwards. To set up the bottles: acquire four plastic bottles. If necessary, remove their labels. Then, use an online tuner such as this one to determine the volume of liquid necessary to produce the desired note for each bottle. We recommend simple trial and error using water. Mark the level and note on the bottle with a marker if desired. Water doesn’t diffuse light very well. In order to improve diffusion, add a small quantity of milk to each bottle. We used a standard soda bottle cap to measure out the milk, and used between half of a capful and a whole capful for each bottle; add milk until it looks cool to you, testing diffusion using an LED. We also experimented with some other liquids, such as tea; we encourage you to experiment with liquids as well. Volume, not density, determines pitch, so the type of liquid shouldn’t matter. Finally, place the bottles above the LEDs, plug the USB cable into the Arduino and the computer, and start making music!
The final set-up should look something like this: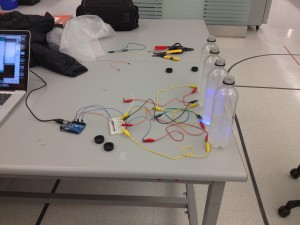
Code:
/*****
 * File: mary_lamb
 * Description: blinks LEDs to play
   Mary Had a Little Lamb.
 * HCI L0
 * netids: bmeisenm, mmcgil, vbarboy, eportnoy
 *******/

// Define which pins represent each note.
const int cpin = 3;
const int dpin = 5;
const int epin = 9;
const int gpin = 10;

void setup()
{
  // initialize the serial communication:
  Serial.begin(9600);
  // initialize pins output:
  pinMode(cpin, OUTPUT);
  pinMode(dpin, OUTPUT);
  pinMode(epin, OUTPUT);
  pinMode(gpin, OUTPUT);
}

// Make a pulse at pin for a length of time
void pulse(int pin, double time)
{
  int maxbright = 255;
  for (int i=0; i <= maxbright; i++) {
    analogWrite(pin, 255 - i);
    delay(time/255.0);
  }
}

// "Plays" a song
void playsong(int notes[], int lengths[], int numnotes) {
  for (int i = 0; i < numnotes; i++) {
    pulse(notes[i], lengths[i]);
  }
}

// Main run loop.
void loop() {
  // Defines pulse lengths.
  double shortpulse= 1500;
  double shorterpulse = shortpulse * 0.8;
  double longpulse = shortpulse * 1.5;
  // Defines the song! (in terms of pins & lengths)
  int notes[26] = {epin, dpin, cpin, dpin,
                 epin, epin, epin, dpin,
                 dpin, dpin, epin, gpin,
                 gpin, epin, dpin, cpin,
                 dpin, epin, epin, epin,
                 epin, dpin, dpin, epin,
                 dpin, cpin};
  int lengths[sizeof(notes)];
  for (int i=0; i < sizeof(notes); i++)
    lengths[i] = shortpulse;
  lengths[6] = longpulse;
  lengths[9] = longpulse;
  lengths[12] = longpulse;
  lengths[17] = shorterpulse;
  lengths[18] = shorterpulse;
  lengths[19] = shorterpulse;
  lengths[20] = shorterpulse;
  lengths[sizeof(notes) - 1] = longpulse;
  // Play song.
  playsong(notes, lengths, sizeof(notes));
  // Delay at end just for fun.
  delay(4000);
}

