
Light DJ
Ryan Soussan, Bereket Abraham, Lauren Berdick, Andrew Ferg
Description
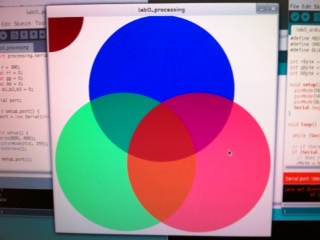
We used Processing and the Arduino to map a color wheel to the multi-color LED. On the computer screen, Processing displayed 3 overlapping circles, which were red, green, and blue. The mouse’s distance from each circle’s center corresponds to the intensity of that color. We then send those values to the Arduino and use them to set the brightness of each LED color. The only problem we encountered was the mismatch between the RGB mixing from Processing’s color values and the actual mixing of red, green, and blue light. When the LED mixes all 3 colors at equal intensities, it creates white light; however, mixing red, green, and blue in Processing creates a dark black-brown, creating a discrepancy between the GUI and the actual LED output.
Parts
1 computer (to run Processing and Arduino)
1 Arduino Uno microcontroller
1 multi-color LED
4 jumper wires
3 330 ohm resistors
1 small breadboard
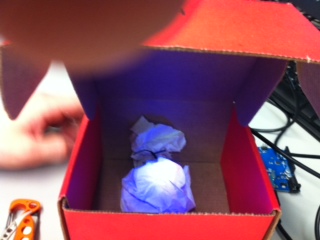
1 piece of wax paper to diffuse the LED
Instructions
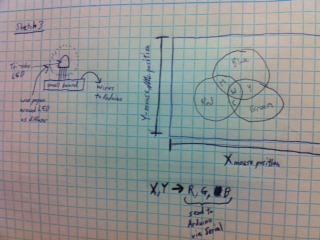
2 of our design sketches:
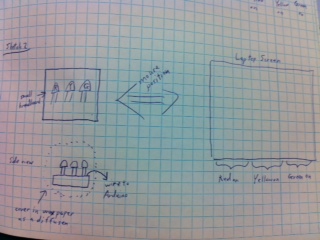
Install Arduino and connect the board to you computer. Use the Blink and Dimmer tutorials to make the LED turn on. Remember to include a resistor for each pin. Use three PWM pins (~) so that you can modulate the brightness of the LED (these let you mimic an analog signal using a digital output). Test the different ends in order to match each pin to a certain color, and then encase the LED and mini-breadboard in wax paper to diffuse the light.
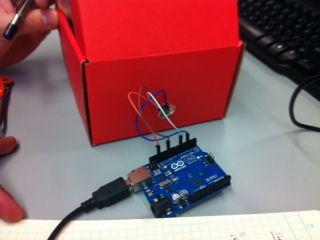
Front and back views of our little contraption:
Now go to Processing and make your GUI. We represented the color wheel with 3 circles in a triangle (go to the color tutorial at processing.org). Make the circles slightly transparent so that they can overlap and mix. We then mapped the distance from each circle to the intensity of that particular color.
Our Processing GUI:
The last step is to send the Processing color values to the Arduino using serial communications. Convert the color values calculated by Processing into bytes, to ease serial communications, and have the Arduino read the bytes one at a time, and set them to the corresponding color values. (For debugging, it may be useful to have the Arduino print the RGB values back to the serial port)
Source Code
Arduino:
#define RED 6
#define GREEN 10
#define BLUE 3
int rByte = 0;
int gByte = 0;
int bByte = 0;
void setup() {
pinMode(RED, OUTPUT);
pinMode(GREEN, OUTPUT);
pinMode(BLUE, OUTPUT);
Serial.begin(9600);
}
void loop() {
while (Serial.available() < 3) {};
// if there are any serial bytes available to read
if (Serial.available() > 0) {
// then read the 3 bytes, sent in order R,G,B
rByte = Serial.read();
gByte = Serial.read();
bByte = Serial.read();
}
// write the RGB values to the LED outputs
analogWrite(RED, rByte);
analogWrite(GREEN, gByte);
analogWrite(BLUE, bByte);
//Serial.write(rByte);
//Serial.write(gByte);
//Serial.write(bByte);
}
Processing:
import processing.serial.*;
int r = 390;
float rr = 0;
float gg = 0;
float bb = 0;
int b1,b2,b3 = 0;
Serial port;
void setup_port() {
port = new Serial(this, Serial.list()[0], 9600);
}
void setup() {
size(600, 600);
colorMode(RGB, 255);
noStroke();
setup_port();
}
void draw() {
background(255);
//blue circle
fill(0, 0, 255, 255);
ellipse(300, 200, r, r);
//green circle
fill(0, 255, 0, 150);
ellipse(200, 400, r, r);
//red circle
fill(255, 0, 0, 150);
ellipse(400, 400, r, r);
rr = sqrt((400-mouseX)*(400-mouseX) + (400-mouseY)*(400-mouseY));
gg = sqrt((200-mouseX)*(200-mouseX) + (400-mouseY)*(400-mouseY));
bb = sqrt((300-mouseX)*(300-mouseX) + (200-mouseY)*(200-mouseY));
rr = 255 – rr;
gg = 255 – gg;
bb = 255 – bb;
if (rr < 0)
rr = 0;
// else if (rr < r)
// rr = 255;
if (gg < 0)
gg = 0;
// else if (gg < r)
// gg = 255;
if (bb < 0)
bb = 0;
// else if (bb < r)
// bb = 255;
fill(rr, gg, bb, 255);
ellipse(0, 0, r, r);
b1 = (int)rr;
b2 = (int)gg;
b3 = (int)bb;
byte[] rgb = {(byte) rr, (byte)gg, (byte)bb};
port.write(rgb);
println(“Sending:”);
println(b1);
println(b2);
println(b3);
if (port.available() > 0) {
println(“Reading: “);
println(port.read());
println(port.read());
println(port.read());
}
delay(5);
}