
Brian Matejek (bmatejek)
Matt Dolan (mdolan)
Ed Kelley (ekelley)
Josh Prager (jprager)
Date: 2/11/2013
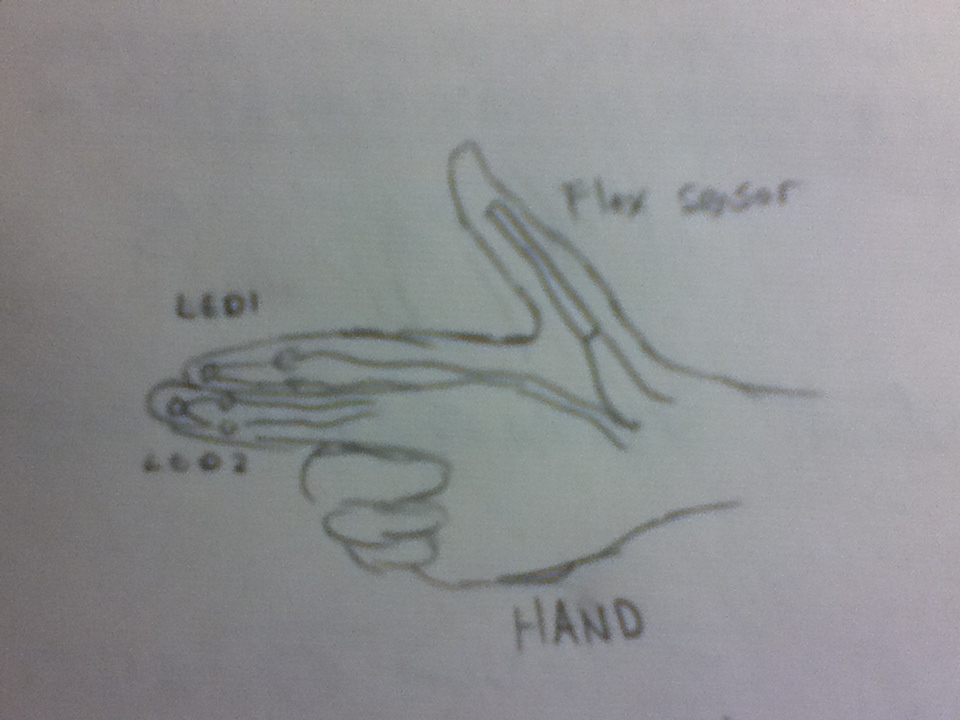
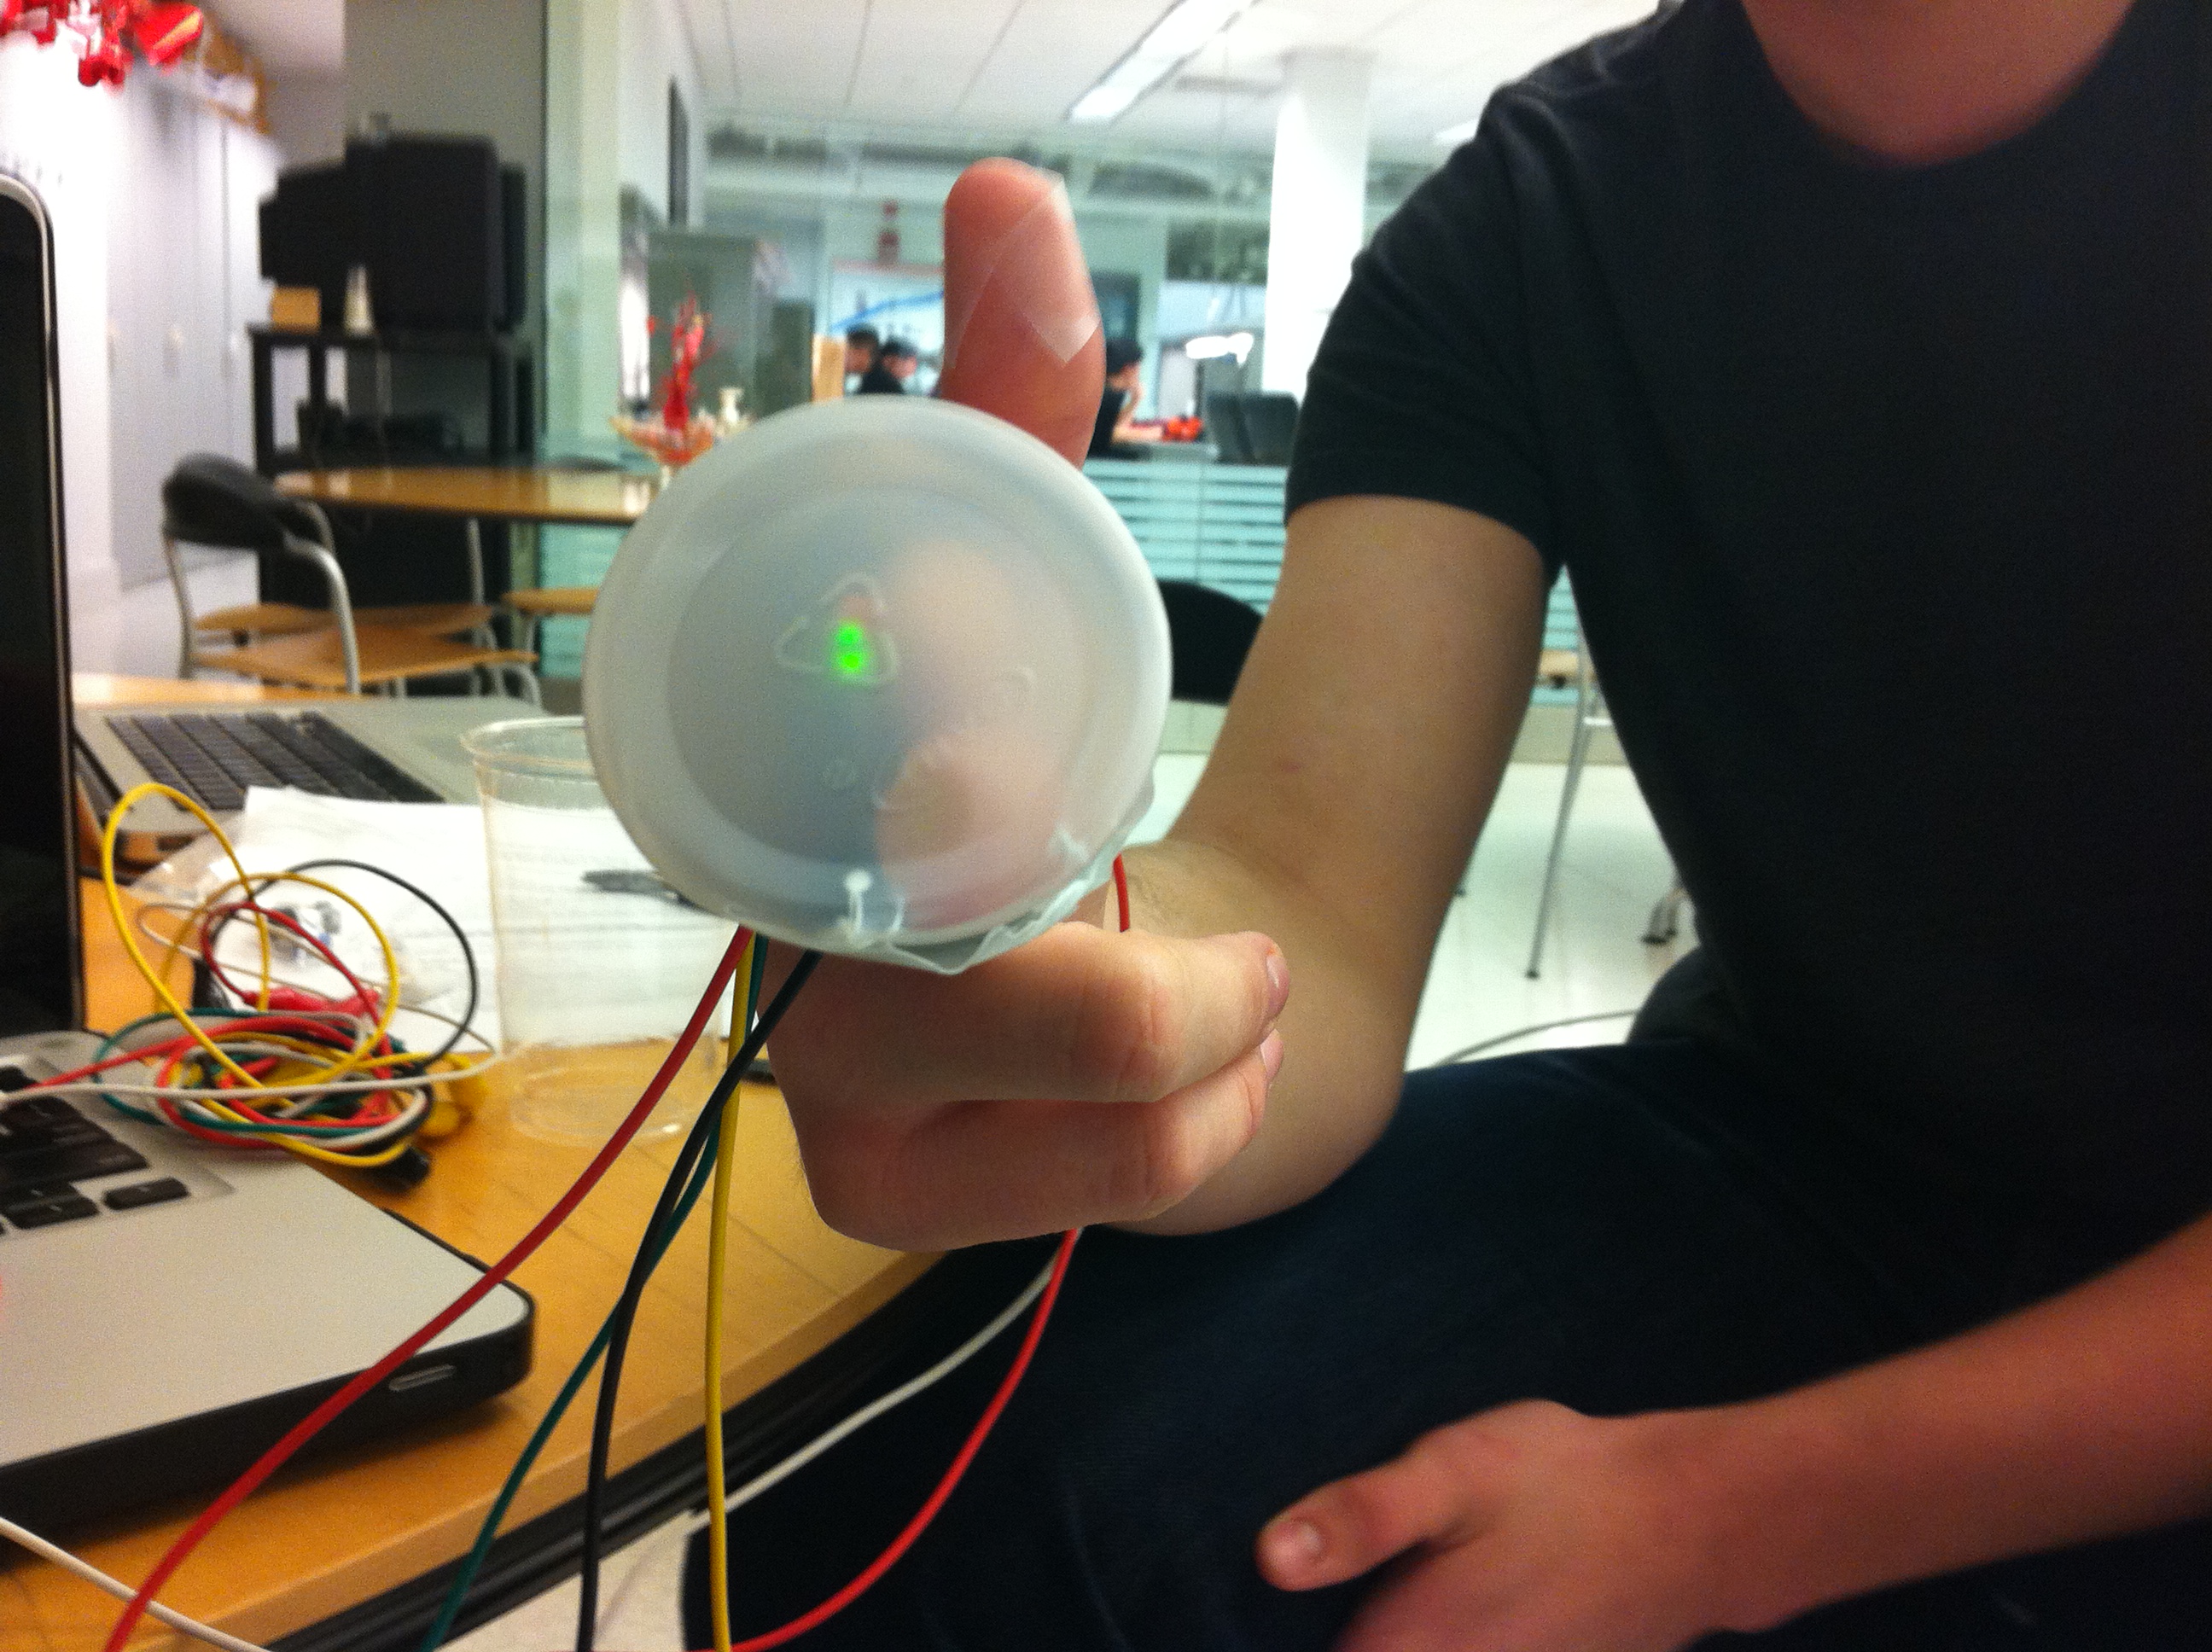
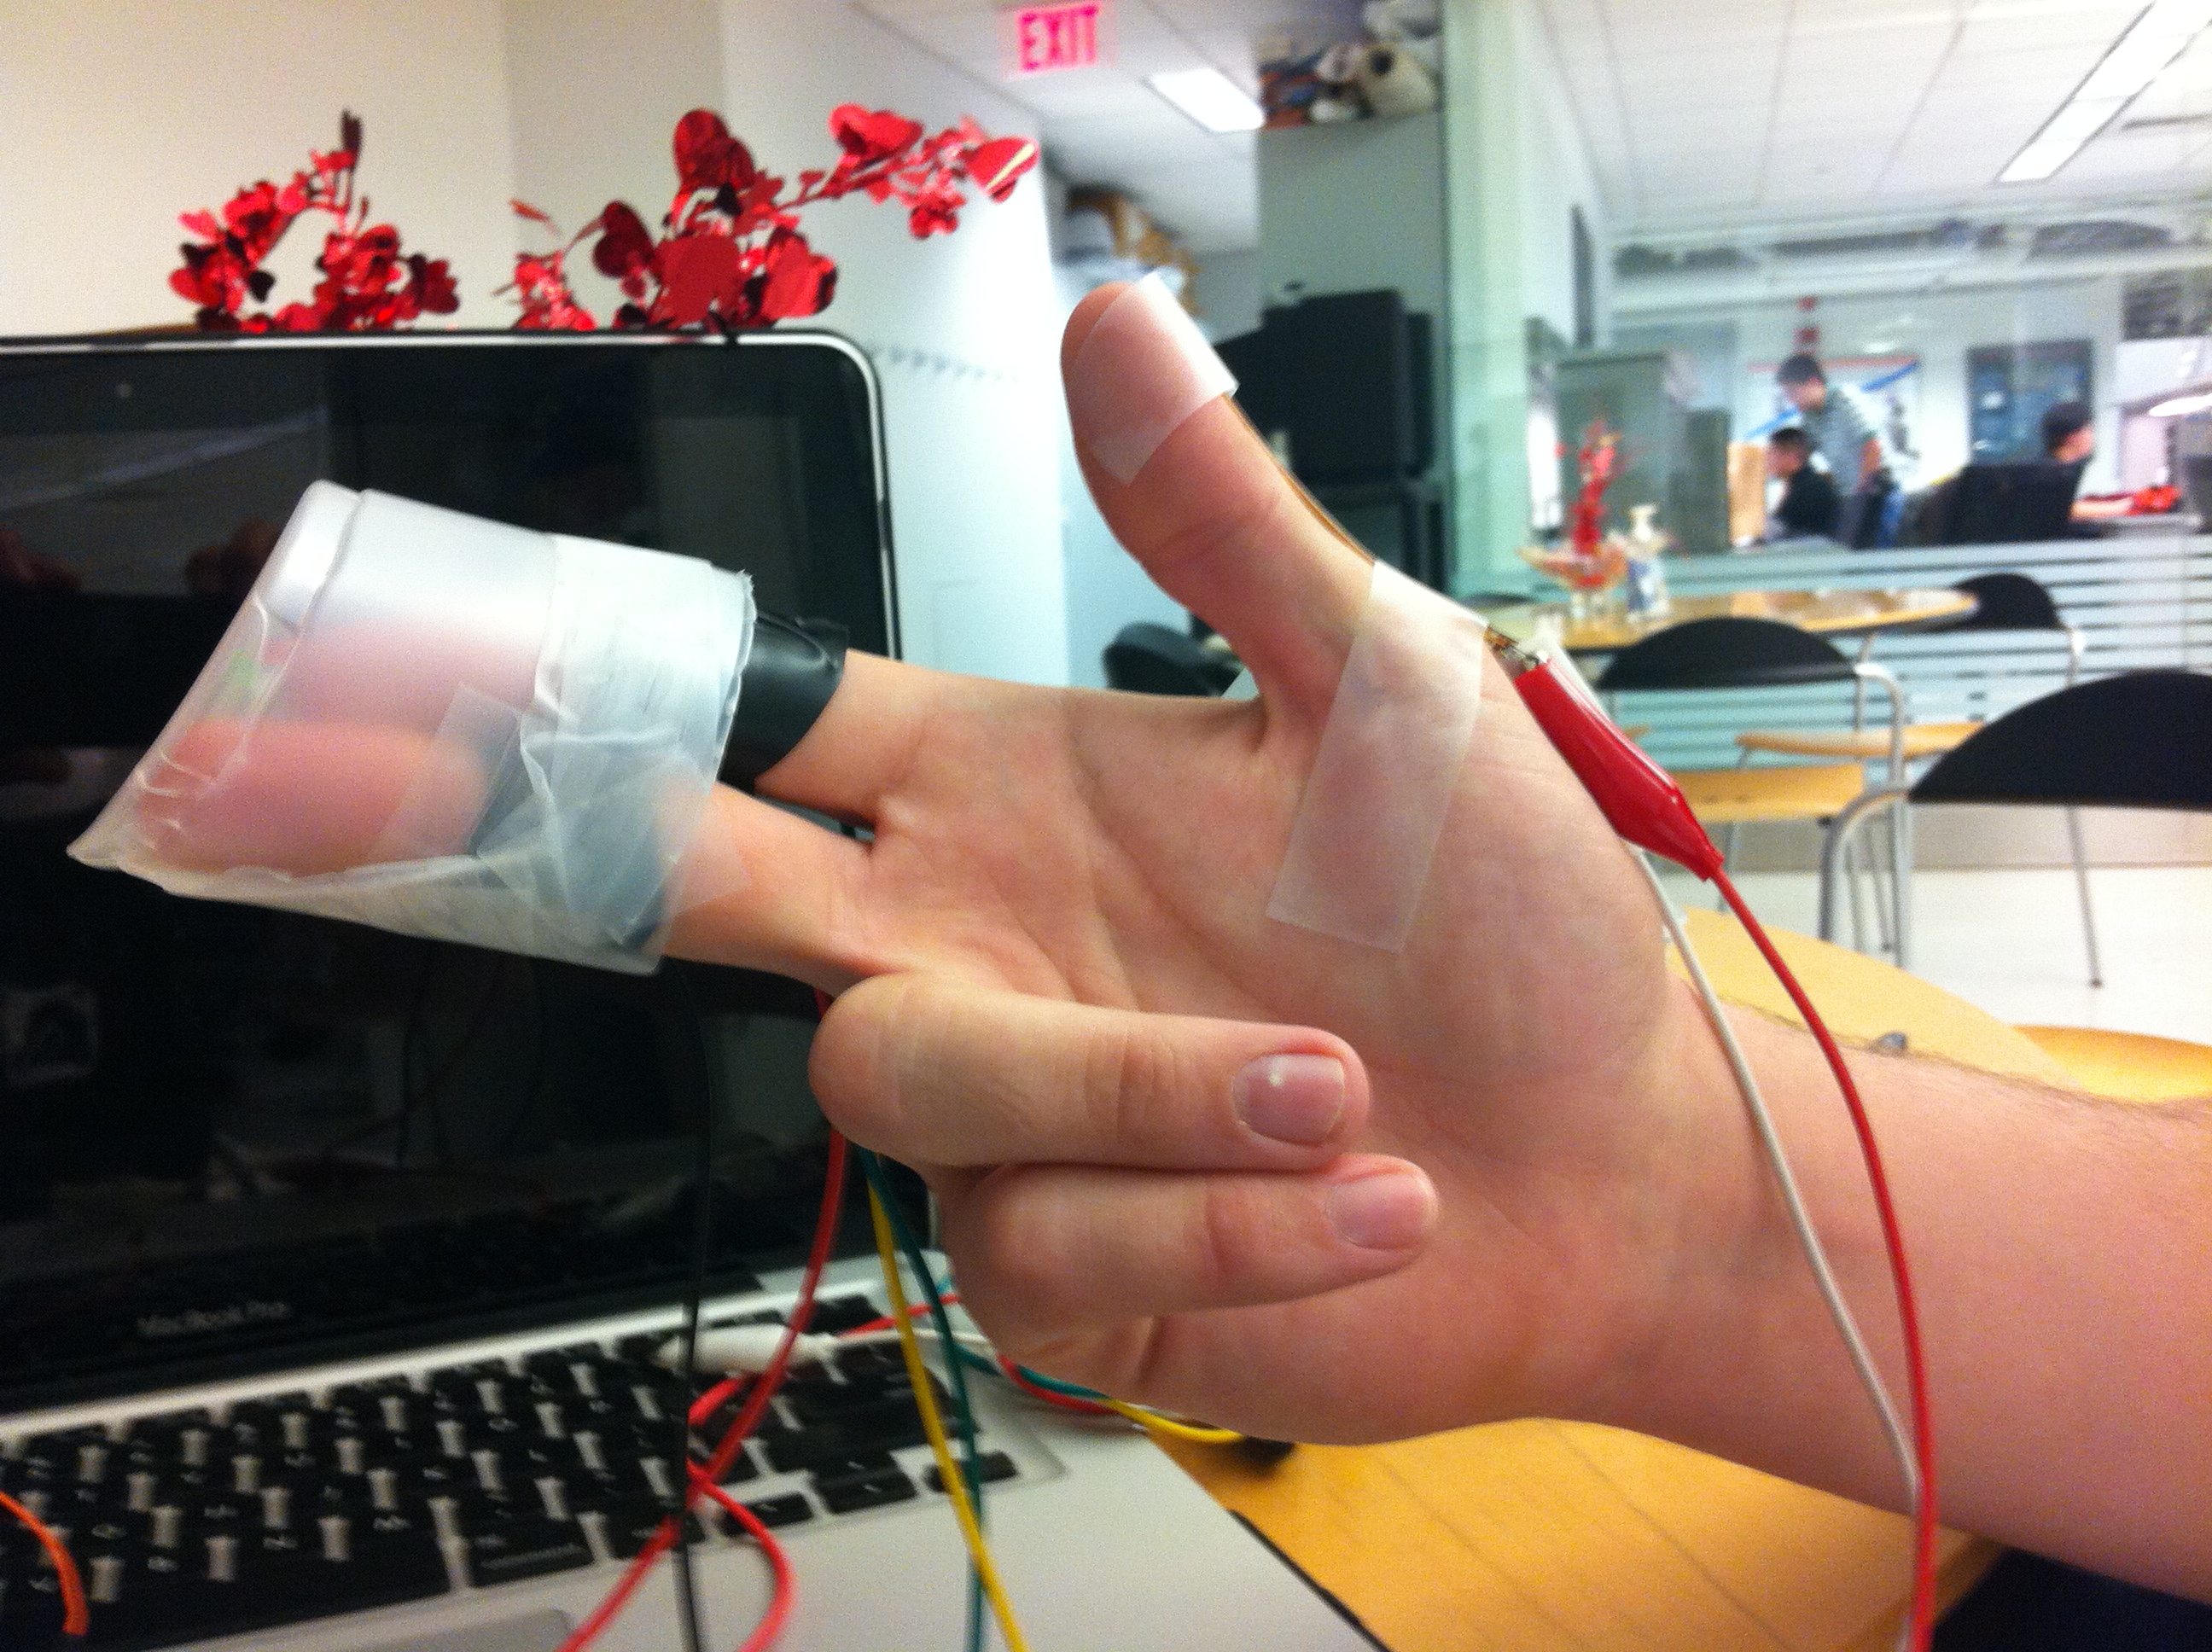
Idea: We want to use the flex sensor to adjust the brightness and frequency of two LED lights. If the flex sensor bends in one direction, one of the lights turns on and the other off. If the flex sensor bends in the other direction, the other light turns on and other off. We want to create a game of visual laser tag. We taped the flex sensor to Ed’s thumb (see diagram and video), and one LED light to his index finger and another LED light to his middle finger. The red LED goes on when Ed bends the flex sensor to lower the resistance, and the green LED turns on when Ed bends the flex sensor to raise the resistance. The red LED is on the index finger and the green LED is on the middle finger. We can play a game of virtual laser tag, where one shoots by bending his thumb in a direction that either increases or decreases the resistance of the flex sensor. In the video, Ed shoots by bending the flex sensor to lower the resistance and turn the red light on. We covered the lights in a plastic cup.
Design Sketches:
Initial Design:
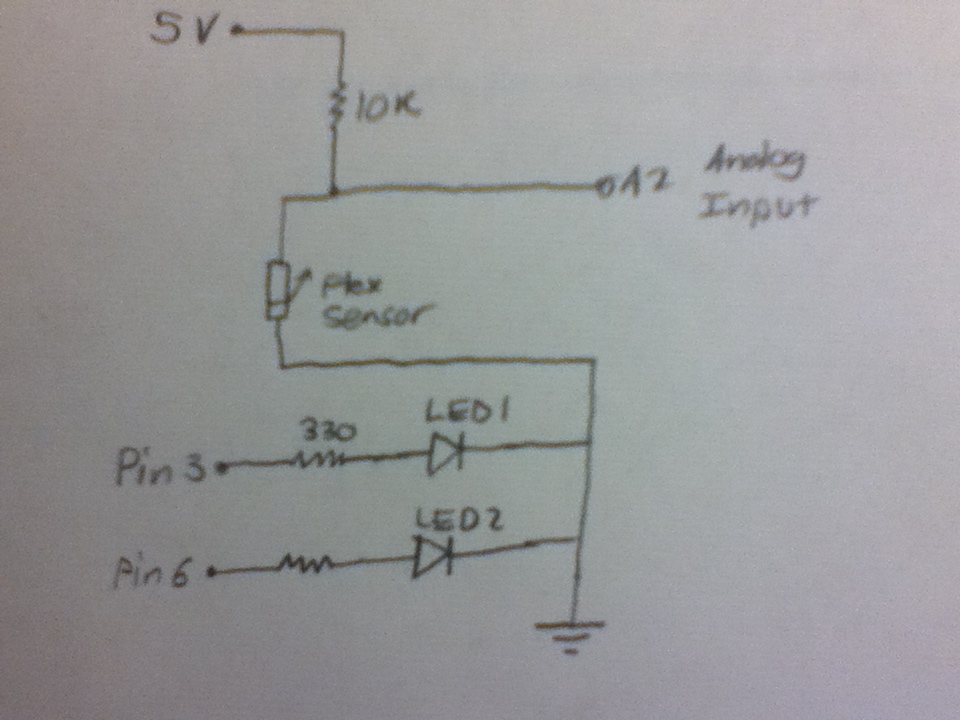
Schematic Design:
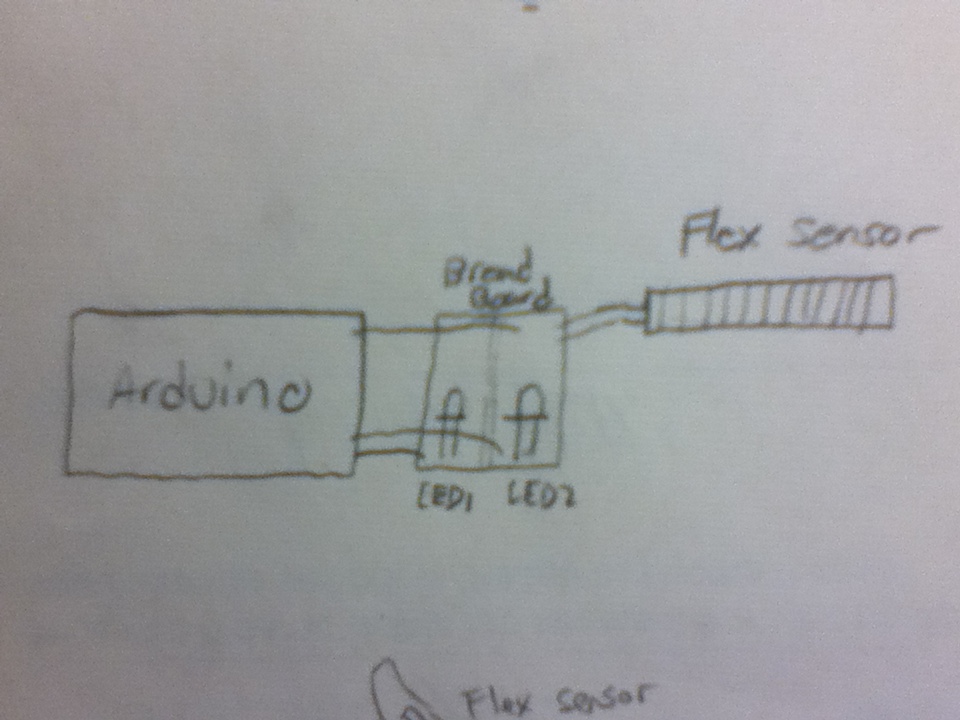
Final Design
Demo:
http://www.youtube.com/watch?v=cTny9olE80E
Code:
Code Here!
Materials:
1 Arduino
1 Flex Sensor
1 Breadboard
1 Small Secondary Breadboard
Assorted extra wires
2 LED lights
1 Plastic Cup
2 330 Ohm resistors
1 10K Ohm resistor
Instructions:
-Connect digital output pin 3 to a 330 ohm resistor.
-Connect the resistor to the positive terminal of an LED and connect the negative terminal of the LED to ground.
-Repeat the above two steps on pin 6.
-Connect a 10K ohm resistor to the 5V output on the Arduino. Connect the end of the resistor to both the anaolg input pin 2 and the flex sensor.
-Connect the other end of the flex sensor to ground.
-Mount the LED and flex sensors on a control surface (e.g. a golve or your hand).
-Have fun!