
Group Members: Matthew Drabick, Adam Suczewski, Andrew Callahan, Peter Grabowski
High Level Description:
For part 3 of the lab, our group decided to build a “Simon” game. Our game setup uses 3 buttons and 4 LEDs. Each button corresponds to one LED and the 4th LED is used to indicate an error. The game starts with the arduino flashing one of the 3 lights, chosen randomly. The user must then press the button corresponding to that light. If the user’s input is correct, the arduino extends the pattern by one and the user must then match that extended pattern. If the user’s input is incorrect, the error light goes off and the user loses the game. This process repeats until the pattern reaches length 7, in which case the user wins the game.
Our game is mounted a paper plate for support and uses origami balloons to diffuse light from the leds.
Here is a video of the game in action:
High Level Design Process:
We began with brainstorming. Our initial ideas included interactive and non-interactive designs. These ideas included pre-set light display patterns (Morse code or musical patterns), diffusers using various translucent paper and plastic covers, and a binary counter.
We decided to first make the binary counter, as we thought it would be both technically and visually interesting. We also would have the opportunity to use our origami balloon/lantern diffusers which we thought were pretty cool.
The binary counter consisted of two buttons (an increment and a decrement) as well four LEDs to display a 4 bit number. With those four LEDs, we could count from 0 to fifteen, and display a fun pattern on overflow or underflow.
We began by sketching our design and drawing the circuitry. Here are our initial brainstorming sketches:
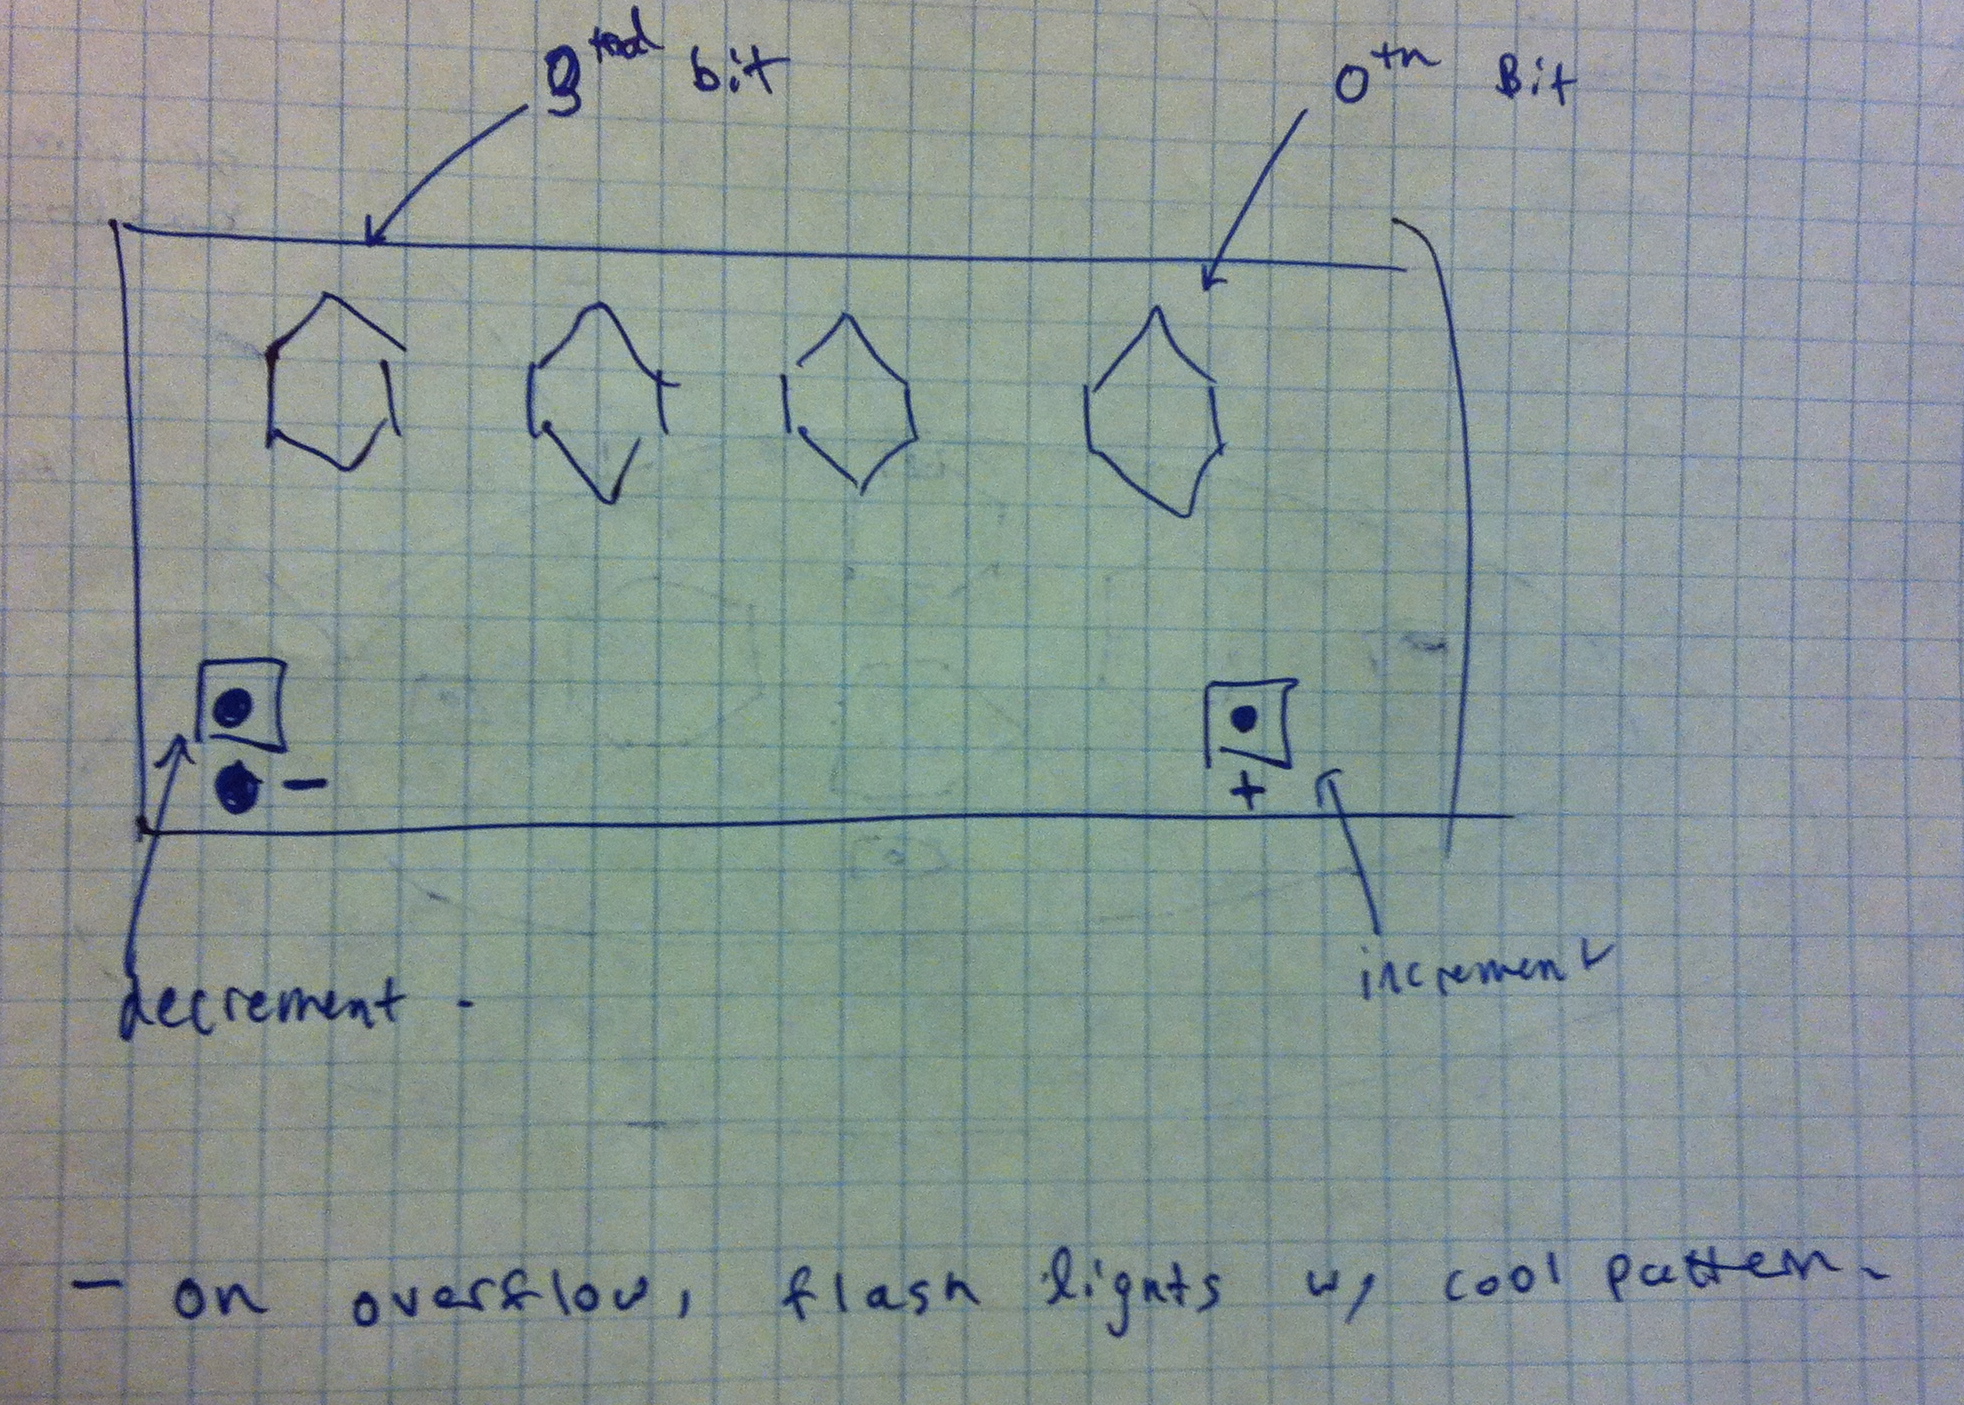
Drawing of the binary counter interface.
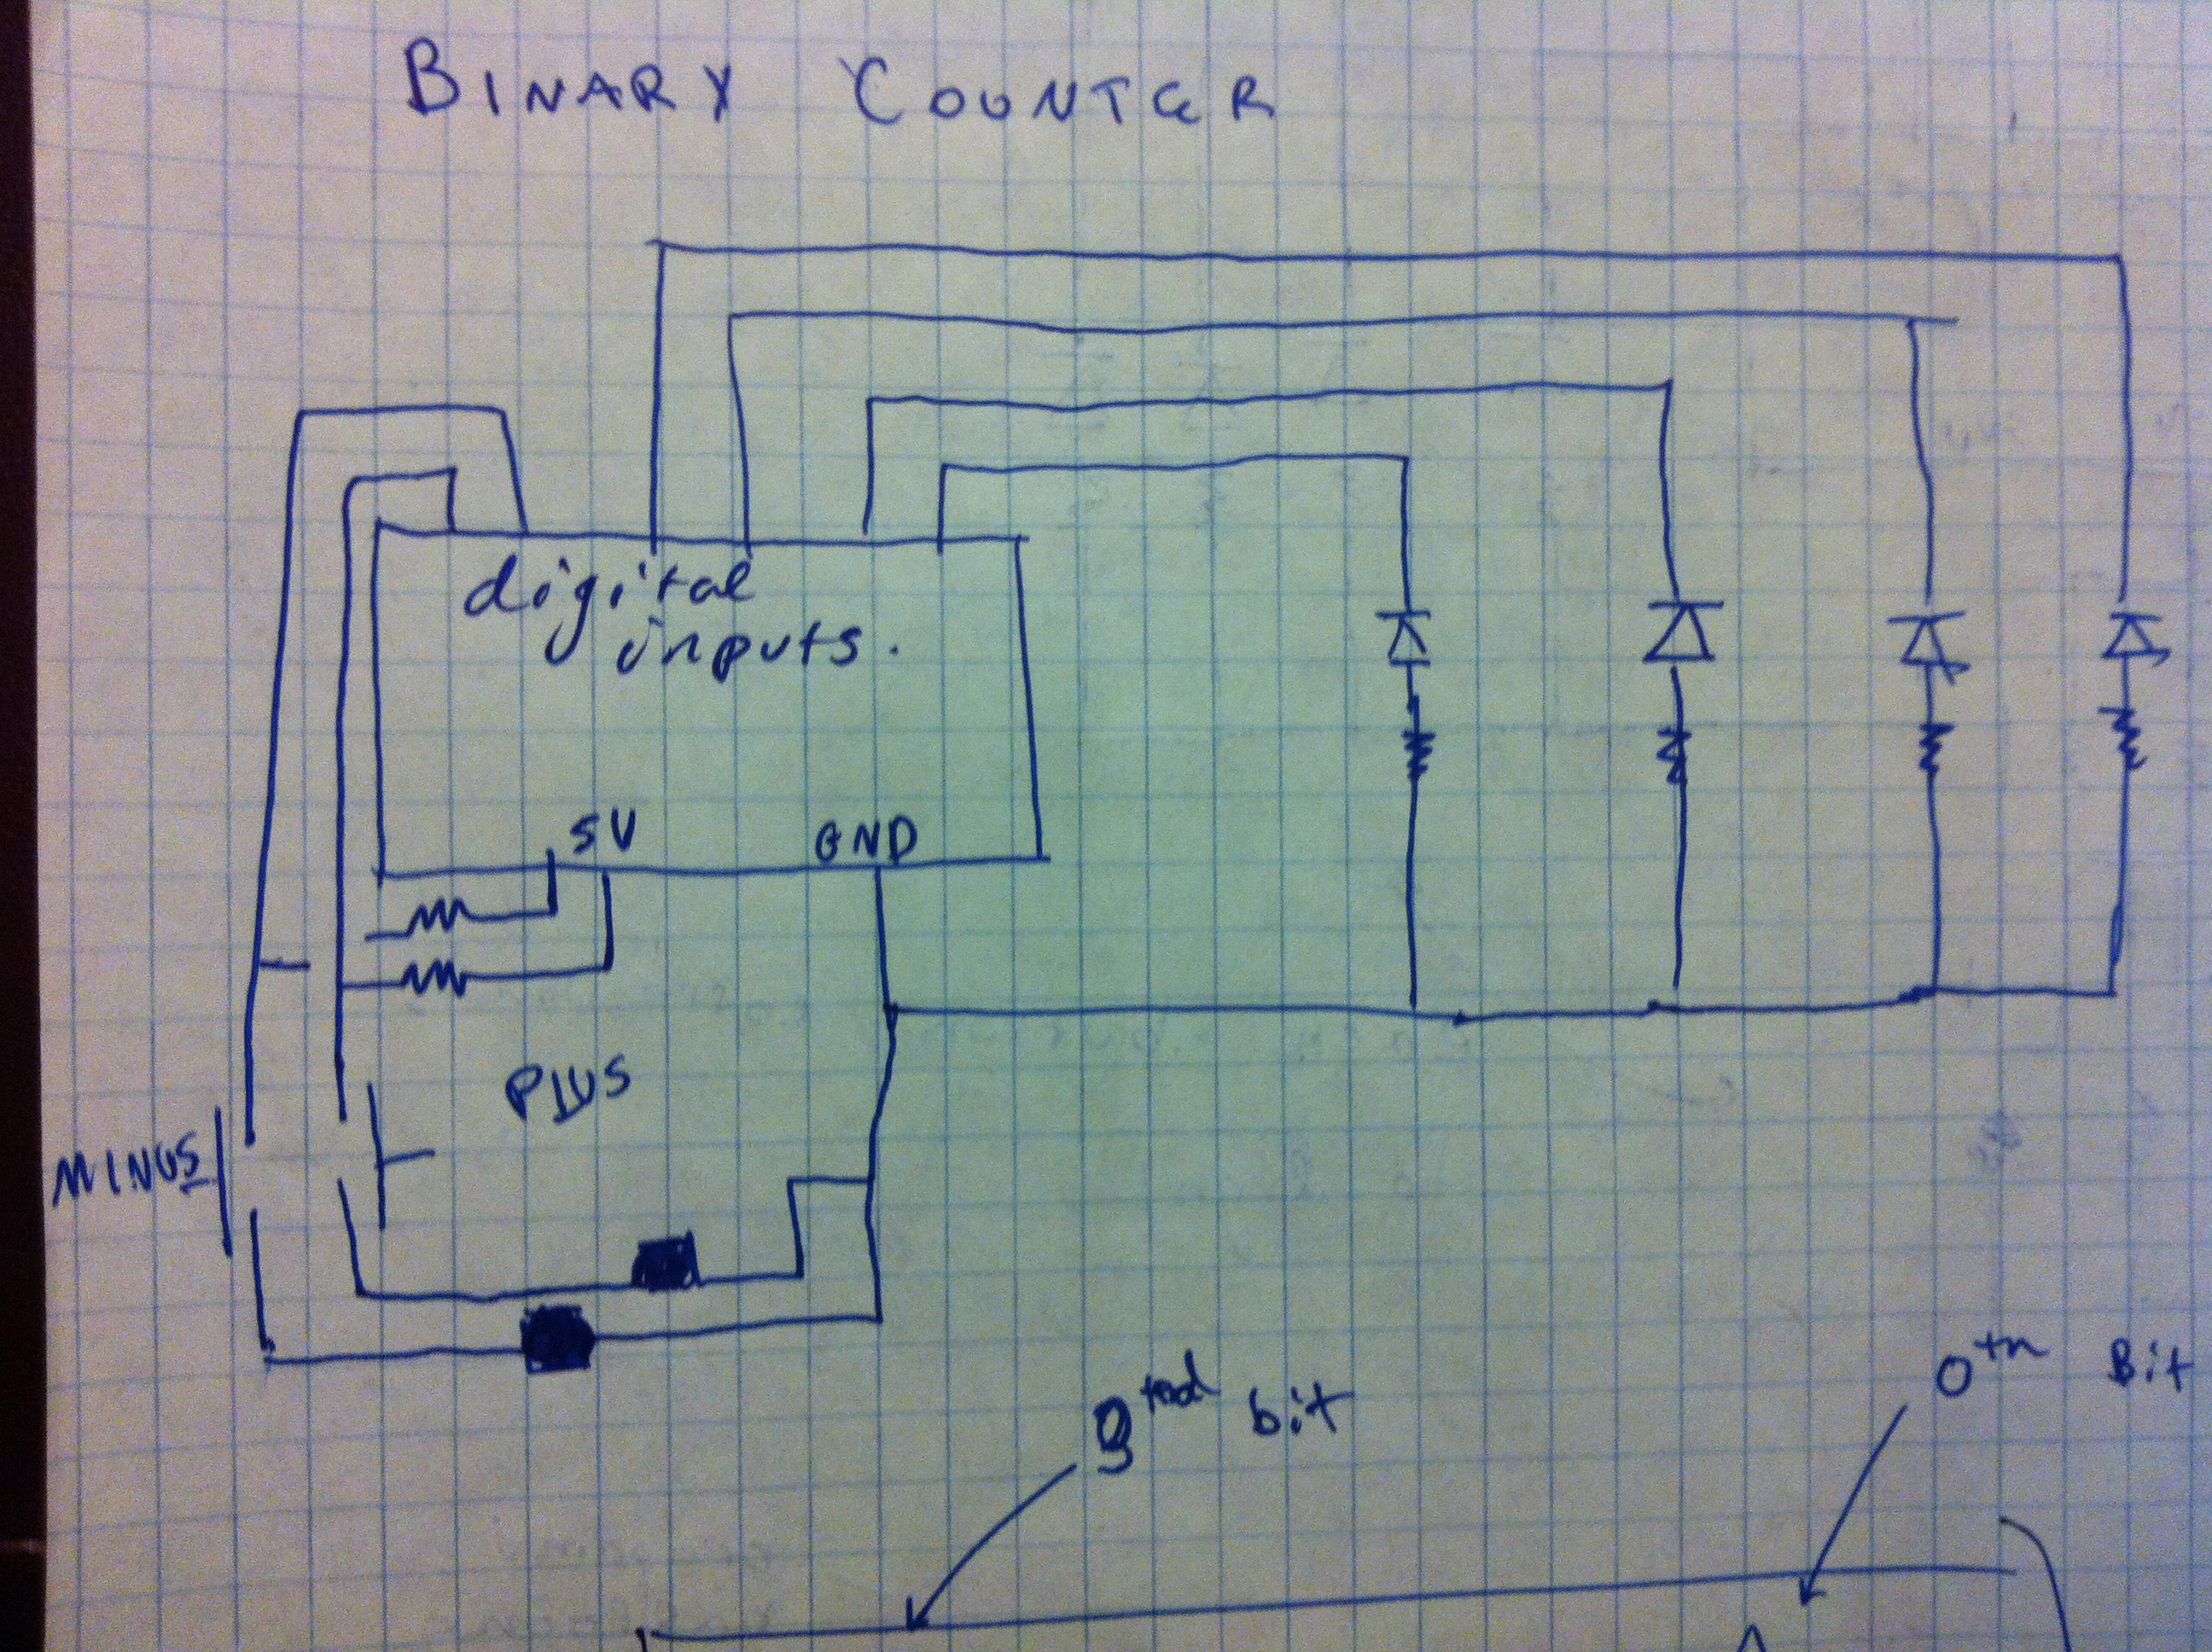
Diagram of the binary counter circuitry.
We then assembled our circuit and wrote the code to power our binary counter (technical details given below). In the end we built this:
After completing the binary counter though, we considered our design choices and thought about what we could do to make our circuit better. After making modifications and iterating through different design choices, we decided that what our circuit was lacking was an interesting method of interacting with the counter. We liked how the binary counter was interactive; however, it was limited to single presses doing the same thing every time. With this in mind, we considered various ways of expanding on our counter, such as using the counter to select and play one of 16 different pre-set light patterns (which could be Morse code messages or other interesting displays) or to play a game. In the end we decided to create the Simon game described above.
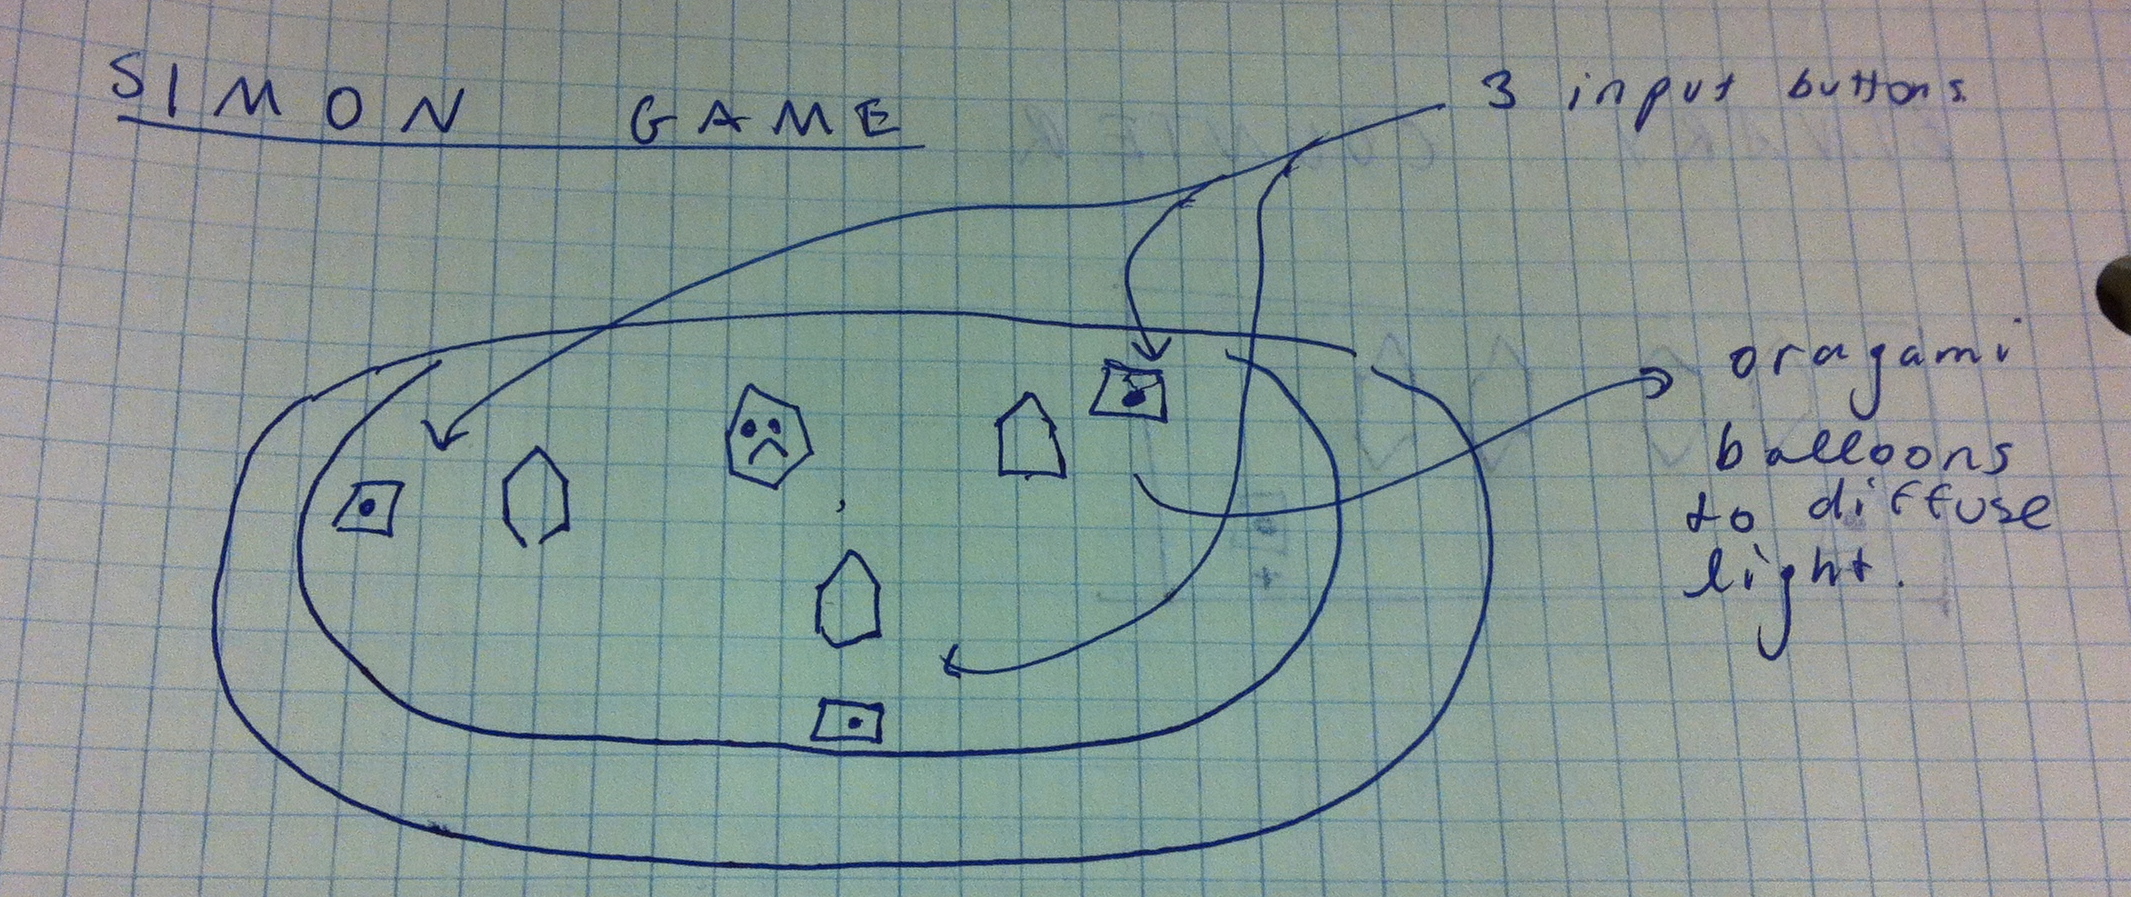
An initial drawing of the simon interface
Initial design decisions for Simon included how to organize the user interface and how many lights and buttons to include. We decided to use a paper plate as the body of our game as it was easy to manipulate but also gave sufficient support. We initially planned to make the game with 4 lights and 4 buttons, but reduced those numbers to 3 as we continued in the design process and faced limitations due to the availability of resources and bulkiness of alligator clips.
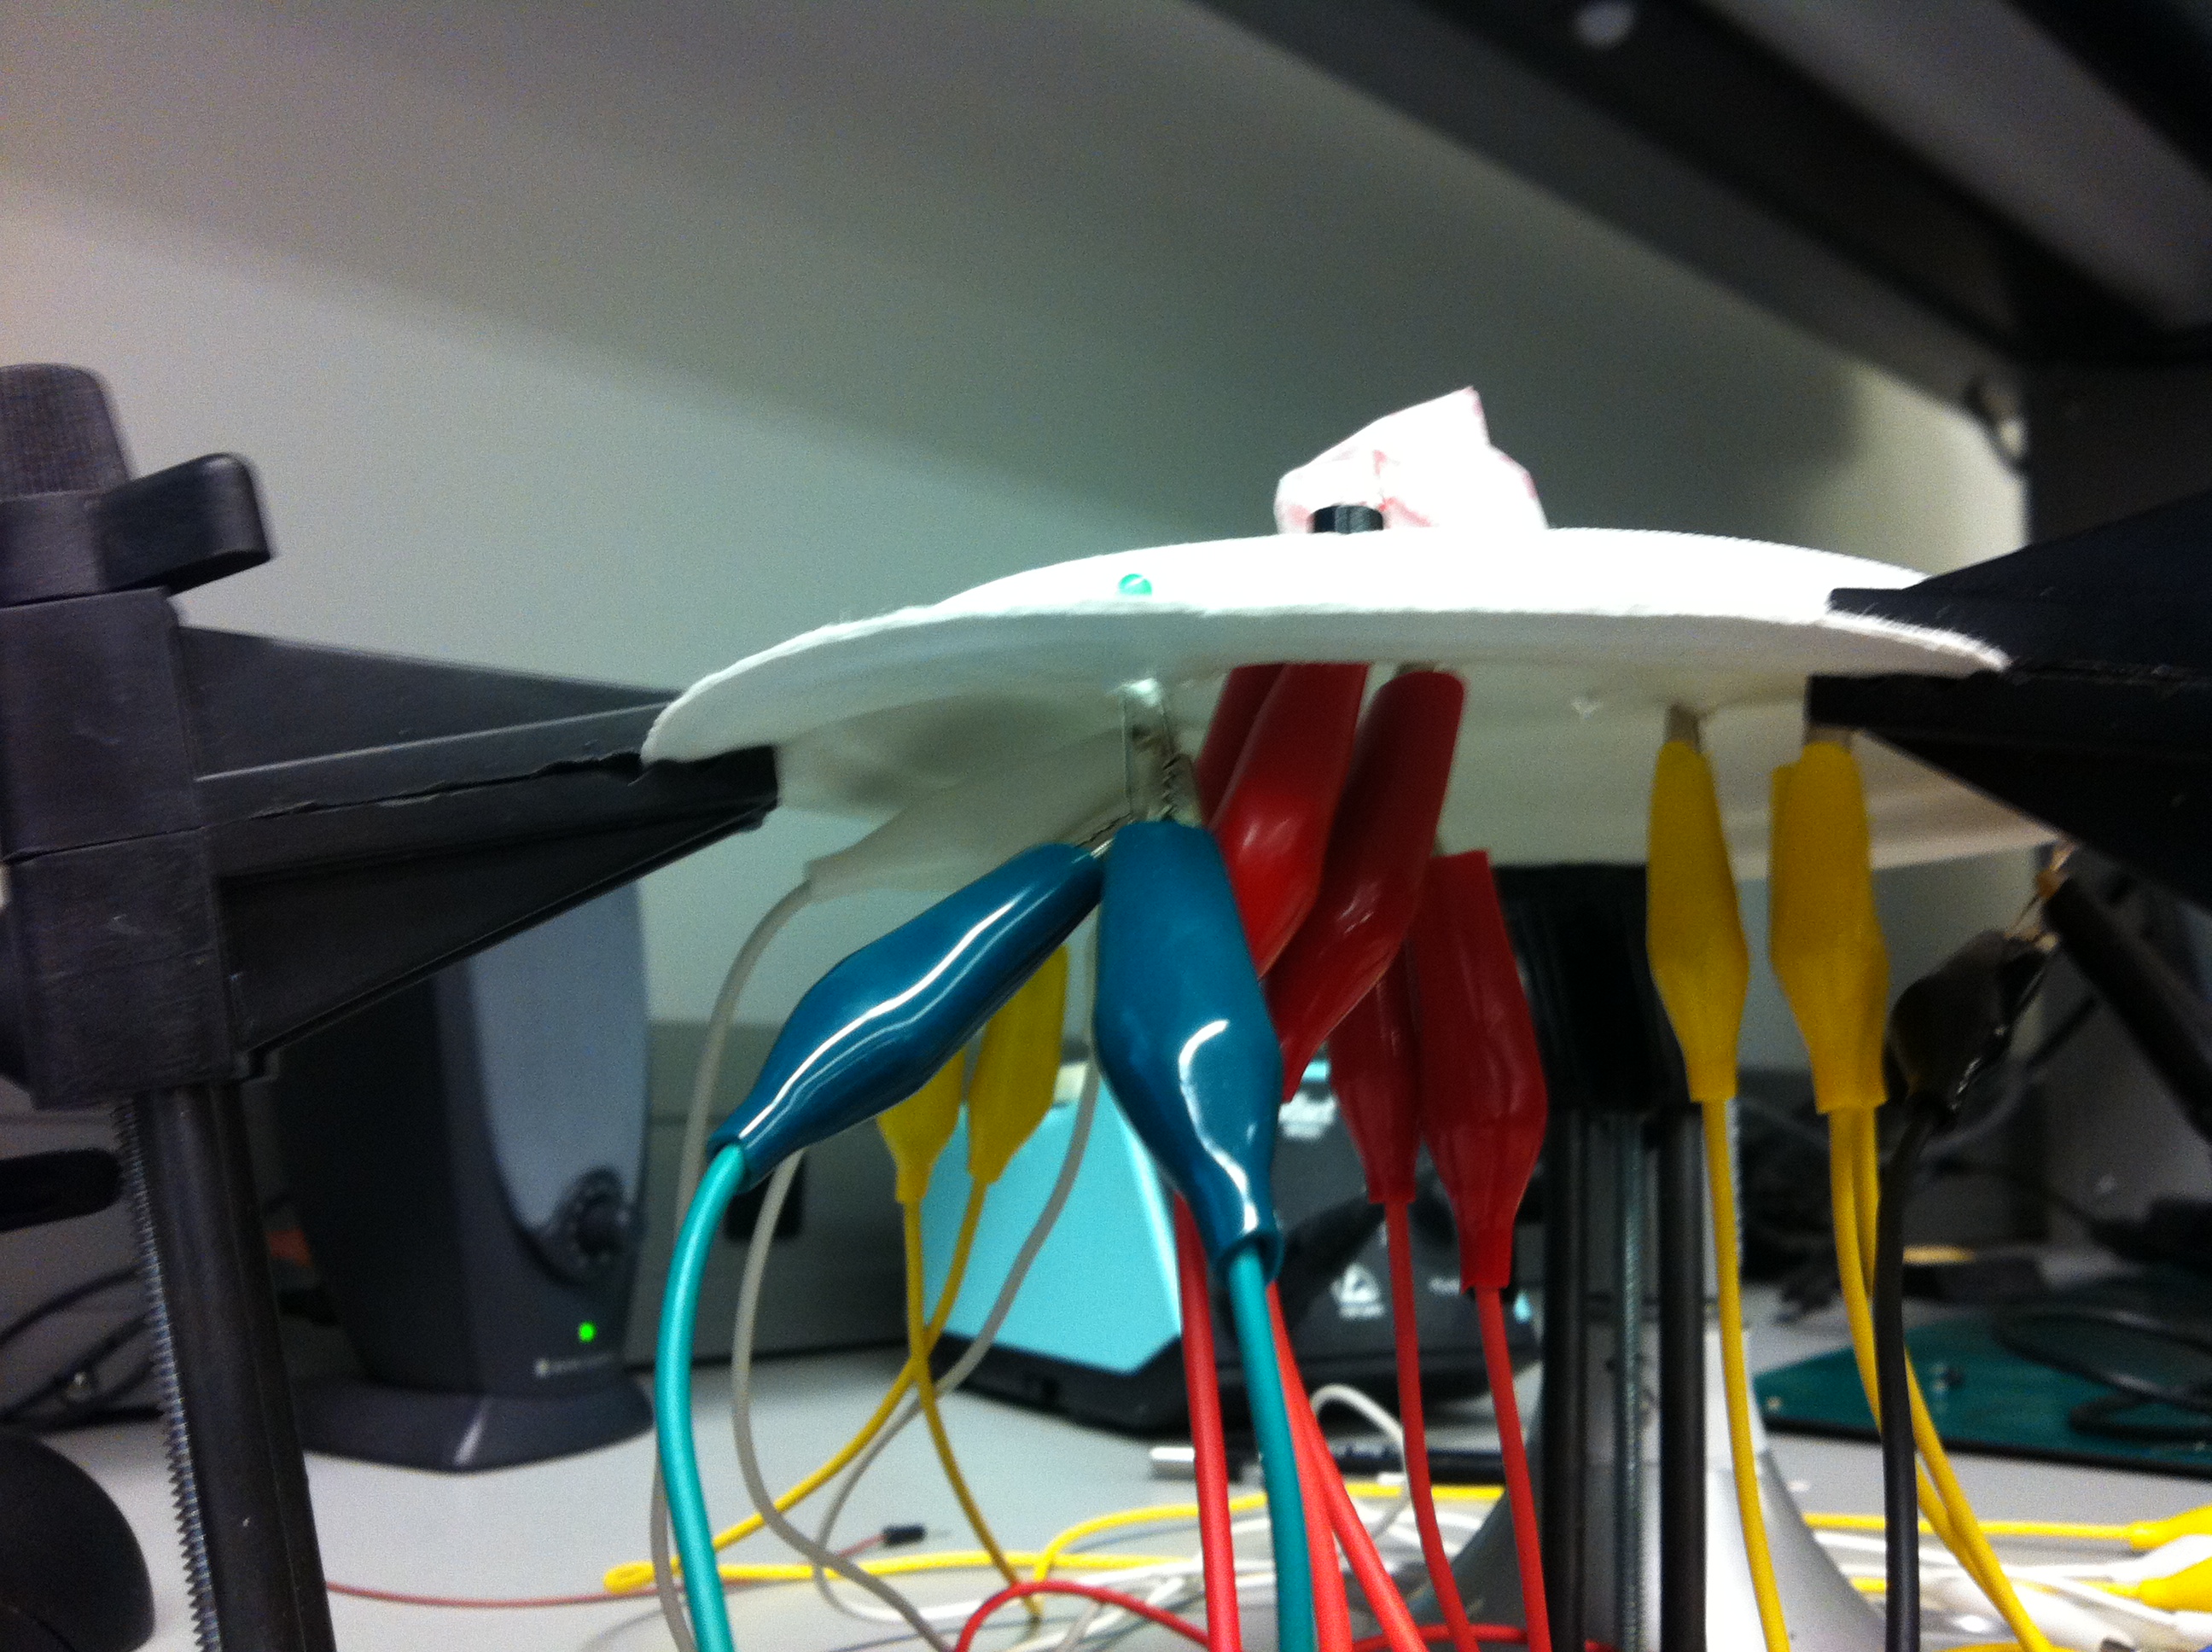
A look at the alligator clips connecting the leds and buttons to the bread board
Once the basic layout of the game was implemented, we made gameplay decisions like how long to wait between flashes of light and how long the pattern should be for the user to win. We made these decisions by playing the game ourselves, and by having other people play our game. We also had to work out bugs such as a single button press being registered twice. After trying our game with different parameters, we arrived at our final design.
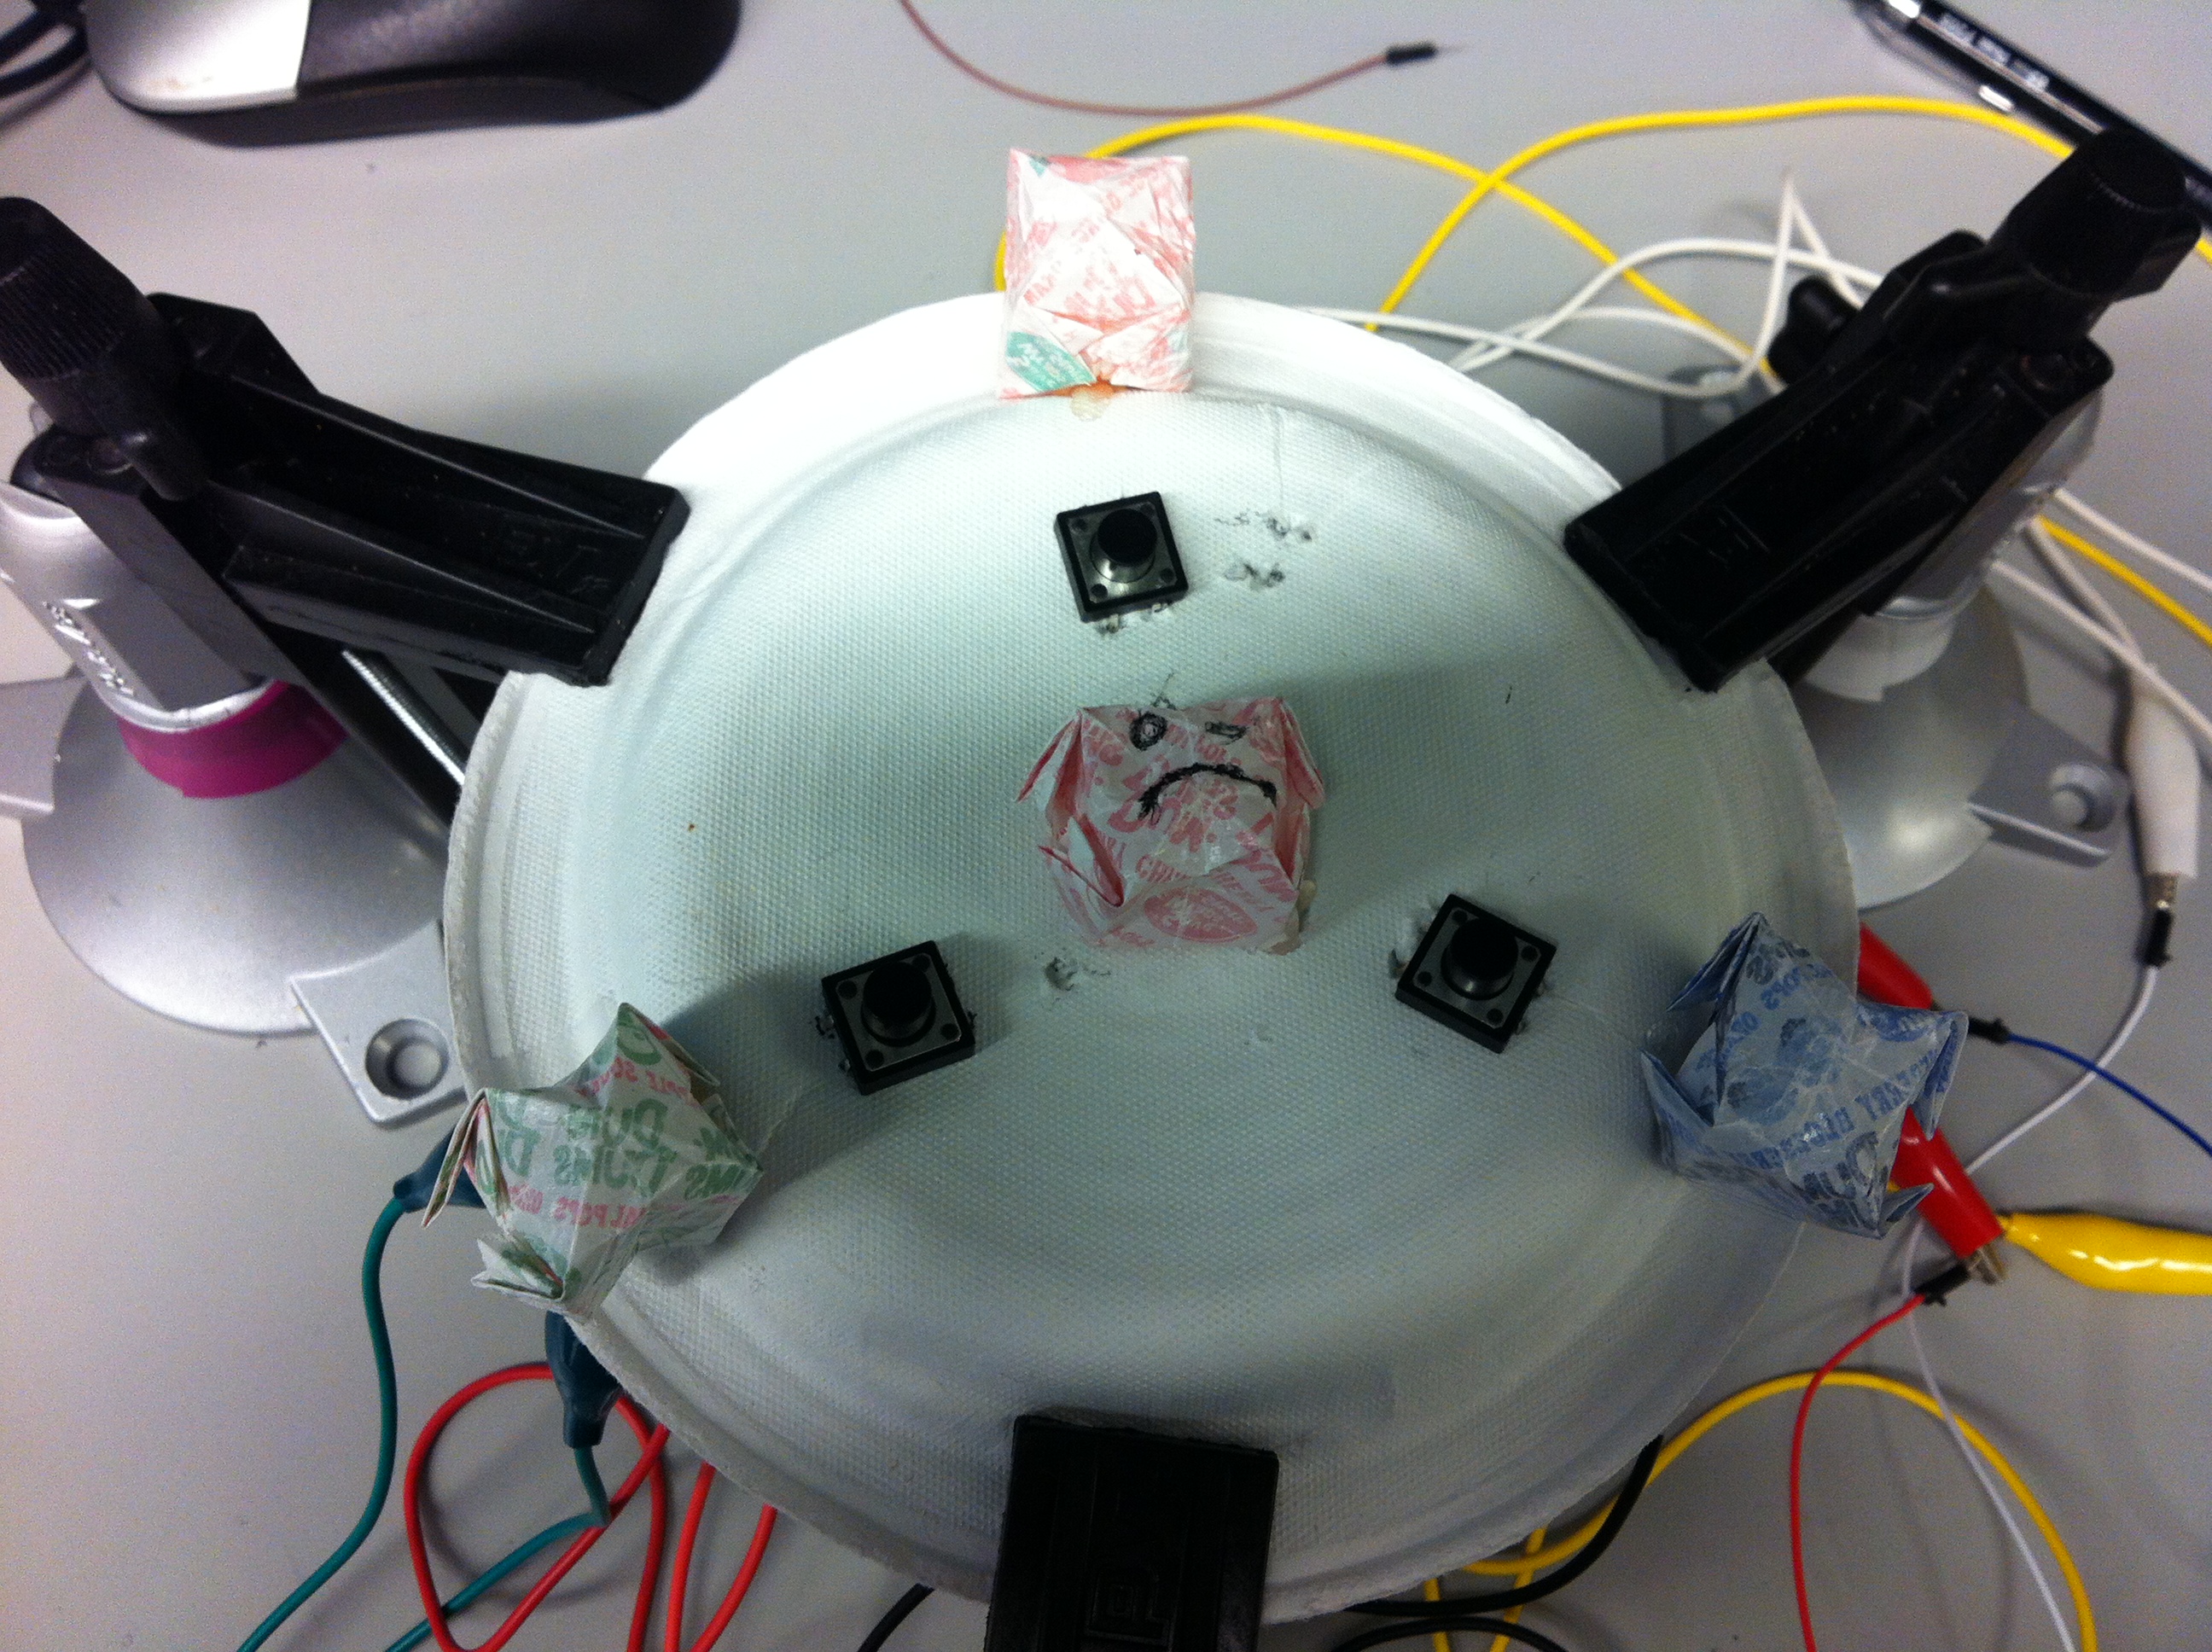
A top view of the final simon game
Technical Documentation / Technical Design Choices:
There were 2 main circuit components that we used to power our game: LEDs and buttons (these were used with resistors, as needed). In the first 2 parts of the lab, we became familiar with using LEDs. Helpful information about using LEDs with arduinos is found at http://arduino.cc/en/Tutorial/blink.
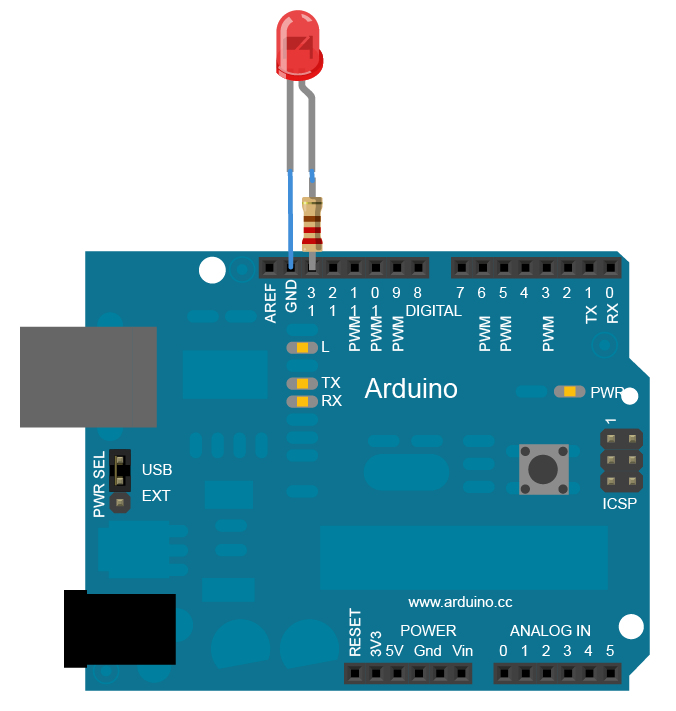
LEDs are implemented by creating a connection between an Arduion pin and ground. (Image from arduino.cc/en/tutorial/blink)
We then looked up how to use buttons with arduino at http://arduino.cc/en/tutorial/button. To use a button, we needed to provide a path from ground to 5v (with a resistor) as well as a path to an input pin to sense when the button is closed.

Buttons are implemented by creating a path between ground, 5v, and an input pin. (Image from arduino.cc/en/tutorial/button)
With an understanding of buttons and LEDs, we were able to get started with the technical side of the design process.
We started by drawing the circuitry for our game. There are four LED’s and three buttons in the final implementation but only 3 leds in the diagram below. The fourth LED is an indicator light for when you incorrectly input a sequence.
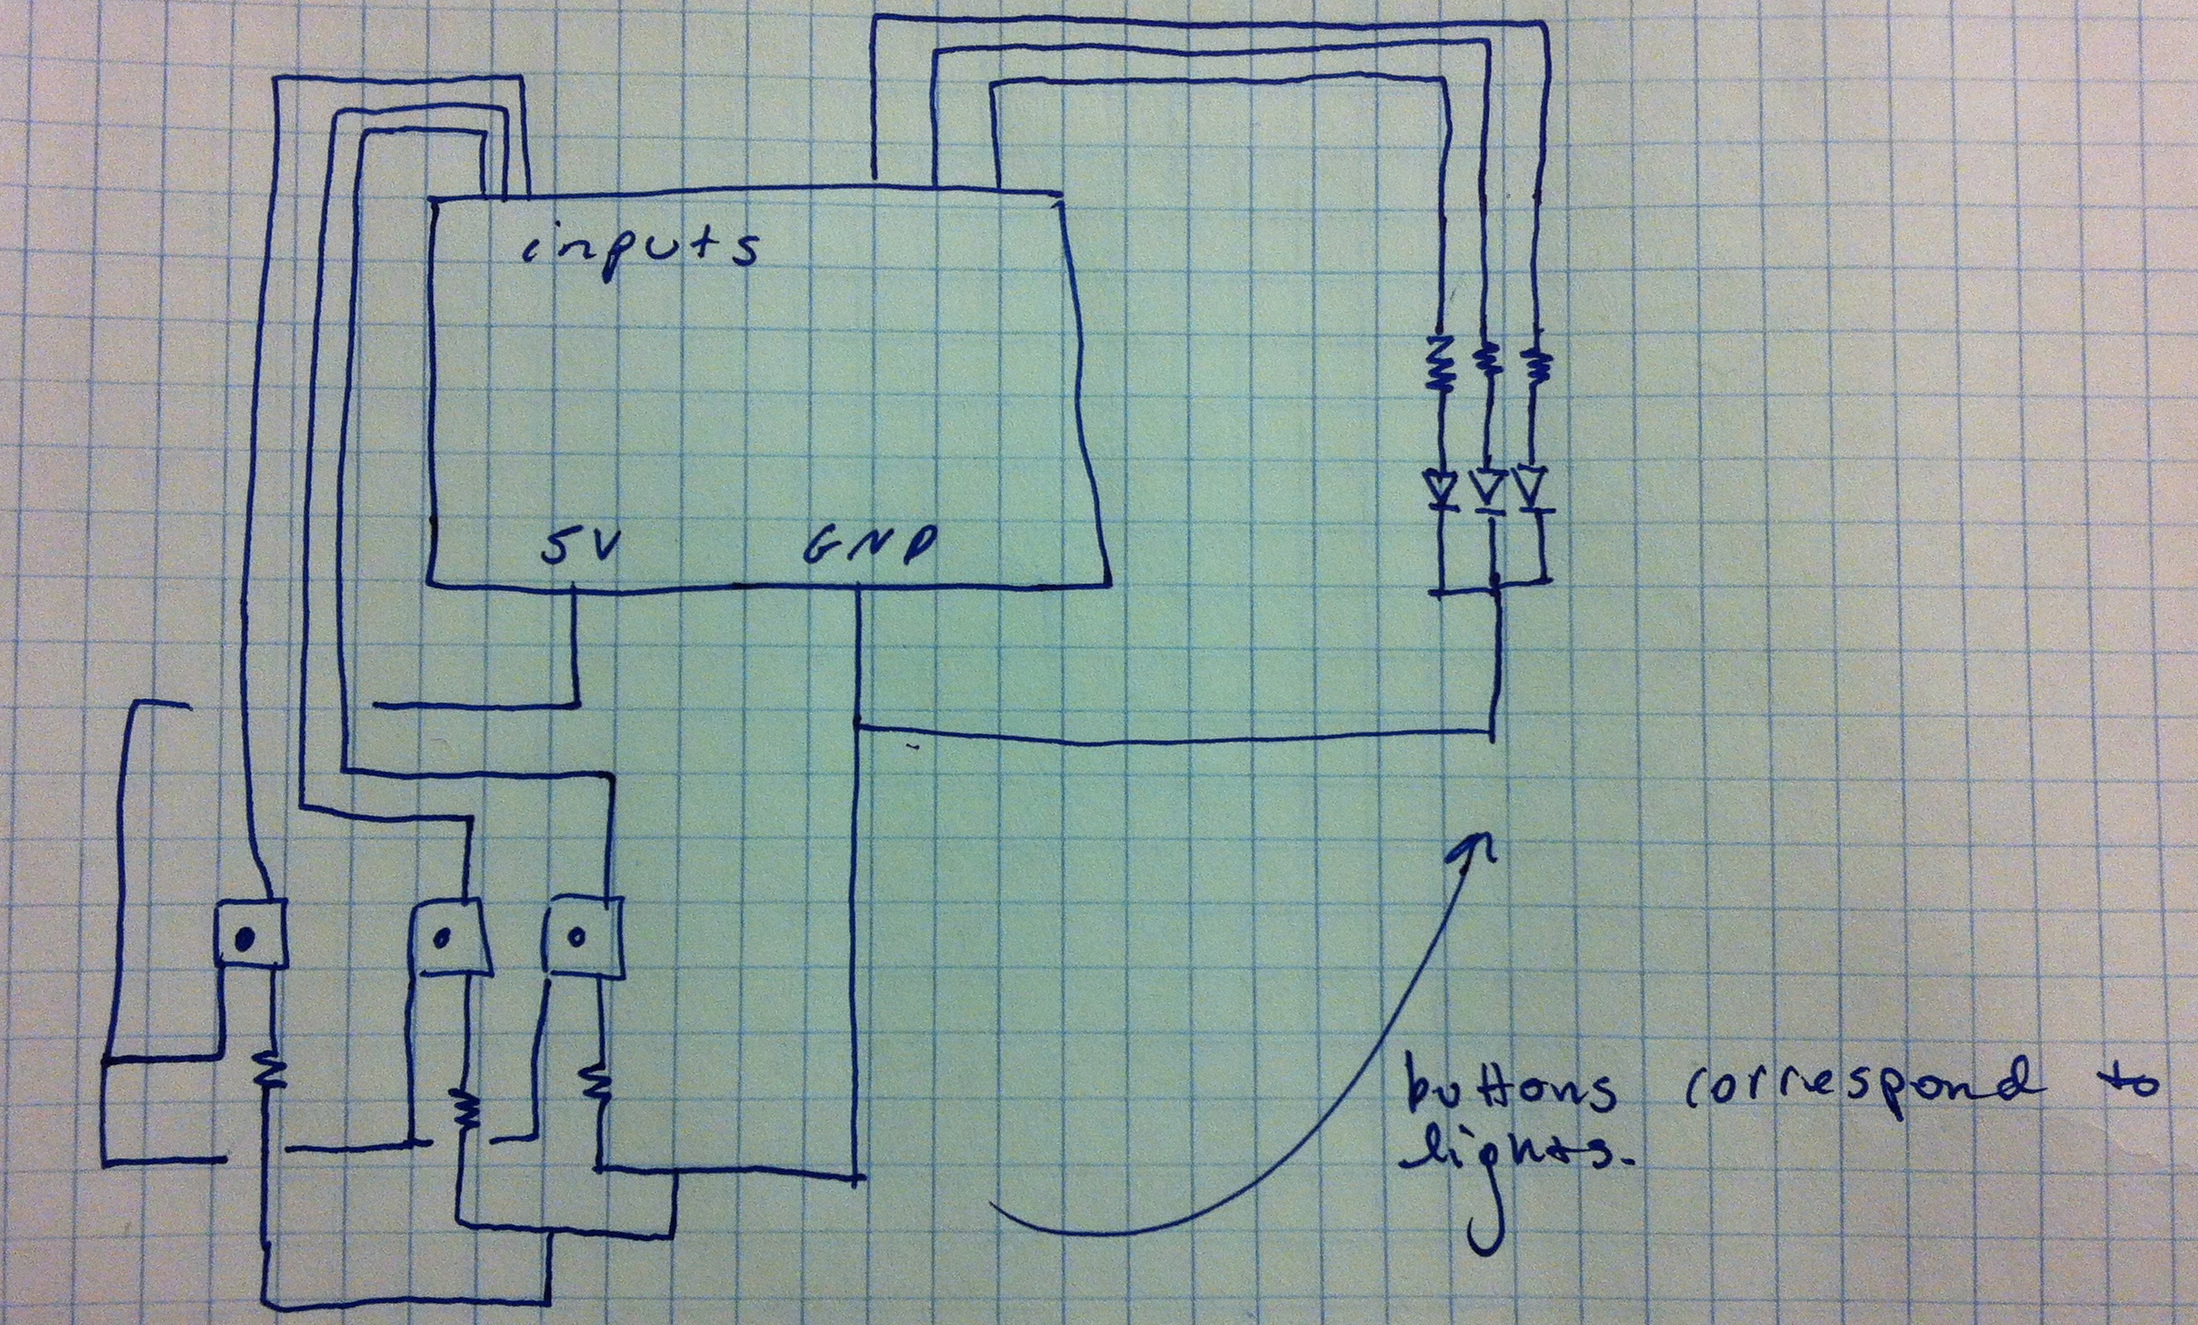
An initial drawing of simon circuitry
With these design sketches, we were then able to implement our design on the breadboard and mount the buttons and lights on the plate. Though the organization of wires in our pictures looks complicated, it is essentially 4 leds/resistors connected to a digital input pin and ground, and 3 button/resistors connected to a digital input pin, ground, and 5v.
We did not reach our final design immediately though. Our initial design had the LED’s on the inside; we eventually decided to move them to the outside of paper plate for the final prototype. This allowed the diffusers to fit better and also made room for our center failure indication LED. We also attempted to incorporate a 4th LED/button pair but found we were limited on resources.
With the circuitry in place, we then focused on the physical construction. For the led diffusers, we chose to uses the origami ballons/lanterns that we had used previously for the binary counter. We used these origami instructions to make four balloons out of dum-dum wrappers.

A single origami balloon used to diffuse light.
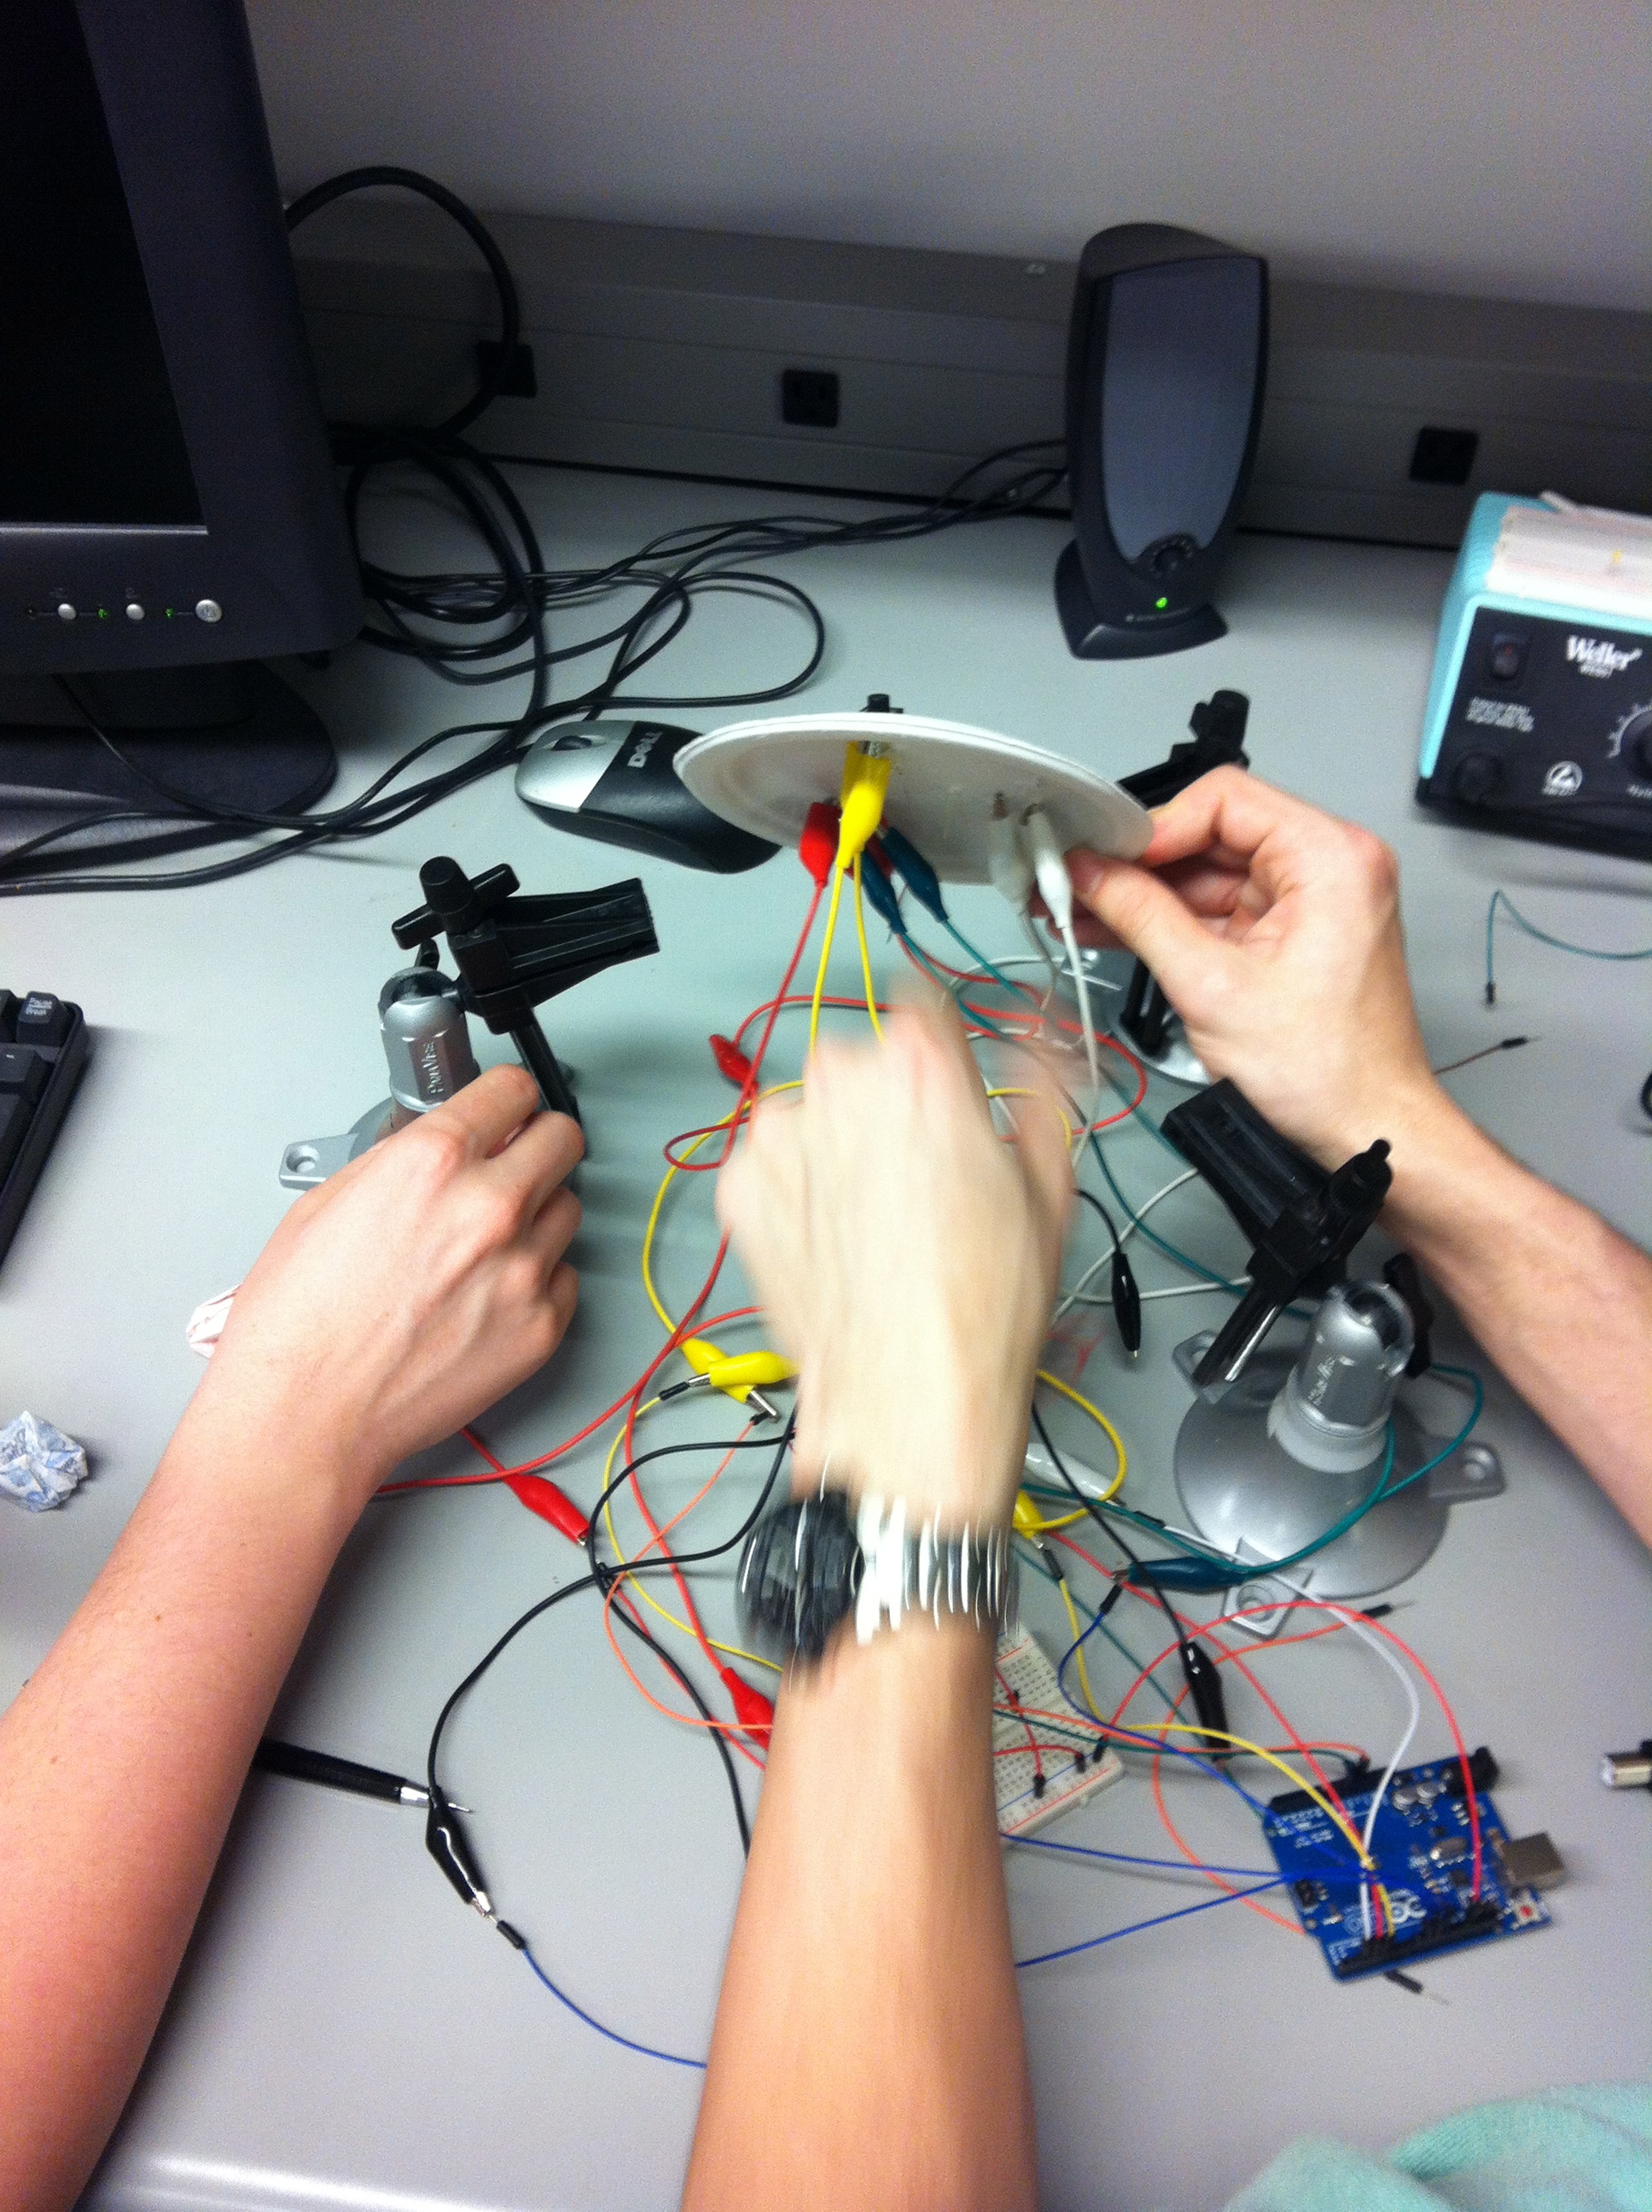
For the base of the game, we took a paper plate and poked four holes for each button (one for each leg) and a single hole for each LED. We then could insert the switches and LEDs and attach alligator clips to the bottom to make the circuits displayed in the tutorials and our diagrams. By following those design diagrams, we constructed what you see in the picture below.
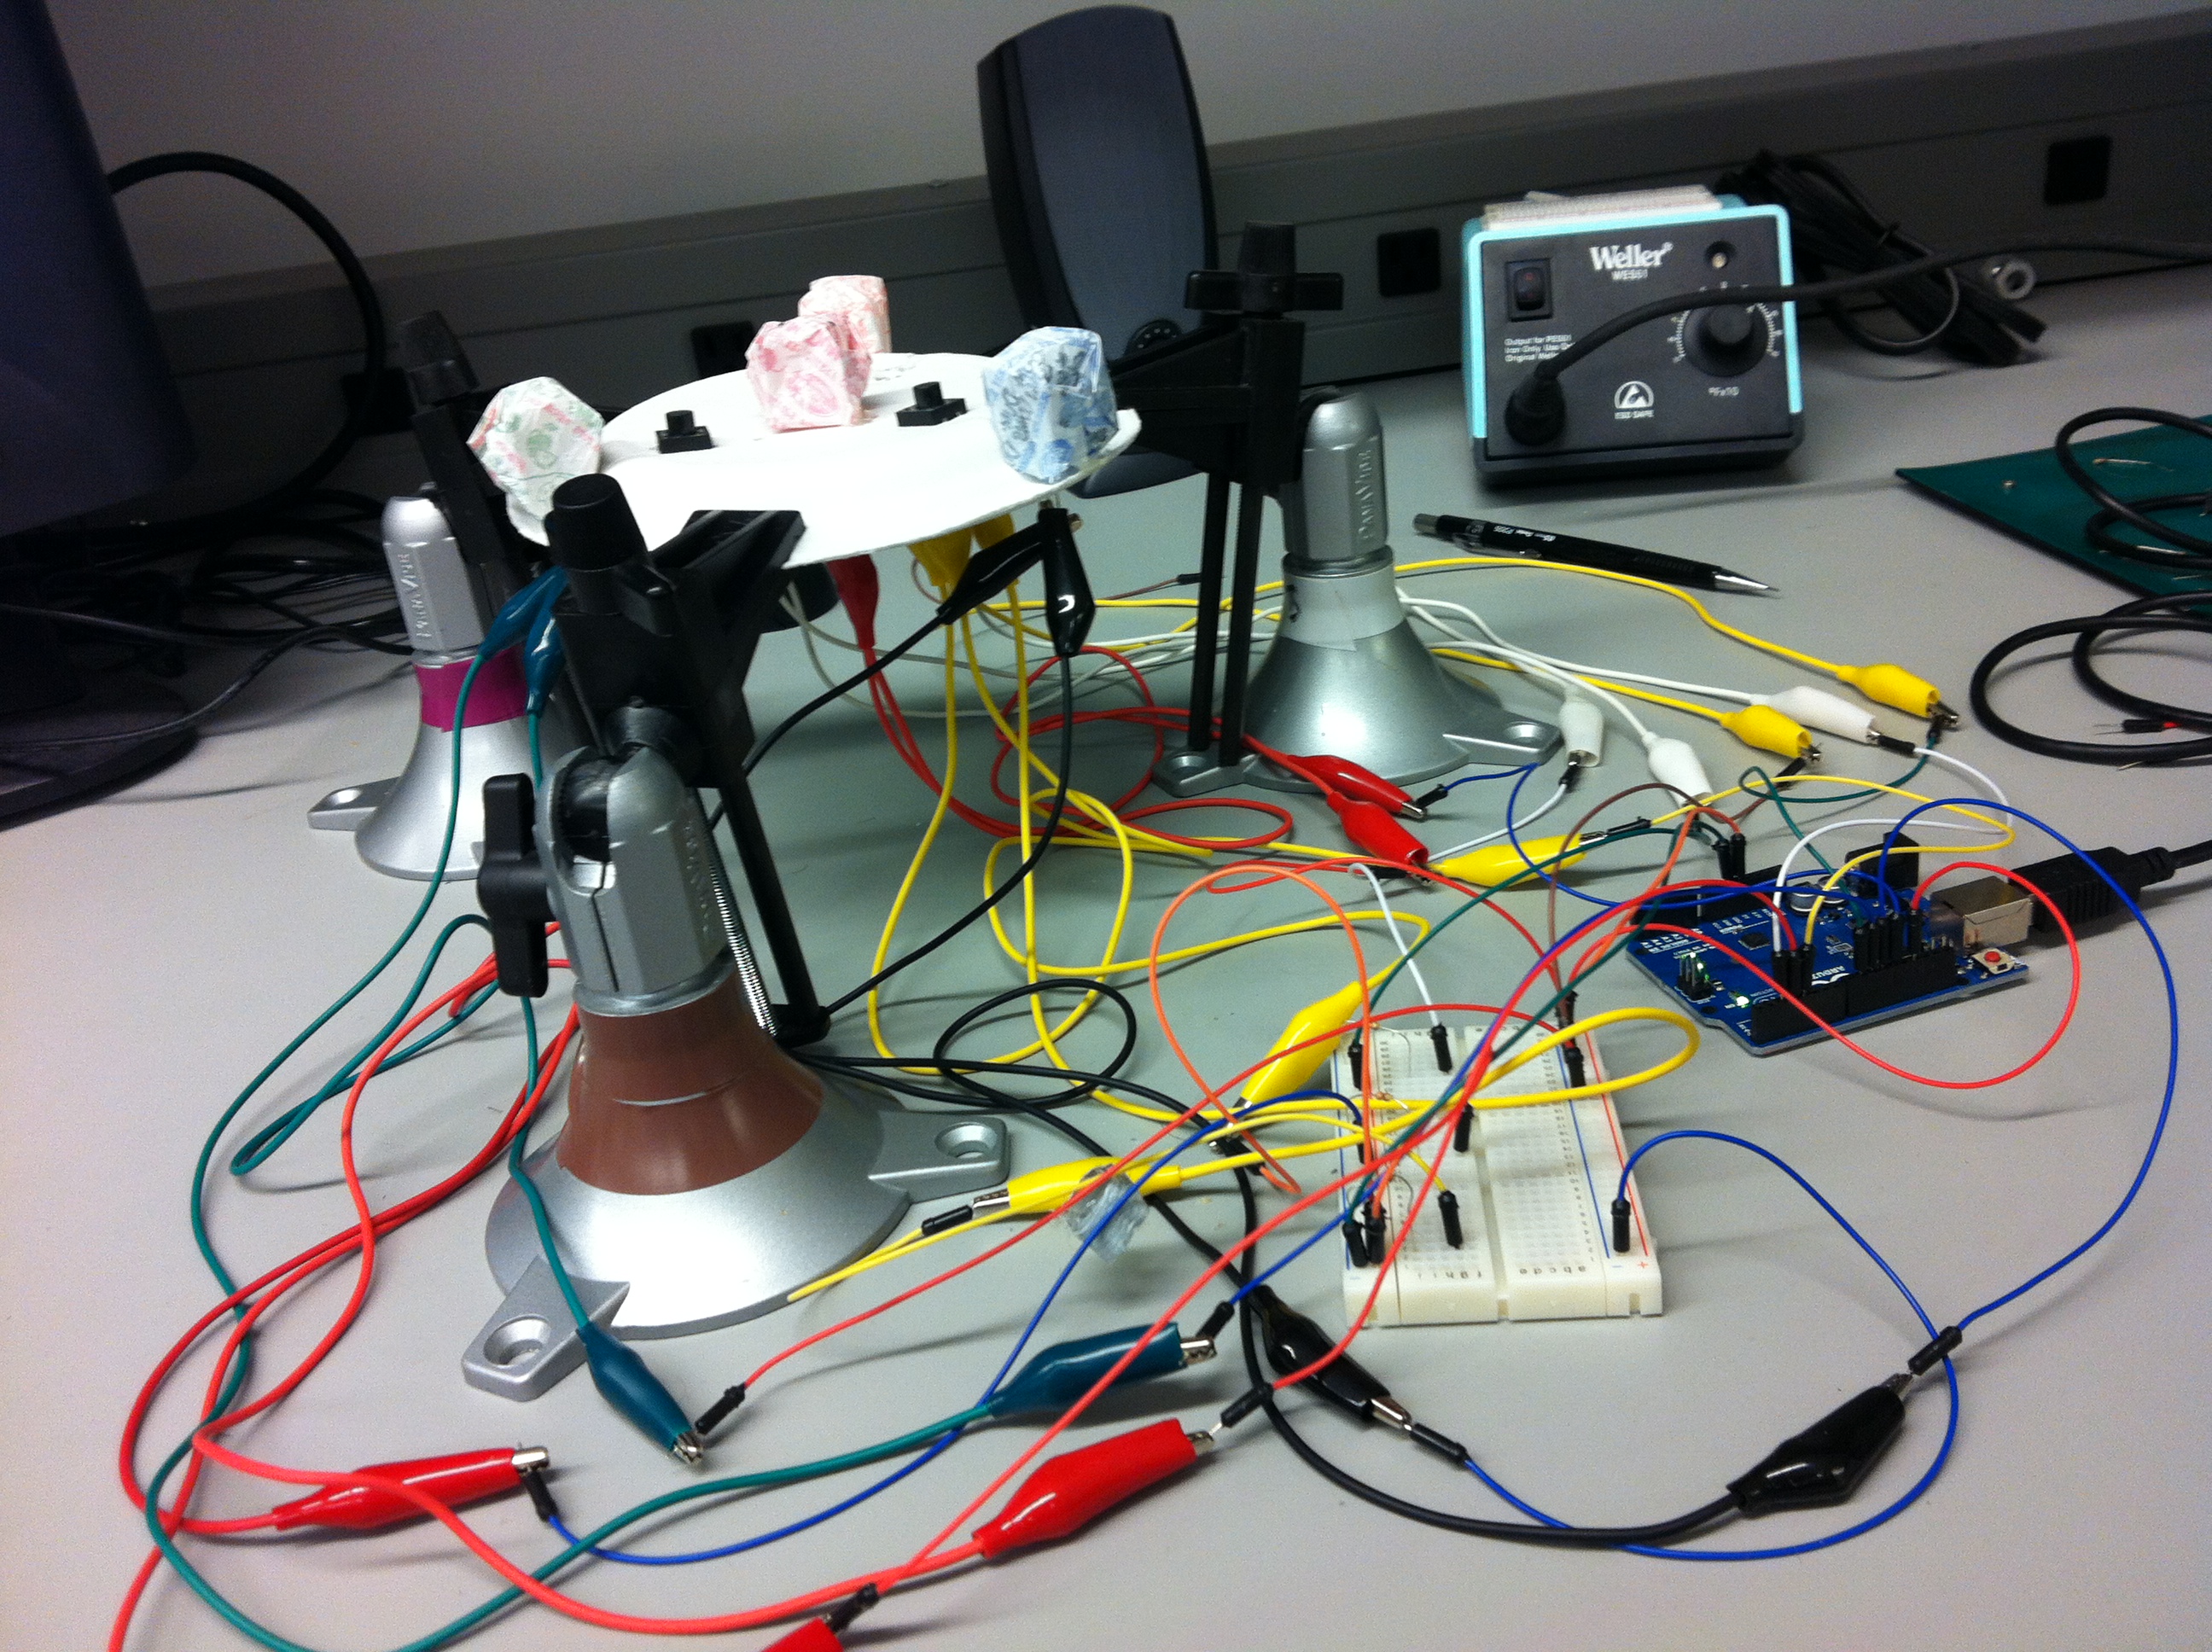
Wiring of simon interface to arduino
As you can see, we have supported the plate with three stationary clamps (“helping hands”). This allows the alligator clips to hang down, making the circuits easy to connect and prevent them from touching accidentally. This also allowed us easy access during debugging. After some cleaning up of our wires we finished our simon design. Here is a walkthrough of the finished project:
How to:
1) After reading over the blink tutorial, connect LEDs to your bread board so they connect to digital input pins 9, 10, 11, and 12, a resistor, and ground.
2) After reading over the button tutorial, connect your buttons to your bread board so they connect to digital input pins 2, 3, and 4, ground and 5v.
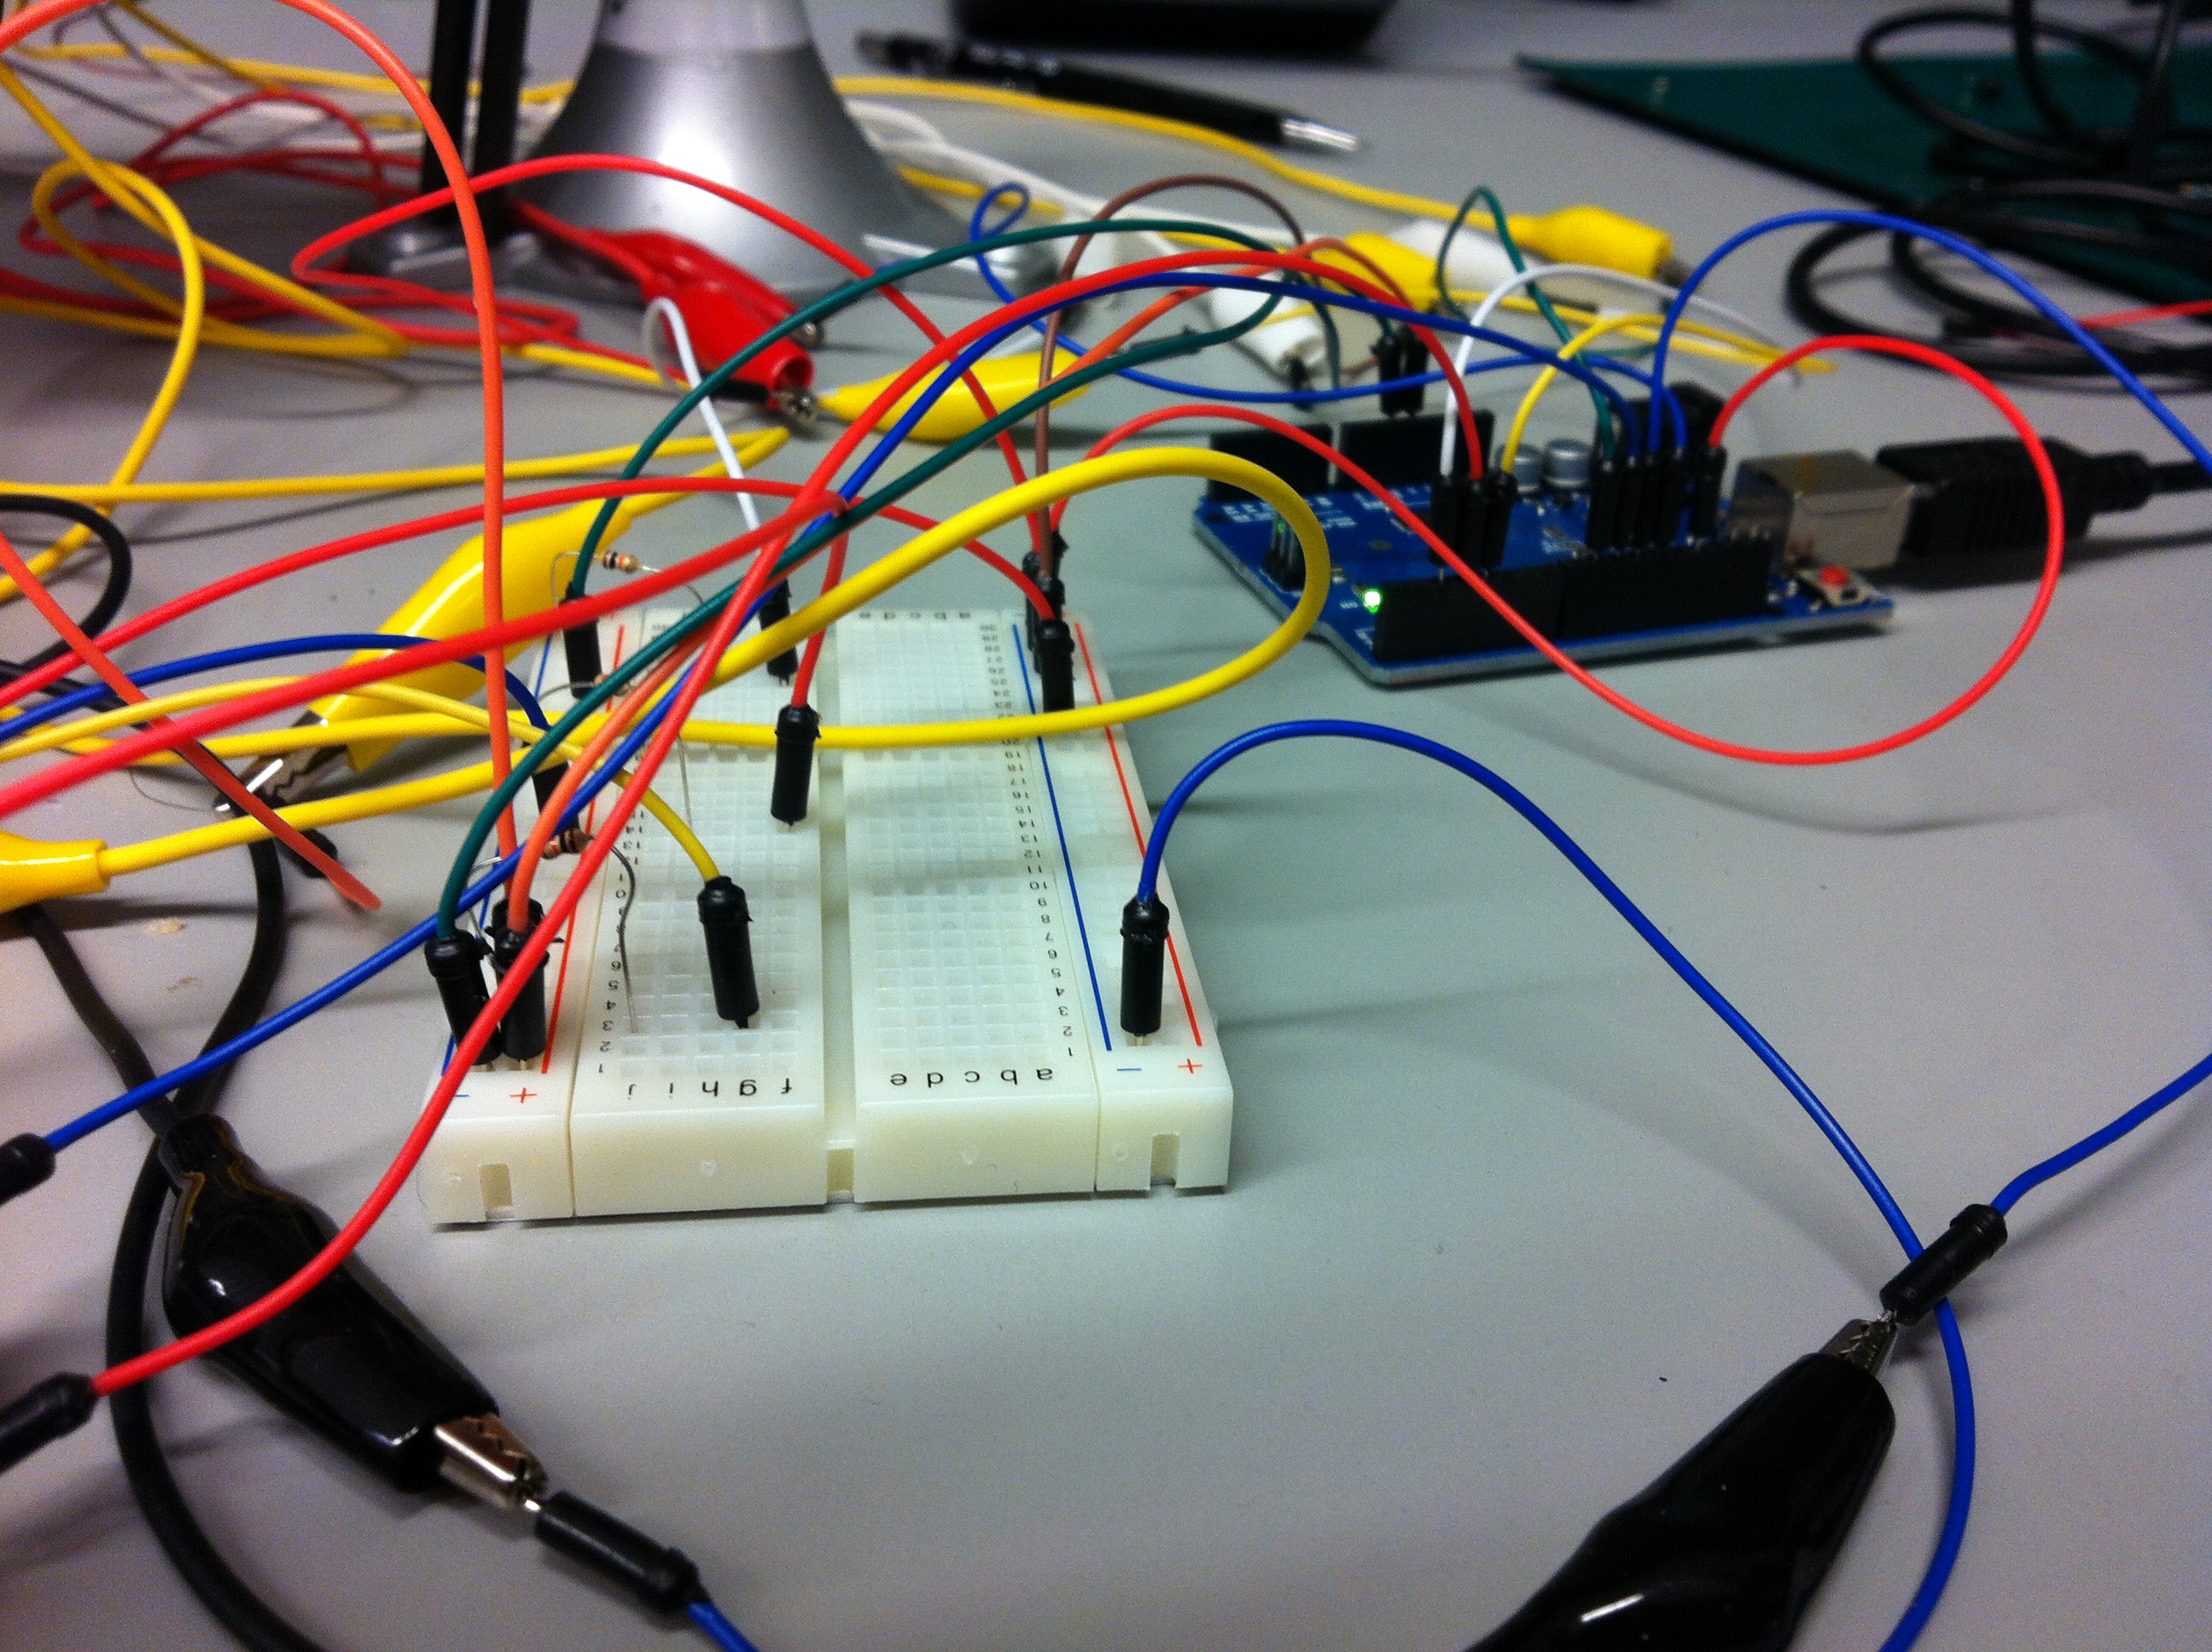
Our simon breadboard.
3) Run some test code on you Arduino. Start by running blink on each led to check that you leds and connections are working. Then, try the button code to test that each button is working. Finally, upload the code below to check that the simon game works.
4) Construct the base of the game using a paper plate or similar material. Arrange the buttons/leds in the manner shown below with the electrical contacts sticking through the plate.
5) Construct 4 origami balloons to act as diffusers.
6) Move the 4 leds and 3 buttons on your breadboard over to the plate setup one by one by running aligator clips from the plate setup to the breadboard.
7) Repeat set 3.
8) Cover each led with an origami balloon diffuser. Hot glue to balloons to the plate for support.
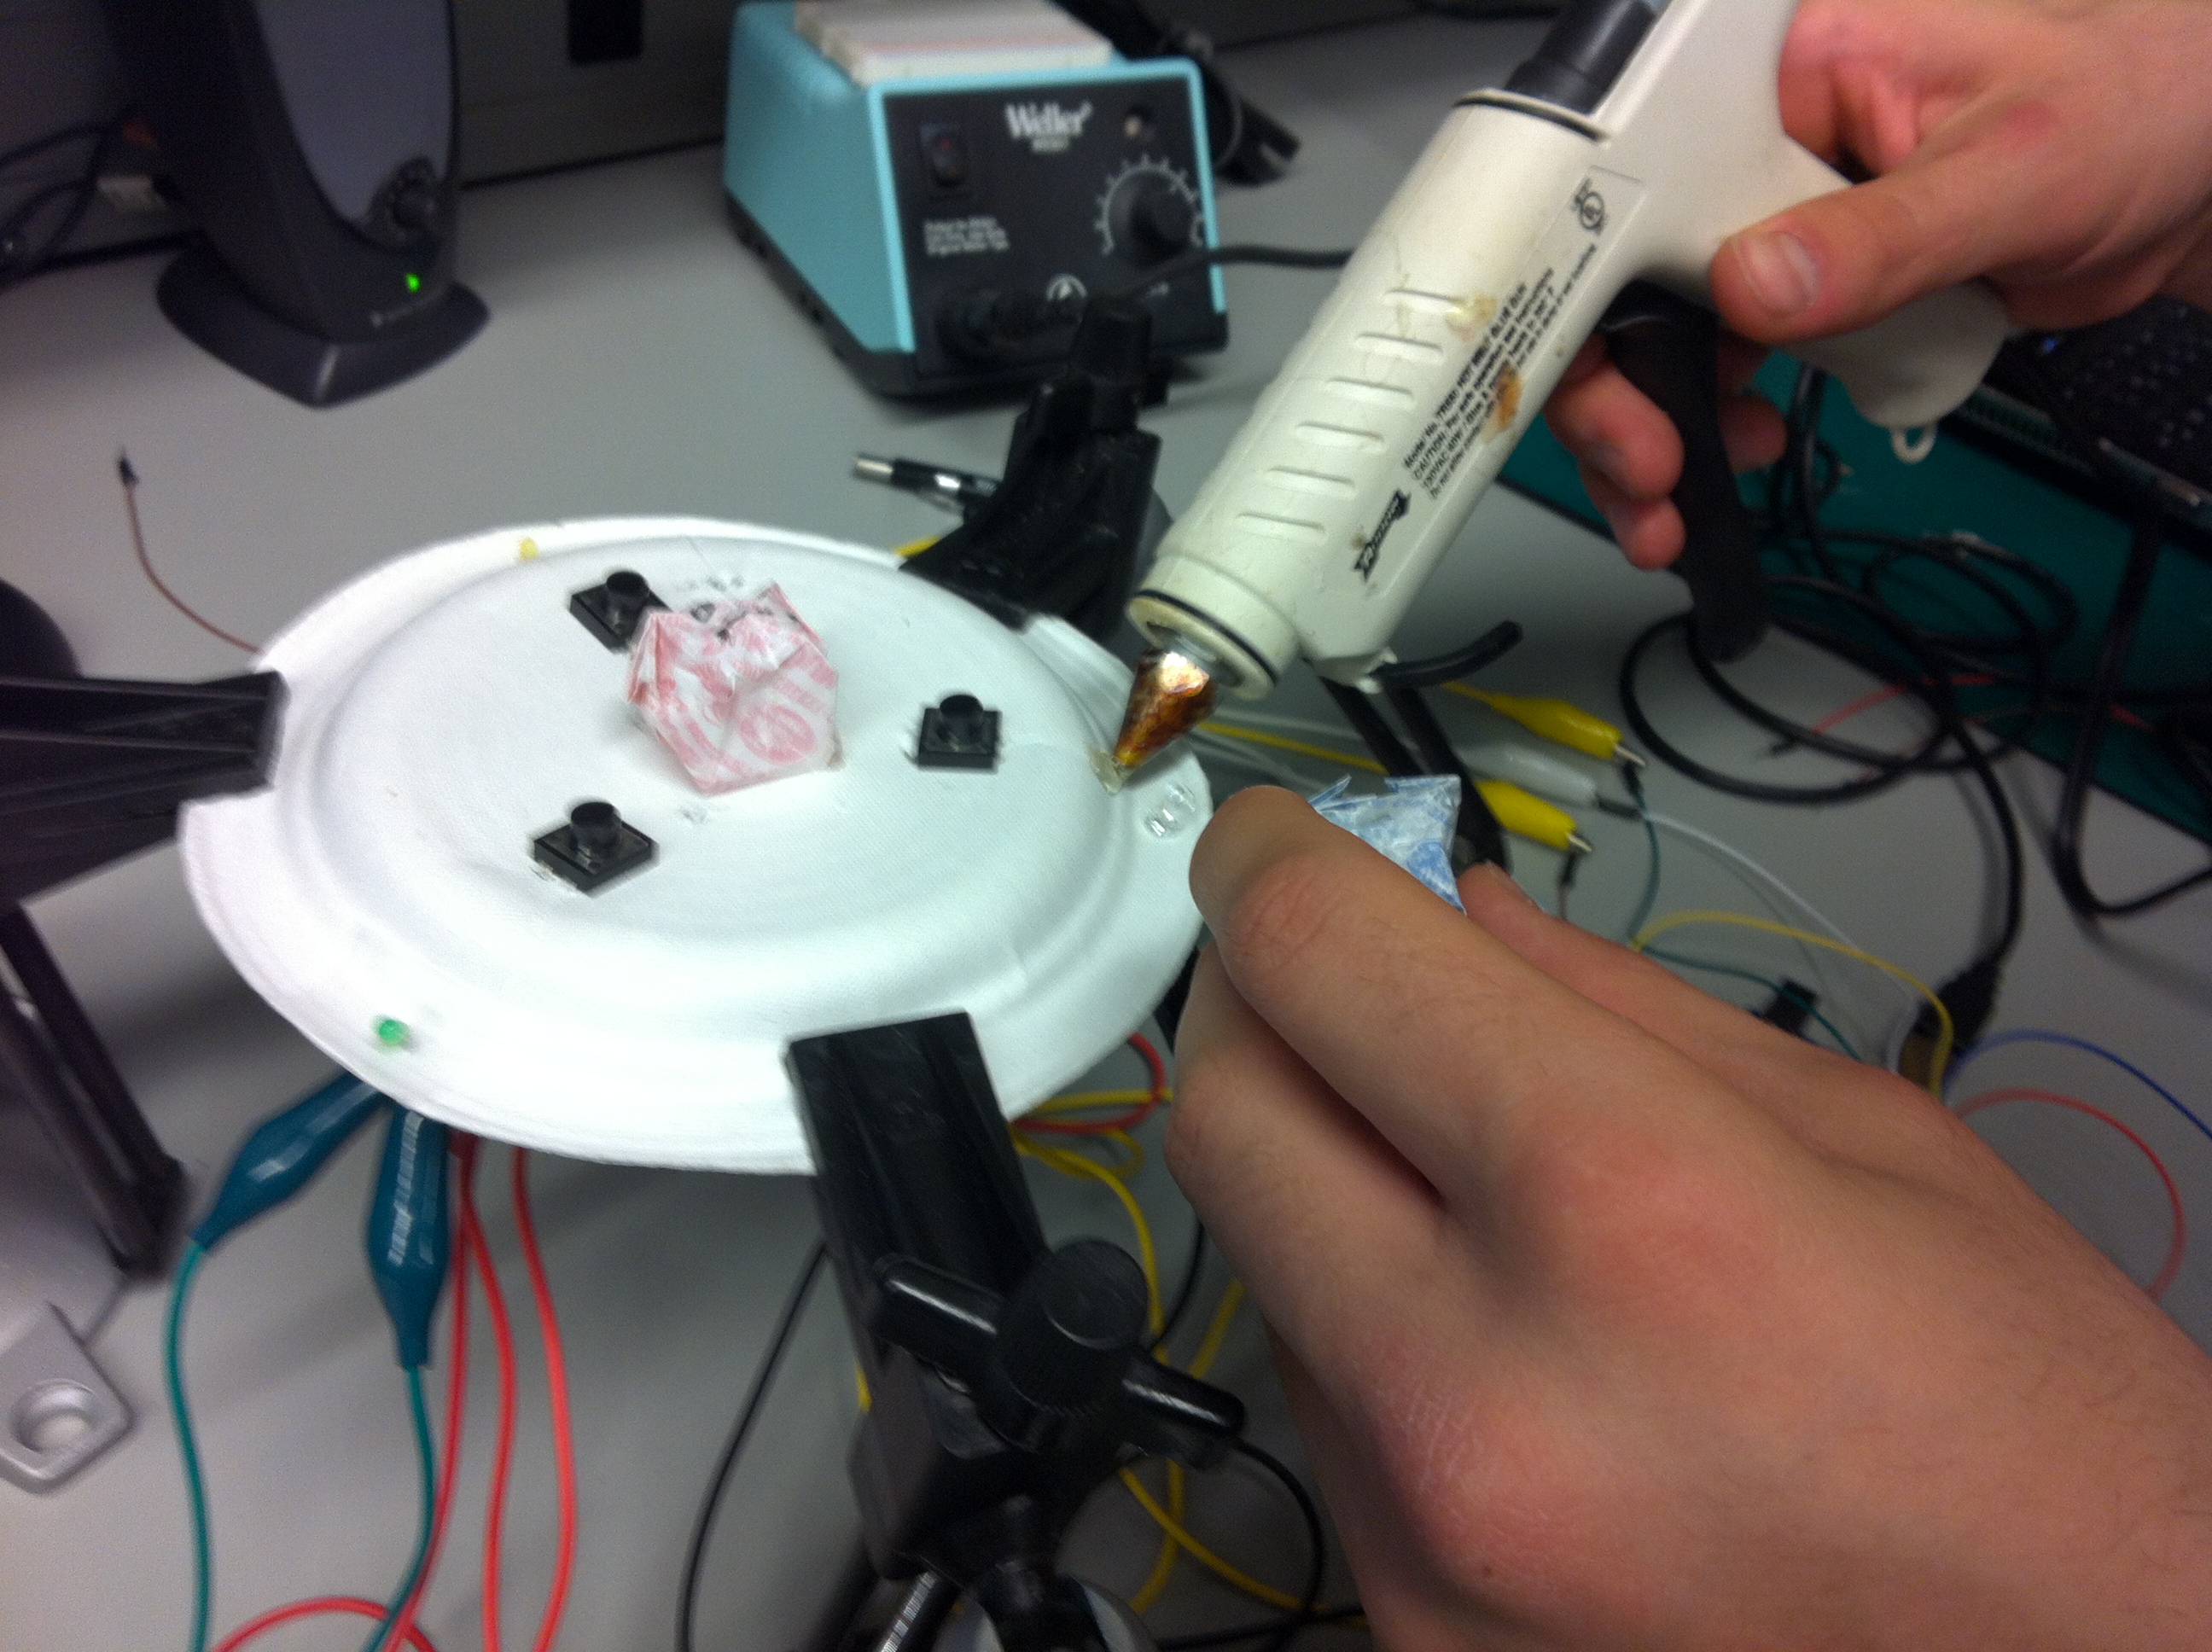
Hot gluing origami balloon diffusers to leds
9) You’re done!
The Code:
Our code starts by initializing a random array, with length equal to the number of button presses needed to win. It flashes the first color in the sequence, and then falls into the main loop, continually checking for button presses. When a button is pressed, the Arduino checks if it corresponds to the next color in the sequence. If it is the expected color, it advances the position in the sequence by 1. Otherwise, it flashes the sad face led and resets. When the user has reentered the sequence correctly, the next element is added to the sequence, and the game repeats until the user has succeeded on the maximum level.
Here is the code we used for the project:
const int numButtons   = 3;
    const int buttonPins[] = {2,3,4}; // arduino input pins
    const int ledPins[]    = {9,10,11}; // arduino output pins
    const int errorLed     = 12;

    const int maxLength    = 5;

    int randSeq[maxLength]; // contains randomly gen'd game seq
    int level; // current level
    int numCorrect; // how many pins you've pressed correctly so far
                    // always less than level

    int lastStates[numButtons]; // to check button input

    void setup() {
      victory();
      delay(250);
      resetState();
      randomSeed(analogRead(0));
    }

    //initialize randSeq with random values between 0 and numButtons
    int makeArray(void) {
      int i;
      for (i = 0; i < maxLength; i++) {
       randSeq[i] = random(numButtons);
     }
   }

   // flash a given led
   void flashLed (int ledNum) {
    analogWrite(ledNum, 0);
    delay(50);
    analogWrite(ledNum, 255);
    delay(200);
    analogWrite(ledNum, 0);
    delay(50);
  }

  // handle input
  void checkInput(int i) {

    // wrong button was pressed
    if (randSeq[numCorrect] != i) {
      flashLed(errorLed);
      flashLed(errorLed);
      flashLed(errorLed);
      delay(250);
      resetState();
      return;
    }
    // correct button was pressed
    else {
      numCorrect++;
      // check for last button in level
      if (numCorrect == level) {
        // check for last level in game
        if (level == maxLength) {
          victory();
          delay(250);
          resetState();
        }
        // not last level in game
        else {
          delay(500);
          numCorrect = 0;
          level++;
          flashSeq();
        }
      }
      // not last button in level
      else {
        delay(100);
      }
    }
  }

  // determine which button was pressed
  void checkButtons () {
    int i;
    for (i = 0; i < numButtons; i++) {
      int state = digitalRead(buttonPins[i]);
      if (state != lastStates[i]) {
        if (state == HIGH) {
          checkInput(i);
          delay(100);
        }
        lastStates[i] = state;
      }
    }
  }

  // flash the sequence of leds up to current level
  void flashSeq(){
    int i;
    for (i = 0; i < level; i++){
      flashLed(ledPins[randSeq[i]]);
      delay(250);
    }

  }

  // turn all leds off
  void setAllOff() {
    analogWrite(ledPins[0], 0);
    analogWrite(ledPins[1], 0);
    analogWrite(ledPins[2], 0);
  }

  // turn all leds on
  void setAllOn() {
    analogWrite(ledPins[0], 255);
    analogWrite(ledPins[1], 255);
    analogWrite(ledPins[2], 255);
  }

  // flash all leds
  void flashLeds(){
    setAllOff();
    delay(100);
    setAllOn();
    delay(100);
    setAllOff();
  }

  // flash the leds in a circle
  void circle() {
    setAllOff();
    delay(100);
    analogWrite(ledPins[0], 255);
    delay(100);
    analogWrite(ledPins[0], 0);
    analogWrite(ledPins[1], 255);
    delay(100);
    analogWrite(ledPins[1], 0);
    analogWrite(ledPins[2], 255);
    delay(100);
    analogWrite(ledPins[2], 0);
    delay(100);
  }

  // special victory flash sequence
  void victory() {
    flashLeds();
    flashLeds();
    flashLeds();
    circle();
    circle();
    circle();
    flashLeds();
    flashLeds();
    flashLeds();
  }

  // reset for a new game
  void resetState() {
    makeArray();
    level = 1;
    numCorrect = 0;
      // delay(500);
    flashSeq();
  }

  // main loop
  void loop() {
    checkButtons();
  }