
Group members:
David Lackey – dlackey@
John O’Neill – jconeill@
Horia Radoi – hradoi@
(Santhosh Balasubramanian)
Playing Simon Sees
The aim of our project was to create a wearable version of the classic game of Simon Says. As such, the goal of Simon Sees is to remember and duplicate the sequence of lights generated by the microcontroller. The player wears a pair of glasses with two lights, one on each side, which are diffused via straws to create a visible beam of light. The game begins by showing a light sequence of length 1, which the player must duplicate by pressing the corresponding buttons – lighting the straws to indicate his or her decision. After each successful level, an additional light is added to the sequence. When the user makes a mistake, a red LED light notifies the user, and he or she has to restart the game. Overall, we found our final implementation fairly successful, especially after decreasing the time between the lights in the sequence, which increased the amount of attention needed by the player. After spending time with our prototype and inviting additional users to participate, we discovered that future iterations should contain more than two sources of input/ouput and that the current interface for user input (two buttons) could be transformed into something more engaging and unique, such as auditory- or motion-based forms of interaction.
Click here to view our project in action!
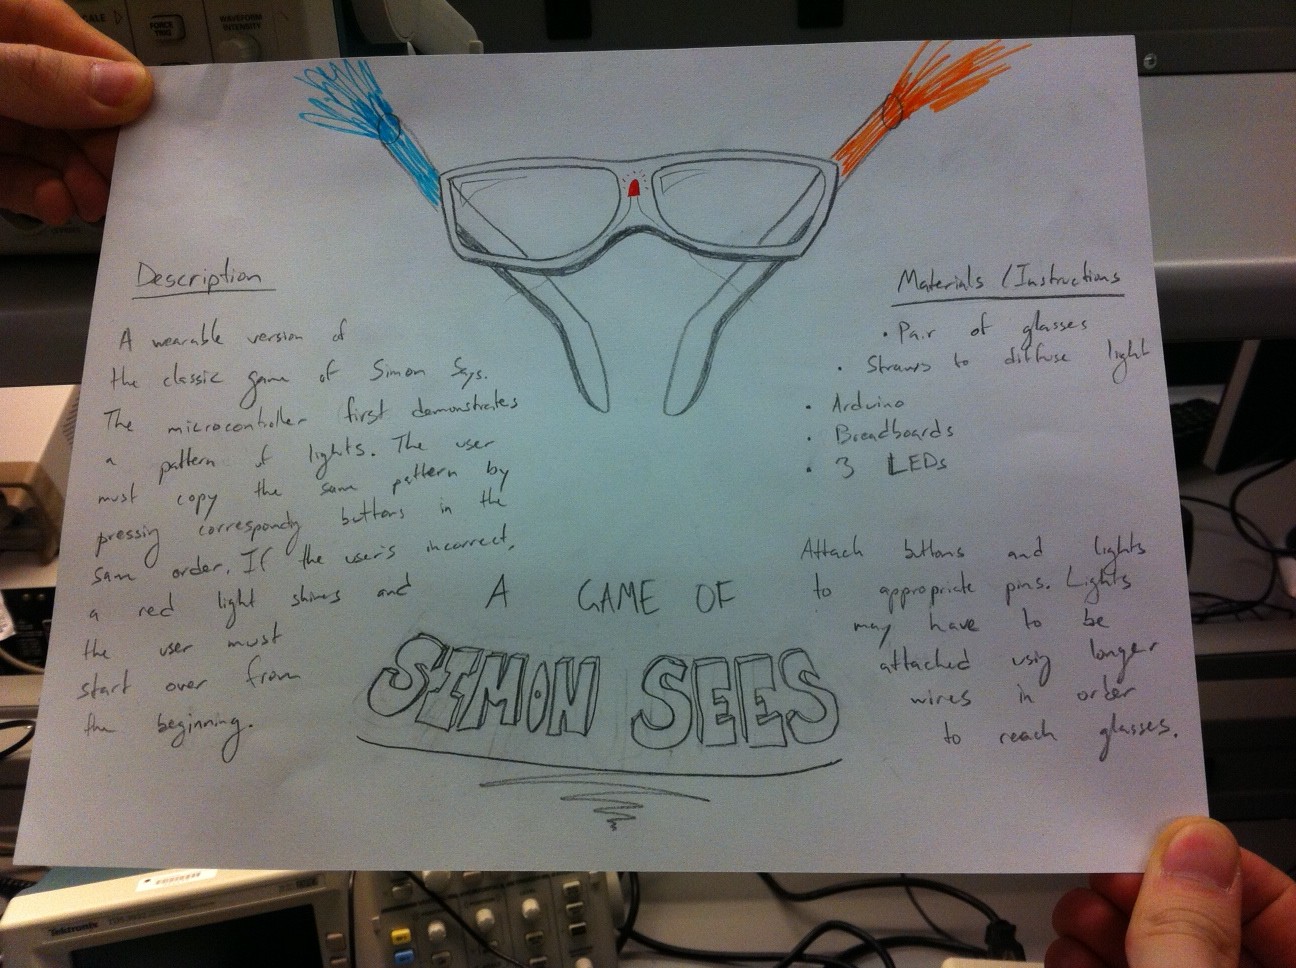
Initial Design Sketch

The Simon Sees interface. Note the red light used to notify a user when they make an incorrect move.
Players use the controller to indiciate which light they think is next in the sequence.
Additional Designs
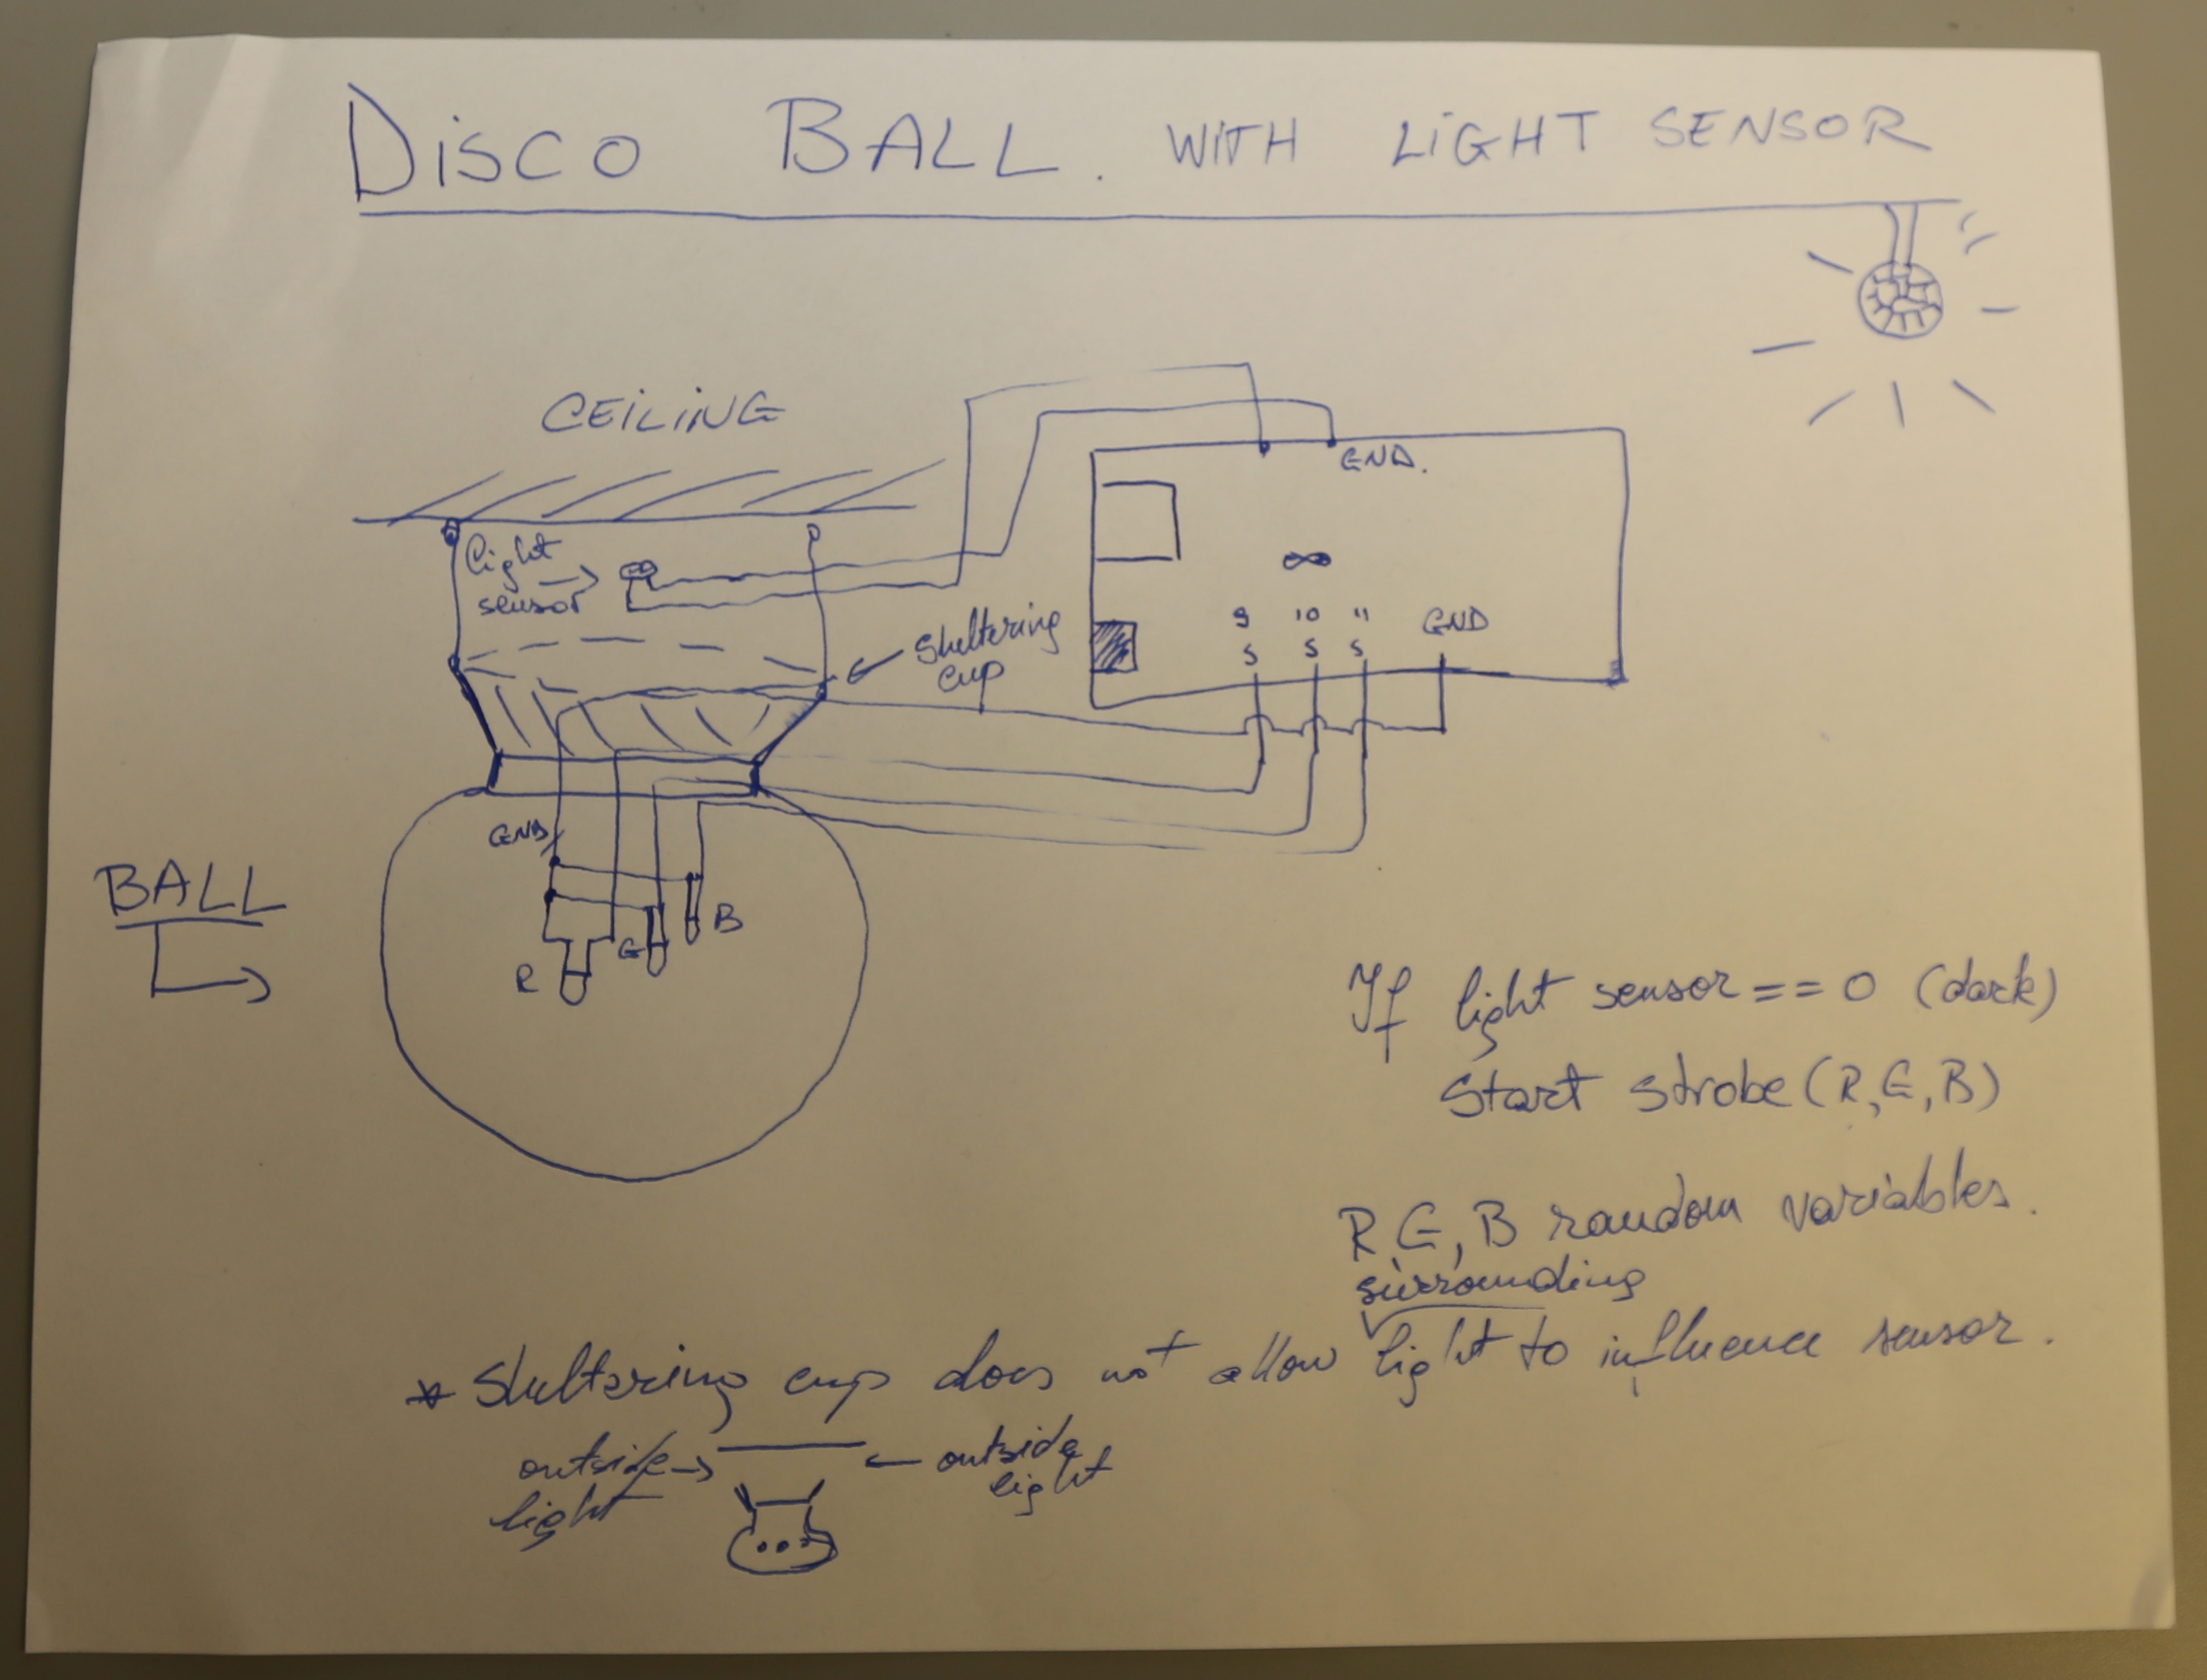
1. Contextual Disco Ball
If our disco ball senses a low-light environment, it begins increasing the brightness of our LED’s (one red, one green, one blue,) which are placed inside of a semitransparent ball. The lights are pulsating, and the frequency at which these lights pulsate is determined by an interactive Processing interface.
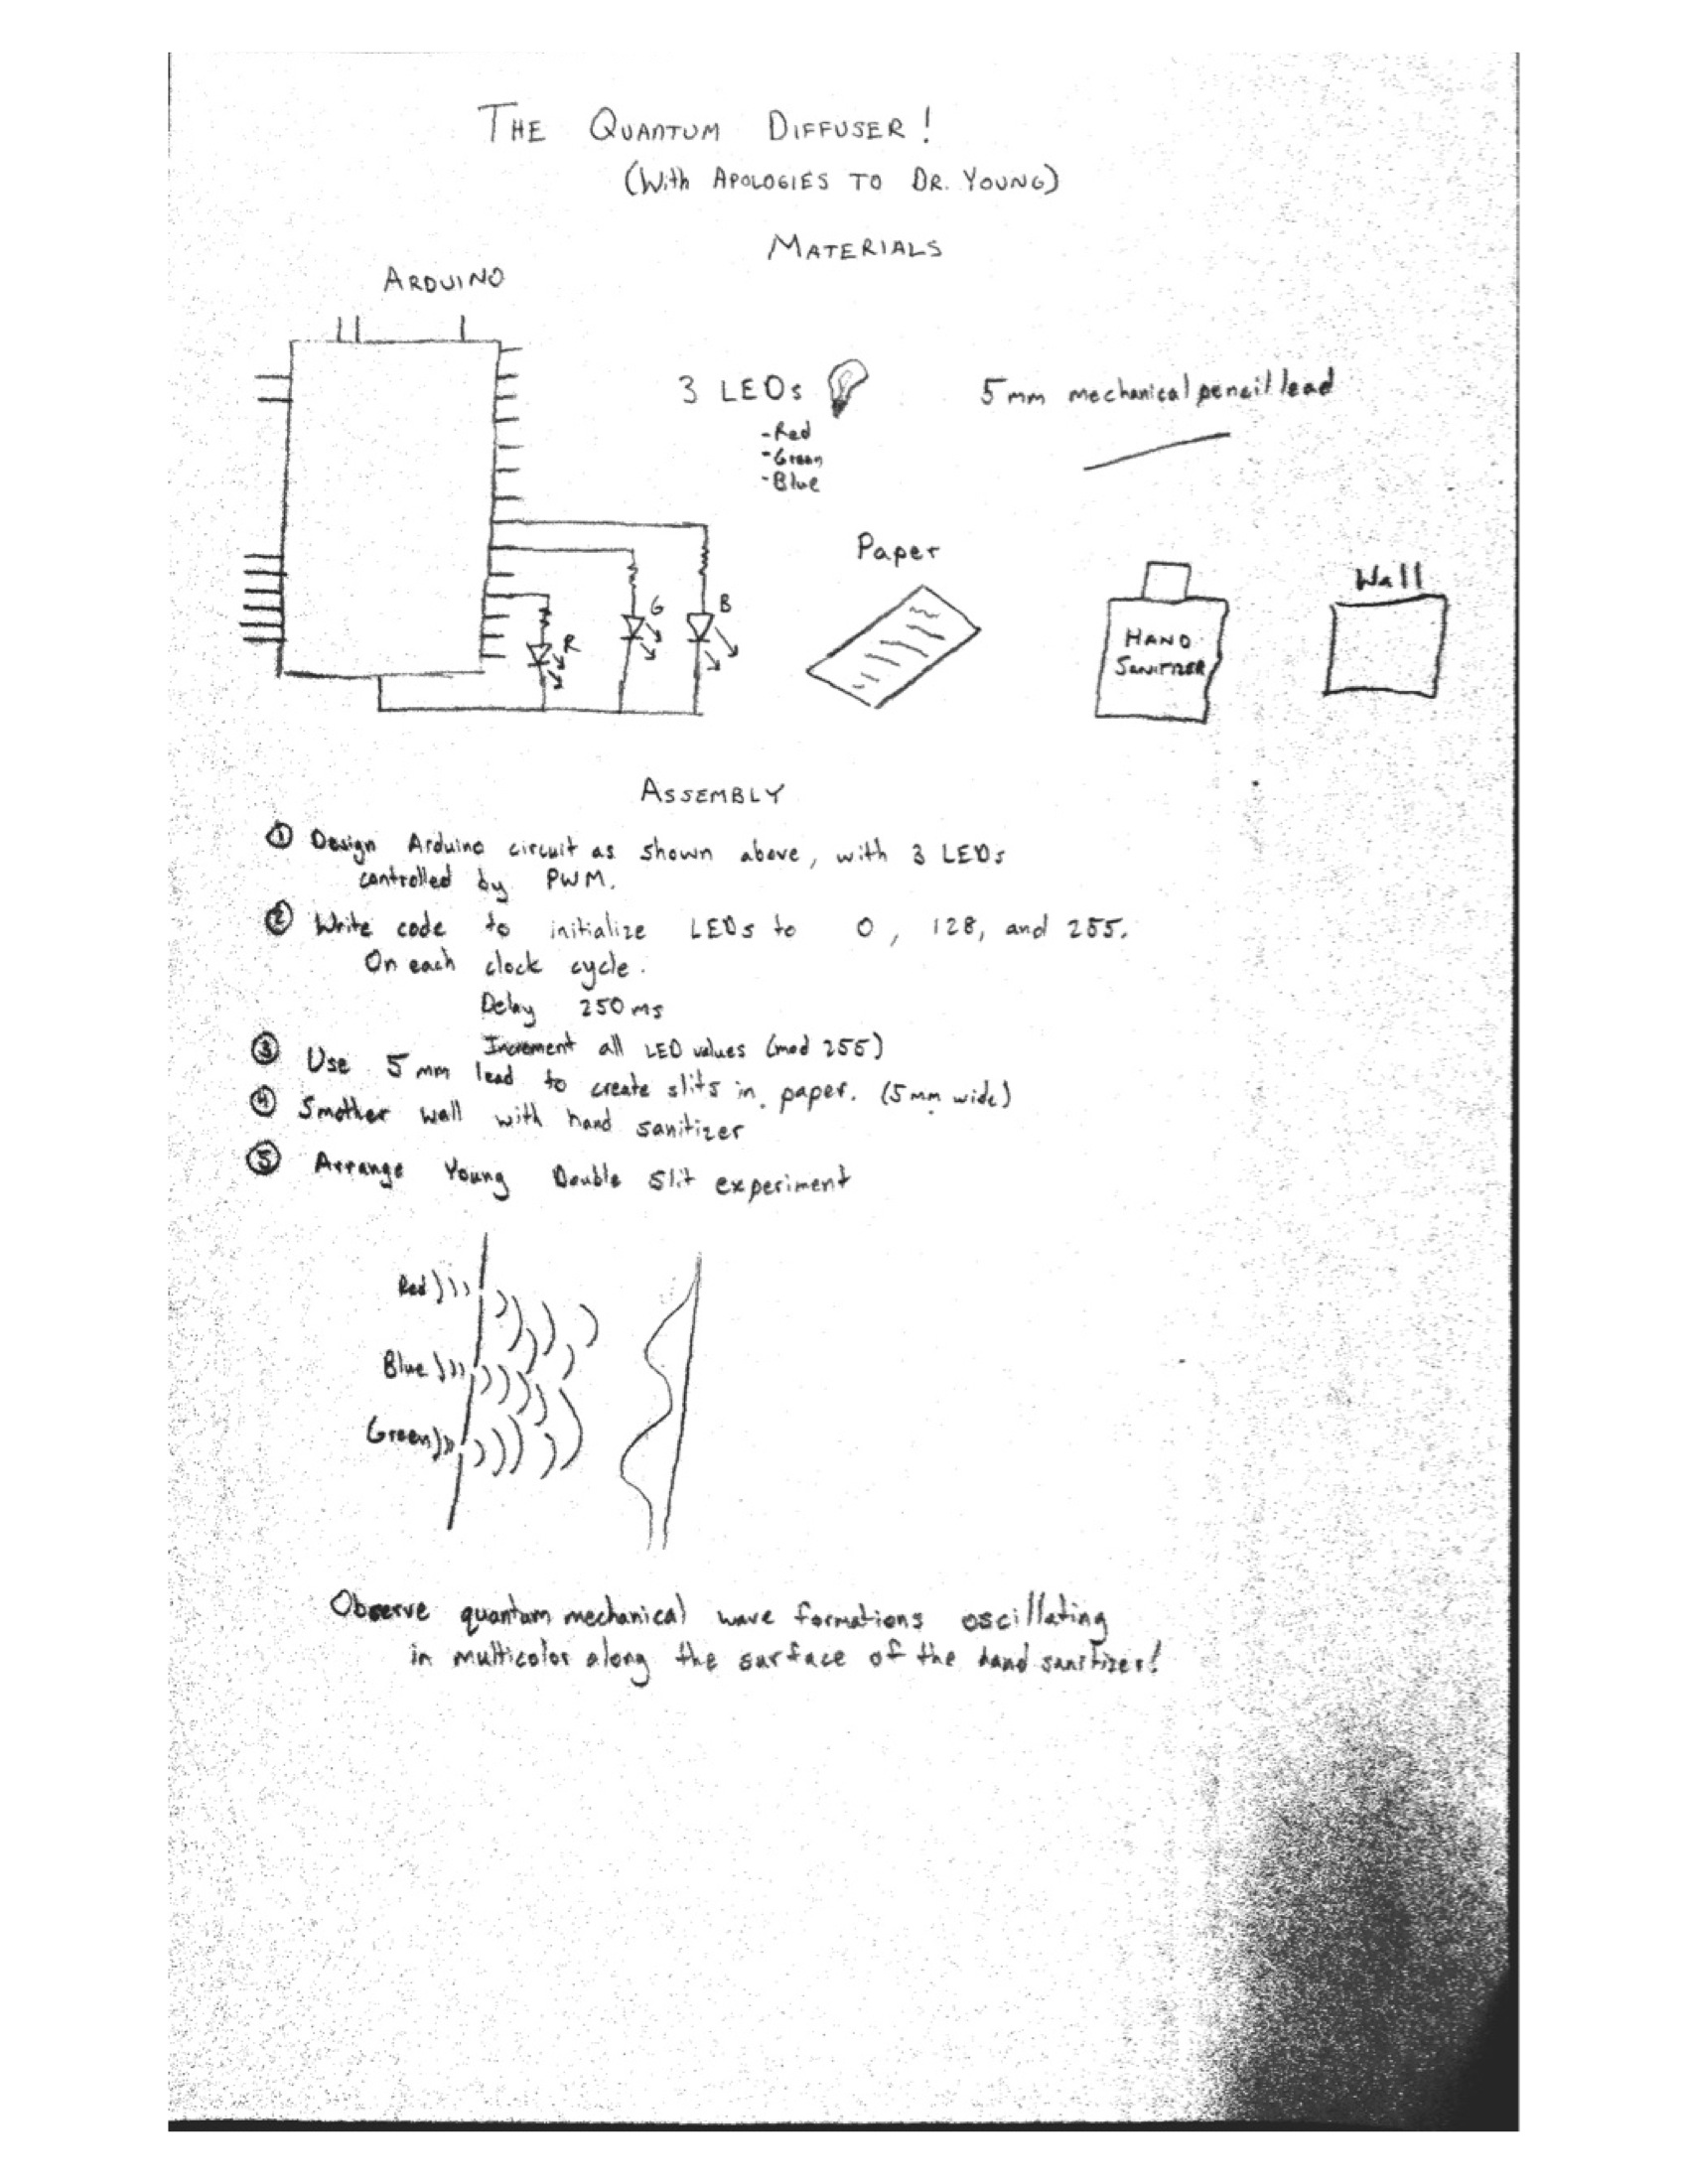
2. Slit Experiment
Using an LED light and a dark box with two thin vertical cuts in one side (at a known distance), generate an interference pattern on a wall by turning the LED light on inside the black box and pointing the side with the two cuts towards a wall (requires a dark room).
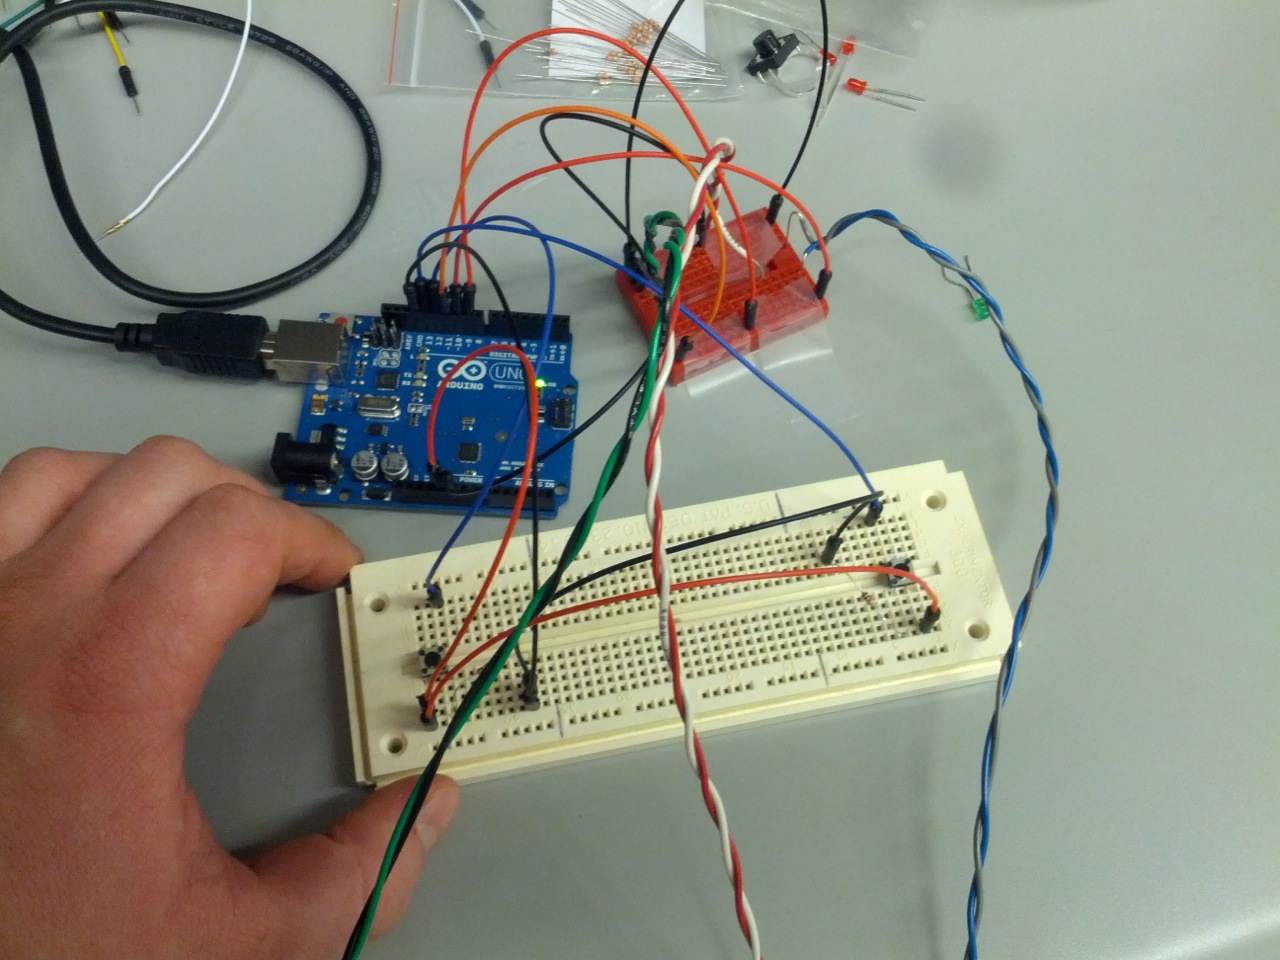
List of Parts
- 1 Arduino
- 2 Breadboards
- 2 Buttons
- 3 LEDs (1 blue, 1 green, 1 red)
- Alligator clips
- 1 Pair of glasses
- 2 Straws
Instructions
- Begin by properly placing the circuitry elements on the Arduino board. One button, which is used to trigger the left light, must use pin 13 and should be arranged to a schematic similar to that as described in the Arduino blogs. The button for the right light should be using pin 12. Our left, right, and red LEDs should be using pins 10, 11, and 9, respectively.
- In order to attach the LED’s to the glasses, use long wires that have been braided together. These allow us to alter where we place our LEDs while being fairly unobtrusive.
- Place LEDs in straws and tape them to the corresponding side of the glasses.
- Load the Arduino with the following code, observe the first light in the sequence, and copy – enjoy!
Code
/*
 Simon Says
 Repeat the sequence of lights given by the button inputs.
 */

// Constants
int N = 10;
int RED_LED = 9;
int LEFT_LED = 10;
int RIGHT_LED = 11;
int LEFT_BUTTON = 13;
int RIGHT_BUTTON = 12;
int DELAY = 200;
int RED_DELAY = 1000;
// State variables
boolean isShowing; // Are we showing lights?
boolean leftLights[10]; // Each element is true for left, false for right
int i; // leftLights index
int level; // Game level

// the setup routine runs once when you press reset:
void setup() {

 // LEDs
 pinMode(RED_LED, OUTPUT);
 pinMode(LEFT_LED, OUTPUT);
 pinMode(RIGHT_LED, OUTPUT);

// Buttons
 pinMode(LEFT_BUTTON, INPUT);
 pinMode(RIGHT_BUTTON, INPUT);

// Init game
 reset();
}

// Reset game
void reset() {
 i = 0;
 level = 1;
 isShowing = true;
 generateLights();
}

// generate lights array
void generateLights() {
 randomSeed(analogRead(0));
 for (int j = 0; j < N; j++){
 leftLights[j] = random(0, 2);
 }
}

// the loop routine runs over and over again forever:
void loop() {
 if (!isShowing) {
 checkInput();
 }
 else if (i < level && level <= N) {
 showLights();
 }
 else {
 // Stop showing lights
 isShowing = false;
 i = 0;
 }
}

// Check player input
void checkInput() {
 // Collect input
 int leftButtonState = digitalRead(LEFT_BUTTON);
 int rightButtonState = digitalRead(RIGHT_BUTTON);
 // Check
 if (leftButtonState == HIGH && leftLights[i]) {
 // Left hit
 i++;
 show(LEFT_LED);
 }
 else if (rightButtonState == HIGH && !leftLights[i]) {
 // Right hit
 i++;
 show(RIGHT_LED);
 }
 else if (rightButtonState == HIGH || leftButtonState == HIGH) {
 // Miss
 show(RED_LED);
 reset();
 }

 // Check level completion
 if (i == level) {
 i = 0;
 level++;
 isShowing = true;
 }
}

// Show lights
void showLights() {
 // Show lights
 if (leftLights[i++]) {
 show(LEFT_LED);
 }
 else {
 show(RIGHT_LED);
 }
}

// play light
void show(int led) {
 int d = DELAY;
 if (led == RED_LED) {
 d = RED_DELAY;
 }

 digitalWrite(led, HIGH);
 delay(d);
 digitalWrite(led, LOW);
 delay(d);
}