
Group Members: Abbi Ward, Dillon Reisman, Prerna Ramachandra, Sam Payne
Group Number: 9
Ideas and Sketches:
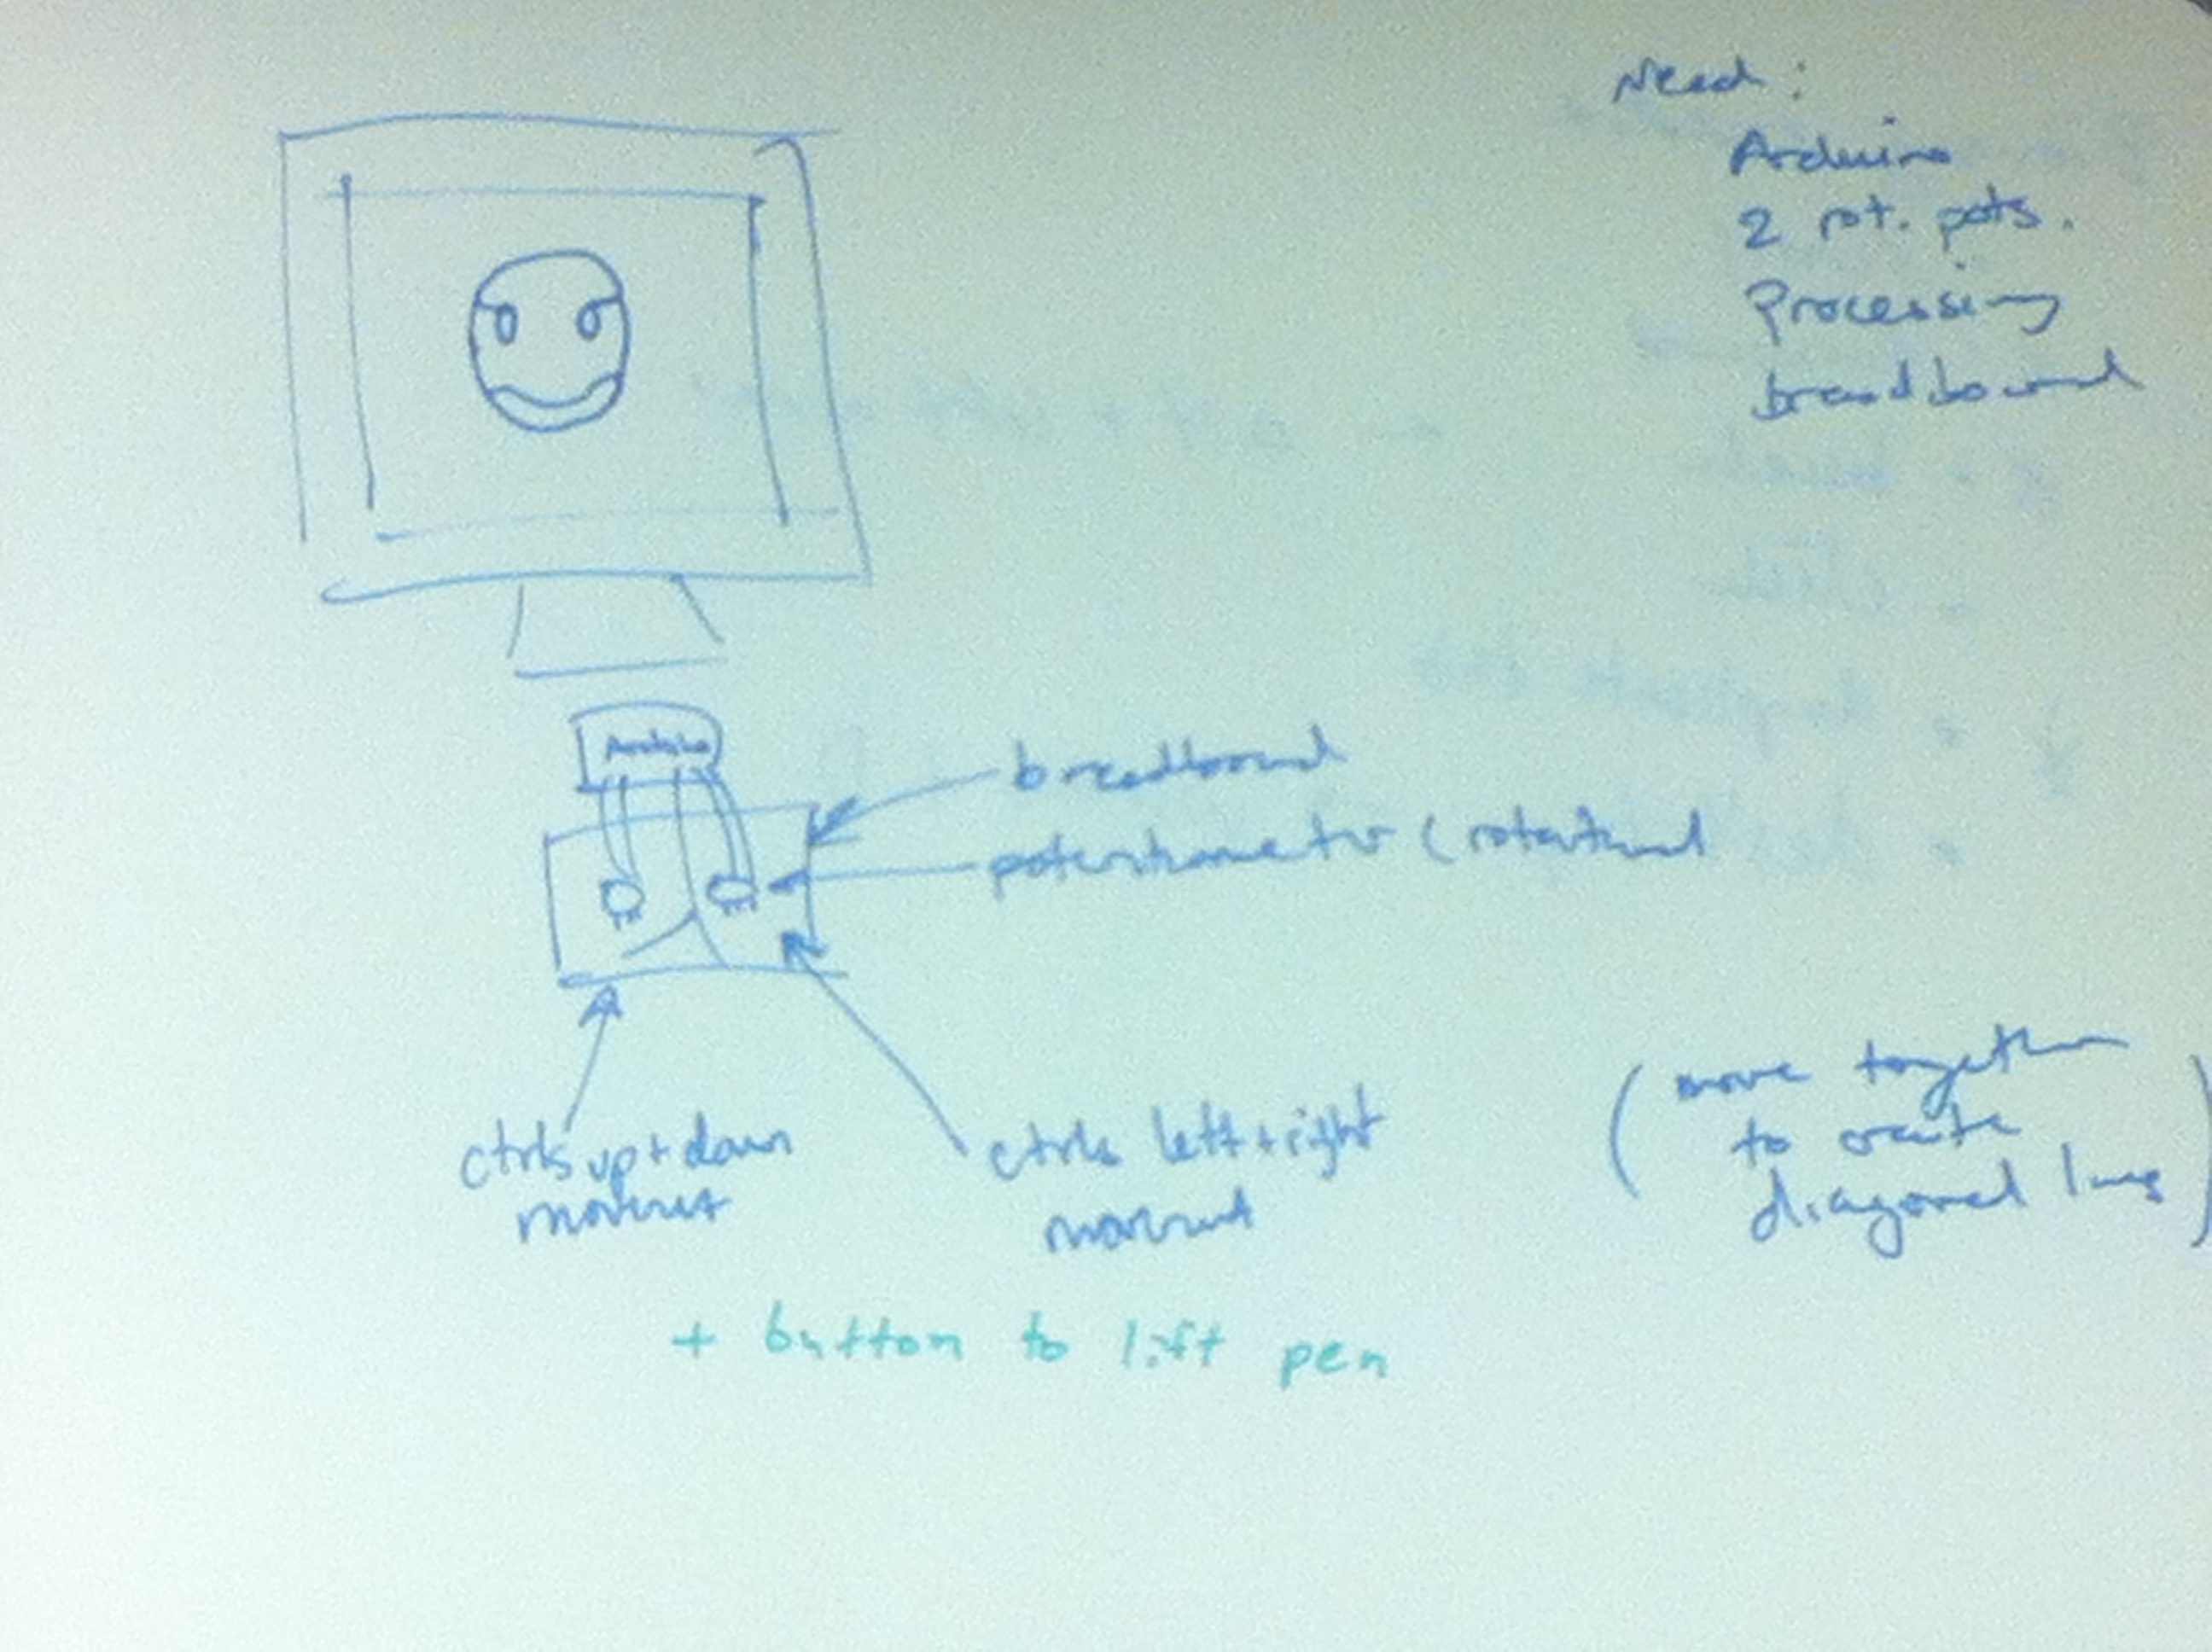
1. Etch-A-Sketch – a version of the famous Etch-A-Sketch game using 2 rotational potentiometers
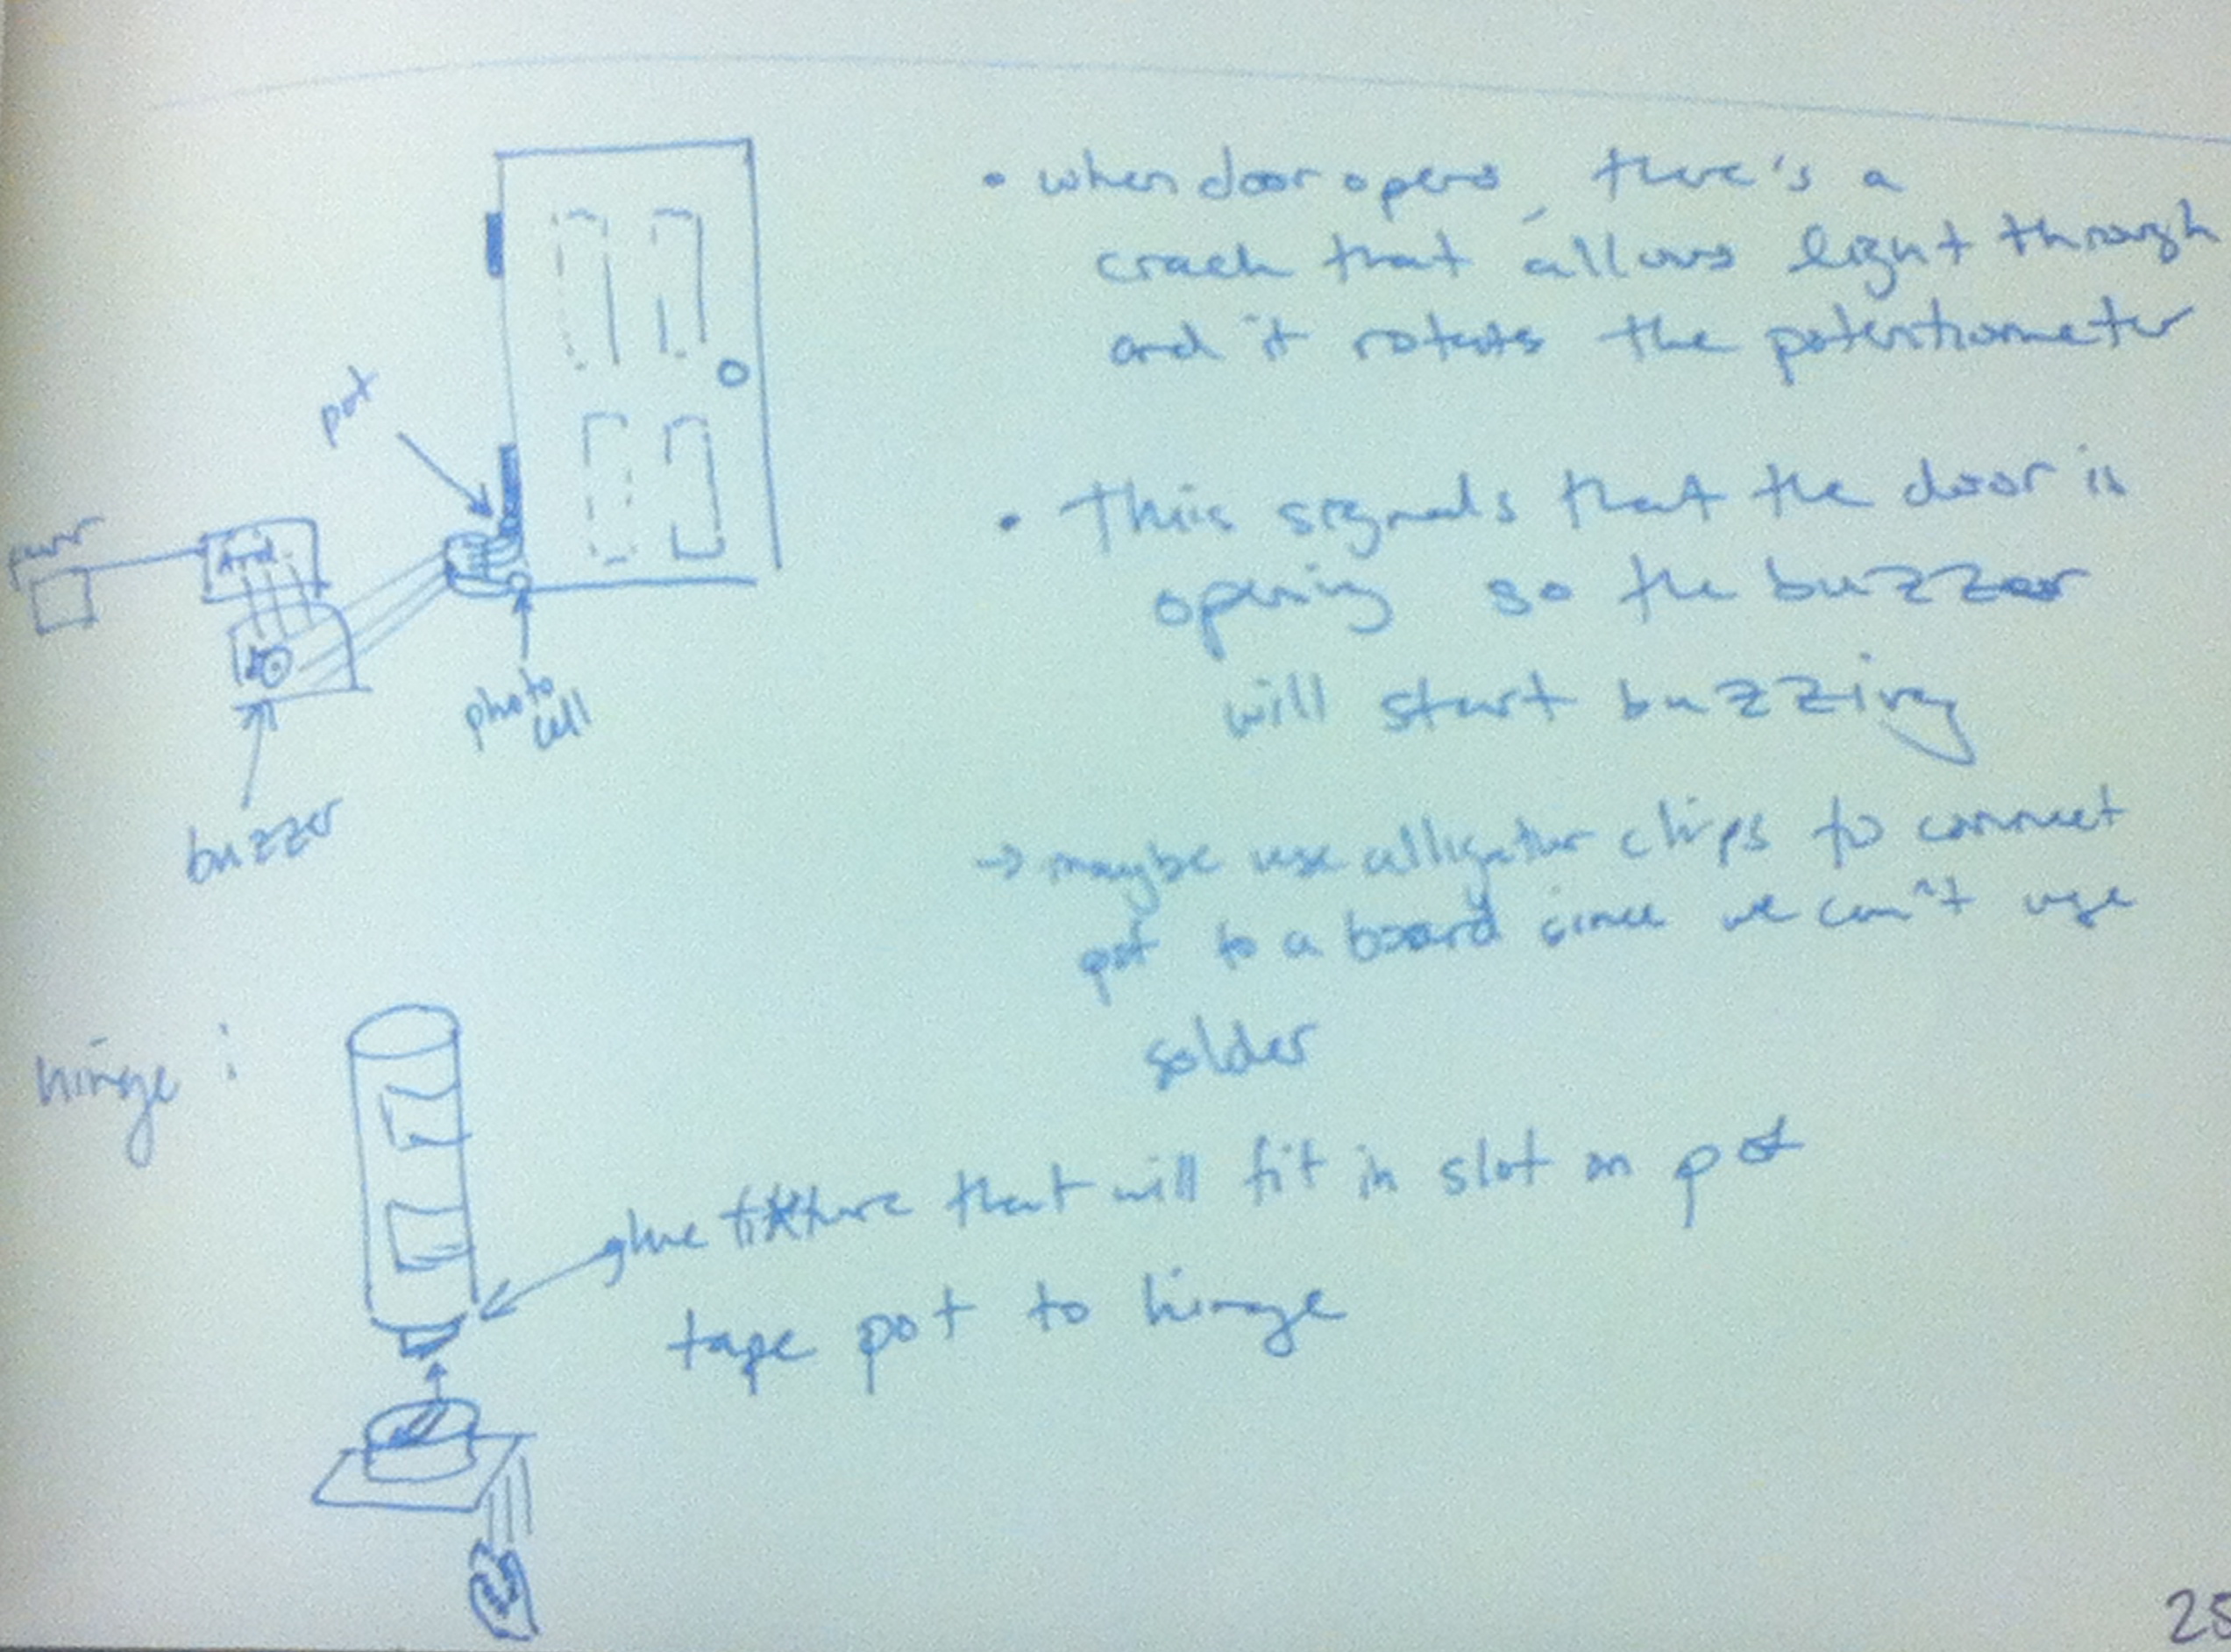
2. Intruder Alert – An alert if someone opens the door to your room while you’re asleep using photocells and a potentiometer
3. Intuitive Control for the Computer – Use of finger flicking movement to quickly minimize windows on the computer.
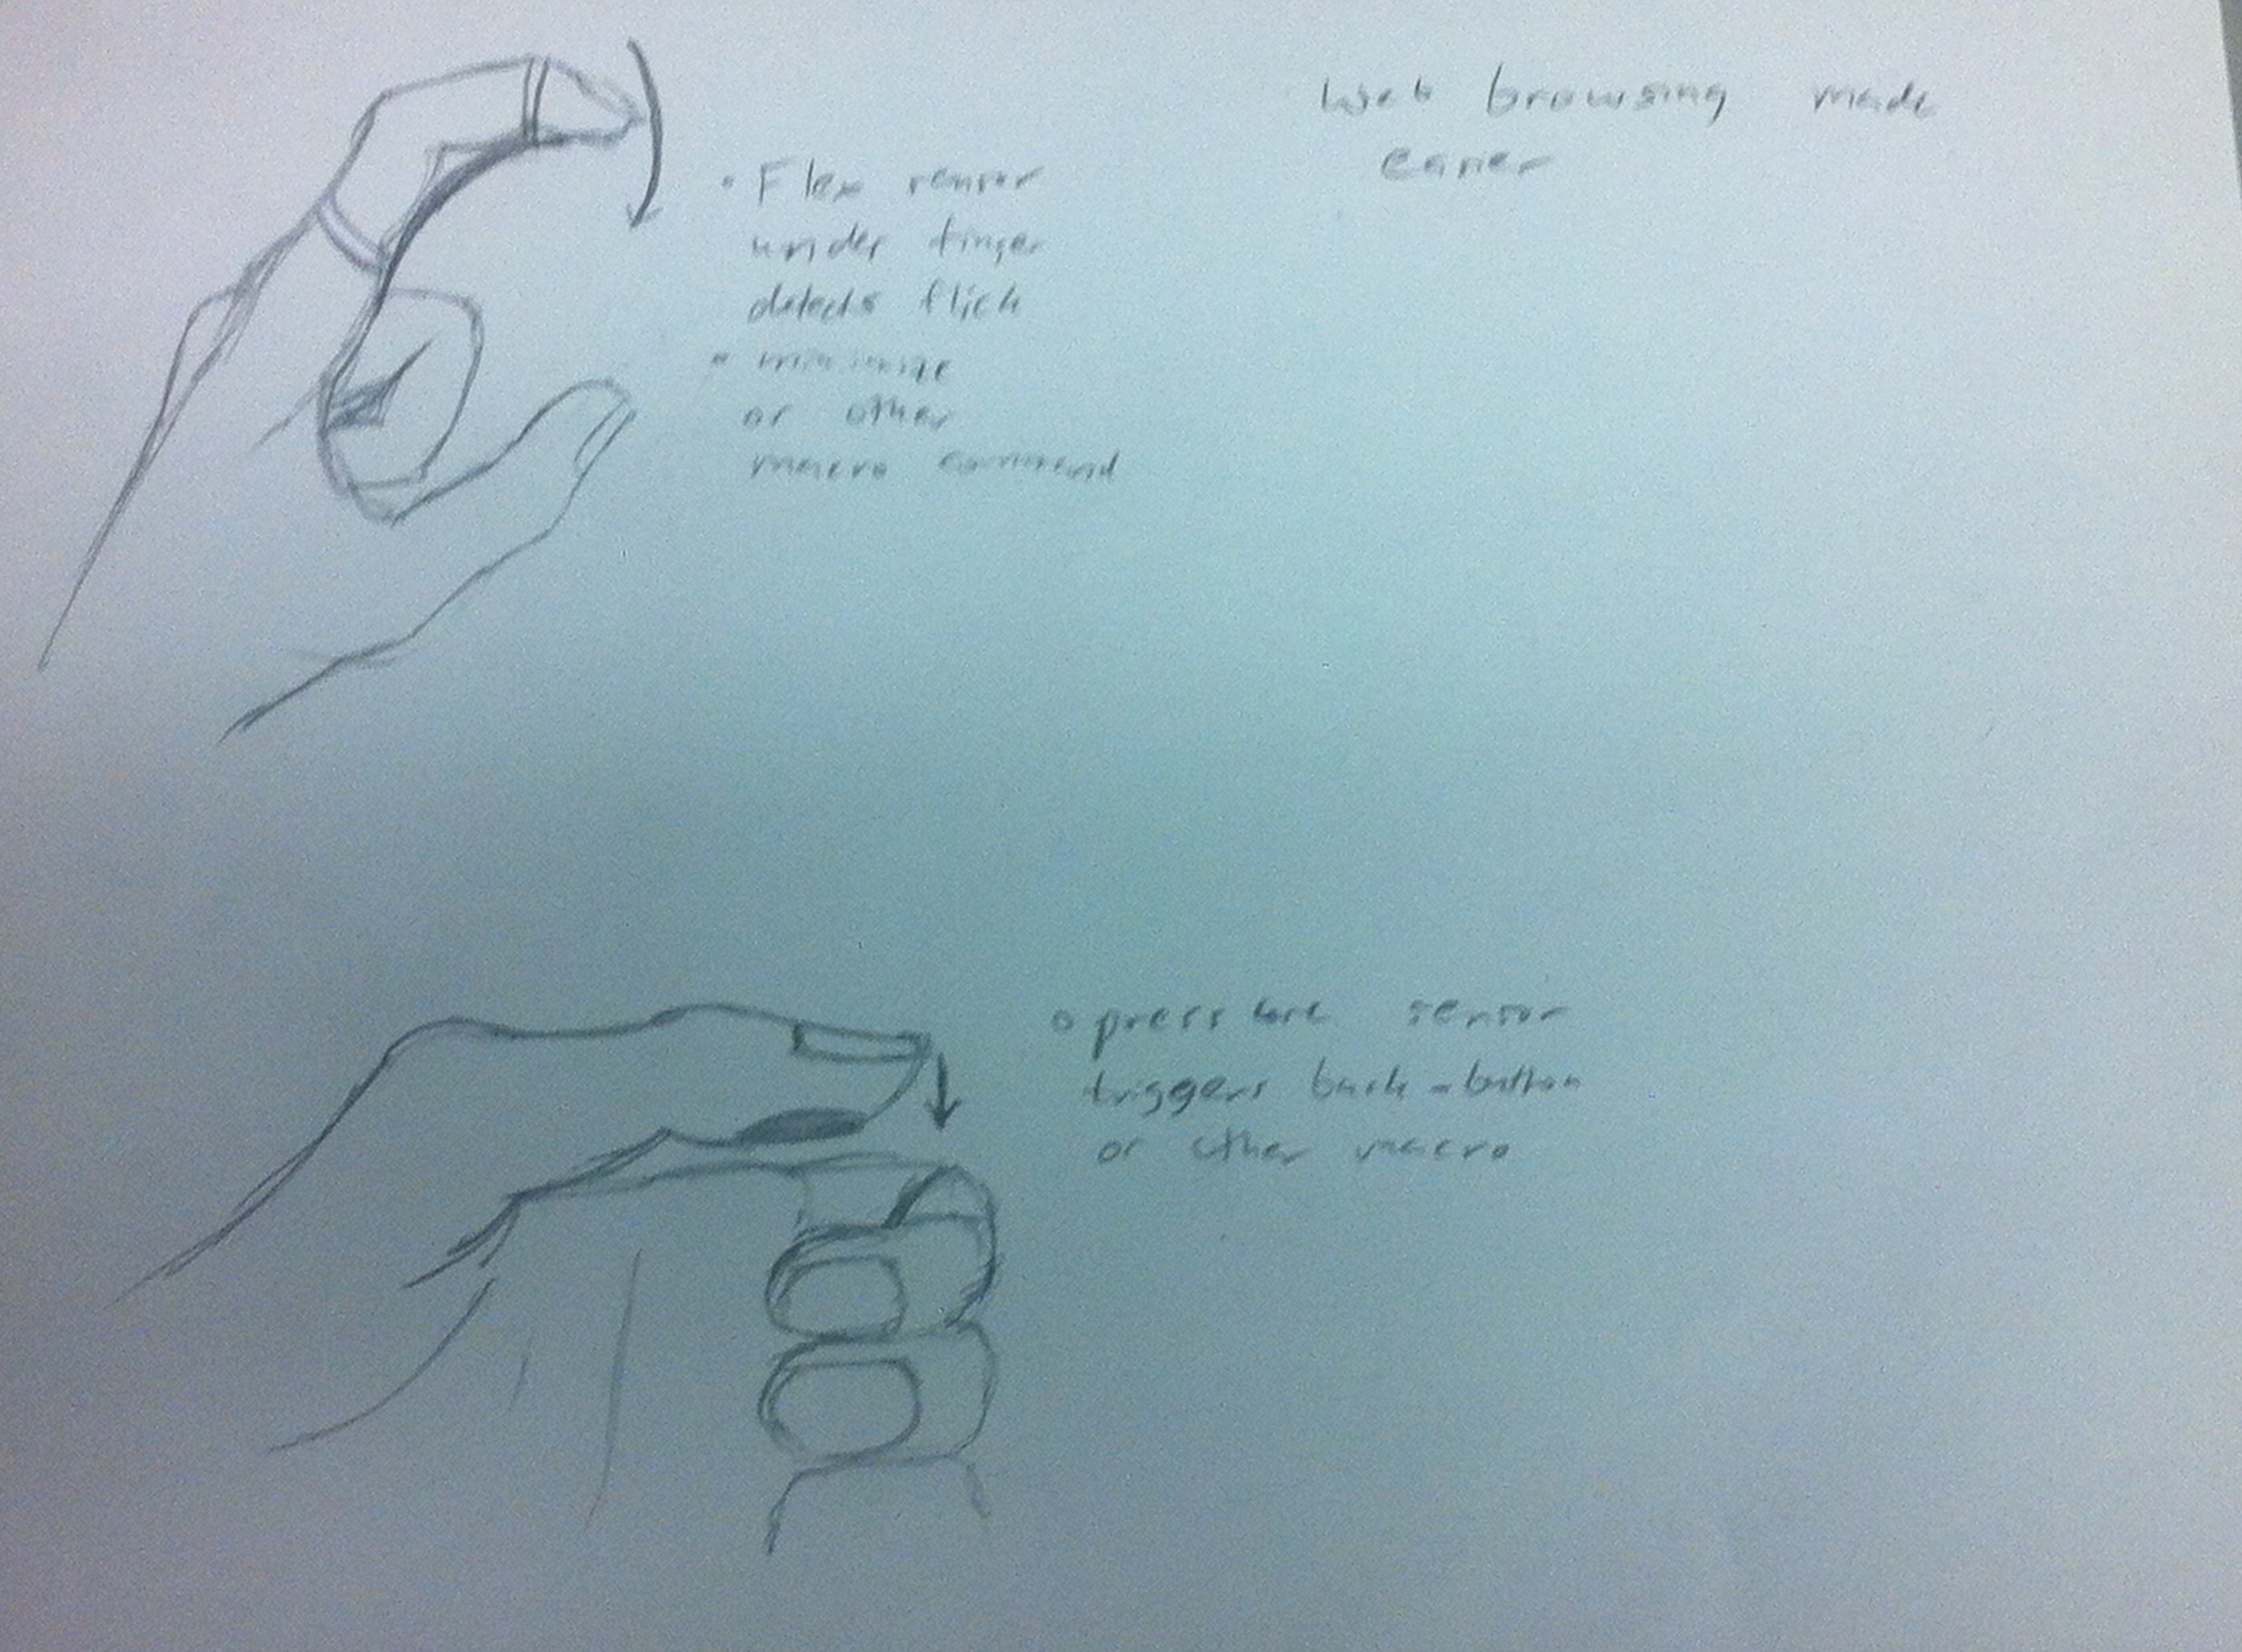
We decided to select Idea number 3, since it seemed the most intuitive and feasibly implementable for the lab.
Project Description:
For L1, we built a glove that allows the user to navigate the Internet more naturally. For this implementation we sought to enable a user to do a simple “flick” gesture to minimize the browser quickly for privacy. Currently, the process of minimizing all windows at best requires the user to enter a key macro on their keyboard. The problem with this is that when surfing the Internet the user is not always engaged with the keyboard. This glove uses a flex sensor on the user’s non-dominant index finger so the user does not have to inefficiently engage the keyboard in the event that they have to close their browser quickly. The difficulty with this project was that the Arduino Uno does not have a native API to override the keyboard. To accomplish the task of associating a flex sensor with the keyboard macro to minimize all windows, we used Processing and had the signal indicating a flick written to a file that would be simultaneously read from by a Java module. Java’s “Robot” class allowed us to trigger the keyboard macro we needed to minimize all windows. We are very pleased with the final result- our Java module could be adapted to implement even more functionality by simply triggering different keyboard macros given different signals from Processing. In the future, however, we would like to be able to find a more efficient system to get the Arduino to interact with the computer’s hardware than this write/read process that is happening between Processing/Java.
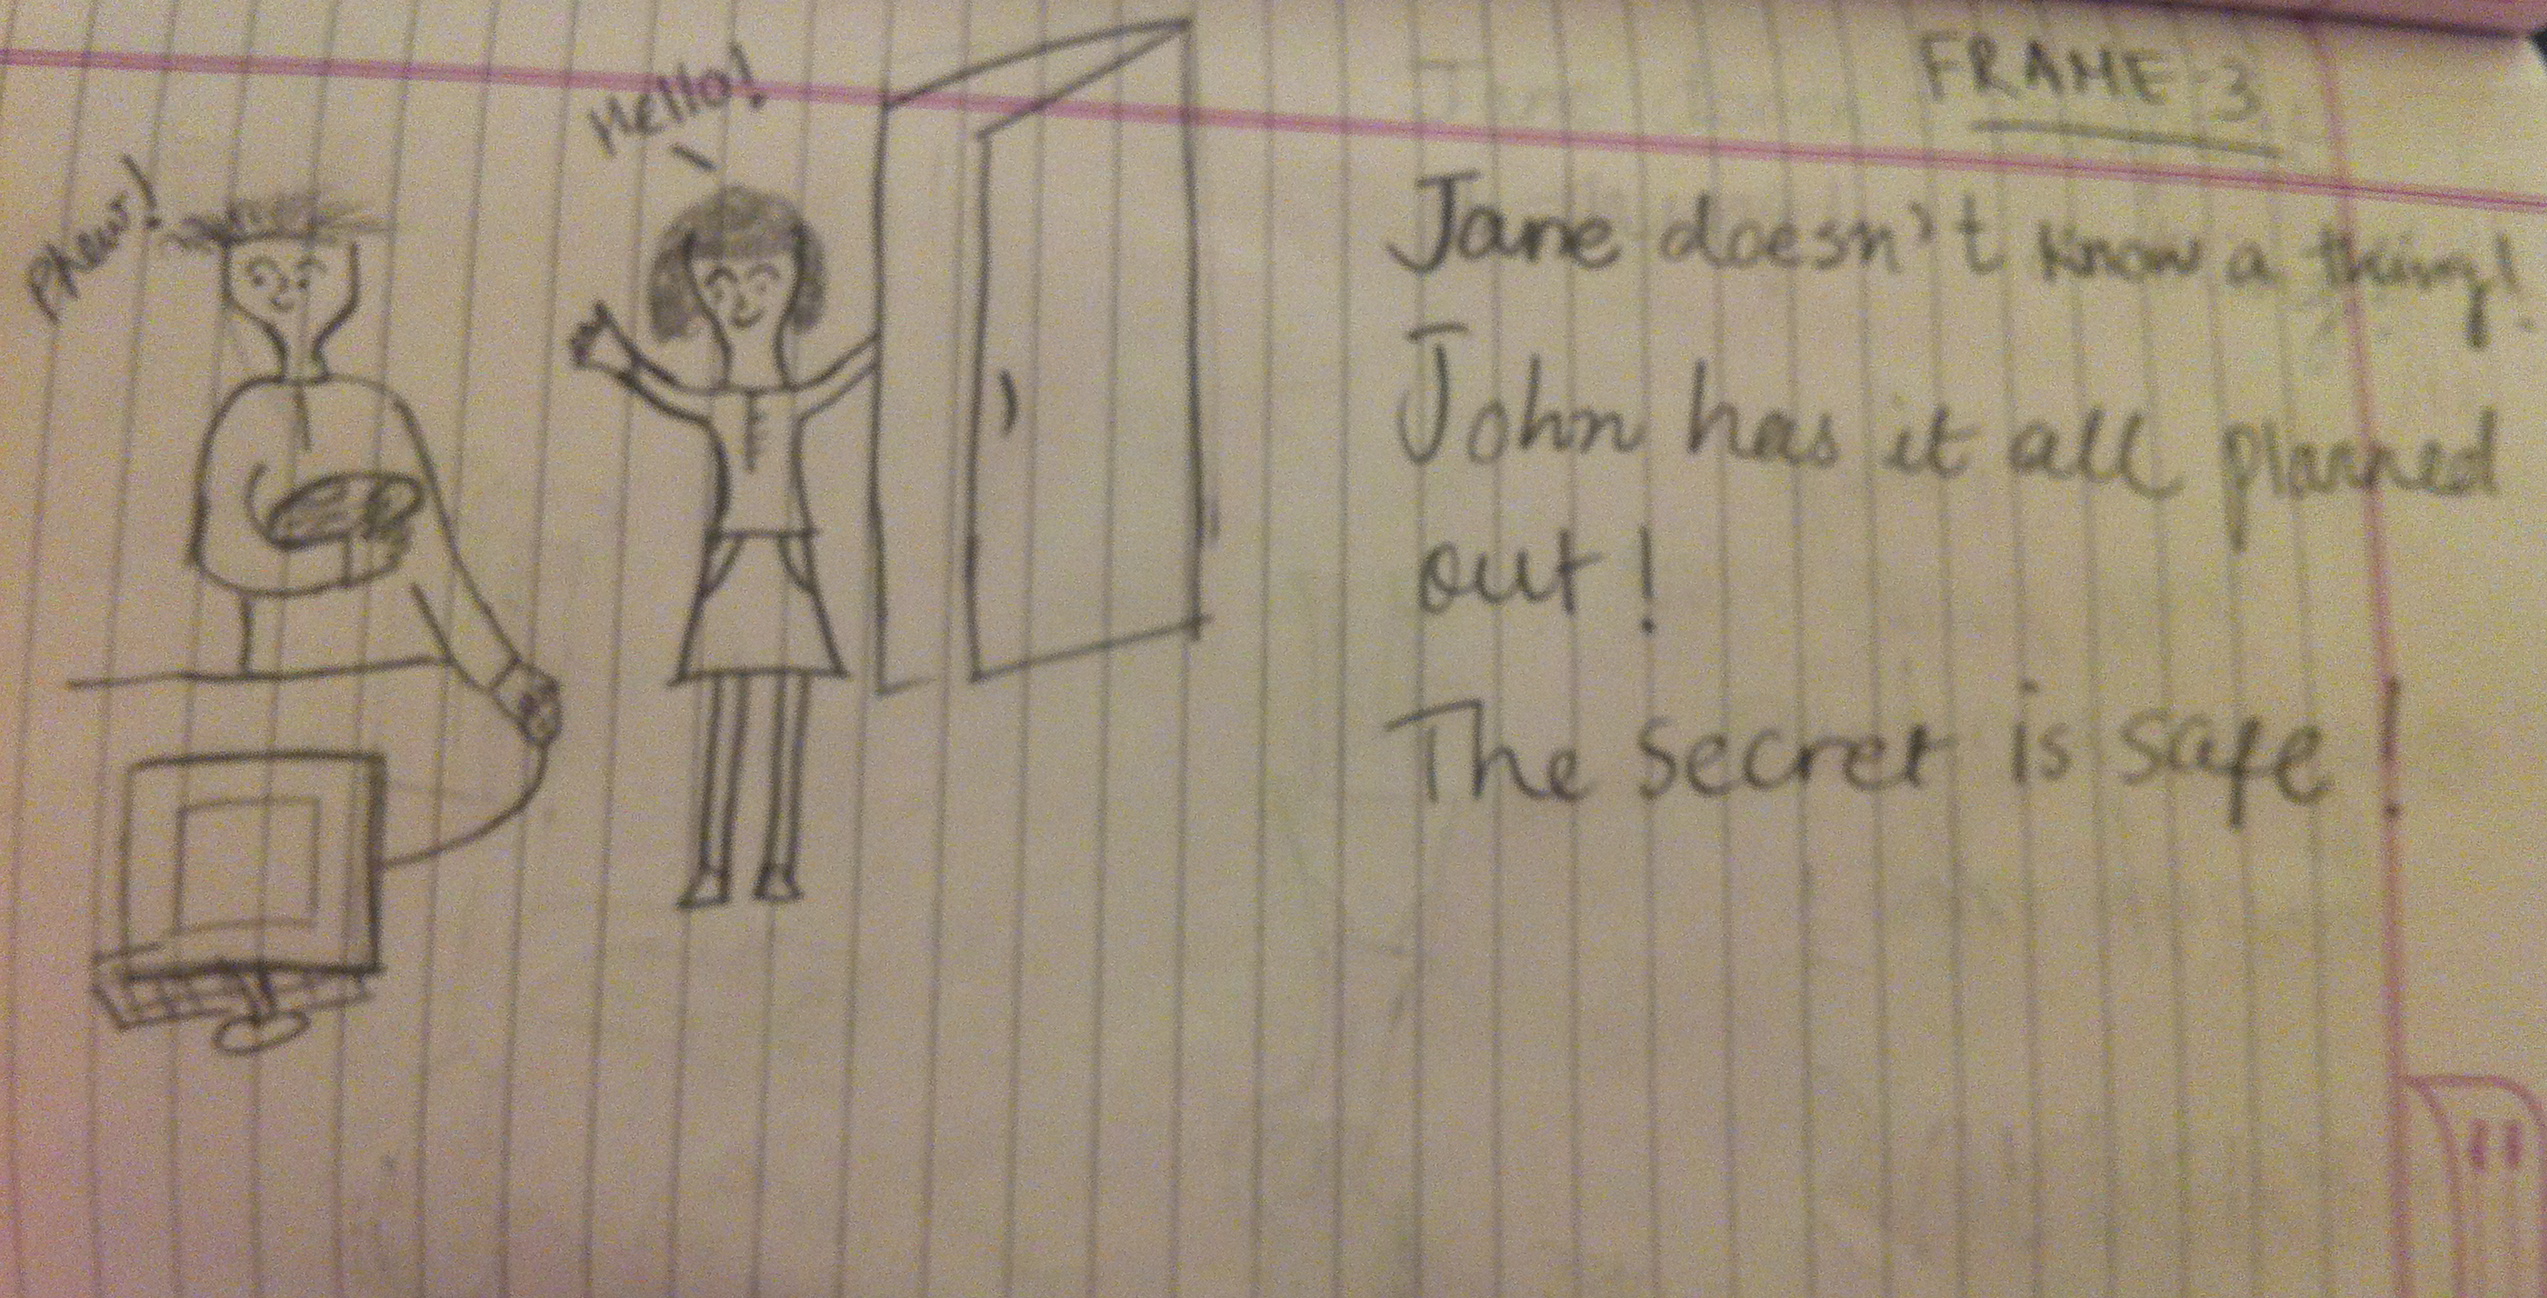
Project Storyboard
Frame 1

Frame 2

Frame 3
Frame 4

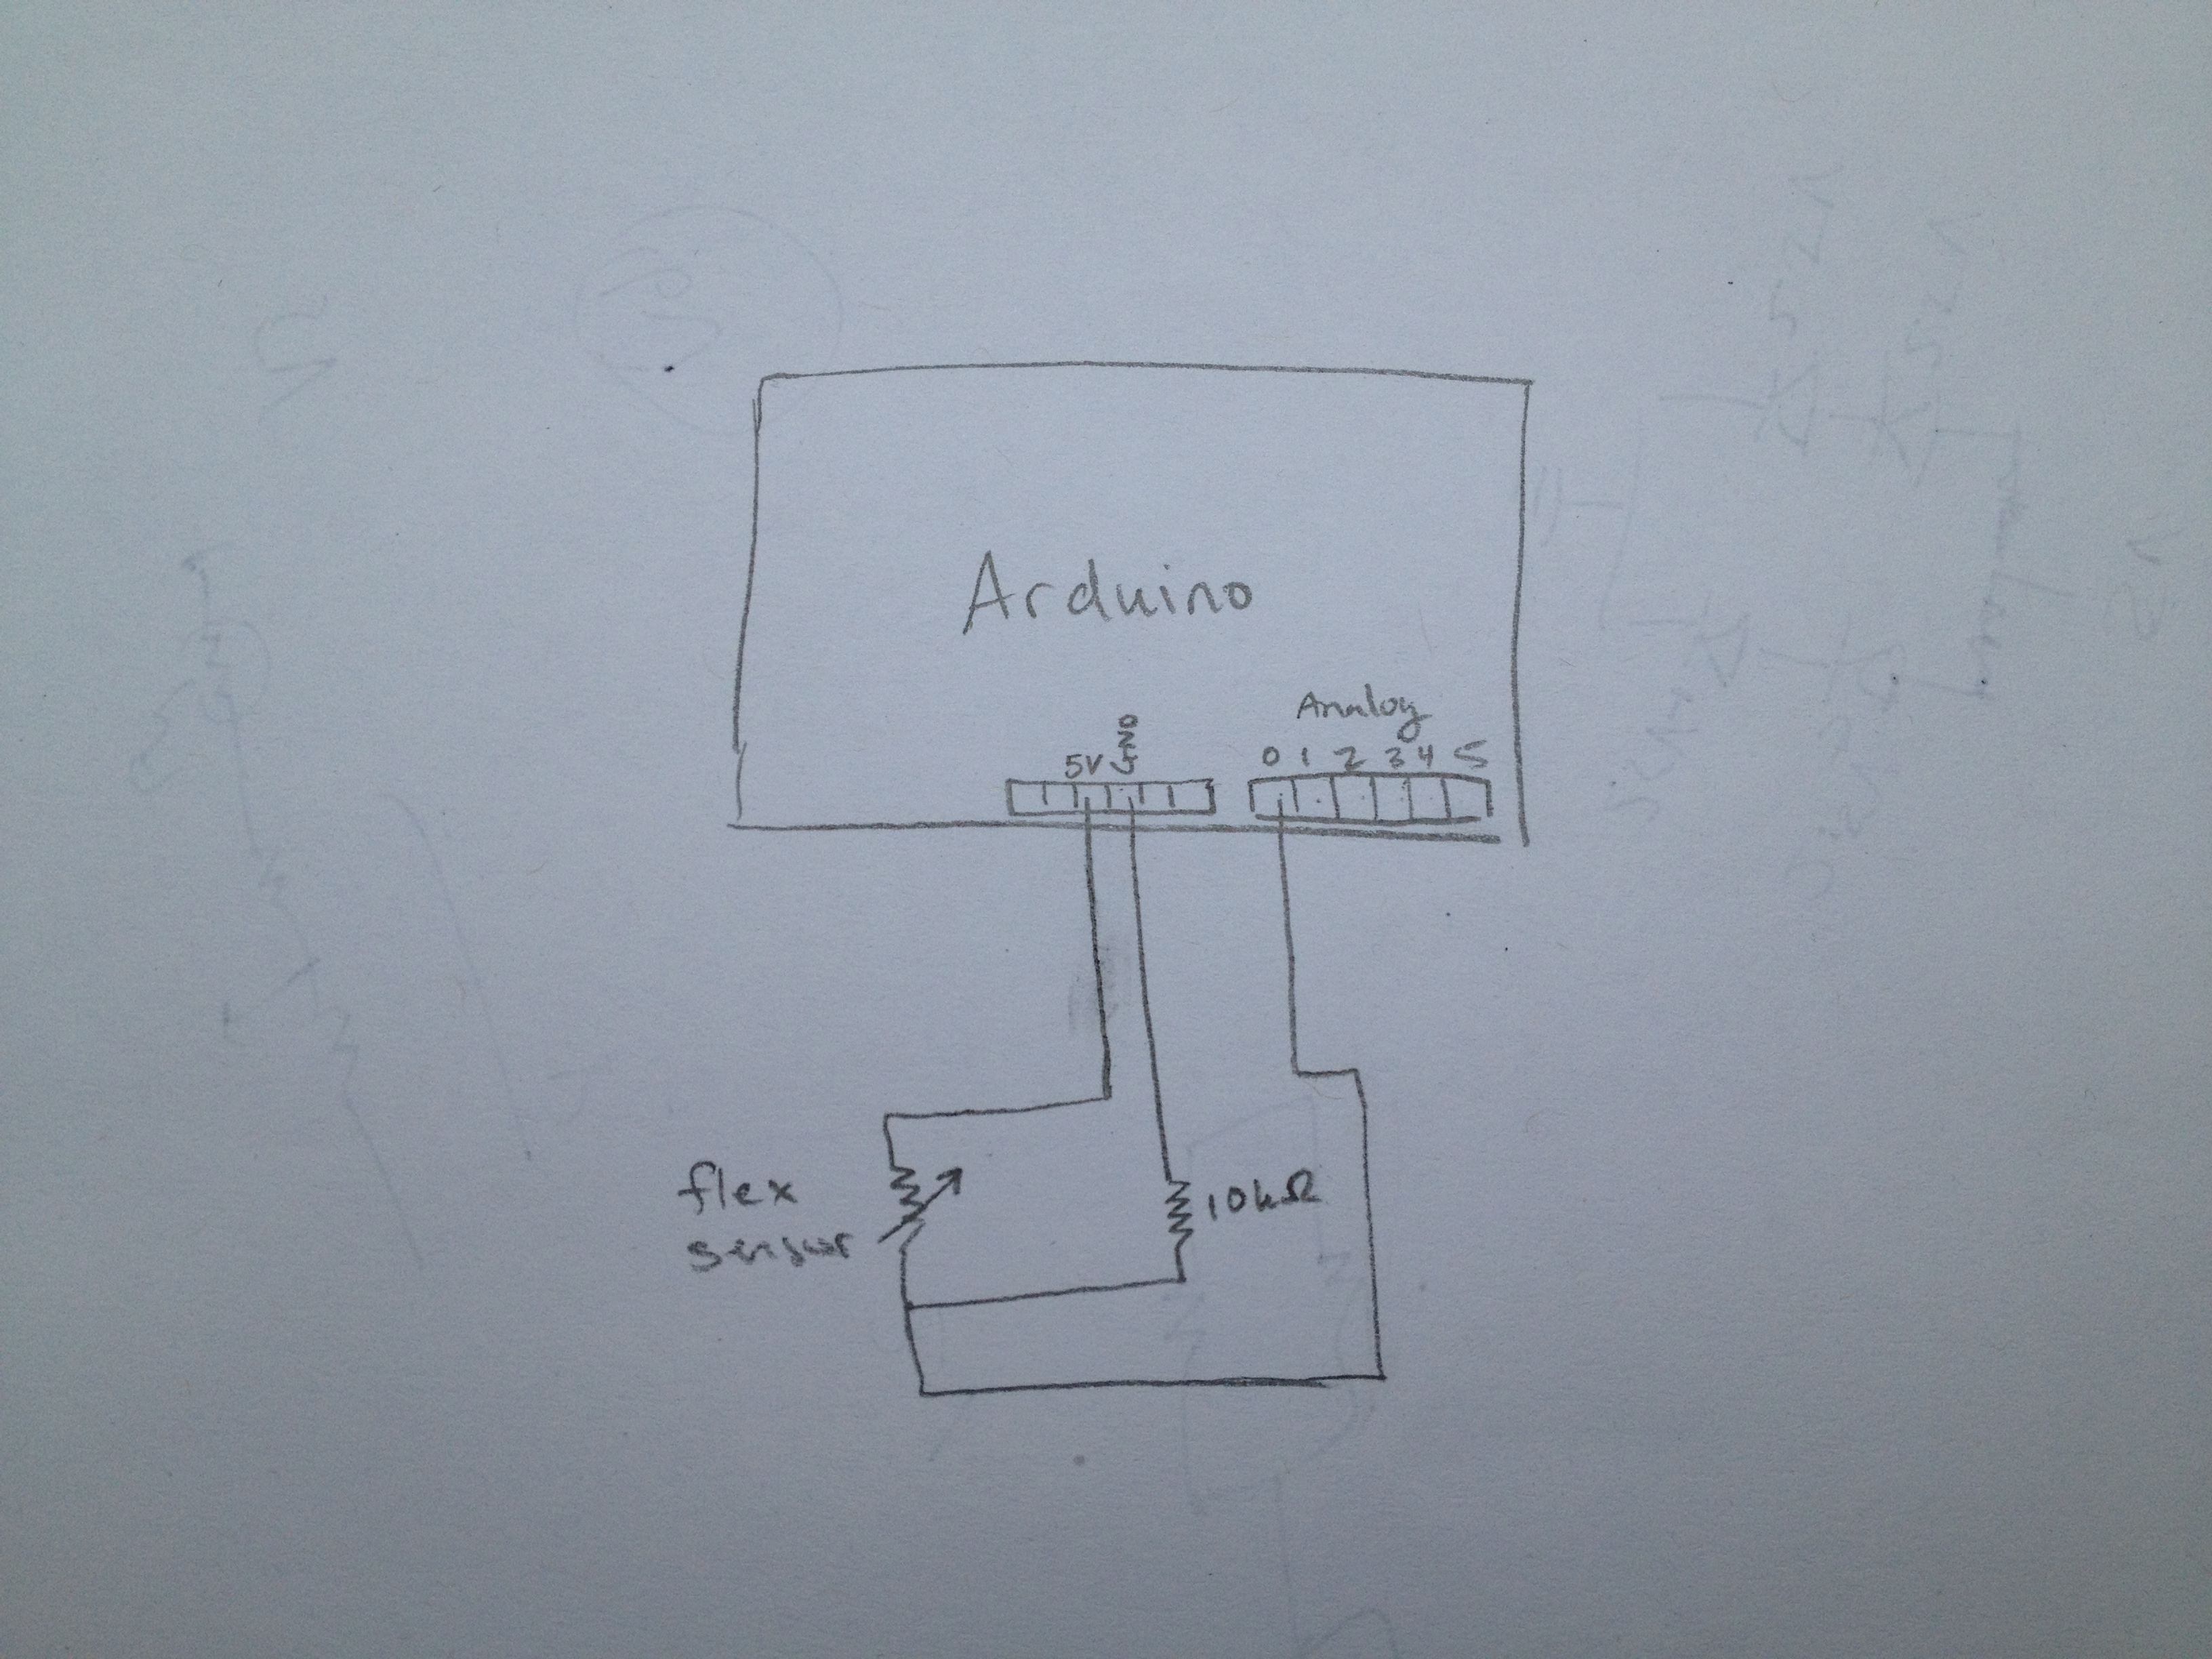
Project Schematic
Demo Video
List of Parts Used
- Software
- Arduino
- Processing + our keyeventsprogram program
- Java + our KeyboardInteractor.java
- Hardware
- flex sensor
- Arduino
- 10 kOhm pull up resistor
- Other
- glove (to hold the sensor)
Instructions to Recreate Design
- Follow the given schematic.
- On the Arduino, upload FirmataStandard (in the Example Software, under Firmata) to enable the Arduino to work with Processing.
- Go to https://github.com/pardo-bsso/processing-arduino to get an arduino-processing interface library with fixed bugs.
- Open our Processing code(keyeventsprogram), Java code (KeyboardInteractor.java) and a command line. You will need to adjust the pathnames stored in the files for your own computer.
- With the circuit all hooked up, start the Processing program. A small gray box should pop up.
- At the command line, type “tail -f desktop.txt | java KeyboardInteractor”. This takes the output of the Processing program (that is stored in desktop.txt) and pipes it to our Java program. Now, when you interact with the sensor (i.e. by flicking your finger), the shortcut should happen (i.e. windows+d takes you to your desktop)
Source Code
Code for Arduino
/**
* Names: Sam Payne, Abbi Ward, Dillon Reisman, Prerna Ramachandra
* Dates: 2/22/13
* COS 436, L1
*
* NOTE: since Robot objects are not allowed due to graphical
* interference, this program interfaces with an external application
* to trigger desktop results
*/
import processing.serial.*;
import cc.arduino.*;
Arduino arduino;
int desktopPin = 0; // pin reads from flex sensor
int desktopReading; // reading from flex sensor pins
PrintWriter output; // write to file when triggered
//Paramters for sensor reading
int FLICKTOP = 280; //threshold to trigger flick motion
int desktopCounter = 0; //number of times which flick has triggered
//setup
void setup()
{
 arduino = new Arduino(this, Arduino.list()[0], 57600);
 arduino.pinMode(ledPin, Arduino.OUTPUT);
 //create pipe file for Robot helper to read
 output = createWriter("C:/Users/Abbi/Programming/hcilab/src/desktop.txt");
}
void draw()
{
 // for this prototype only perform the shortcut once
 if (desktopCounter == 0) {
 desktopReading = arduino.analogRead(desktopPin);
 //output.println(desktopReading);
 }
// if above the threshold, then go do desktop
 if (desktopReading > FLICKTOP) {
 desktopCounter++;
 desktopReading = 200;
 //Send command to buffer file for robot object to interpret
 output.println("D");
 output.flush();
 }

 //exit the program after 5 triggers, this is a prototype function
 if (desktopCounter > 5) {
 output.flush();
 output.close();
 exit();
 }
 //arduino.digitalWrite(ledPin, Arduino.HIGH);

 delay(20); // delay 20 ms
}
Java Code with Robot class as workaround for using a different Arduino
/**
* Names: Sam Payne, Abbi Ward, Dillon Reisman, Prerna Ramachandra
* Dates: 2/22/13
* COS 436, L1
* Keyboard interacting program to interface with Arduino
* since robot class is not allowed due to graphics interference
*/
import java.lang.Object;
import java.awt.Robot;
import java.awt.AWTException;
public class KeyboardInteractor {
 public static void main(String[] args) {
 Robot rob;
 //In in = new In("C:/Users/Abbi/Programming/hcilab/src/desktop.txt");
 try {
 rob = new Robot();

 //character mappings in java
 int VK_D = 68;
 int VK_WINDOWS = 524;
 int VK_BACK_SPACE = 8;

 char c;
 String line;
 while(true) {
 //c = StdIn.readChar();
 line = StdIn.readLine();
 if (line != null) StdOut.println(line);
 if((line != null) && (line.equals("D"))) {
 //StdOut.println("Desktop Command Detected");
 //trigger keypresses
 rob.keyPress(VK_WINDOWS);
 rob.keyPress(VK_D);
 rob.keyRelease(VK_D);
 rob.keyRelease(VK_WINDOWS);
 }

 //example for additional functionality
 //with additional sensors and triggers
 if((line != null) && (line.equals("B"))) {
 rob.keyPress(VK_BACK_SPACE);
 rob.keyRelease(VK_BACK_SPACE);
 }

 }
 } catch (AWTException e) {
 e.printStackTrace();
 }

 }

}