
Group 15: Prakhar Agarwal (pagarwal@), Colleen Carroll (cecarrol@), Gabriel Chen (gcthree@)
Description:
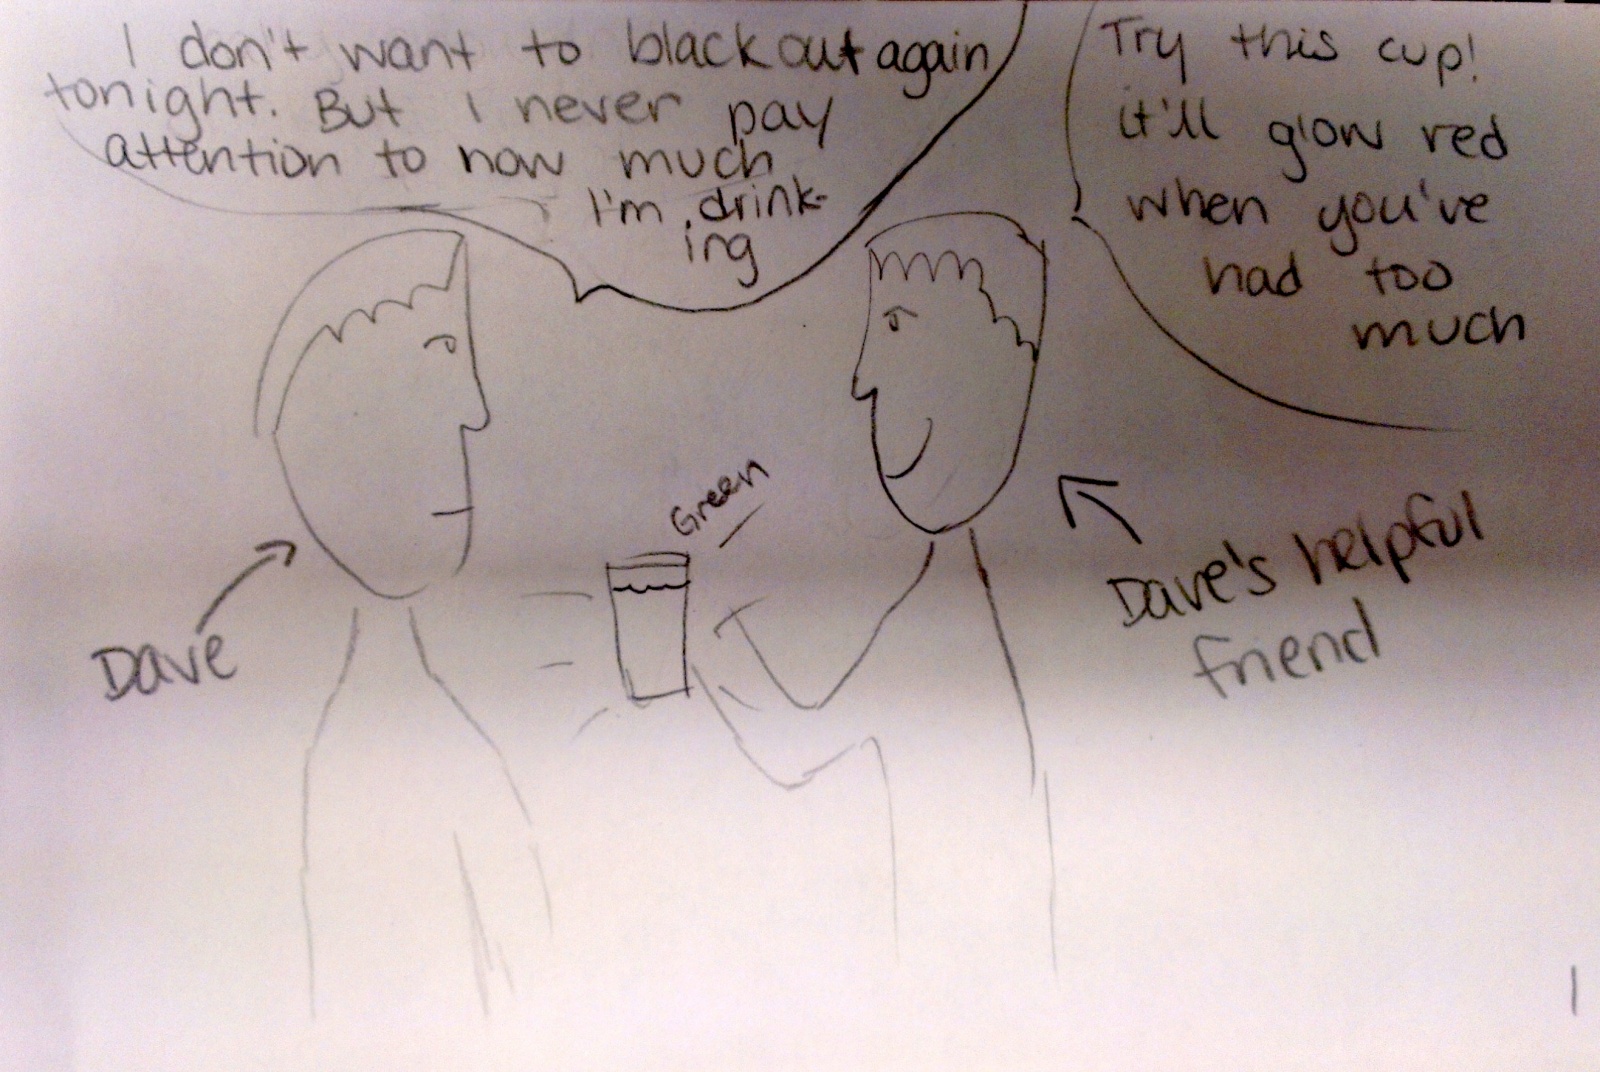
We chose to build a pressure sensitive cup because it was the most widely useful of all of our ideas, and we could imagine using it in everyday life for a number of different applications. The cup uses a force sensor to detect the amount of liquid in the cup and colored lights to indicate to the user how much they have filled/emptied the cup. The idea was originally inspired as an easy way to track your drinking on a night out. The best part of our design is that it requires almost no new interactions for the users to learn. You can fill or drink from the cup like you would with any other cup and the color scheme of the lights follows standard green/yellow/red signaling for go/slow/stop. In our video, we show the application of this to building an light-signaling overflow detector and our storyboard shows another application of this sort of technology to staying safe on a night out. As we have the cup now, it is easy to pour into, but hard to pour out of (because it is hooked up to the Arduino), which complicates certain use cases. With more time, we would make it more mobile, and we would also like to create a way for it to keep track of when the cup is filled/emptied multiple times.
Photos of Sketches:
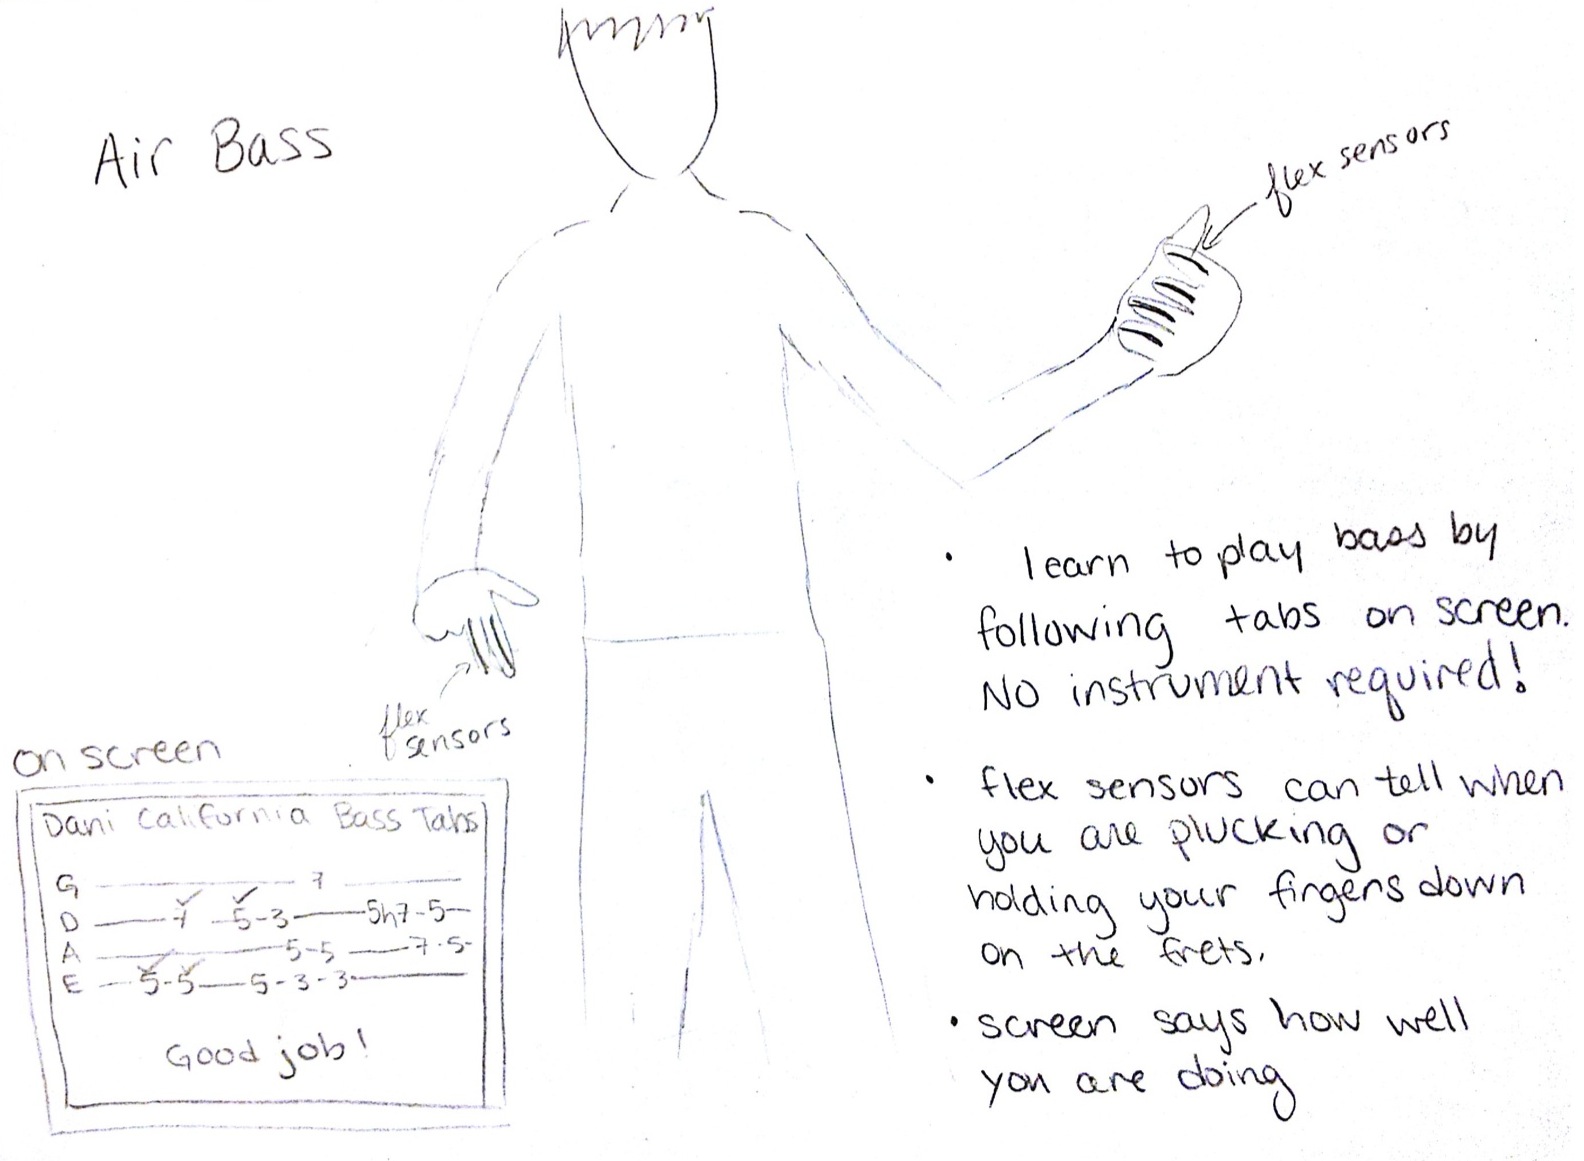
Air Bass Sketch

Fat Belt Sketch

Overflow Cup Sketch
Storyboard:


Live in Action:
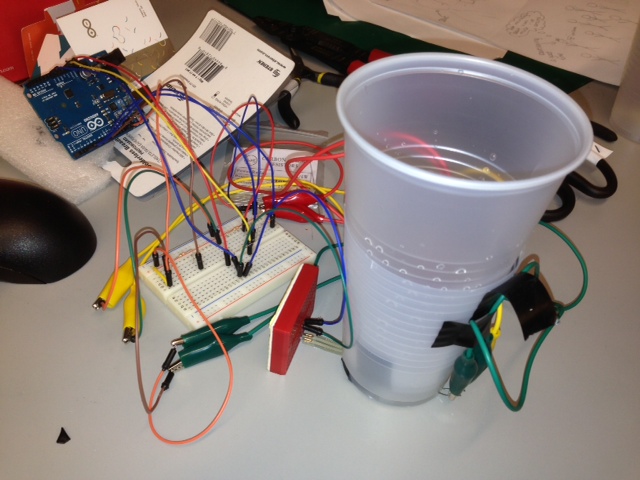
Photo of the full setup

Photo showing the outer cup with sensor and LEDs
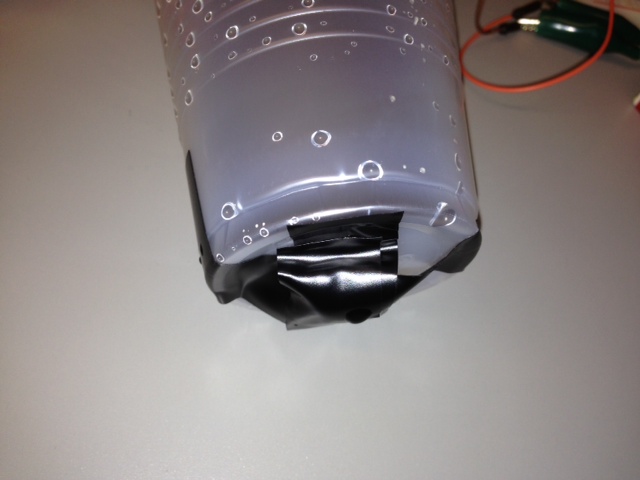
Photo showing the bottom of the inner cup with a piece of styrofoam used apply pressure directly to the pressure sensor
Materials:
- 2 plastic cups
- FSR
- 3 LEDs (green, yellow, red)
- small piece of Styrofoam or cardboard
- alligator clips
- electrical tape
- Knife
- Arduino
- USB cable
- Breadboard
Instructions:
- Start by cutting one cup to about half of its original height. This will make it easier to attach the electronic components to the bottom.
- Pierce a slit in the bottom of the cup. Put the FSR through the slit so that the round sensor is centered inside the cup and the long end is sticking outside.
- Next, pierce three sets of 2 small holes in the bottom of the cup. You stick one LED in each of these sets so that the light is on the inside of the cup and the wires are sticking out.
- Fit the uncut cup inside the cut one. Notice the size of the gap between the bottom of the inside cup and the bottom of the outside cup.
- Cut a piece of Styrofoam or cardboard to the shape and size of the head of the FSR and then tape it over the FSR. This will serve as padding between the top cup and bottom cup so that the top cup will put pressure directly on the FSR, through the padding, as it is filled with water. (Note: Ensure that the padding is taller than the LEDs.)
- Set up the circuit as shown in the schematic so that each of the lights is connected independently to a digital input on the Arduino.
- Test the FSR. Note the reading when the cup is empty, half way full, full, and about to overflow.
- Write your program so that: If you are sensing an overflowing cup, the yellow lights up at half way, green at full, and red at overflowing. If you are sensing a draining cup, green lights up at full, yellow at halfway, and red at empty.
Code:
const int ledYellow = 2;
const int ledRed = 4;
const int ledGreen = 7;
int fsrPin = 0; // the FSR and 10K pulldown are connected to a0
int fsrReading; // the analog reading from the FSR resistor divider

void setup(void) {

// We'll send debugging information via the Serial monitor
Serial.begin(9600);

pinMode(ledRed, OUTPUT);
pinMode(ledYellow, OUTPUT);
pinMode(ledGreen, OUTPUT);

}

void loop(void) {

fsrReading = analogRead(fsrPin);

if (fsrReading < 500) {
digitalWrite(ledRed, LOW);
digitalWrite(ledGreen, LOW);
digitalWrite(ledYellow, LOW);
}

if (fsrReading > 500 && fsrReading <= 600) {
digitalWrite(ledRed, LOW);
digitalWrite(ledGreen, LOW);
digitalWrite(ledYellow, HIGH);
}

if (fsrReading > 600 && fsrReading <= 680) {
digitalWrite(ledRed, LOW);
digitalWrite(ledGreen, HIGH);
digitalWrite(ledYellow, LOW);
}

if (fsrReading > 680) {
digitalWrite(ledRed, HIGH);
digitalWrite(ledGreen, LOW);
digitalWrite(ledYellow, LOW);
}

Serial.print("Analog reading = ");
Serial.println(fsrReading); // the raw analog reading
delay(100);
}