Final Blog Post: The GaitKeeper

Group 6 (GARP): The GaitKeeper

Group members:

Phil, Gene, Alice, Rodrigo

One sentence description:

Our project uses a shoe insole with pressure sensors to measure and track a runner’s gait, offering opportunities for live feedback and detailed post-run analysis.

Links to previous blog posts:

P1 – http://blogs.princeton.edu/humancomputerinterface/2013/02/22/team-garp-project-1/

P2 – http://blogs.princeton.edu/humancomputerinterface/2013/03/11/group-6-team-garp/

P3 – http://blogs.princeton.edu/humancomputerinterface/2013/03/27/gaitkeeper/

P4 – http://blogs.princeton.edu/humancomputerinterface/2013/04/08/gaitkeeper-p4/

P5 – http://blogs.princeton.edu/humancomputerinterface/2013/04/21/p5-garp/

P6 – http://blogs.princeton.edu/humancomputerinterface/2013/05/06/p6-the-gaitkeeper/

Pictures and Videos with Captions:

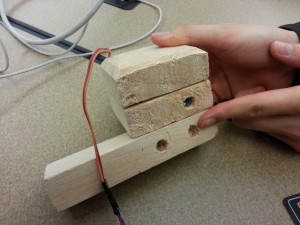
Pictures of the prototype – https://drive.google.com/folderview?id=0B4_S-8qAp4jyYk9NSjJweXBkN0E&usp=sharing .   These photos illustrate the basic use of the prototype, as well as its physical form factor.  You can see from them how the insole and wires fit in the shoe, and how they fit to the user’s body.  This was designed to make the product have a minimal effect on the user’s running patterns, so these aspects of the user interaction are especially important.

Video of computer-based user interface – Computer-Based UI .  This video (with voiceover) demonstrates the use of our user interface for saving and viewing past runs.

Video of live feedback based on machine learning – Live Feedback from Machine Learning .   This video (also with voiceover) demonstrates the live feedback element of the GaitKeeper, which tells the user if their gait is good or not.

Changes since P6:

  • Slightly thicker insole with a stronger internal structure – Thickness did not appear to be an issue for the testers, since the insole was made of a single sheet of paper.  We observed some difficulty in getting the insole into the shoe, however, and felt that making it slightly thicker would be useful in solving this issue.

  • Laminated insole – One of our testers had previously run that day, and his shoes were still slightly sweaty.  When taking off the insole, the sweat from his shoe and sock made the insole stick to him.  When removing it from his foot, the insole also was torn slightly.  We noticed that the tape part didn’t stick, and felt that making the entire insole of similar material would solve this issue.

  • Color changes in the UI heatmap – one of our testers noted that he found the colors in the heatmap to be visually distracting and different from traditional heatmaps.  This issue was corrected by choosing a new color palette.

  • Enhanced structural support for the Arduino on the waist – After user testing, we found significant wear and tear on the arduino box which is attached to the user with a waistband.  This was reinforced to make it more durable.  It was made slightly larger, which we felt was not an issue since users indicated that they found the previous implementation acceptably small and this change did  not significantly affect the form factor.

  • Ability to run without USB connection – This was an element which we had originally planned in the product, but were not able to fully execute for P6.  We used wizard of oz techniques at the time, and this replaced that.  Now, data can be imported into the computer from the arduino for analysis after a run.  Unfortunately, live feedback still requires a computer connection, but given further iteration could possibly be made mobile as well.

  • Wekinator training of live feedback during running – During testing, this was a wizard of oz element, where the lights went on and off for predetermined amounts of time to simulate feedback from the system.  This was replaced with true live feedback which is informed by the Wekinator’s machine learning abilities.

  • Ability to save and view saved data in the UI – User testing was done with a simulated run from our own testing data, rather than from actual saved runs.  We have added the ability for the user to save and view their own data imported from the arduino

  • Ability to import arduino data – User testing relied upon user simulation of the data upload process.  This is now fully implemented, and allows users to see the results of their running.

Explanation of goal and design evolution:

We began the semester with very little information about how a runner’s gait is actually assessed, but with the understanding that it was generally based on direct observation by a planned professional.  We originally planned to have a device which bridged the gait analysis demands of store employees, medical professionals, and runners themselves.  Over time, we realized that one of those three user groups had a very different set of needs, which resulted in us deciding to focus on just store employees and frequent runners.  Both user groups were considered by us to be well informed about running, and would be using the product to observe gait through a run for technique modification and product selection.  Our goals were then modified to better serve those user groups by focusing on the post-run analysis features, such as the ability to save and access old data.

Also, at the beginning of the semester, we had wanted to design the device to provide live feedback.  Over time, we came to realize that meaningful live feedback required a machine learning tool like Wekinator.  As a result, we were forced to maintain a computer connection for live feedback, which was a change from the fully mobile vision we had at the beginning.  This has slightly changed our vision for how the live feedback element of the product would be used; given the tethering requirement, live feedback would probably be most useful in a situation where the runner is on a treadmill and is trying to actively change their gait.  Other changes in design included a remake of the pressure-sensing insole, which our testers originally found to be sticky, difficult to place in a shoe, and overly fragile.  We moved from a paper-based structure to a design of mostly electrical tape, which increased durability without a significant cost in thickness.


Critical evaluation of project:

It is difficult to say whether this product could become a useful real-world system.  In testing, our users often found the product to be interesting, but many of the frequent runners had difficulty in really making use of the data.  They were able to accurately identify the striking features of their gait, which was the main information goal of the project.  One thing we observed, however, was that there were not many changes in gait between runs, with most changes occurring due to fatigue or natural compensation for small injuries.  That led us to conclude that the product might be better suited for the running store environment, where new users are seen frequently.  Given the relatively small number of running stores, we believe the most promising market for this product would be small, and focused on the post-run analysis features.  Live feedback was much less important to the running store employees, who were willing to tolerate a slight delay to get more detailed results.  We found that this space enjoys using technology already (such as slow motion video from multiple angles), and was quite enthusiastic about being able to show customers a new way to scientifically gather information about their gait and properly fit them for shoes.  Their main areas of focus on the product were reusability, the ability to fit multiple shoe sizes, accuracy of information, and small form factor.

We feel confident that further iteration would certainly make the product easier to use, also more focused on the running store employee user group, since they appear to be the ones most likely to purchase the product.  That being said, we are unsure that this device could progress beyond being more than a replacement for existing video systems.  Despite several conversations with running store employees, including contextual interviews while they met with actual customers, we were unable to identify any real information uses outside of the ones currently performed by the visual video analysis.  While our product is more accurate and takes a more scientific approach, achieving adoption would likely be a major hurdle due to the money such stores have already invested in video systems.

While the live feedback functionality is a quite interesting element of the project, it seems to have a less clear marketable use.  The runners we spoke to seemed to feel that live feedback was an interesting and cool feature, but not one that they would be willing to pay for.  Most (before testing) felt that their gait did not change significantly while running, and in surveys indicated that they already use a variety of electronics to track themselves while running.  These products include GPS, pedometers, and Nike+.  The runners consistently rated information feedback such as distance, location, pace, and comparison to past runs as more important than gait, running style, and foot pressure.  They also indicated an unwillingness to add additional electronic devices to their running, which already often involves issues of carrying a large phone or mp3 player.  As a result, one avenue which has some potential would be integration into an existing system.  The most likely option in this field would probably be Nike+, which is already built around a shoe.  Designing a special insole which communicates with the shoe (and through it, the iPod or iPhone) would be a potential way to implement the gait feedback device as a viable product for sale.  Clearly, this would have significant issues with licensing and product integration (with both Nike and Apple), but otherwise there does not appear to be a real opportunity.  As a result, we concluded that the product’s future would almost definitely require a stronger focus on the running store employee demographic.


Future steps if we had more time:

With more time, one of the things we would spend a great deal of time on would be the training of the arduino for live feedback.  Our users gave feedback several times that the two light system was not enough to really guide changes in gait, especially given that many changes in running style happen subconsciously over time as the runner gets tired.  The system did not give enough indication on how to fix the problem, only indicating the fact that a problem existed.  This could be solved through integration into a system like Nike+ or other phone apps, which would allow a heatmap gui to give directions to the runner.  Before implementing such a system, we would like to speak more with runners about how they would interact with this format of live feedback, as well as if they would want it at all.  Following that, more testing would be done about the most effective ways to convey problems and solutions in gait through a mobile system.

Although live feedback is likely the area which has the most opportunity for improvement in our prototype, our understanding of the targeted users indicates a stronger demand for the analysis portion for use in running stores.  Therefore, we would likely focus more on areas such as reusability and durability, to ensure that multiple users of different characteristics could use the product.  Furthermore, we would revisit the idea of resizing, which is currently done by folding the insole.  It is possible that multiple sizes could be made, but resizing is a more attractive option (if it is feasible) because it allows running stores to purchase only one.  This would likely involve more testing along the lines of what we already completed: having users of different shoe sizes attempt to use the product, either with or without instructions on resizing.  Additionally, for the running store application, we would seriously consider doing something to limit the amount of wires running along the user’s leg.  This could be done using a bluetooth transmitter strapped on the ankle, or through a wired connection to a treadmill.  While this is a significant implementation challenge, it seems that a feasible solution would likely exist.  Lastly, we found the machine learning tools to be quite interesting, and would also consider explore using a veteran employee’s shoe recommendations to train our device to select shoes for the runner.  This would allow the store to hire less experienced employees and save money.  Such a system would also likely require testing, in which we would gain a better understanding of how this would affect the interaction between the store employee and customer.  It would be very interesting to see if such a design undermined the authority of the employee, or if it made the customer more likely to buy the recommended shoe.


Source code and README zip file: 

 https://docs.google.com/file/d/0B4_S-8qAp4jyZFdNTEFkWnI2eG8/edit?usp=sharing


Third-party code list:

PDF Demo Materials:

https://docs.google.com/file/d/0ByIgykOGv7CCbGM3RXFPNTNVZjA/edit?usp=sharing


Final Submission – Team TFCS

Group Num­ber: 4
Group Name: Team TFCS
Group Mem­bers: Collin, Dale, Farhan, Ray­mond

Sum­mary: We are mak­ing a hard­ware plat­form which receives and tracks data from sen­sors that users attach to objects around them, and sends them noti­fi­ca­tions e.g. to build and rein­force habits and track activity.

Previous Posts:

P6: https://blogs.princeton.edu/humancomputerinterface/2013/05/06/p6-team-tfcs/
P5: https://blogs.princeton.edu/humancomputerinterface/2013/04/22/5642/
P4: https://blogs.princeton.edu/humancomputerinterface/2013/04/08/p4-team-tfcs/
P3: https://blogs.princeton.edu/humancomputerinterface/2013/03/29/p3-2/
P2: https://blogs.princeton.edu/humancomputerinterface/2013/03/11/p2-tfcs/
P1: http://blogs.princeton.edu/humancomputerinterface/2013/02/22/964/

Final Video

Changes from P6

Added a “delete” function and prompt to remove tracked tasks
This was a usability issue that we discovered while testing the app.

Improved the algorithm that decided when a user performed a task
The previous version had a very sensitive threshold for detecting tasks. We improved the threshold and also used a vector of multiple sensor values to decide what to use asa cutoff instead of only one sensor.

– Simplified choice of sensors to include only accelerometer and magnetometer
This was a result of the user testing which indicated that the multiple sensor choices vastly confused people. We simplified it to two straightforward choices.

– Updated text, descriptions and tutorial within the app to be more clear, based on user input from P6
– Updated each individual sensortag page to display an icon representative of the senor type, simplified the information received from the sensortag in realtime, and added a view of user’s progress in completing tasks

Goal/Design Evolution

At the beginning of the semester, our goal was to make an iPhone application that allowed users to track tasks with TI sensortags, but in a much more general way than we actually implemented. For example, we wanted users to decide which sensors on our sensortag–gyroscope, magnetometer, barometer, thermometer, etc–they would use and how, and we would simply assume that users would be able to figure out how best to use these readings to fit their needs.  This proved to be a poor assumption, because it was not obvious to nontechnical users how these sensors would be used to track tasks they cared about.

We quickly reoriented ourselves to provide not a sensortag tracking app but a *task* tracking app, where the focus of the app was in registering when users took certain actions–opening a book, taking a pill from a pillbox, going to the gym with a gym bag–rather than activated the sensors on certain sensortags. Within this framework, however, we made the model for our application more general, exposing more of how the system functions by allowing them to set up sensors for each task, rather than choose from a menu of tasks within each application. This made our system’s function easier to understand for the end user, which was reflected in our second set of interviews.

Critical Evaluation
Our work over the semester provided strong evidence that this type of HCI device is quite feasible and useful. Most of our tested users expressed an interest in an automated task-tracking application and said that they would use Taskly personally. Still, one of the biggest problems of our implementation of a sensor-based habit tracking system was the size and shape of the sensors themselves. We used a sensortag designed by TI which was large and clunky, and although we built custom enclosures to make the devices less intrusive and easier to use, they were still not “ready for production.” However, as mentioned above, this is something that could easily be fixed in more mature iterations of Taskly. One reason to believe that our system might function well in the real world is that the biggest problems we encountered–the sensortag enclosures and the lack of a fully-featured iPhone app–are things we would naturally fix if we were to continue to develop Taskly. We learned a significant amount about the Bluetooth APIs through implementing this project, as well as about the specific microcontroller we used; we expect BLE devices, now supported only by the iPhone 4S and later phones, will gain significant adoption.

The project ended up being short on time; our lack of iOS experience (initially) made it difficult to build a substantively complex system. The iPhone application, for example, does not have all of the features we showed in our early paper-prototypes. This was partly because those interfaces revealed themselves to be excessively complicated for a system that was simple on the hardware side; however, we lost configurability and certain features in the process. On the other hand, we found learning new hardware platforms (for both iOS and the SensorTag) to be something that could definitely be accomplished over the course of weeks, especially making use of previous computer science knowledge.

One final observation that was reinforced as a result of our user testing was that the market for habit-forming apps is very narrow. People were very satified with the use cases that we presented to them and their recommendations for future applications for the system very closely aligned to the tasks we believed to be applicable for Taskly. Working on this project helped us recognize the diversity of people and needs that exist for assistive HCI-type technologies like this one, and helped us gain a better idea of what kind of people would be most receptive towards systems where they interact with embedded computers.

Moving Forward

One of the things we’d most like to improve upon in later iterations of Taskly are custom sensortags. The current sensortags we use are made by Texas Instruments as a prototyping platform, but they’re rather clunky. Even though we’ve made custom enclosures for attaching these sensors to textbooks, bags, and pillboxes, they are likely still too intrusive to be useful. In a late iteration, we could create a custom sensor that uses just the bluetooth microcontroller core of the current sensortag we’re using (called the CC2541) and the relevant onboard sensors like the gyroscope, accelerometer, and magnetometer. We could fabricate our own PCB and make the entire tag slightly larger than the coin-cell battery that powers the tag. We could then 3D print a custom case that’s tiny and streamlined, so that it would be truly nonintrusive.

Beyond the sensortags, we can move forward by continue to build the Taskly iPhone application using the best APIs that Apple provides. For example, we currently notify users of overdue tasks by texting them with Twilio. We would like to eventually send them push notifications using Apple Push Notifications Services, since text messages are typically used for communication. We could also expand what information the app makes available, increasing the depth and sophistication of historical data we expose. Finally, we could make the sensortag more sophisticated in its recognition of movements like the opening of a book or pillbox by implementing Machine Learning data to interpret these motions (perhaps, for example, using Weka). This would involve a learning section where the user performs the task with the sensortag attached to the object and the system would learn what sensor information corresponds to the task being performed.

Another thing we need to implement before the system can go public is offline storage. Currently the sensor only logs data when the phone is in range of the sensortag. By accessing the firmware on the sensortag, it is possible to make it store data even when the phone is not in range and then transmit it when a device becomes available. We focused on the iOS application and interfacing to Bluetooth, because the demonstration firmware already supported sending all the data we needed and none of us knew iOS programming at the start of the project. Now that we have developed a basic application, we can start looking into optimizing microcontroller firmware specifically for our system, and implementing as much as we can on the SensorTag rather than sending all data upstream (which is more power-hungry). A final change to make would be to reverse the way Bluetooth connects the phone and sensor: currently, the phone initiates connections to the Bluetooth tag; reversing this relationship (which is possible using the Bluetooth Low Energy host API) would make the platform far more interesting, since tags would now be able to push information to the phone all the time, and not just when a phone initiates a connection.

iOS and Server Code

https://www.dropbox.com/s/3xu3q92bekn3hf5/taskly.tar.gz

Third Party Code

1. TI offers a basic iOS application for connecting to SensorTags. We used it as a launching point for our app. http://www.ti.com/tool/sensortag-ios

2. We used a jquery graphing library for visualization. http://www.highcharts.com

Demo Poster

https://www.dropbox.com/s/qspkoob9tggp6yd/Taskly_final.pdf

Final Project – Team VARPEX

Richter Threads

Group Name and Number: VARPEX, Group 9

Group Members: Abbi, Dillon, Prerna and Sam

Project Description

Richter Threads is a jacket that creates a new private music listening experience through motors which vibrate with bass.

Previous Blog Posts:

Video

Changes Since P6

  • New protoboard with components soldered on: In our feedback from P5, many of our subjects complained that the box they had to carry around containing the system was cumbersome. To create a sleeker and more integrated experience, we soldered our system onto a small protoboard that could be affixed with velcro inside the jacket. The prototype box is no longer necessary.
  • Velcro fasteners for motors: The cloth pockets were not effective at holding the motors; we needed to sew them in our last prototype. For this iteration we put velcro inside the jacket and velcro on the motors to make them easier to attach and detach. This also enhances sensation from the motors since there is not an additional layer of cloth over them
  • Threshold potentiometer: We discovered in P6 that users liked being able to use their own music, but different music pumps out different bass frequencies. To allow users to change the threshold of bass volume needed for the jackets to vibrate, we included a knob users could use to adjust the amount of bass required to vibrate the motors when listening to their music.
  • Volume knob: We reversed the direction of the volume knob to make it more intuitive (turning clockwise increases the volume now).
  • New sweater: We chose a much more stylish and, more importantly, a better-fitting sweater for our system, since no one found our original sweater particularly attractive or comfortable.
  • Power switch: We added a power switch for just the batteries, to allow people to more easily listen to their music without the jacket on.
  • Length of motor wires: We lengthened some of the wires driving the motors, so that the jacket would be easier to put on despite the presence of a lot of wires.
  • “Internalizing” components: The board is affixed to the inside of the jacket while the controls (volume/threshold knob, power switch) are embedded in the pocket of the jacket to make the entire system more conspicuously hidden.
  • Batteries consolidated: Our battery pack has been consolidated and secured in a different part of the jacket. The batteries impose a large space bottleneck on our design (hard to miniaturize power needs like we did the board), so they require special placement within the jacket.

Evolution of Goals and Design

Our goals over the course of prototyping definitely broadened as we received feedback from users. The original inspiration for the jacket was the dubstep and electronica genres, which are known for being bass-heavy. In testing however, users responded positively to listening to other genres of music through the headphones; by limiting our goals to representing the concert going experience for dubstep/electronica, we were missing out on exploring the potential of the jacket in other musical genres. This development actually lead to a concrete design change when we added a threshold knob to allow users to adjust the sensitivity of the jacket. This actually leads into a different change in goals. Though we set out to replicate the concert-going experience, we succeeded in creating a unique experience in its own right. Our jacket offers users a tactile experience with music beyond mimicking large subwoofers.

As for our design, our early design goals sought to use an Arduino to perform the audio processing needed to filter low bass frequencies to actuate the motors. We quickly learned that this introduced a delay, and unfortunately in music-related applications, any delay can make the application useless. We found an excellent solution however, by implementing a low-pass filter with a threshold to actuate the motors in an analog circuit. This design change also allowed us to work on making the circuit more compact and portable with every iteration of our design. It also eliminates the need for a lot of complicated set-up of a microcontroller; it is hard to imagine that the set-up with an Arduino would have been as easy as plugging in your mp3 player and headphones and turning the jacket on, as it is in our current design.

 Project Evaluation

We will continue to create improved iterations of this jacket in the future. The users who have tested our project have expressed interest in the experience our jacket had to offer, and through the prototyping process we have worked on making the system as portable and inconspicuous as possible. In our last two iterations alone, we moved our system from a bulky box containing our hardware to a much smaller protoboard that we could embed in the inside of the jacket. If we ever wanted to produce this jacket for sale, surface mounted circuits could be made to decrease the electronic size even further. As our jacket stands right now, the jacket does not outwardly appear to be anything but a normal hoodie jacket. It is this sort of form factor that we think people could be interested in owning.

We worked in an applications space we would label as “entertainment electronics.” The challenge this space poses to us is that user ratings are, at their core, almost entirely subjective. We had to evaluate areas like user comfort and the quality of a “sensation,” none of which can really be independently tested or verified. In a way, our design goals boil down to going after a sort of “coolness factor,” and our real challenge was making the jacket as interesting of an experience as possible while minimizing the obstacles to usage. For instance, in P6, people reported difficulty in having to carry around a box that contained the system’s hardware, and while they liked the sensation of the jacket they found the form factor cumbersome. We sought to fix this in our final iteration of the jacket’s design- it is now as comfortable and inconspicuous as a normal jacket, which we hope would allow people to see the jacket as something purely fun at no cost of convenience.

We set out with the goal of replicating a concert-going experience, but in the process created something new entirely. We believe we were successful in the regard of giving something “cool” to people that brought them joy. It is not clear to us what sort of objective measures alone could have achieved this. While we could have strictly timed how long it took people to figure out how our jacket worked, for example, this wouldn’t have informed us about what people really would want out of our system. While we had tasks in mind when we set out to build and test our jacket, the users themselves came up with their own tasks (the jacket’s benefits in silent discos or at sculpture gardens, its uses in a variety of musical genres, etc) that forced us to consider our jacket beyond the narrow goals we had defined for ourselves. It is this sort of feedback that makes designing for entertainment an exciting and dynamic application space.

 Future Plans

If we had more time, we would form a product as sleek, comfortable, and safe as a normal jacket. We would address problems introduced by moisture (sweating or rain) to ensure user safety and proper functioning. In order for this to become a product used in the long term, these concerns must be addressed. Next, we would seek to minimize the impact of the hardware within the jacket. We would use smaller, more flexible wires to attach to the motors. Printed circuit boards would decrease the size of the circuitry and we would optimize the layout of the components. In even further iterations, we would use surface mount electronics to decrease the size of the electronics. We would also like to find a better power solution. For instance, a 9.6V NiCd rechargeable battery would be capable of supplying the necessary current for each of the voltage regulators and can fit in a better form factor. It would also prevent users from having to periodically buy new batteries. We would also test the battery-life of the device to determine acceptable trade-offs between physical battery size and total battery energy. The motors would also be integrated into a removable lining which would hold down the wires and improve the washability and durability of the jacket. We would like to add additional features, including automatic threshold adjustment and a pause button. These new features will require additional understanding of analog electronics and the standards for audio signals on different mobile devices.

The next stages of user testing would inform our decisions about battery type and the long-term usability of the jacket. We would have different sizes of the jacket so we can accommodate users of many body sizes, and we would ideally give the jacket to users for several hours or over the course of days to get quality feedback about practicality and durability. These experiments would also help us understand how users react to the jacket’s sensations after their novelty has worn off. This user testing could further shed light on additional features we might add to the jacket.

 README

How it works:

A male auxiliary cable plugs into a user’s music player and receives the audio signal. The signals from each of the two channels are fed to a dual potentiometer to reduce the volume for the user. The ground of this potentiometer is at VREF (1.56V) because a DC offset is needed in order to keep all the audio information with single supply op-amps. The output of this potentiometer is fed to a female auxiliary cable where the user plugs in headphones. One channel of the audio is also fed to a voltage follower which helps protect the signal from the rest of our circuit. This signal then goes to a low-pass filter which filters out frequencies above 160 Hz. The filtered signal is compared to a threshold value to determine the gate signal for the transistors. When each transistor turns on, current flows through its corresponding motor pair. The circuit is powered through three 9V batteries, each attached to a 5V voltage regulator (L705CVs). Two of the batteries power the motors, which draw significant current, and the third battery powers the operational amplifiers used for the comparator and voltage follower.

Schematics

XRSrJHj zNY6syP bTPJ270

 Budget

Since our project is mostly hardware based, we’ve included a parts list and final budget below.

Item

Quantity

Price ($)

Total Cost/Item

L7805CV Voltage Regulator

3

$.59

$1.77

PN2222A Transistor

6

$.32

$1.92

LM358 Dual Op-amp

2

$.58

$1.16

motor

12

$1.95

$23.40

protoboard

1

$6.50

$6.50

10k dual potentiometer

2

$1.99

$3.98

switch

2

$1.03

$2.06

battery clips

3

$1.20

$3.60

capacitor (.1uF)

15

$0.30

$4.50

capacitor (1.0uF)

2

$0.30

$.60

1N4001

7

$0.08

$.56

misc.

1

$1.00

$1.00

Total

$51.05

 Third Party Code

In earlier iterations, we attempted to use the Arduino to do the audio processing.

http://wiki.openmusiclabs.com/wiki/ArduinoFFT

Demo Materials

https://www.dropbox.com/sh/qxxsu30yclbh7l1/wv1qeXYeM-


P6: Usability Study

Group 24 – the Cereal Killers
Andrew, Bereket, Ryan, and Lauren

The brisq bracelet is an easily-programmable, lightweight, wearable system that allows users to control their computers with gestures picked up by a motion-sensitive bracelet.

Introduction
Brisq is designed to be a simple, wearable interface that allows users to have customizable control over their computers without making use of a mouse or keyboard.

Implementation and Improvements
P5: P5 Blog Post Link

In addition to what we had in our previous prototype, we have finally integrated out GUI with the backend for the program, enabling users to actually record gestures without a “wizard of oz” approach to testing. However, since we do not yet have the accelerometer-based bracelet working, w will still be using one of our team members to simulate gesture execution.

Method
We chose 3 volunteers who had a diverse background of majors, in order to attempt to spread our test subjects across a wide spread of computer expertise. One of our test subjects Is a Woody Woo major, one is a Civil engineer, and one is a COS major. We chose this spread in order to give us a good spread of computer expertise in our test subjects.

For this test, we used our current, semi-functional brisq prototype. It consists of the program backend which can record and execute a series of mouse and keyboard shortcuts, our GUI which is now functionally connected to the program backend, and an arbitrary bracelet + “Wizard of Oz” acting in place of the accelerometer-based bracelet which is still under construction. The tests were all conducted in Quadrangle Club on members who volunteered for our experiment.

Task 1, Cooking: The test subject is asked to look up the recipe for a new dish they do not know how to prepare, and then prepare it while using brisq to navigate through the online recipe while cooking.

Task 2, Watching a movie: The test subject is sitting on a couch and is asked to map gestures to various controls for the movie, e.g. volume changes, pausing, fast forward, rewind, etc, and then use them to control the movie during playback.

Task 3, Disability test: The test subject is asked to perform a specific test while only using one arm to simulate a disability. The subject is given a cast to wear on their dominant arm, and then asked to type, and to open and close various programs.

Procedure
The user was able to record the computer action using the gui.

We used a remote desktop in order to replay the gestures to simulate the bracelet gesture recognition.

When the user did a gesture, the action was replayed using the remote desktop so the user did not have to press the replay button.

For each user, we changed up the order of the tasks

brisq

Test Measures
Qualitative:
Do users pick commands that are appropriate for the task.
– If their choice of commands if inefficient, do they need suggestions on tasks?
Do people easily remember which gestures they assigned to which actions?
– If they get confused, what confuses them? Do they mistake one gesture for another, or forget them entirely?
– Do they get flustered, confused, agitated and mess things up when they forget?
Do people actually use the gesture they create, or do they just forget after a while that they have the bracelet at their disposal?

Quantitative:
Tasks 1 and 2:
record the number of gestures performed during set cooking/movie time
Task 3:
record the time taken to complete the given task

Results and Discussion

User 1
Background: 21, male, sophomore, computer science, Dell Windows 8, computer level 5, no other input devices, no bracelets or watches, >10 hrs of active daily use, > 20 of passive daily use (confirmed), most common activity: running big stuff while I sleep

Cooking
-He was confused by the labels: record gesture or record computer action?
-maybe an explanatory paragraph would help to clarify
-we needed to explain that Esc ends the recording (the user didn’t want to minimise the new window to go back to the GUI to end the recording)
-he didn’t want to have the GUI window up after when he wanted to use the gesture
-page up/down doesn’t work

Gesture1 – swoosh up → open window with his favourite recipe site
Gesture2 – right/clockwise twist → page up
Gesture3 – left/counterclockwise twist → page down

TV
-he had trouble remembering functions and their associated gestures.
-he discovered he needed to record more gestures as he went

Gesture1 – big counterclockwise circle → open TV guide
Gesture2 – big clockwise circle → change the input activity
Gesture3 – twist clockwise → channel up
Gesture4 – twist counterclockwise → channel down
Gesture5 – hand palm up → volume up
Gesture6 – hand palm down → volume down
Gesture7 – punch → ok

Injured
-he had trouble thinking of good actions for computers, but using a computer involves complex tasks

Gesture1 – 90 degree right turn of the wrist → make a key work as its mirror key (to allow typing with one hand)
Gesture2 – a tap → backspace
Gesture3 – swipe to the left → close window
Gesture4 – swipe to right → open chrome
Gesture5 – lift hand up quickly → enter key

User 2
Background: 21, female, junior, civil and environmental engineering, laptop: OSX, level 4 computer user, no other input device, 9 hrs of active daily use, 11 hrs of passive daily use, most common task: doing homework, playing music, facebook

Injured
– she was confused about the order of pressing buttons
-she wanted multitouch gestures form IOS
-she used gestures in a limited way → need suggestions for gestures?
-used Esc button to not open window aagain
-play/pause doesn’t work
-page up/down and window key doesn’t get recorded
– she had trouble remembering actions
-she wanted to be able to hold and move icons, files and windows

TV Room
-wanted 2 handed gestures
-she wanted to have volume as level of arm height

Gesture1/2 – hand up/down → channel up/down
Gesture3/4 – hand side/side → volume up and down
Gesture5 – big swipe → mute
Gesture6 – circle hand clockwise/ counterclockwise→ forward / rewind
Gesture7 – punch → play/pause
Gesture8 – diagonal swipe → on/off

Cooking
-she thought that we could have a recipe sponsorship, so when the user does a gesture, it goes to the sponsored recipe site

Gesture1 – swipe hand down → scrolling
Gesture2 – hand to the right/ left → next page/ previous page
Gesture3 – hand in → magnify

User 3
Background: 20, female, sophomore, woodrow wilson school, computer level 2, input device: touchscreen, both bracelets and watches, 5-6 hrs of active daily use, 7-8 hrs of passive daily use, most common task: internet, playing music, writing papers

TV Room
– wanted to know how subtle the gestures are, i.e. how fine can the arm motions be?
– she thought arm motions are difficult, would rather do finger gestures. She wanted to replace the bracelet with a ring of glove.
– wanted more instructions. was confused about what gestures to pick and how to use the device.
– Some of the gestures she thought of were similar to each, and would be difficult for the classifying algorithm

Gesture1 – up/down → volume
Gesture2 – side/side → channel

Injured
Gesture1 – move arm in xy plane to control
Gesture 2 – punch in the z axis to click and double click

Cooking
Gesture1 – up/down → scroll
Gesture2 – diagonal arm swings → zoom in and out

User 4
Background: 21, male, junior, economics, lenovo laptop Windows 7, computer level 3, imput device: fingerprint scanner, neither bracelets nor watches, 6-7 hrs of active daily use, 6-7 hrs of passive daily use, most common task: facebook, buzzfeed, cracked articles, youtube videos

Injured
Gesture1 – hand side/side → switch between window
Gesture2 – diagonal hand swipe → close window
Gesture3 – hand up/down → minimise/maximise window

Tv Room
Gesture1 – wavy hand motion → play
Gesture2 – stop hand motion → pause


Test subject 1, cooking


Test subject 1, watching TV


Test subject 2, watching TV

Appendices

Consent form – Consent Form Link

Demographic Questionnaire –
Do you own a computer? If so, what kind (desktop or laptop? OS?)
Please describe your level of computer savviness, on a scale of 1 to 5 (1 – never used a computer/only uses email and facebook; 5 – can effectively navigate/control your computer through the terminal)
How many hours a day do you actively use your computer?
How many hours a day is your computer on performing a task for you (i.e. playing music, streaming a video)?
What activity do you perform the most on or with your computer?
Have you ever used something other than a keyboard or mouse to control your computer?
Do you wear bracelets or watches?
Have you ever needed crutches, a cast, a sling, or some other type of device to assist with a disability?

Demo Script –
Our project intends to simplify everyday computer tasks, and help make computer users of all levels more connected to their laptops. We aim to provide a simple way for users to add motion control to any of their computer applications. We think there are many applications that could benefit from the addition of gestures, such as pausing videos from a distance, scrolling through online cookbooks when the chef’s hands are dirty, and helping amputees use computers more effectively. The following tests will be aimed at seeing how users such as yourself interfaces with brisq. Brisq is meant to make tasks simpler, more intuitive, and most of all, more convenient; our tests will be aimed at learning how to better engineer brisq to accomplish these goals.

Our GUI has a simple interface with which users can record a series of computer actions to be replicated later with a motion-based command of the brisq bracelet.
[on laptop, demonstrate how users can record a mouse/keyboard command]

Now that a gesture has been recorded, you can map it to one of our predetermined gestures. shake brisq to turn it on or off, performing the gesture at any time when on to activate the series of actions on your computer.
[show how to set gesture to a command]

We think life should be simple. So simplify your life. Be brisq.

Interview script –
We have just finished showing you a quick demo of how to use brisq. Please use our program to enter the computer shortcuts you would like to use and the gestures to trigger them for the task of cooking with a new online recipe using your laptop. The bracelet we will give you is a replica of the real form, and one of our lab members will assist us in simulating the program.
We ask that you then carry on with the activity as you normally would. Do you have any questions?

[user performs task 1]

Now, please use the program to enter the computer shortcuts you would like to use and the gestures to trigger them for the task of watching a movie with your laptop hooked up to a tv, and you are lying on the couch. The bracelet we will give you is a replica of the real form, and one of our lab members will assist us in simulating the program.
We ask that you then carry on with the activity as you normally would. Do you have any questions?

[user performs task 2]

Lastly, please use the program to enter the computer shortcuts you would like to use and the gestures to trigger them for the task of using a computer with an injured arm/cast/etc. For this, we will ask that during the test, you refrain from using one of your arms for simulation purposes. The bracelet we will give you is a replica of the real form, and one of our lab members will assist us in simulating the program.
We ask that you then carry on with the activity as you normally would. Do you have any questions?

[user performs task 3]

Thank you! We will now ask you a short survey based on these tests.

Post-Task Questionnaire –
Did you find the device useful?
How well did the gestures help you perform the task? 1 to 5 where 1 is it hindered you, 3 is neutral/no effect, and 5 is it helped you a lot
How much would you be willing to pay for such a device?
What was the best thing about the product? What was the worst thing?
What other times do you think you would use this?
Any ideas for improvement/other comments?

Group 10 – P6

Group 10 — Team X

-Junjun Chen (junjunc),

-Osman Khwaja (okhwaja),

-Igor Zabukovec (iz),

-(av)

Summary:

A “Kinect Jukebox” that lets you control music using gestures.

Introduction:

Our project aims to pro­vide a way for dancers to inter­act with recorded music through ges­ture recog­ni­tion. By using a Kinect, we can elim­i­nate any need for the dancers to press but­tons, speak com­mands, or gen­er­ally inter­rupt their move­ment when they want to mod­ify the music’s play­back in some way. Our moti­va­tion for devel­op­ing this sys­tem is twofold: first of all, it can be used to make prac­tice rou­tines for dancers more effi­cient; sec­ond of all, it will have the poten­tial to be inte­grated into impro­visatory dance per­for­mances, as the ges­tural con­trol can be seam­lessly included as part of the dancer’s movement. In this experiment, we want to use three tasks to determine how well our system accomplishes those goals, by measuring the general frustration level of users as they use our system, the level of difficulty they may have with picking up our system, and how well our system does in recognizing gestures and responding to them.

Implementation and Improvements

P5: https://blogs.princeton.edu/humancomputerinterface/2013/04/22/p5-group-10-team-x/

Changes:

  • Implemented the connection between the Kinect gesture recognition and music processing components using OSC messages which we were not able to do for P5. This means that we did not need to use any wizard of oz techniques for P6 testing.

  • Implemented the GUI for selecting music (this was just a mock up in P5).

Method:

Participants:

The participants were selected at random (from Brown Hall). We pulled people aside, and asked if they had any dancing experience. We tried to select users who had experience, but since we want our system to be intuitive and useful for dancers of all levels, we did not require them to have too much experience.

Apparatus:

The equipment used included a Kinect, a laptop, and speakers. The test was conducted in a room in Brown Hall, where there was privacy, as well as a large clear area for the dancers.

Tasks:

1 (Easy). The first task we have chosen to support is the ability to play and pause music with specific gestures. This is our easy task, and we’ve found through testing that it is a good way to introduce users to our system.

2 (Medium). We changed the second task from “setting breakpoints” to “choosing music” as we wanted to make sure to include our GUI in the testing. We thought that the first and third task was adequate for testing the gesture control (especially since the gesture control components are still being modified). We had participants go through the process of selecting a song using our graphic interface.

3 (Hard). The third task is to be able to change the speed of the music on the fly. We had originally wanted to have the music just follow the user’s moves, but we found that the gesture recognition for this would have to be incredibly accurate for that to be useful (and not just frustrating). So, instead, the speed of the music will just be controlled with gestures (for speeding up, slowing down, and returning to normal).

Procedure:

For test­ing, we had each user come into the room and do the tasks. We first read the general description script to the user, then gave them the informed consent form, and asked for verbal consent. We then showed them a short demo. We then asked if they had any ques­tions and clar­i­fied any issues. After that, we fol­lowed the task scripts in increas­ing order of dif­fi­culty. We used the eas­i­est task, set­ting and using pause and play ges­tures, to help the user get used to the idea. This way, the users were more com­fort­able with the harder tasks (which we wanted the most feed­back on). While the users were completing the tasks, we took notes on general observations, but also measured the statistics described below. At the end, we had them fill out the brief post-test survey.

Test Measures:

Besides making general observations as the users performed our tasks, we measured the following:

  • Frustration Level (1 to 5, judged by body language, facial expressions, etc.), as the main purpose of our project is to make the processes of controlling music while practicing as easy as possible.

  • Initial pickup – how many questions were asked at the beginning? Did the user figure out how to use the system? We wanted to see how intuitive and easy to use our system was, and whether we explained our tasks well.

  • Number of times reviewing gestures – (how many times did they have to look back at screen?) We wanted to see how well preset gestures would work (is it easy to convey a gesture to a user?)

  • Attempts per gesture  (APG) – The number of tries it took the user to get the gesture to work. We wanted to see how difficult it would be for users to copy gestures and for the system to recognize those gestures, since getting gestures to be recognized is the integral part of the system.

  • Success – (0 or 1) Did the user complete the task?

Results and Discussion

Here are statistical averages for the parameters measured for each task.

Task 1

Task 2

Task 3

Frustration Level

1.67

0.33

3

Initial Pickup

0

0

0.33

Reviewing Gestures

1

1.33

Success

1

1

0.66

Play APG

3

Pause APG

1.33

Normalize Speed APG

1.5 on success
10 on failure

Slow Down APG

2.33

Speed Up APG

4.33

From these statistics, we found that APG for each tasks was relatively high, and high APGs correlated with higher frustration levels. Also, unfortunately, the APG didn’t seem to go down with practice (from task 1 to task 3, and with the 3 different gestures in tasks 3). The tasks with the highest APG (10+ on normalize speed, and 8 on speed up) both happened towards the end of the sessions.

These issues seem to stem from misinterpretation of the details of the gesture on the screen (users tried to mirror the gestures, when in fact the gestures should have been performed in the opposite direction), as well as general issues in the consistency of the gesture recognition. All three users found the idea interesting, but as users 1 and 3 commented on, gesture recognition needs to be robust for the system to be useful.

Changes we plan to make include a better visualization of the gestures, so that users have less trouble following them. Based on the trouble some of our users had with certain gestures, we’ve decided that custom gestures are an important part of the system (users would be able to set gestures that they are more comfortable with, and will be able to reproduce more readily). This should alleviate some of the user errors we saw in testing. On the technical side, we also have to make our gesture recognition system more robust.

Appendices

i. Items Provided / Read to Participants:

ii. Raw Data

Links to Participant Test Results:

Individual Statistics:

Participant 1:

Task 1

Task 2

Task 3

Frustration Level

-2

0

4

Initial Pickup

0

0

1

Reviewing Gestures

3

2

Success

1

1

0

Play APG

5

Pause APG

2

Normalize Speed APG

10 (failure)

Slow Down APG

3

Speed Up APG

2

Participant 2:

Task 1

Task 2

Task 3

Frustration Level

1

0

2

Initial Pickup

0

0

0

Reviewing Gestures

0

1

Success

1

1

1

Play APG

1

Pause APG

1

Normalize Speed APG

1 (success)

Slow Down APG

2

Speed Up APG

3

Participant 3:

Task 1

Task 2

Task 3

Frustration Level

2

1

3

Initial Pickup

0

0

0

Reviewing Gestures

1

1

Success

1

1

1

Play APG

3

Pause APG

1

Normalize Speed APG

2 (success)

Slow Down APG

2

Speed Up APG

8

Video


P5 Grupo Naidy

Group Number: 1

Group Members:

Avneesh Sarwate, John Subosits, Yaared Al-Mehairi, Joe Turchiano, Kuni Nagakura

Project Summary:

Our project is a serving system for restaurants, called Ser­vice­Center, that allows wait­ers to effi­ciently man­age orders and tasks by displaying information about their tables.

Description of tasks we chose to support:

In our working prototype, we have chosen to support an easy, medium, and hard task. For the easy task, users are simply asked to request help if they ever feel overwhelmed or need any assistance. This task is important to our system, because one of our functionalities is the ability to request assistance from waiters who may have a minute to spare and are watching the motherboard.

For our medium task, we ask users to input order information into the system for their table. Once users input orders, the motherboard will be populated with orders and the kitchen will also be notified of the orders. This is a medium task since this is simply inputting information.

Finally, for our hard task, we ask our users to utilize customer statuses (ie. cup statuses, food orders) to determining task orders. This task covers both ensuring that cups are always full and that the prepared food is not left out for too long. The motherboard’s main functionality is to gather all this information in an easy to read manner, allowing waiters to simply glance at the customer status to determine what order they should do things.

How our tasks have changed since P3 and P4:

We didn’t end up changing our tasks too much, since we thought it covered the functionality of the system pretty well. Based on user testing, testing, our easy task was performed as needed, and our other two tasks were performed regularly throughout the testing process. We decided to combine the medium and hard task into a hard task and add a new task that requires users to input customer orders into the system. This last task was added so that we could test the full functionality of our system. We also didn’t test the input interface in P4, so we really wanted to add this as a new task.

Discussion of revised Interface Design:

Initially, we had designated a dedicated person to take the order-slips of the waiters and then input them into the system. However, during our paper-prototype test, we saw that this designated inputter was by far the slowest element of the system. We decided, then, that it may be easier to have the waiters enter their own orders. Even though there is a lag involved in typing out items twice, there could be more of a lag if a single person manning the input screens becomes overwhelmed, as then that worker could make mistakes that lead to errors that cause problems for other waiters. By having each waiter responsible for their own input, we could reduce the volatility of our system.

Our initial design for the order-input interface was fairly involved, and displayed the restaurant menu as a clickable menu with a list and checkboxes, but after seeing how long basic tasks took on the paper prototype, we thought we should strip down to make it more efficient. We decided, for the purposes of this prototype, to have a simple text entry box and button for each table. Having a physical menu next to the entry station could also save screen space, and allow the input interface to be displayable on much smaller screens (cheap tablets, old portable TVs, smartphones). We decided to move to a typing interface because we had a very minimal amount of information that needed entering, and typing seemed faster for this limited interaction.

Easy Task 

Medium Task

Hard Task

Overview and Discussion of New Prototype 

The table-end side of the system has been fairly extensively prototyped although the interface between it and the rest of the system has not been implemented.  The current system for each restaurant table consists of three coasters for the patrons’ drinks which incorporate FSR’s to estimate the fullness of the glass based on its weight.  The coasters were manufactured from clear Plexiglas.  An Arduino monitors the sensors on the table and sends their states to a laptop computer via a serial connection.  The status of each of the glasses then prints to a serial monitor window on the laptop.  For the purpose of this prototype, a wizard-of-oz technique used a person at this computer communicating via a chat application with another person at the computer controlling the motherboard which displays the status of the various tables.  The wireless communication between the Arduino and the motherboard via a laptop was not implemented for this prototype because of the ease with which wizard-of-oz techniques could be used to simulate it and the relative difficulty of this part of the project.  The code for monitoring the FSR’s with the Arduino was loosely based on the Adafruit FSR tutorial code, available at http://learn.adafruit.com/force-sensitive-resistor-fsr/using-an-fsr, although the code was used primarily as inspiration.  Little was retained from the code expect the variable names and setup routine.

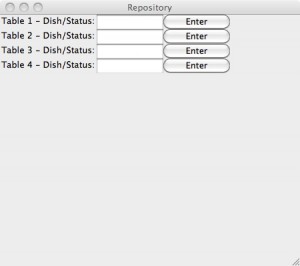
We implemented the changes to the interface design for the order input system. The minimal language that the users would enter into the box of each table would be “DishName Command.”  DishName could be any string (so users could use their own shorthand), while Command would be either “add,” “done,” or “del.” Add would add the item to the list for that table, done would mark that item as delivered, and delete would delete them from the order list. Pressing the button would “send” the information to the motherboard.

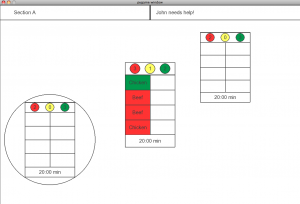
We chose to implement the Motherboard (the actual display screen for the app) using Python, with the Pygame module and a “Standard Draw”-like module included for ease of creating the actual screen. We chose Python since it is a simple, easy-to-use and debug language which fully supports object-oriented programming. Each “Table” on the screen is implemented as an object, which contains a variable number of “Order” objects and a single “Cup Display” object (which displays the current number of empty, medium, and full cups). We deemed it important to implement these objects to allow for modularity in the display screen to adjust to different restaurant floor plans. With the current implementation, it is possible (and fairly simple) to draw a rectangular table of any size at any position on the screen along with all of the table status features. In the final implementation, we plan to include support for circular tables as well. The screen updates itself whenever it receives new information to display it in real time.

We decided to leave out implementing the communication between different parts in our working prototype. Our system currently is made up of independent components with a set API. We have defined an API for each system so that cup statuses and order inputs/statuses can be easily changed through these functions once the communication channel has been implemented. In testing our prototype, we will use a Wizard of Oz technique for the communication between devices, and have our group members relay the information from each sytem. We chose this functionality to leave out of the working prototype, because we wanted to focus primarily on the layout of the motherboard and input system, and the functionality of our coasters. The help button is still a paper prototype, since in our ultimate system, this will simply be a button that alerts the motherboard. We decided that having a paper prototype and an observer to keep track of when the button is pressed (an easy task as P4 showed) were enough for user testing.

The Motherboard section used the Pygame module for Python. Apart from this, all code was written by Kuni Nagakura and Joe Turchiano.

A Plexiglas coaster with protective covering still in place showing temporary FSR attachment.

A Plexiglas coaster with protective covering still in place showing temporary FSR attachment.

Circuitry showing three inputs and 10K resistors.

Circuitry showing three inputs and 10K resistors.

Simple Order Input Interface

Simple Order Input Interface


Screenshot of Motherboard

Screenshot of Motherboard

Group 8 – Backend Cleaning Inspectors – P5: Working Prototype

Your group number and name
Group 8 – Backend Cleaning Inspectors

First names of everyone in your group
Dylan
Green
Tae Jun
Keunwoo Peter

1-sentence project summary. 1 paragraph describing the tasks you have chosen to support in this working prototype (3 short descriptions, 2–3 sentences each; should be one easy, one medium, one hard).
Our project is to make a device that could help with laun­dry room security.

Tasks supported in this prototype
1. Cur­rent User: Lock­ing the machine:

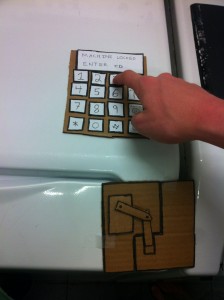
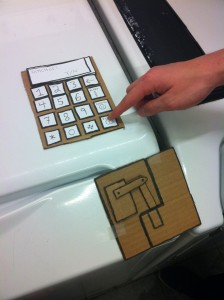
– The Current User inputs ID number into lock­ing unit key­pad. The product will then try and match his number to a netid in our system. If it finds a match, it will ask the user if this is their id. They can then answer yes or no and if yes, the machine locks. This netid is also the netid that will be sent emails if an alert is sent. This task would be medium in difficulty as the user has to ensure that he/she enters the right 9-digit number.

2. Next User: Send­ing mes­sage to cur­rent user that laun­dry is done and some­one is wait­ing to use the machine:

– When there are no machines open, the next user can press a but­ton to send an alert at any time dur­ing the cycle. When the but­ton is pressed, an alert will be sent to the current user saying someone is waiting to use the machine. The difficulty of this task would be easy. It is lit­er­ally as easy as press­ing a button.

3. Cur­rent User: Unlock the machine:

– If the machine is cur­rently locked and the current user wishes to unlock the machine, the cur­rent user must input his princeton ID number. Once he has done this, the system then checks this id and tries to find a potential match to a net id. If it does, it will ask the user if this is his net id and on yes, it will unlock. This is a medium/hard task, as the user must input his number and confirm to unlock.

1 short paragraph discussing how your choice of tasks has changed from P3 and P4, if at all, as well as the rationale for changing or not changing the set of tasks from your earlier work.
The only change to our task was that instead of unlocking automatically when the cycle and following grace period ended, our system will unlock only when a new user alerts the owner of the locked machine (followed by a subsequent, shorter grace period).

2–3 paragraphs discussing your revised interface design
Describe changes you made to the design as a result of P4, and your rationale
behind these changes (refer to photos, your P4 blog post, etc. where appropriate)
We decided to only make one significant change to our system. Before, we planned to have our system automatically unlock after the grace period (the 10 minute-ish period after the laundry finished) was finished. However, we decided that there is no reason to unlock the machine if no one is waiting to use it. That would be unnecessarily risky. Thus, we decided to start the grace period only after an alert has been sent to the current user.

Provide updated storyboards of your 3 tasks
first task

second task

third task

Provide sketches for still-unimplemented portions of the system, and any other
sketches that are helpful in communicating changes to your design and/or
scenarios

3–4 paragraphs providing an overview and discussion of your new prototype

Discuss the implemented functionality, with references to images and/or video in the next section
Our product implements each of the three tasks described above. In addition to the procedures mentioned above for taks one and two, our product also gracefully handles backspacing, clearing, and various other errors, such as entering the wrong id or an id not yet in our database system. As for the matching of the numbers to ids, currently we have just hardcoded a few pairs into our system. Were we to make our product for real, we would have to get a list from the school and integrate it with our product. This is unnecessary for our product at this stage however.

Describe what functionality from the proposed complete system you decided to leave out of this prototype, and why
As of right now, we have not implemented the grace period system yet. It is intended to be a system where an alert can be sent, once the machine is finished running. When someone presses the alert button, our product sends an email to the current user of the machine telling them that someone is waiting to use the machine, and that the machine will be unlocked after a certain period of grace time has passed. We haven’t decided how long this grace period will be yet, but we think something like 5 or 10 minutes should suffice. The alert button can also be pressed before the laundry is done (before 35 minutes have passed), but the alert is still only sent once the laundry is done. The reason we have not fully implemented this grace period functionality yet, is because we had trouble with the code for implementing a third party timer class. We plan to have this functionality up and running in a week or so. We do however have the “send alert” functionality already running. When the button is pushed an email will be sent to the current user alerting them that someone wishes to use their machine. We just haven’t implemented the grace period timing yet.

iii. Describe any wizard-of-oz techniques that are required to make your prototype work

No wizard of oz techniques are required to make our prototype work.

In the above sections, be sure to provide your rationale for choosing what
functionality to implement, what to wizard-of-oz, and what to ignore.
The only thing we havent implemented yet is the timing mechanism for the grace period interval. This is due to unfamiliarity using third party library to implement the timing code.

Document any code you used that was not written by your team (e.g., obtained
from an online tutorial, third-party library, etc.). If you did not use code from other
sources, say so.
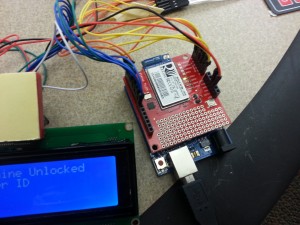
The additional libraries we use are: Keypad, LiquidCrystal, Servo, SimpleTimer, and WiFly Shield.

Video and/or images documenting your current prototype

keypad

wifly shield and lcd

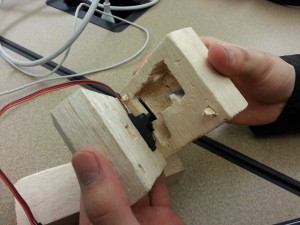
inside of lock mechanism

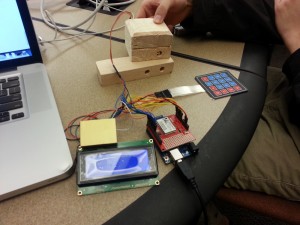
whole set up

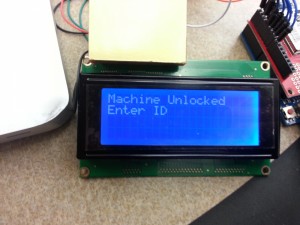
lcd screen

lock mechanism

Videos:

P5 – Group 16 – Epple

Group 16 – Epple

Andrew, Brian, Kevin, Saswathi

Project Summary:

Our project is to use Kinect to make an intuitive interface for controlling web cameras through using body orientation.

Tasks:

The first task we have chosen to support with our working prototype is the easy-difficulty task of allowing for web chat while breaking the restriction of having the chat partner sit in front of the computer.  A constant problem with web chats is the restriction that users must sit in front of the web camera to carry on the conversation; otherwise, the problem of off-screen speakers arises.  With our prototype, If a chat partner moves out of the screen, the user can eliminate the problem of off-screen speakers through intuitive head movements to change the camera view. Our second task is the medium-difficulty task of searching a distant location for a person with a web camera.  Our prototype allows users to seek out people in public spaces through using intuitive head motions to control the search of a space via web camera, just as they would in person.  Our third task is the hard-difficulty task of allowing web chat with more than one person on the other side of the web camera.  Our prototype allows users to web chat seamlessly with all the partners at once. Whenever the user wants to address a different web chat partner, he will intuitively change the camera view with his head to face the target partner.

Task changes:

Our set of tasks has not changed from P3 and P4.  Our rationale behind this is that each of our tasks was and is clearly defined and the users testing our low-fi prototype did not have complaints about the tasks themselves and saw the value behind them. The comments and complaints we received were more about the design of our prototype environment, such as placement of paper cutouts, and inaccuracies with our low-fi prototype, such as the allowance of peripheral vision and audio cues with it.

Design Changes:

The changes we decided to make to our design based on user feedback from P4 were minimal. The main types of feedback that we received, as can be seen on the P4 blog post, were issues with the design of the low-fidelity prototype that made the user experience not entirely accurate, suggestions on additional product functionality, and tips for making our product more intuitive. Some of the suggestions were not useful in terms of making changes to our design while other suggestions were very insightful but we decided that they were not essential for a prototype at this stage. For example, in the first task we asked users to keep the chat partner in view with the screen as he ran around the room. The user commented that this was a bit strange and tedious, and that it might be better to just have the camera track the moving person automatically. This might be a good change, but it changes that intended function of our system from being something that the user interacts with, as if peering into another room naturally, to more of a surveillance or tracking device. This kind of functionality change is something that we decided not to implement.

Users also commented that their usage of peripheral vision and audio cues made the low-fi prototype a bit less realistic, but that is an issue that arose due to inherent limits of a paper prototype rather than due to the design of our interface. Our new prototype will inherently overcome these difficulties and be much more realistic, as we will be using a real mobile display, and the user will only be able to see the web camera’s video feed.  The user can also actually use head motions to control the viewing angle of the camera. We did gain some particularly useful feedback, such as the suggestion that using something like an iPad would be useful for the mobile screen because it would allow users to rotate the screen to fit more horizontal or vertical space. This is something that we decided would be worthwhile if we chose to mass produce our product, but we decided not to implement this in our our prototype for this class as it is not essential to demonstrate the main goals of the project.  We also realized from our low fidelity prototype that the lack of directional sound cues from their speakers’ audio would make it hard to get a sense of which direction an off-screen speaker’s voice is coming from. We realized that implementing something like a 3D sound system or a system of providing suggestions on which way to turn the screen would be useful, but again, we decided that it was not necessary for our first prototype.

One particular thing that we have changed going from the low-fidelity prototype to this new prototype is the way that users would interact with the web camera. One of the comments we got from P4 was that users felt that they didn’t get the full experience of how they would react to a camera that independently rotated while they were video chatting. We felt that this was a valid point and something that we overlooked in our first prototype as it was low-fidelity. It is also something that we felt was essential to our proof of concept in the next prototype, so we have the web camera attached to a servo motor to rotate in front of the chat partner with our new prototype as show below.

-Web Camera on top of a servo motor:

Web Camera on Servo motor

Storyboard sketches for tasks:

Task 1- web chat while breaking the restriction of having the chat partner sit in front of the computer:

Task 1 – Chat without restriction on movement – Prototype all connected to one computer

Task 2 – searching a distant location for a person with a web camera:

Task 2 – Searching for a Friend in a public place – Prototype all connected to one computer

Task 3 – allowing web chat with more than one person on the other side of the web camera:

Task 3 – Multi-Person Webchat – Prototype all connected to one computer

Unimplemented functionality – camera rotates vertically up and down if user moves his head upwards or downwards:

Ability of camera to move up and down in addition to left and right.

Unimplemented functionality – Kinect face data is sent over a network to control the viewing angle of a web camera remotely:

Remote camera control over a network

Prototype:

We implemented functionality for the web camera rotation by attaching it to a servo motor that turns to a set angle given input from an Arduino.  We also implemented face tracking functionality with the Kinect to find the yaw of a user’s head and send this value as input to the Arduino through Processing using serial communication over a USB cable. The camera can turn 180 degrees due to the servo motor, and the Kinect can track the yaw of a single person’s face accurately up to 60 degrees in either direction while maintaining a lock on the person’s face. However, the yaw reading of the face is only guaranteed to be accurate within 30 degrees of rotation in either direction. Rotation of a face in excess of 60 degrees usually results in a loss of recognition of the face by the Kinect, and the user must directly face the Kinect before their face is recognized again. Therefore the camera also has a practical limitation of 120 degrees of rotation.  This is all shown in image and video form in the next section.

The parts of the system that we decided to leave unimplemented for this prototype are mainly parts that we felt were not essential to demonstrate the basic concept of our idea. For example, we have a servo motor that will rotate the webcam horizontally left and right, but we decided that it was not essential to, at this stage, have another servo motor rotating the camera vertically up and down, as it is a similar implementation of code and usage of input signals, only in a different direction. The usage cases for moving the camera up and down are also lacking as people usually do move vertically.  We also decided not to implement network functionality to transmit kinect signals to the arduino remotely at this stage. We intend to implement this functionality in a future prototype, but for the moment, we feel it is nonessential, and that it is sufficient to have everything controlled by one computer and simply divide the room using potentially a cardboard wall to keep the kinect side of the room and the web camera side of the room separated.  The one major Wizard-Of-Oz technique that we will use when testing this prototype is to thus pretend that the user is remotely far from the web chat partners, when in reality, they are in the same room, and we are using a simple screen to separate the two sides of interface.  This is because, again, the kinect and the arduino-controlled-webcam will be connected to the same computer to avoid having to send signals over a network, which we do not have the implementation for.  We will thus only pretend that the two sides of the video chat are far apart.for the purpose of testing the prototype.

We chose to implement the core functionality of our design for this prototype. It was essential that we implement face tracking with the Kinect, as this makes up half of our design. We also implemented control of the camera via serial communication with the Arduino. We decided to only implement yaw rotation and not pitch rotation because that would require two motors, and this prototype adequately demonstrates our proof-of-concept with only horizontal left-right rotation. We thus chose to implement for breadth rather than depth in terms of degrees of control over the web camera.  We also worked on remote communication between the Kinect and Arduino/camera setup, but have not finished this functionality yet, and it is not necessary to demonstrate our core functionality for this working prototype.  We thus, again chose to implement for breadth rather than depth at this stage in deciding serial communication with Arduino over a USB cable was enough.  By choosing breadth over depth, we have enough functionality with our prototype to test our three selected tasks, as all three essentially require face tracking control of the viewing angle of a web camera.

We used the FaceTrackingVisualization sample code included with the Kinect Development Toolkit as our starting point with the Kinect code.  We also looked at some tutorial code for having Processing and Arduino interact with each other at: http://arduinobasics.blogspot.com/2012/05/reading-from-text-file-and-sending-to.html

Video/Images:

A video of our system.  We show Kinect recognizing the yaw of a person’s face and using this to control the viewing angle of a camera.  Note that we display on the laptop a visualizer of Kinect’s face tracking, not the web camera feed itself.  Accessing the web camera feed itself is trivial through simply installing drivers:

Video of working prototype

Prototype Images:

Kinect to detect head movement

Webcam and Arduino

Kinect recognizing a face and it’s orientation

Kinect detecting a face that is a bit farther away


P4 – Team TFCS

Group Number: 4
Group Name: TFCS
Group Members: Farhan, Raymond, Dale, Collin

Project Description:  We are making a “habit reinforcement” app that receives data from sensors which users can attach to objects around them in order to track their usage.

Test Method:

  • Obtaining Consent: 

To obtain informed consent, we explained to potential testers the context of our project, the scope, duration, and degree of their potential involvement, and possible consequences of testing, with a focus on privacy and disclosing what data we collected. First, we explained that this was an HCI class project, and that we were developing a task-tracking iPhone app using sensors to log specified actions. We explained how we expected the user to interact with it during the experiment: they would use a paper prototype to program 3 tasks, by indicating with their finger, while we took photographs of the prototype in use. We also though it was important to tell participants how long the experiment would take (10 minutes), but most importantly, how their data would be used. We explained that we would take notes during the experiment which might contain identifying information, but not the user’s name. We would then compile data from multiple users and possibly share this information in a report, but keep user’s identity confidential. Finally, we mentioned that the data we collected would be available to users after on request.

Consent Script

  • Participants:

We attempted to find a diverse group of test users representing our target audience, including both its mainstream and fringes. First, we looked for an organized user, who uses organizational tools like to-do lists, calendars, perhaps even other habit-tracking software. We hoped that this user would be a sort of “expert” on organizational software who could give us feedback perhaps on how our product compares to what he/she is currently using and what works well in other comparable products.

We also tested with a user who wasn’t particularly interested in organization and habit-tracking. This would let us see if our system was streamlined enough to convince someone who would otherwise not care about habit-tracking to use our app. We also hoped it would expose flaws and difficulties in using our product, and offer a new perspective.

Finally, we wanted an “average” user who was not strongly interested nor opposed to habit-tracking software, as we felt this would represent how the average person would interact with our product. We aimed for a user who was comfortable with technology and had a receptive attitude towards it, so they could represent a demographic of users of novel lifestyle applications and gadgets.

  • Testing Environment:

The testing environment was situated in working spaces, to be natural for our testers. We used a paper-prototype of the iPhone app to walk the user through the process of creating and configuring tasks. For the tags, which are USB-sized bluetooth-enabled sensor devices, we used a small cardboard box the same size and shape of the sensor and gave three of these to the user, one for each task. We also had a gym bag, a pill box and a sample book as props for the tasks.

  • Testing Procedure:

After going through our consent script, we used our paper iPhone prototype to show the user how to program a simple task with Task.ly. We had a deck of paper screens, and Raymond led the user through this demo task by clicking icons, menu items, etc. Farhan changed the paper screen to reflect the result of Raymond’s actions. We then handed the paper prototype with a single screen to the test user. Farhan continued to change the paper screens in response to the user’s actions. When scheduling a task, the user had to set up a tag, which was described above.

The first task we asked users to complete was to add a new Task.ly task, “Going to the gym.” This involved the user navigating the Task.ly interface and selecting “Create a preset task.” We then gave the user a real gym bag, and the user had to properly install the sensor tag in the bag.

The second task we asked our user to do was track taking pills. This also required the user to create a new Task.ly preset task, and required the user to set up a phone reminder. Then, the user was given a pencil box to represent a pill box, and the user had to install a sensor tag underneath the lid of the pencil box.

Finally, the user had to add a “Track Reading” Task.ly task, which was the hardest task because it involved installing a sensor tag as well as a small, quarter-sized magnet on either covers of a textbook. The user was given a textbook, a cardboard sensor tag, and a magnet to perform this task.

While the user was performing these tasks, Farhan, Collin, and Dale took turns flipping the paper screens during each task and taking notes, while Raymond took continuous and comprehensive notes on the user’s experience.

<a href =”https://www.dropbox.com/s/f46suiuwml8qclv/script.rtf”>Script</a>


IMAG0086

User 1 tasked with tracking reading

IMG_20130408_160528IMG_20130408_214935

Results Summary:

All three users managed to complete each task, though they each had difficulties along the way. During the first task, tracking trips to the gym, our first respondent looked at the home screen of our app and remarked that some of the premade tracking options seemed to be subsets of each other (Severity: 2). When he tried to create a new task, he was frustrated with the interface for making the weekly schedule for the task. Our menu allowed him to choose how many days apart to make each tracking checkpoint, but he realized that such a system made it impossible for him to track a habit twice a week (Severity : 4). Respondent #2 noted that he liked the screens explaining how the bluetooth sensors paired to his phone, though he thought these should be fleshed out even more. Once he had to attach the sensor to his gym bag, however, he again expressed confusion when following our instructions (Severity: 4). He said that he thought the task was simple enough to forego needing instructions.

Of the three tasks, our users performed the best on tracking medication. Note, however, that this was not the last task we asked them to do, indicating that their performance was not merely a product of having greater familiarity with the app after several trials. Respondent #3 remarked that tracking medication was the most useful of the precreated tasks. All three users navigated the GUI without running into new problems unique to those experienced during the first task. All users attached the sensor tag to our demo pill box based on the directions given by the app; all performed the job as expected, and none expressed confusion. However, during the third task, tracking the opening and closing of books, new problems emerged with the sensor tags. Though two users navigated the GUI quickly (as they had during the second task), one respondent did not understand why there was a distinction made between tracking when a book was opened and tracking when a book was closed. He thought that the distinction was unnecessary clutter in the GUI. We judge this a problem of severity 2, a cosmetic problem. None of the users attached the sensor to our textbook in the way we expected. We thought that the sensor should be attached to the spine of the book, but users attached the tags to the front or back covers, and one even tried to put the sensor inside the book. Users were also confused by the necessity of attaching a thin piece of metal to either inside cover (severity: 3).

f. Results, Insights, Refinements

Our testers uniformly had problems while setting task schedules. There was no calendar functionality in the prototype; it only let the user set a number of times a task should be performed, over a certain time interval, so we are immediately considering changing this to a pop-up week/day selector, where the user highlights the day/times they want to do the task. Also, testers were confused by the sensors. The informational screens we provided to users to guide them through sensor setup were not complete enough, suggesting that we should make the sensor attachment instructions better phrased, visual, and possibly interactive. Because one user was confused by our having multiple sensor attachment pictures on one screen, we will instead offer the user a chance to swipe through different pictures of sensors being attached. Testers were also confused by the number of options for what the sensor could track, including in particular the option of being notified when a book is either open or closed. We can simply remove that choice.

Our users found the process of creating tasks to be cumbersome. Thus, we will simplify the overall process of creating a task, pre-populating more default information for general use cases, as that was the purpose of having presets in the first place. Then, we will remove the text options to choose how a sensor may be triggered. We will increase the emphasis on preset options, as above. Furthermore, we can accept feedback from the user each time he/she is reminded about a task (e.g. remind me in two days?/dont remind me for a month) to learn about how they want to schedule the task, instead of asking them to set a schedule upfront. This is a more promising model of user behavior as it distributes the work of setting a schedule over time, and lets our users be more proactively engaged. Finally, while considering how to streamline our interface, we also observed that the behavior of our system would be much more predictable to users if the reminder model was directly exposed. Rather than letting the user set a schedule, we observed we could use a countdown timer as a simpler metaphor, so that for each sensor, the user would only have to set a minimum time between triggers. If the time is exceeded, they would then receive reminders. This would be useful e.g. to provide reminders about textbooks that one leaves lying on the floor. Users may often forget about simple, low-difficulty tasks like taking vitamins, and this would make remembering to complete such tasks easier. Finally, this could be combined with deferring setting a schedule as discussed above.

g. Going Forward –  Refinements

With a low-fidelity prototype, we plan on testing two parts of our app in the future. The first part will test if the the design changes that we make from the lo-fi prototype help users navigate the app better. This specifically pertains to the process of creating a task, including improvements regarding simpler presets, deferring setting a schedule, and exposing the reminder system as a countdown, and the test will focus on if creating a task has been made substantively easier. The second major redesign to test is our sensor setup pages, since we will need to validate that increased interactivity and changes in copy allow users to better understand how to attach their sensors.

With the high-fidelity prototype, we will test the interaction of the user with the reminder screens and the information charts about their progress on different habits. This part can only really be tested with the high-fidelity prototype with data about certain tasks and hence, we will move this testing to after we have the hi-fi prototype ready. We also noticed that we couldn’t get a very good idea of actual daily usage of the app, including if a user would actually perform tasks (or not) and respond to notifications. That part of our project will be easier to test once we have a working prototype, to gather actual usage and reminder data.


Group 8 – The Backend Cleaning Inspectors

a. Your group number and name

Group 8 – The Backend Cleaning Inspectors

b. First names of everyone in your group

Peter Yu, Tae Jun Ham, Green Choi, Dylan Bowman

c. A one-sentence project summary

Our project is to make a device that could help with laundry room security.

d. Description of test method

We approached to people who were about to use the laundry machine in dormitory laundry room. We briefly explained them that we want to conduct usability test for our low-fi prototype and asked if they are interested. When they said yes, we gave them the printed consent form and asked them to read very carefully. We started our testing procedure when they signed to the form and we kept the form for records.

The first participant was a female sophomore. She was selected randomly by picking a random time (during peak laundry hours from 6-8pm) from a hat to check the laundry room in the basement of Clapp Hall. The student was using two machines to wash her impressive amount of laundry. She claimed to have waited until the previous user had claimed his clothes to use the second machine.

The second participant was a male sophomore. He was selected in a similarly random fashion using a drawn time within the heavy traffic time. The student was using one machine to wash his laundry, which he claimed was empty when he got there. This was strange, as the spare laundry bins were all full.

The third participant was a male freshman. He was selected in the same manner as the previous two subjects. The student was using one machine to dry his laundry, and claimed that he had no problems with people tampering with his things, although there was in fact someone waiting to use his machine.

The testing environment was set up in the public laundry room in the basement of Clapp Hall in Wilson College on Thursday, April 4th from 6-8pm, which we projected to be the peak time for laundry usage. The low-fi prototype components were set up in their respective places on one of the laundry machines– the processor was attached to the top, while the lock was fastened to the doors. Other equipment used consisted of the laundry machine itself. No laundry machines were harmed in the making of this test.

We first introduce ourselves to the participant and what we are trying to accomplish. After obtaining his/her informed consent and going through our demo script presented by Tae Jun, Dylan will give the system to the participant and explain the first task he/she has to perform for our test, using our first task script. The first task will be to load the laundry machine and lock it using our product. We then observe the user attempting task one. Upon completion, Peter then explains the second task. For the second task, the participant has to switch his/her role to that of the Next User trying to access the locked machine and send a message to the “Current User” of the machine. We all observe the participant attempting task two. Green will finish it up by explaining the last task to the participant, and we all again observe and take notes. The third and last task will involve the participant assuming the role of the Current User again and unlocking the laundry machine once their laundry is done. During all three tasks, we will rotate who is actually managing the changing of the screens of our product, so that we all get a chance to record notes on the different tasks. We then thank the user for his/her participation.

Consent Form: Link
Demo Script: Link

e. Summary of results

Overall, our results were quite positive. Users generally found no trouble in following the prompts, with the exception of a few minor things that they thought could be made more clear. The users often commented on the usefulness of the idea, citing their past negative experiences with people tampering with their laundry. They appreciated the simplicity of the keypad interface, as well as the “grace period” concept and other minor details explained to them. The only issues that came up (which we agreed to be Grade 3 Minor Usability Problems) were with the wordings of the prompts, which the participants would occasionally confirm with the tester.

f. Discussion

The results of our tests were very encouraging. We found that our idea was very well received and that the users were very enthusiastic about seeing it implemented. Despite the minor kinks in wordage and syntax, our lcd output prompts elicited the correct responses from our users and got the job done. In fact, the users’ enthusiasm for a possible laundry solution well overcame any potential problems with a minor learning curve, as all users expressed this implicitly or explicitly at one point in their testing. That being said, the exact wording, order, or nature of the prompts can always be changed in our software. In this testing, we confirmed that our product has a strong demand, an adequately simple interface, and an anticipating audience.

g. Future Test Plan

We believe that we are prepared to begin construction of a higher-fidelity prototype. Our physical components and interface design seem to be adequately simple and readable to begin building, and any issues that presented themselves involved the lcd output prompts or commands, which can easily be refined at virtually any stage in development. Thus, we believe our next course of action will be to begin the assembly and configuration of our hardware components in higher fidelity.