GROUP NAMES: Vivian, Harvest, Neil, Alan
GROUP NUMBER: 25
WHAT WE BUILT:
We played around with capacitive proximity sensing to detect when a user touches the instrument when we considered building 3 music instrument prototypes. We used the same circuit design for a 5-note musical instrument and varied the interface. Each uses aluminum foil in various configurations to play different notes. The first is a guitar tab style device, with aluminum covering stiff paper tabs. The second is a mini piano using pistachio shells to hold clumps of aluminum foil. The final design is a xylophone kit style device, using capacitive sensing with spoons hitting aluminum balls which act as the xylophone bars. We liked the xylophone the best because it had the most interesting visual setup and a comfortable interface, letting users play notes quickly and intuitively. It’s a fun, easy-to-use instrument with a creatively natural use of spoons
- We used the same wiring for all 3 instruments
PROTOTYPE #1: GUITAR TABS
The user strums or just simple touches a tab in order to play a corresponding note.
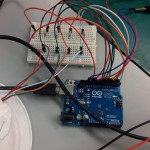
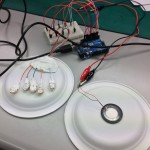
- Setup with tabs and piezo speaker
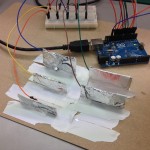
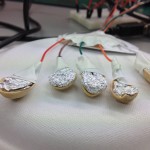
- Front face of tabs covered with aluminum
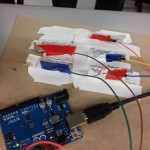
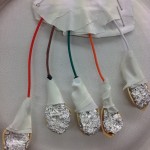
- Back of aluminum tabs, wires attached with electrical tape
Music: “When the Saints Go Marching In”
PROTOTYPE #2: PISTACHIO PIANO
Pistachio shells are used as the base to hold balls of aluminum. The user touches their finger to each aluminum-covered shell to play a note.
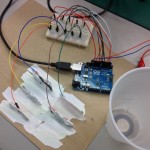
- Pistachio piano setup
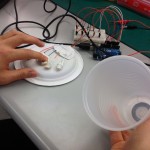
- Playing the piano
- Pistachio shell base
- Aerial view shot
Music: “Turret Opera,” Portal 2
FINAL PROTOTYPE: SAXOBEAT
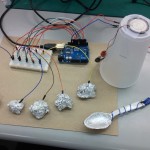
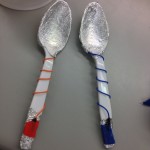
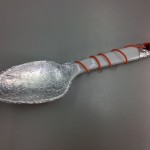
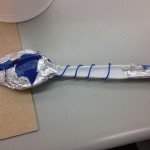
User holds the round end of the spoon, engaging the capacitive nature of the aluminum material. The round end is connected to the flat tip using a wire, and touching the aluminum balls generates a note.
- Saxobeat final setup
- Playing spoons
- Close-up of playing spoons
- Bottom of playing spoons
Music: “Mr. Saxobeat,” Alexandra Stan
LIST OF PARTS:
- Balls of aluminum (x5)
- Plastic spoons (x2)
- Aluminum sheet
- 10 megaohm resistor (x5)
- Arduino Uno (x1)
- Piece of cardboard (x1)
- Breadboard (x1)
- Wires
SETUP INSTRUCTIONS:
- Wrap the round end of the spoon with aluminum. Wrap the thin, flat end of the spoon with aluminum as well. Tape a piece of wire connecting the round and flat end.
- Secure the five balls of aluminum to a stiff piece of cardboard using electric tape.
- Wire up the arduino. Place the five resistors on the breadboard and connect each end to a digital pin. Connect another end of each resistor to an aluminum ball.
- Upload the code and enjoy!
ARDUINO CODE:
// Team Deep Thought
// "Saxobeat" Musical Instrument

#include

CapacitiveSensor   Eb = CapacitiveSensor(3,2);        // 10 megohm resistor between pins 4 & 2, pin 2 is sensor pin, add wire, foil
CapacitiveSensor   D = CapacitiveSensor(5,4);
CapacitiveSensor   C = CapacitiveSensor(7,6);
CapacitiveSensor   Bb = CapacitiveSensor(9,8);
CapacitiveSensor   A = CapacitiveSensor(12,11);
int spkr = 10;

// Turret Opera
int fA = 440;
int fBb = 466;
int fC = 523;
int fD = 587;
int fEb = 622;

// When the Saints Go Marching In
int wC = 262;
int wD = 294;
int wE = 330;
int wF = 349;
int wG = 392;

// Saxobeat
int sB = 494;
int sCs = 554;
int sD = 587;
int sE = 659;
int sFs = 740;

void setup()
{

   A.set_CS_AutocaL_Millis(0xFFFFFFFF);
   Bb.set_CS_AutocaL_Millis(0xFFFFFFFF);
   C.set_CS_AutocaL_Millis(0xFFFFFFFF);
   D.set_CS_AutocaL_Millis(0xFFFFFFFF);
   Eb.set_CS_AutocaL_Millis(0xFFFFFFFF);
   pinMode(spkr, OUTPUT);
   Serial.begin(9600);

}

void loop()
{
    long nA = A.capacitiveSensor(30);
    long nBb = Bb.capacitiveSensor(30);
    long nC = C.capacitiveSensor(30);
    long nD = D.capacitiveSensor(30);
    long nEb = Eb.capacitiveSensor(30);

    // Turret Opera
//    if (nA > 1000) tone(spkr, fA, 80);
//    else if (nBb > 1000) tone(spkr, fBb, 80);
//    else if (nC > 1000) tone(spkr, fC, 80);
//    else if (nD > 1000) tone(spkr, fD, 80);
//    else if (nEb > 1000) tone(spkr, fEb, 80);
//
//    // Saints
//    if (nA > 1000) tone(spkr, wC, 80);
//    else if (nBb > 1000) tone(spkr, wD, 80);
//    else if (nC > 1000) tone(spkr, wE, 80);
//    else if (nD > 1000) tone(spkr, wF, 80);
//    else if (nEb > 1000) tone(spkr, wG, 80);

    // Saxobeat
    if (nA > 1000) tone(spkr, sB, 80);
    else if (nBb > 1000) tone(spkr, sCs, 80);
    else if (nC > 1000) tone(spkr, sD, 80);
    else if (nD > 1000) tone(spkr, sE, 80);
    else if (nEb > 1000) tone(spkr, sFs, 80);

}


