Group Name: Deep Thought
Group #25: Vivian Q., Harvest Z., Neil C., Alan T.
I. A 1-SENTENCE DESCRIPTION OF YOUR PROJECT
AcaKinect is voice recording software that uses a Kinect for gesture-based control, which allows content creators to record multiple loops and beat sequences and organize them into four sections on the screen, creating a more efficient and intuitive way of presenting a music recording interface for those less experienced with the technical side of music production.
2. HYPERLINKS TO PREVIOUS BLOG POSTS
P1: http://blogs.princeton.edu/humancomputerinterface/2013/02/22/a-cappella-solo-live/
P2: http://blogs.princeton.edu/humancomputerinterface/2013/03/11/p2-2/
P3: http://blogs.princeton.edu/humancomputerinterface/2013/03/29/p3-vahn-group-25/
P4: http://blogs.princeton.edu/humancomputerinterface/2013/04/08/p4-acakinect/
P5: http://blogs.princeton.edu/humancomputerinterface/2013/04/22/p5-acakinect/
P6: http://blogs.princeton.edu/humancomputerinterface/2013/05/06/p6-acakinect/
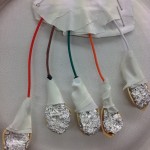
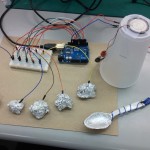
3. VIDEOS & PHOTOS
Videos:
Description:
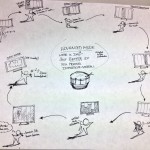
Gesture controls:
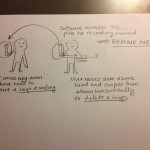
- Record Loop (Raise either arm above head) — Records a single loop of 8 beats at a set tempo. Block representing loop appears in the column the user is standing in, when recording is finished. Blue loading circle appears at initial command.
- Delete Loop (Put hands together in front of torso and swipe outward) — Deletes the last recorded loop in the column user is standing in. If there are no loops, does nothing. Green loading circle appears at initial command.
- Delete Column Loop (Put hands together above hand and swipe straight down) — Deletes all recorded loops in the column user is standing in. If there are no loops, does nothing. Pink loading circle appears at initial command.
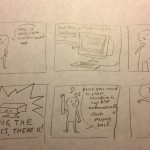
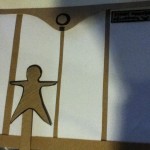
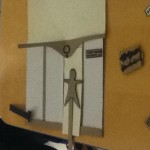
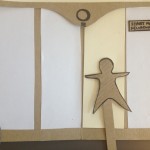
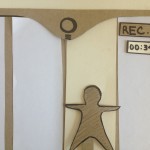
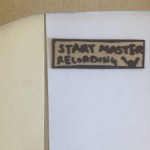
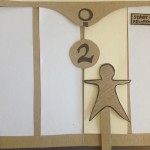
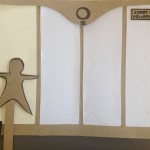
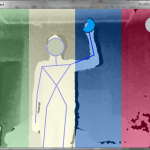
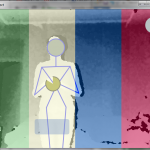
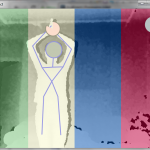
Photos:
-
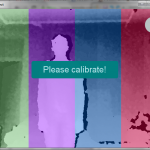
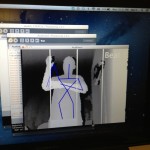
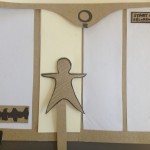
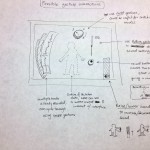
- Calibration notification at the very beginning.
-
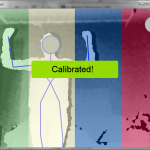
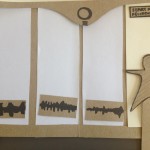
- User skeleton detected and kinect calibrated. Message displayed.
-
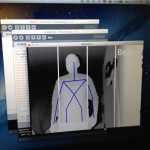
- Recording gesture causes a blue loading circle.
-
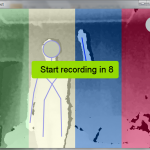
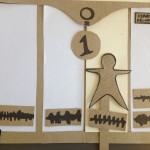
- Once the loading circle fills up, notification to prepare to record.
-
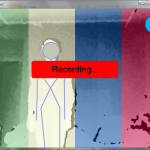
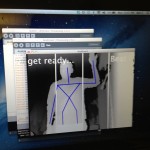
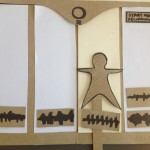
- Currently recording message!
-
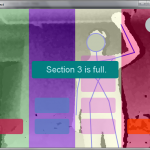
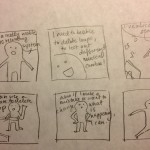
- If user attempts to add more than four loops per section, message is displayed.
-
- Delete gesture causes green loading circle to appear.
-
- Delete column gesture causes pink loading circle to appear.
4. BULLETED LIST OF CHANGES
-
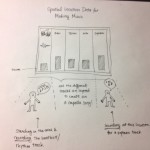
Blocks added to visually indicate the number of loops in each column: this is easier to read than a number in each column and provides better visual indication of the structure and layering of loops across the sections.
-
More beautiful and colorful UI: since we couldn’t get the openGL to run on Processing without distorting our loop recording timing, we just changed the UI using bare Processing to have a more visually-engaging prototype. Each section is a different color (green, purple, blue, and red), all the loop blocks are different colors between columns, beat count is more visible (a complaint from user testing!), and messages displayed clearly and colorfully. We kept in mind conventional recording colors, so the “Begin recording in…” is green and the “Recording!” message is in red.
-
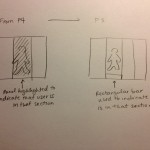
More prominent highlighting of the current section: Since some users needed additional guidance to figure out the fundamental structure of recording different parts in different sections so that each part can be edited or changed separately, we indicate the current section the user is in much more clearly by highlighting the entire column on screen instead of providing a small tab on the bottom.
-
More onscreen visual cues: message notifying user to calibrate, message notifying when user has reached maximum number of loops in a column (4 loops maximum) , count down to the next loop recording, etc. We pop up a prominent and visually consistent notification in the middle of the screen that is easy to read and provides immediate feedback.
-
Better gesture recognition with microphone in hand: the delete loop and begin recording gestures were both modified in order to be easier to do while holding a microphone; the delete loop gesture was entirely changed to be more intuitive and easy to perform with a mic while the begin recording gesture received a few code tweaks to prevent false positives.
-
A “delete column” gesture: during the demo, we noticed that people felt it was tedious when they were deleting repeatedly to clear a column. This gesture makes it faster and easier to delete all loops in the section rather than one by one.
-
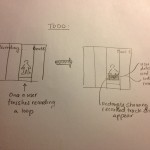
Gesture loading indicators: one problem we noticed during user testing for P6 was that users often didn’t know if the gestures were being recognized. To make this clear, we based our UI fix off many Kinect games that exist. When a command gesture is recognized (record/delete/delete-column), a small circle starts filling up on the user’s hand which started the command. Once the circle fills up completely, then the command executes. This ensures that users aren’t accidentally causing gestures (since they have to hold the pose for 1-2 seconds) and notifies the user that the Kinect recognizes their command. Each loading circle is different colors for clarity and differentiation between commads.
5. HOW AND WHY YOUR GOALS/DESIGN EVOLVED
The original concept for this project was much more complex. Over the course of development and testing, the specification was drastically simplified — coincidentally making development simpler, but more importantly, reaching our target audience more effectively. The original idea was to create a gesture based system, that enables highly complex music creation and manipulation intended for both live performance and recording. With some testing, we discovered that what we really should create a tool for those with little or no music production experience. For those with experience, there are hugely complex systems that offer all the detailed functionality needed. However, there are a large number of musicians who don’t even want to worry about music production at the level of Garageband; these may be very talented musicians who want to use loops and effects, but they may not be interested enough in the technical side of music production to go learn any specific piece of software or hardware. We decided that AcaKinect would slot in at the very bottom of this technological chain: simple enough to pick up and use immediately, and yet fun and flexible enough to retain users and potentially allow them to develop an interest in learning more complex music production tools.
We also realized that the format does not particularly suit recording well; if a user has progressed to the point of wanting to record, edit, and polish these creations, there are a huge number of software loopers available that offer much more flexibility, as previously mentioned; in addition, more experienced musicians who are looking to produce a record will probably turn to a full-fledged Digital Audio Workstation that allows maximum control at the cost of a rather higher learning curve. Thus, we see this as an experimental tool. One tester, who is the music director for an a cappella group on campus, commonly uses a midi keyboard for just this purpose; when arranging a piece for a cappella, he writes down each part and then plays them together on a keyboard to see how they sound. In these cases, it may be easier and more flexible to just test out these parts using AcaKinect, encouraging more exploration and experimentation. To that end, we pared down the specification to the bare minimum needed to provide a flexible looping environment with spatial awareness (columns) to suggest to the user how a piece of music might be structured. There are only two primary functions – record and delete – so the user is not confronted with anything approaching “mixing board” levels of complexity. The division into four sections, and the physical requirement of moving left and right in order to record in each section, suggests a natural split in what to record in each section; users naturally choose to record all percussive sounds in one, all of the bassline in a second, and then maybe a more prominent harmony in a third. This sets them up well for moving on to more complex musical production tools, where structuring loops and tracks in a hierarchy is very important while organizing, say, twenty tracks all at once.
6. CRITICAL EVALUATION OF PROJECT
We believe that with further work and development, this could be a viable and useful real-world system that fills a possible gap in the market that has never really been touched. We’ve already discussed how, in terms of simplicity and feature set, AcaKinect would be slotting in under all the music production software currently available; what we haven’t really covered is the opposite end of the music spectrum, which is currently occupied by games like Rock Band and Guitar Hero. These games do introduce a musical element in the form of rhythmic competence (and in the case of Rock Band, fairly lenient vocal pitch competence), but fundamentally the music is still generated by the game, and the user just kind of tags along for the ride. The goal for AcaKinect with further iteration is a product that is almost as game-like as Rock Band; a fun system for testing out loops and riffs in the living room, and a useful tool for playing with sound and prototyping arrangements. It’s important that AcaKinect is seen as more of an exploratory product; unlike working in a DAW where the user may have a very good idea what she wants to create, AcaKinect would be a live prototyping tool that enables a lot of exploration and iteration of various sounds and harmonies. The simplicity of the controls and the lack of any real learning curve only helps to make that a fairly easy task.
The application space, as far as music production (and even more loosely, music interaction) tools go, is giant, and spans all the way from Rock Band to Logic Pro. There is no real point going for new or extra functionality; whatever arcane feature you’re looking for, it probably already exists, or if it doesn’t, it would probably be best suited to a Logic plugin rather than a whole new product, since the pros are the ones looking for new features. Those who are intimidated by the sheer number of buttons and knobs and controls in a typical piece of music software or hardware seem to much prefer a great simplification of the whole music production process (as would make sense), and we found that there is a big opening in this space for software that can be picked up and used immediately by any musician, no matter whether she has technical background in music production or not.
7. HOW WE MIGHT MOVE FORWARD WITH THE PROJECT
There are still quite a few implementation challenges involved in making this product one that is truly easy to use for any musician. Firstly, given its intended use as a fun and exploratory product in the living room, it’s a little problematic that it only works for one person. If, say, a family is playing with it, it would be much better to allow several people to be recognized at once (even if only one loop is recorded at a time), so that several people may collaborate on a project. SimpleOpenNI is capable of tracking limbs for two people, which is generally what Kinects are used for in Xbox games as well; we could thus implement two people without too much extra trouble, but to do more may be difficult. Secondly, this prototype uses Processing and Minim for ease of coding, testing, and iteration; however, since Minim really wasn’t designed for low-latency audio looping, it has certain issues with timing and tempo for which we have implemented hacks to “get around.” However, in an actual polished product, latency would have to be much lower and the rhythm would have to be much more solid; to that end, a more robust audio framework (hooking directly into Apple’s CoreAudio libraries, for example) would allow us to achieve much better results.
Finally, there’s the issue of physical setup; the user needs to be able to hook up a microphone and play sound out of speakers such that the balance between the current vocal and the sound from the speakers is about right, but without triggering any feedback or recording the speaker output back in the microphone. There are advanced noise-cancellation techniques that can be implemented to signal-process away the feedback, but these will sometimes add artifacts to the recording; one way is just to require that the user use a highly directional microphone with a sharp signal strength falloff, so as to reduce the chance of feedback. An on-screen notification that informs the user of feedback and turns down the levels of the speakers when feedback occurs might also be convenient. Alternate setups may also be a good thing to test; a wireless clip-on mic of the sort used on stage during live performances, for example, may prove slightly more expensive, but it may let users feel less awkward and make gestures easier.
8. LINK TO SOURCE CODE
AcaKinect Source Code (.zip file)
9. THIRD-PARTY CODE USED
- Minim [link: http://code.compartmental.net/tools/minim/]: Included in Processing. We used Minim as the framework for all audio recording and playback functionality
- SimpleOpenNI [link: http://code.google.com/p/simple-openni/]: For cross-platform Kinect usage. Used for all Kinect input processing.
10. LINKS TO PRINTED MATERIALS