
Group 7, Team Colonial
David, John, Horia
Project Summary
The PostureParrot helps users maintain good back posture while sitting.
Working Prototype Tasks
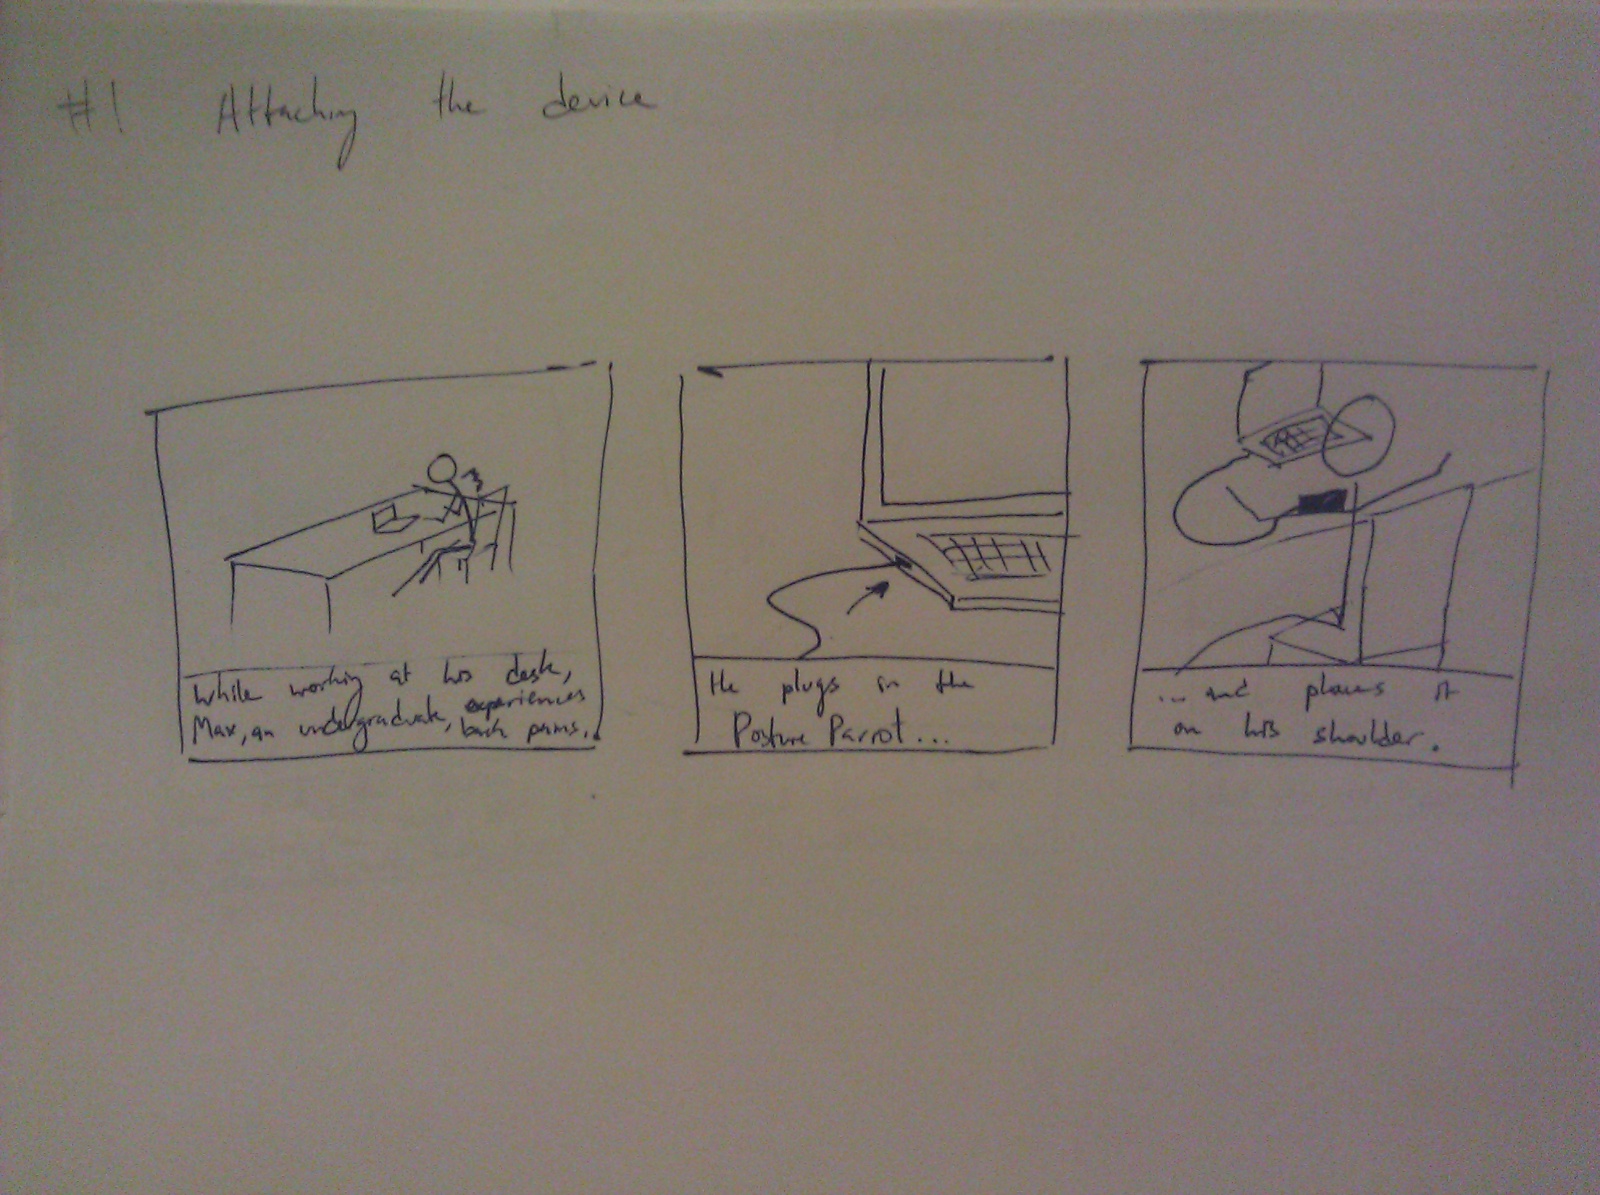
Task 1 (Easy): Putting the posture parrot on
At this point, the PostureParrot is connected to a USB port for power. The user puts the connected device onto the top of their shoulder of choice. The device will stick due to its adhesive underside.
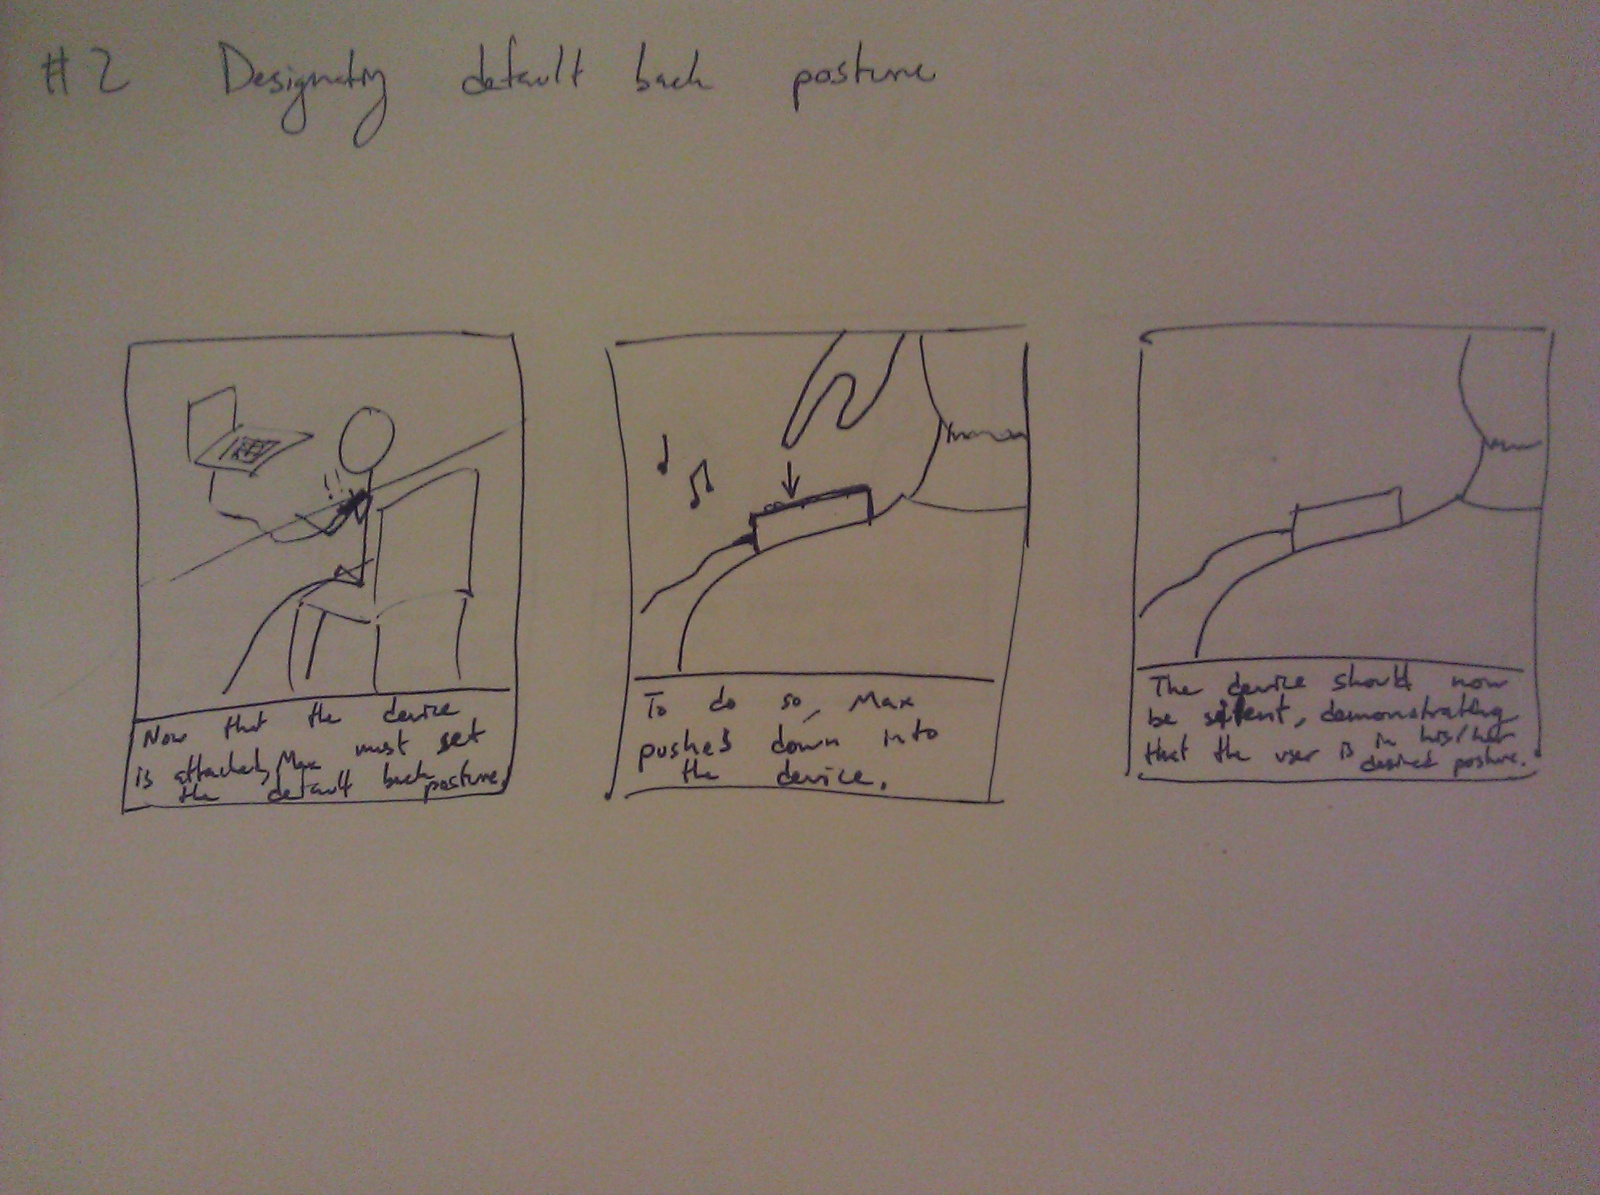
Task 2 (Medium): Setting the default posture
The user should position himself so that he has good back posture. Then he should press the top of the device. This will set the default back posture.
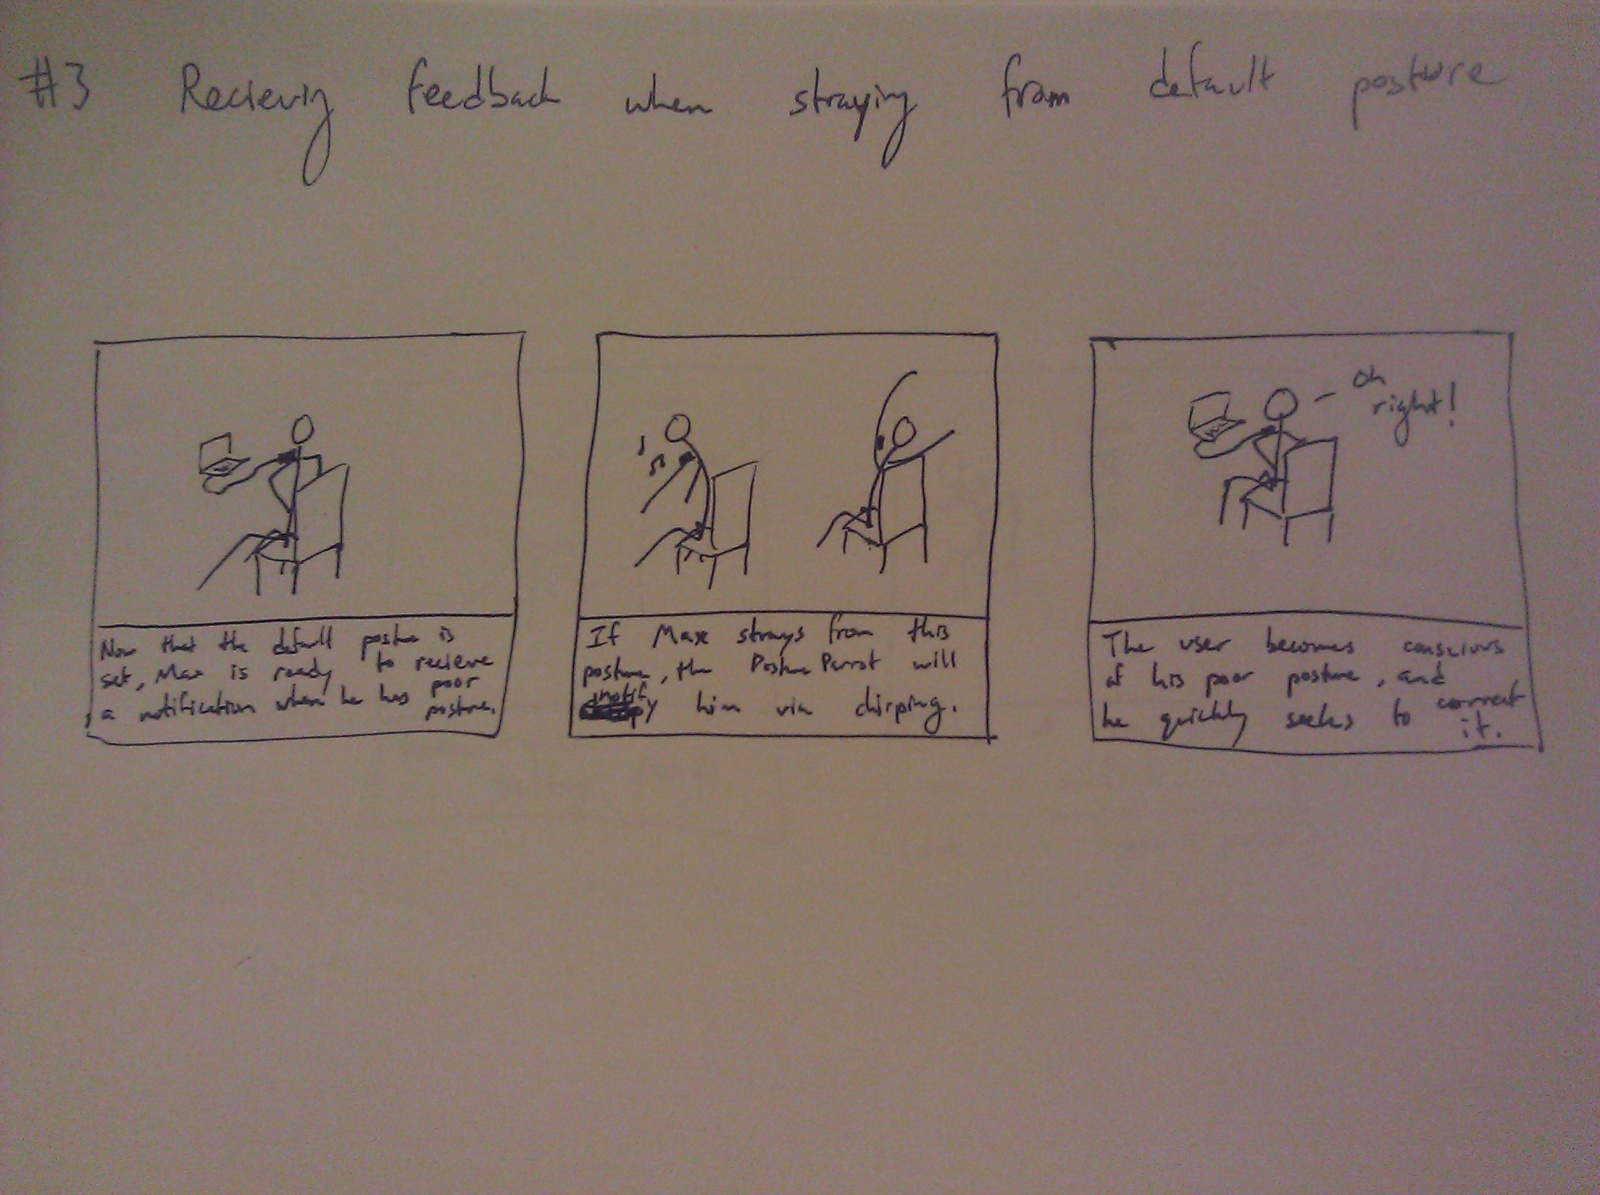
Task 3 (Hard): Adjusting back posture based on device feedback
After the user has set a default back posture, the device will make a noise when the user deviates too far from it. The user must correct their back posture back to the default to make the noise stop.
Choice of Tasks
The goals of these three tasks are the same as in P4. However, there are a few differences in how a user must accomplish these goals. For example, in task 1 the user must put the device on differently due to its new design. In task 2, the user now sets the default back posture through the button that covers the entire top of the device, a simpler design that prevents the user from having to open an application. In task 3, the user still reacts to the feedback given by the device, but this time it is done through the sound given off by the PostureParrot, not a vibration. In general, our adjustment of tasks was driven by the simplification of our product, which eliminated the need for a desktop application.
Revised Interface Design
As a result of P4, we made several changes to how the device is worn. We originally constructed a device that traveled the length of the spine and registered whether or not the user changed his or her posture through a change in flexible, resistive fabrics. One problem with this original design is that it could not accommodate users with extremely small or large back sizes, which we discovered during our paper prototype phase. Additionally, we found that our resistive fabrics were insufficient for creating our device, so we were left in a position that required us to entirely rethink our approach to the problem. Our revised, alternative solution uses an accelerometer to detect changes in posture, and rather than notifying users with a vibrating motor, we decided to notify them auditorily through a piezo buzzer, which requires significantly less weight. This device is placed on the user’s shoulder, rather than the user’s back, and thus accommodates for a wider range of user body types.
Another alteration we made for our revised interface was to remove the data visualization GUI that displayed back posture deviance over time. Through our user tests, we found that plotting the deviance in posture over time and differentiating areas of the back were not contributing a great deal of useful information, and that the benefits of having the device beep was sufficient for notifying the user of poor posture. Through this simplification process, we lost a way for the user to set their default back posture; to account for this, we embedded a reset button in the device itself that provided the same functionality. Overall, these various changes allowed for a more simplified device that could accommodate a wider breadth of users.
Overview and Discussion
The implemented functionality is displayed in Video #1 below. The user can attach the device to a shoulder of their choice, press the top of the device to set a default posture and then reap the benefits of automatic feedback during back posture deviations. The user can always set a new default back posture by pressing the top of the device. In Image #1 you can see the accelerometer and piezo sensor, providing posture input and sound output respectively. In Image #4 you can see the final prototype, complete with colorful tape. A “user” wears the PostureParrot of their choice in Image #5.
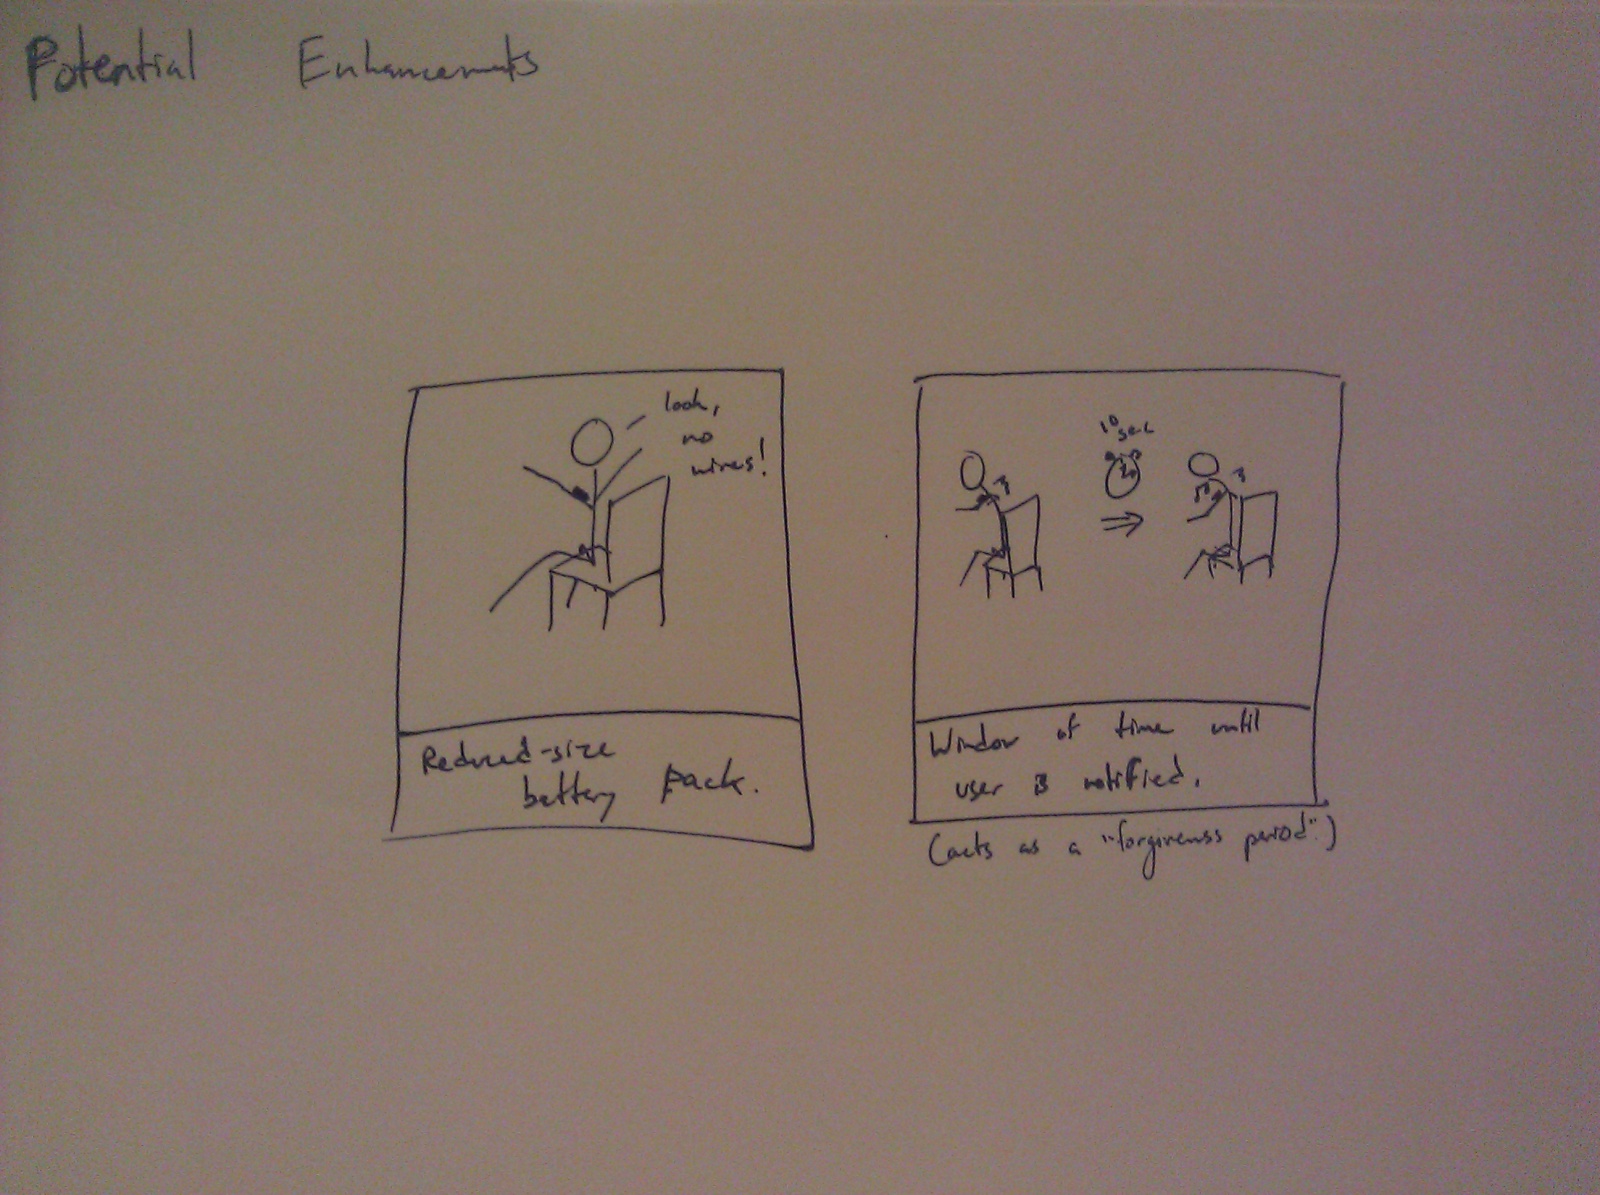
In order to make our prototype work, we needed to attach tape to the bottom of the device so that it would stick to the user’s shoulder. Hopefully, this can be replaced with a more permanent solution in the future. Additionally, we would like to make the PostureParrot a wireless product. Currently, our battery options would more than double the weight of the device. We’re going to have to do more research to find a good solution for power if we want to get rid of the need for a USB cable.
To connect the analog textile press button, we modeled some of our code off of a tutorial from plugandwear.com, where we purchased the button. The code is posted below.
int softPot = 0; // this line selects the input pin a0 for the sensor
int ledPin = 13; // this line selects the pin 13 for the LED output
int tempPot = 0; // variable to store the value coming from the sensor

void setup() {
  // this line declares the ledPin as an OUTPUT:
  pinMode(ledPin, OUTPUT);
}

void loop() {
  // read the value from the soft potentiometer
  tempPot = analogRead(softPot);
  // it turns the LED on
  digitalWrite(ledPin, HIGH);
  // stop the program for  milliseconds:
  delay(tempPot);
  // turn the LED off:
  digitalWrite(ledPin, LOW);
  // stop the program for for  milliseconds:
  delay(tempPot);
}
Video and Images
Video #1 (A video of a user completing all three tasks. Listen carefully for PostureParrot feedback.)
Image #1
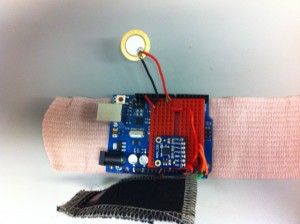
Underlying circuitry, including an arduino, accelerometer, piezo sensor, textile analog pressure sensor and wiring.
Image #2
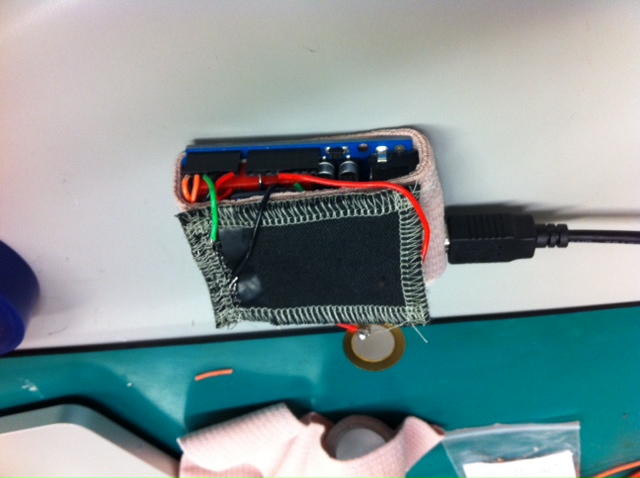
Circuitry enclosed by elastic wrap and textile sensor.
Image #3
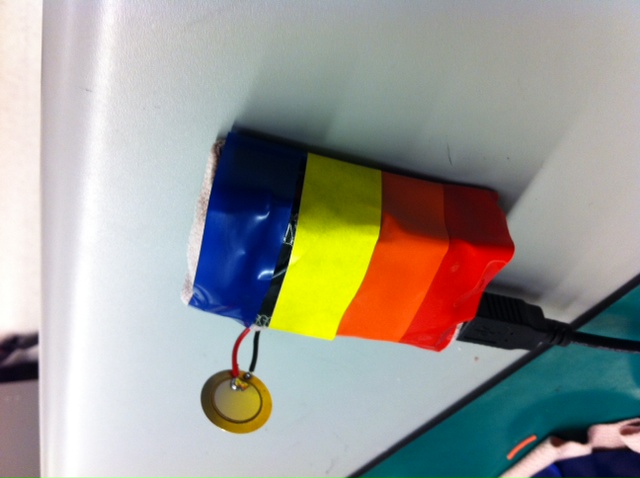
Device wrapped in colorful electric tape.
Image #4
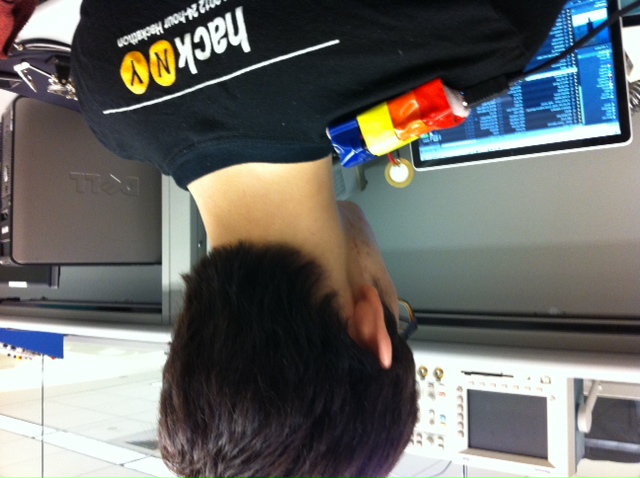
PostureParrot on the left shoulder of a “user”.