Biblio-File Final Post

a. Group information

Group num­ber: 18
Group name: %eiip
Erica (eportnoy@), Mario (mmcgil@), Bon­nie (bmeisenm@), Valya (vbarboy@)

b. Project description

Our project is a smart book­shelf sys­tem that keeps track of which books are in it.

c. Previous blog posts

P1: https://blogs.princeton.edu/humancomputerinterface/2013/02/19/biblio-file/
P2: https://blogs.princeton.edu/humancomputerinterface/2013/03/11/eiip-p2-interviews/
P3: https://blogs.princeton.edu/humancomputerinterface/2013/03/27/eiip-p3-low-fidelity-prototype/
P4: https://blogs.princeton.edu/humancomputerinterface/2013/04/07/eiip-p4-usability-testing/
P5: https://blogs.princeton.edu/humancomputerinterface/2013/04/22/biblio-file-p5/
P6: https://blogs.princeton.edu/humancomputerinterface/2013/05/06/biblio-file-p6/

d. Video

Here is a video demonstration of our final project and its capabilities.

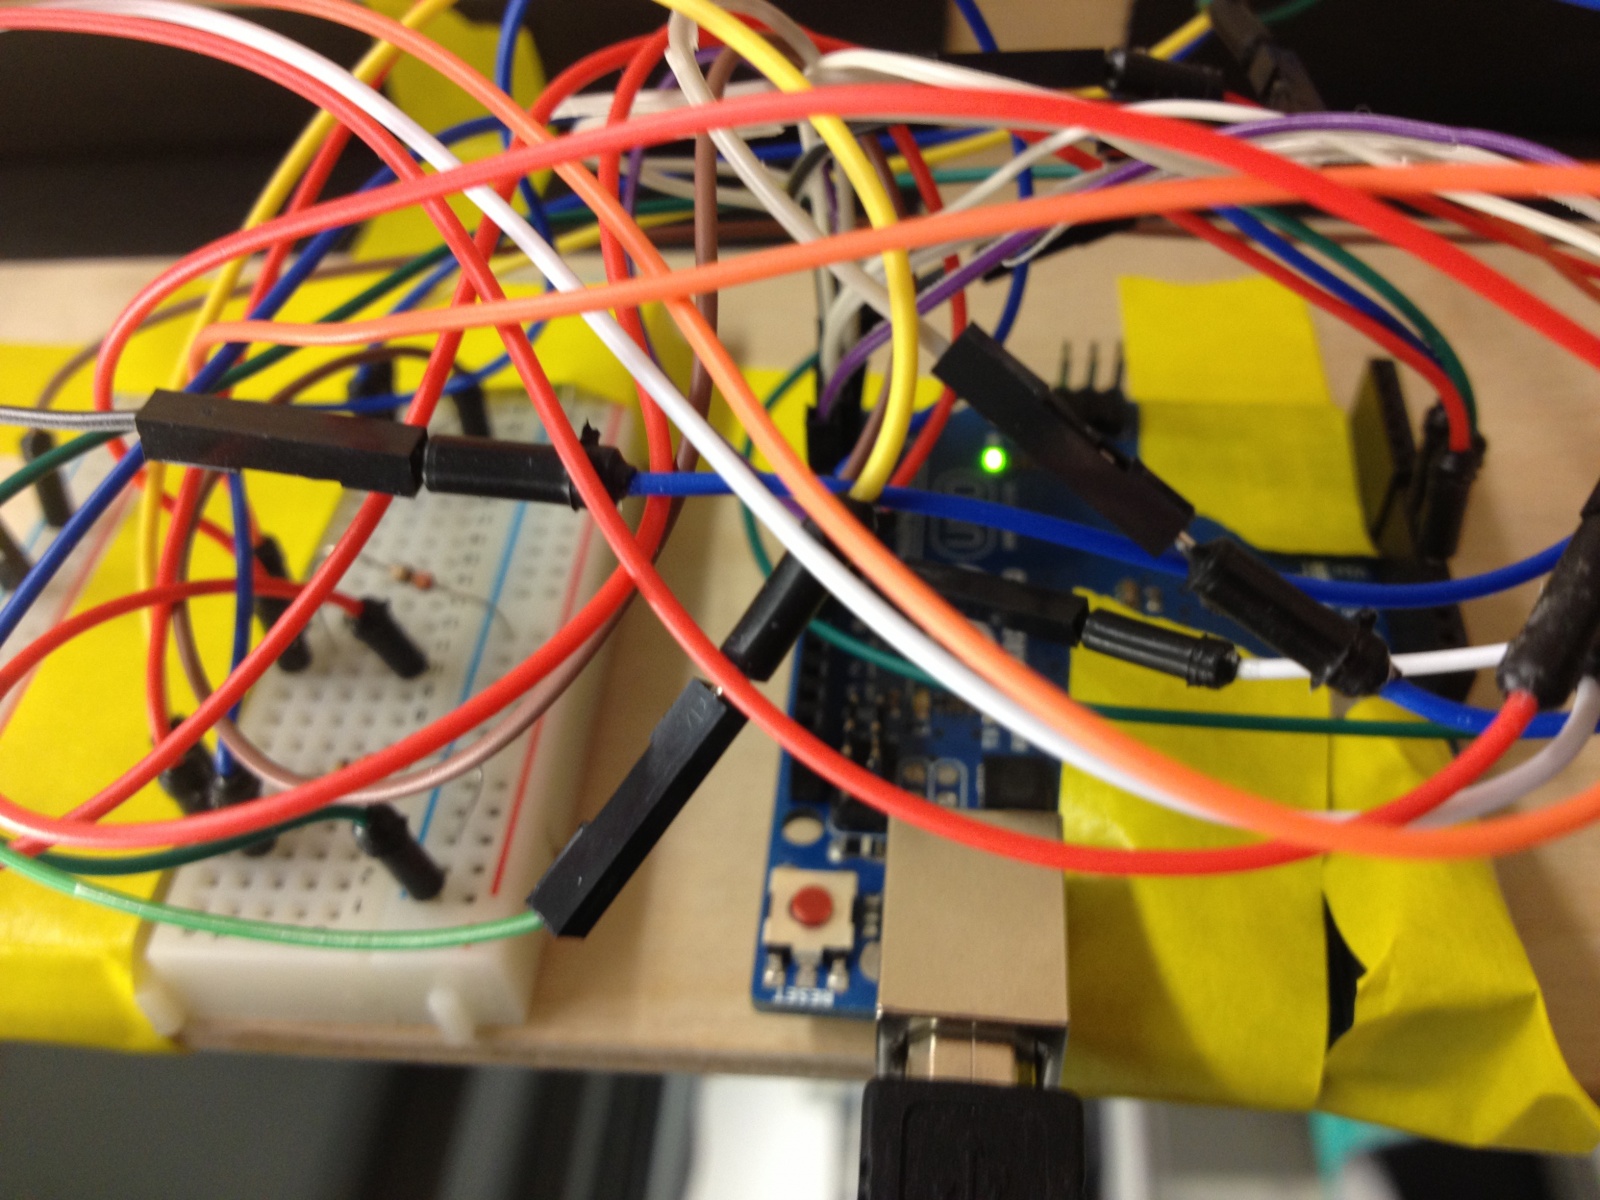
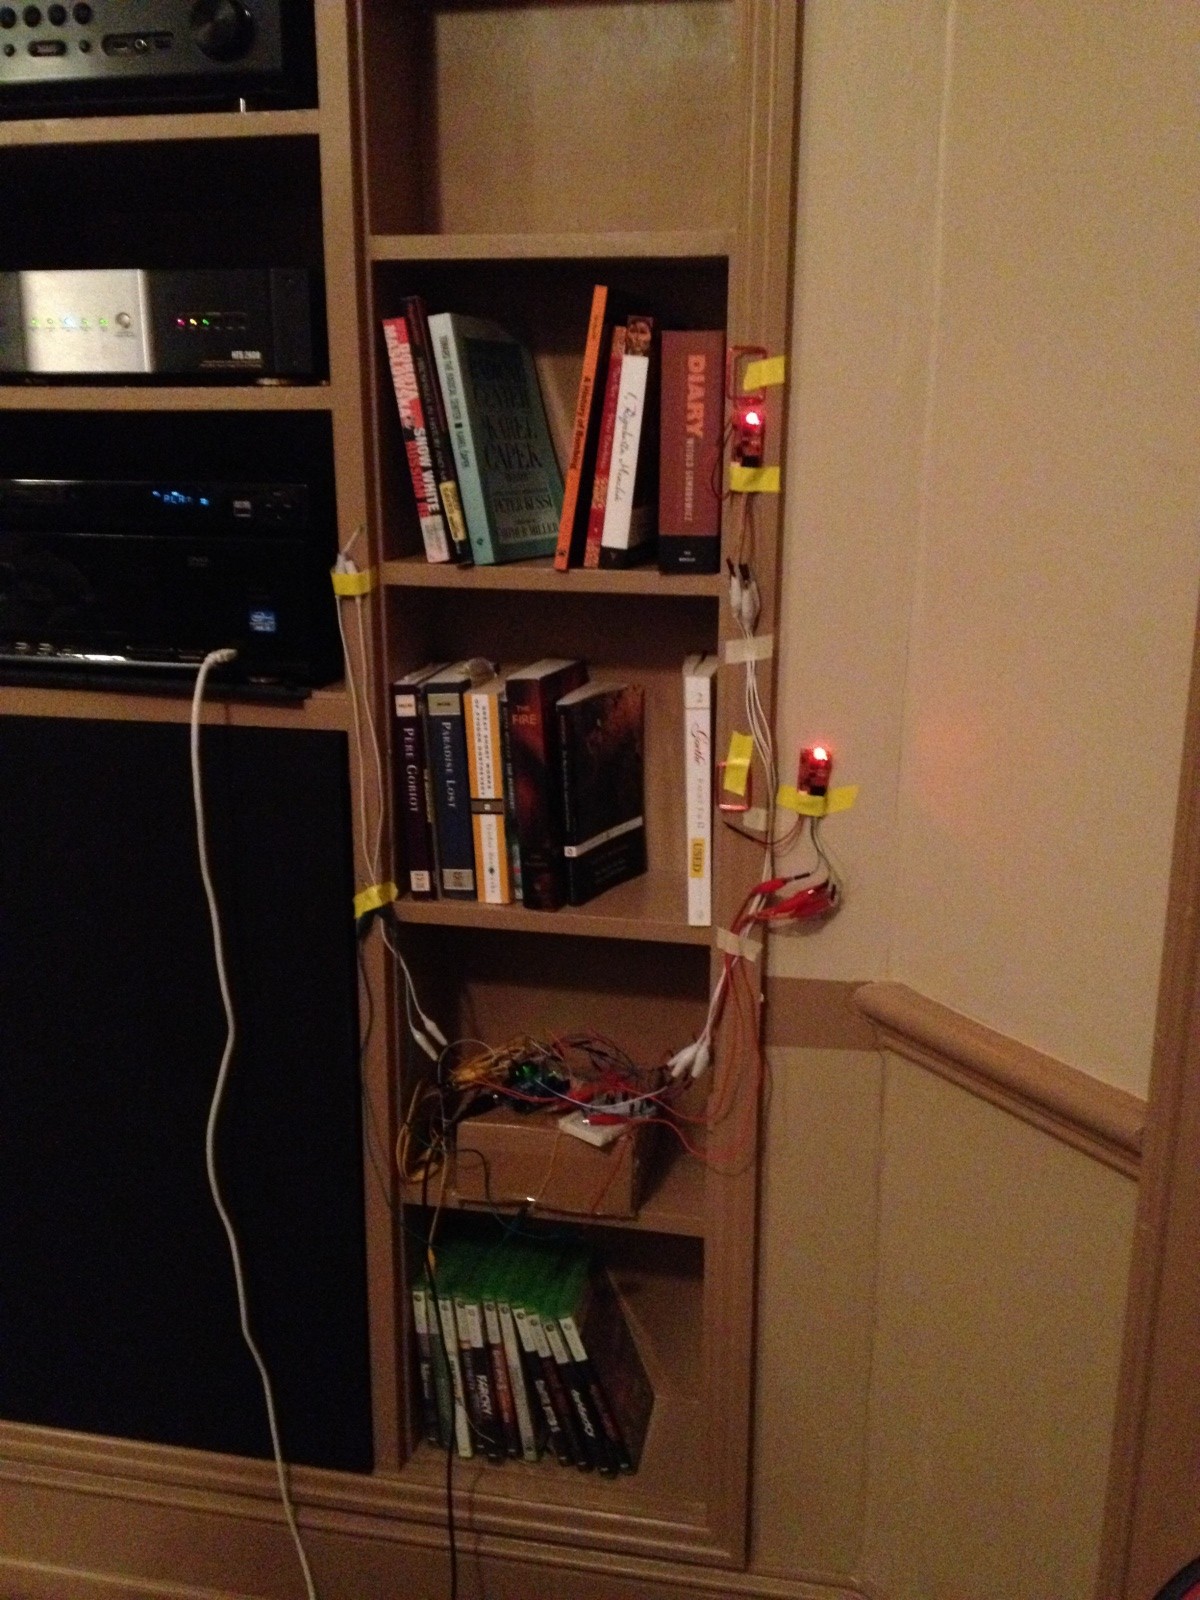
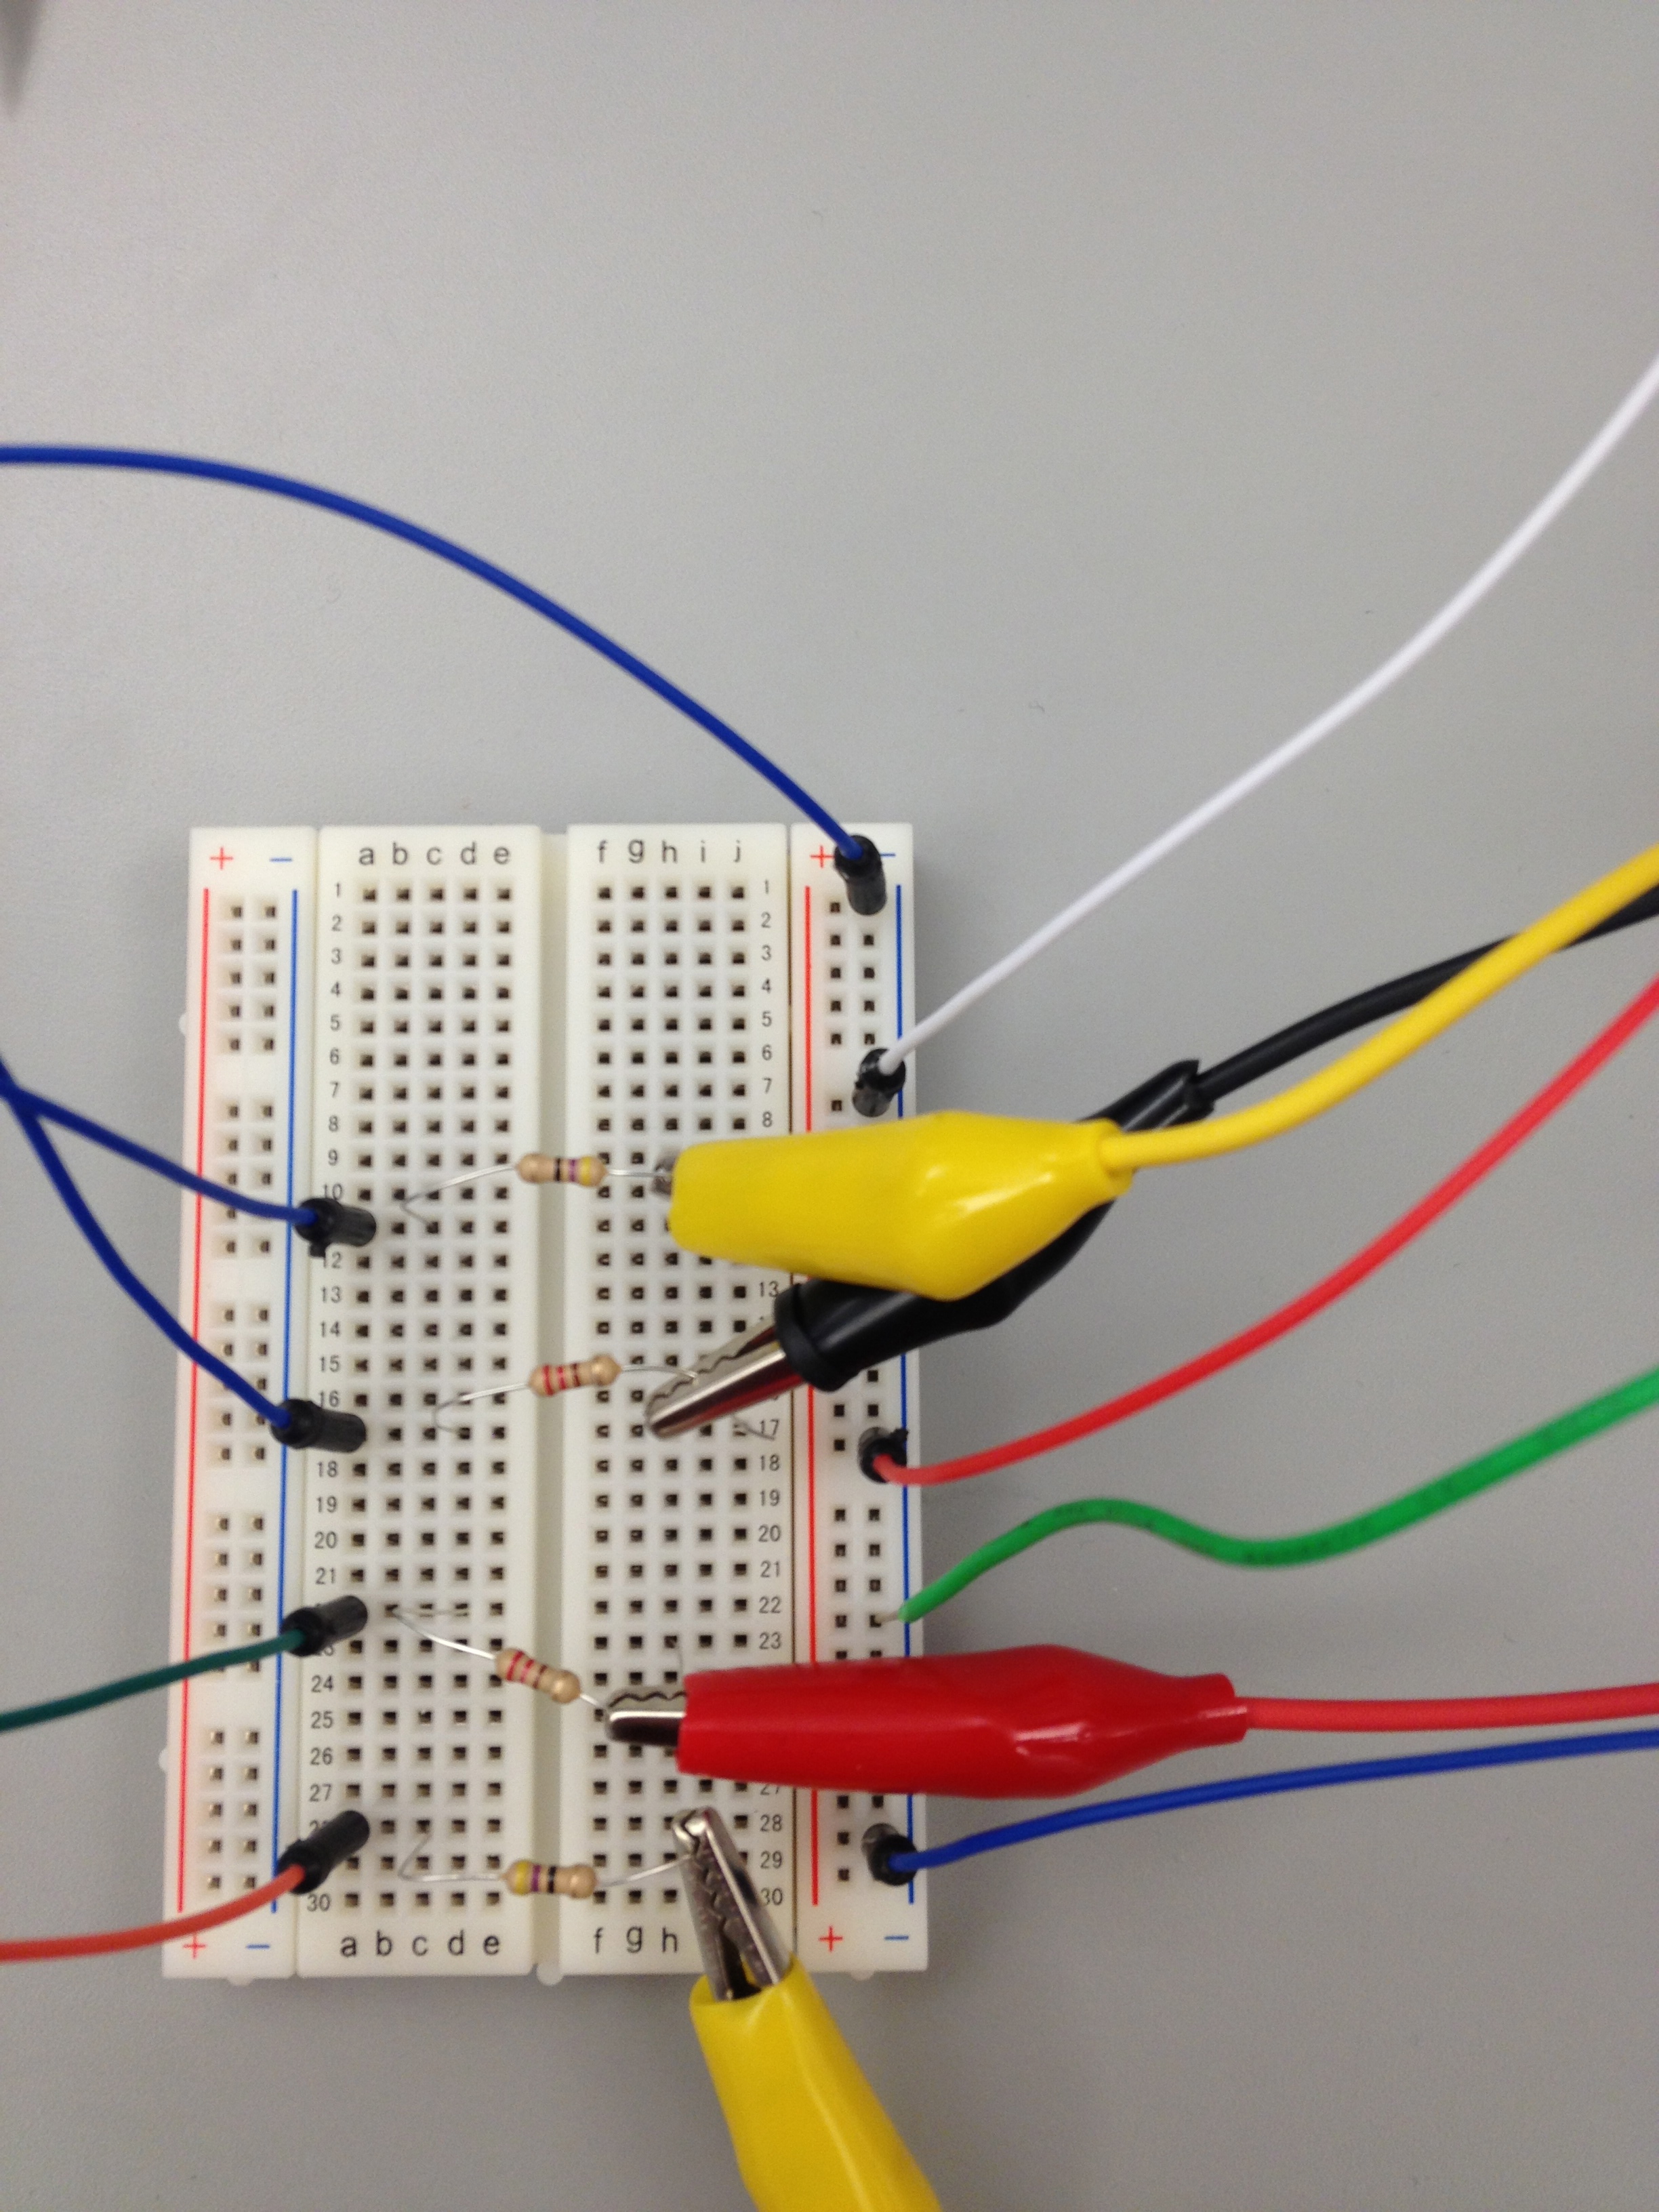
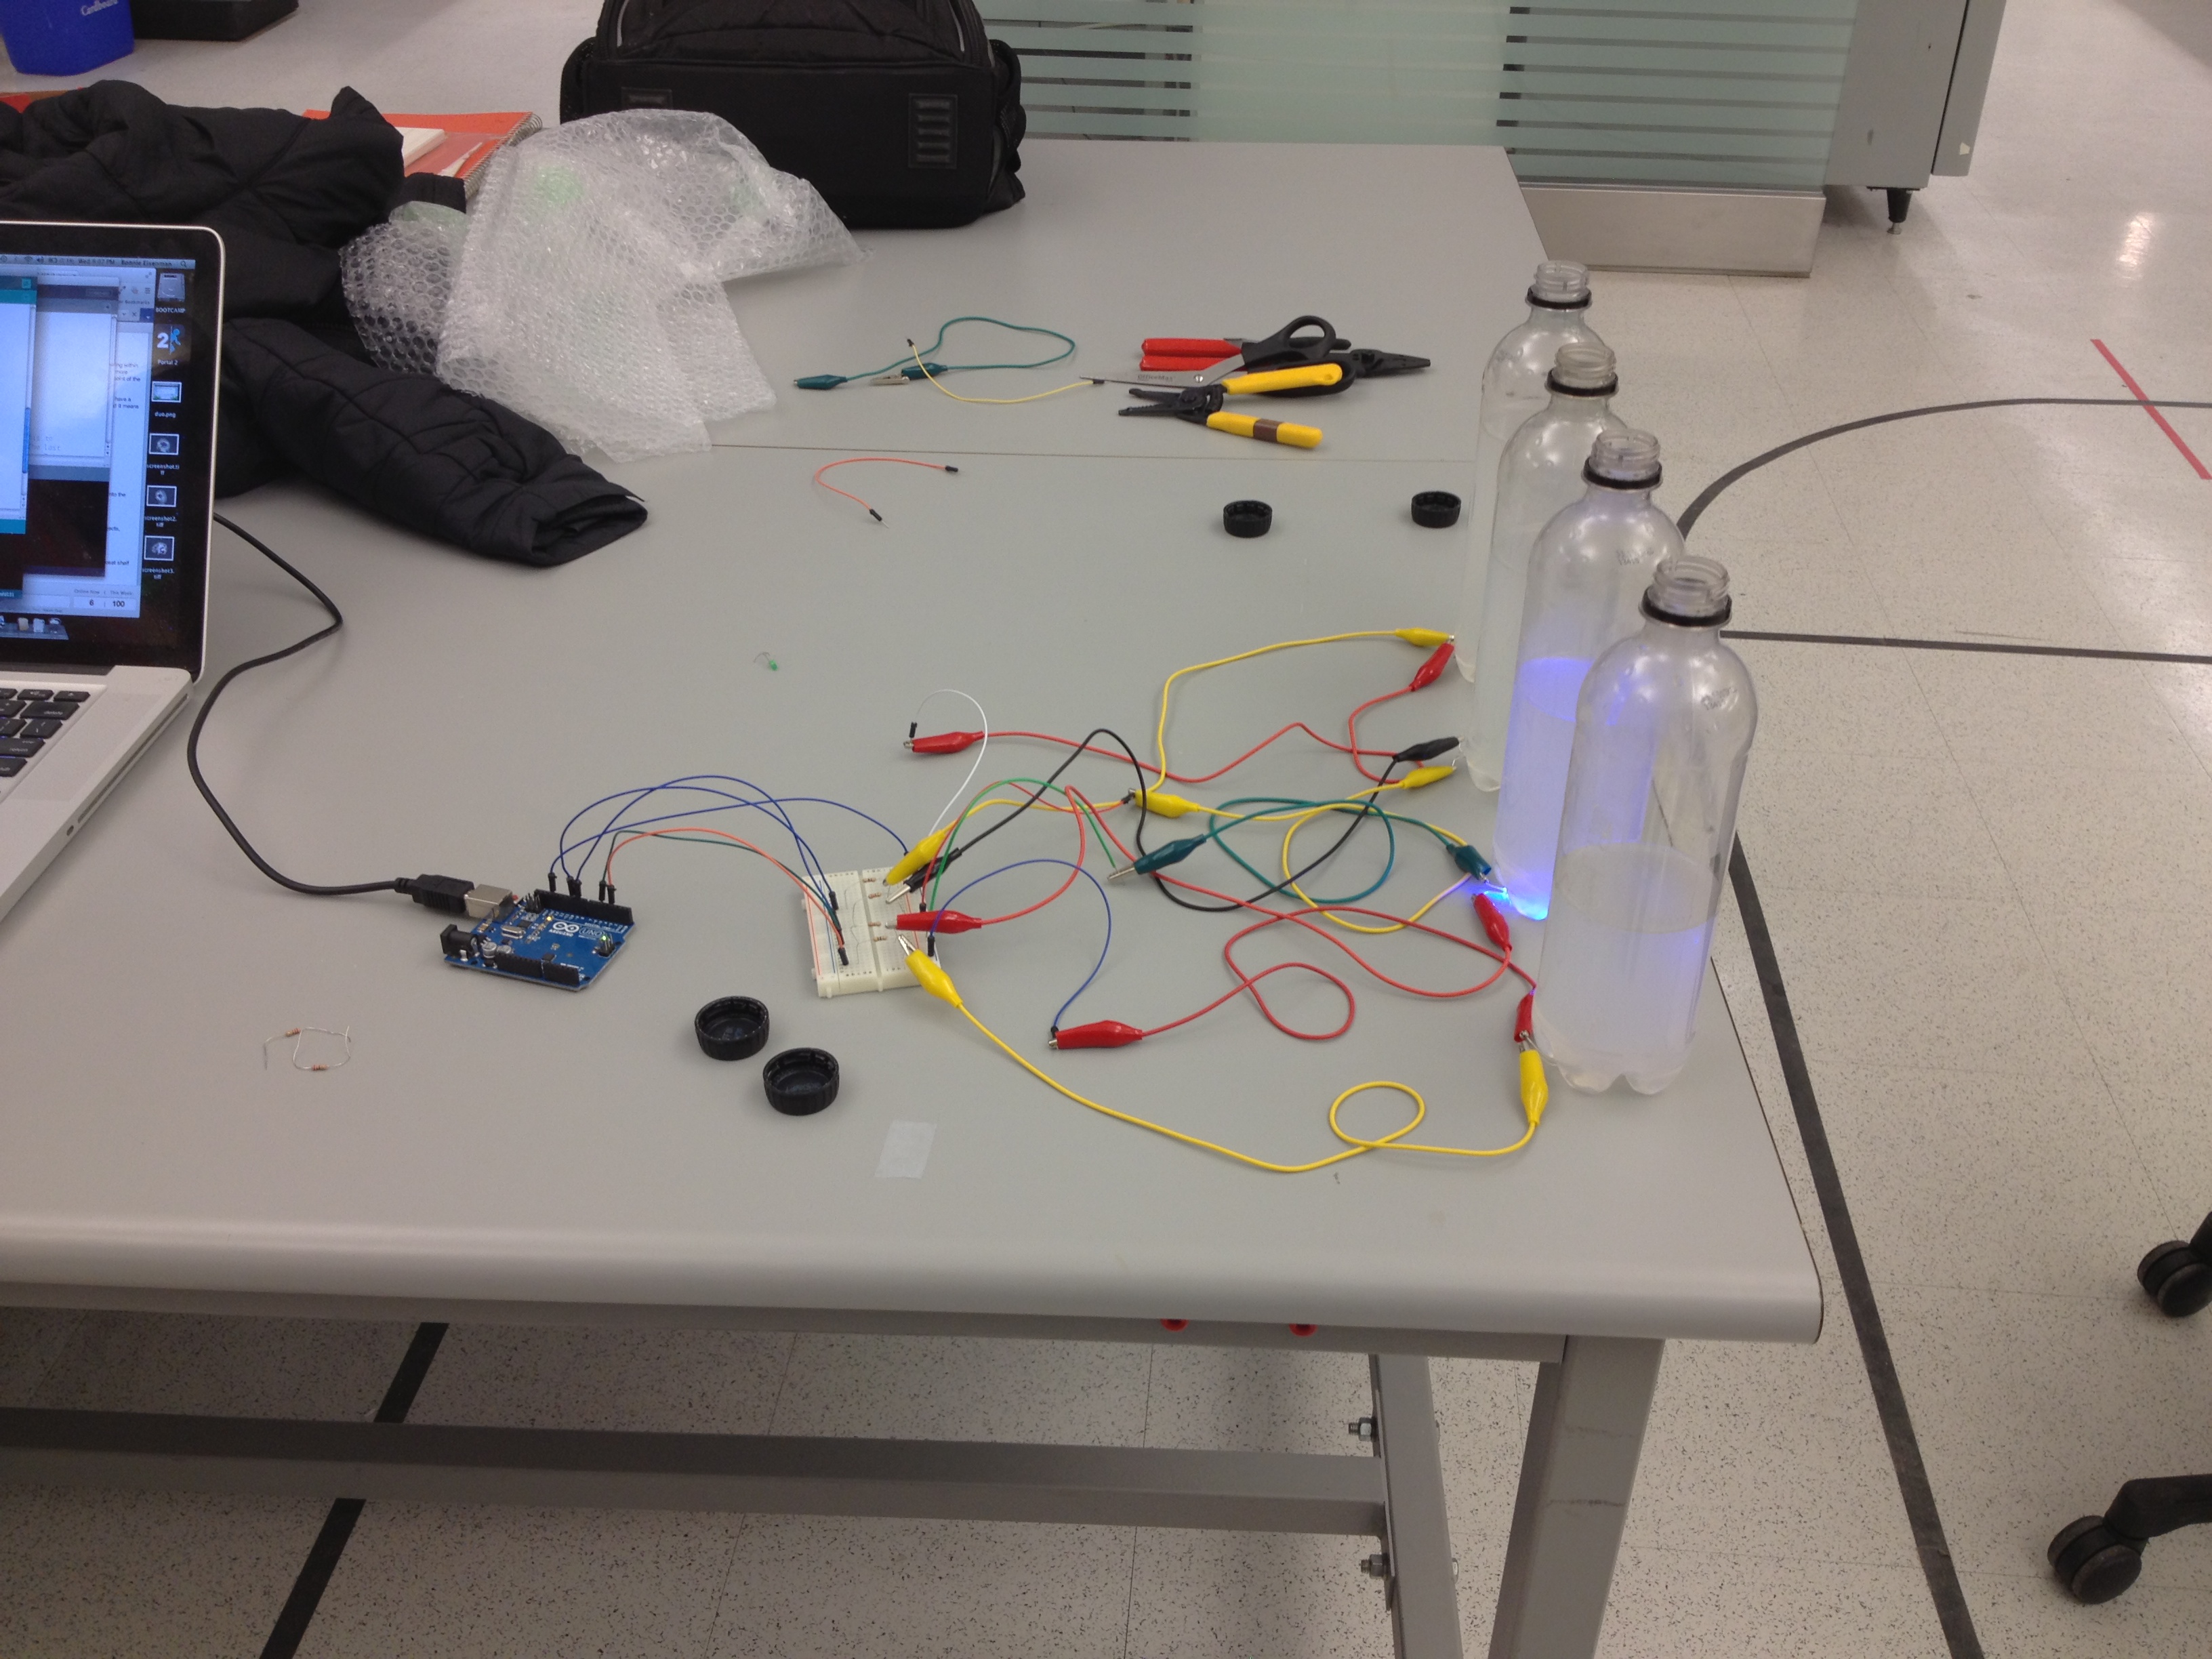
Our final system, wired and ready to go!

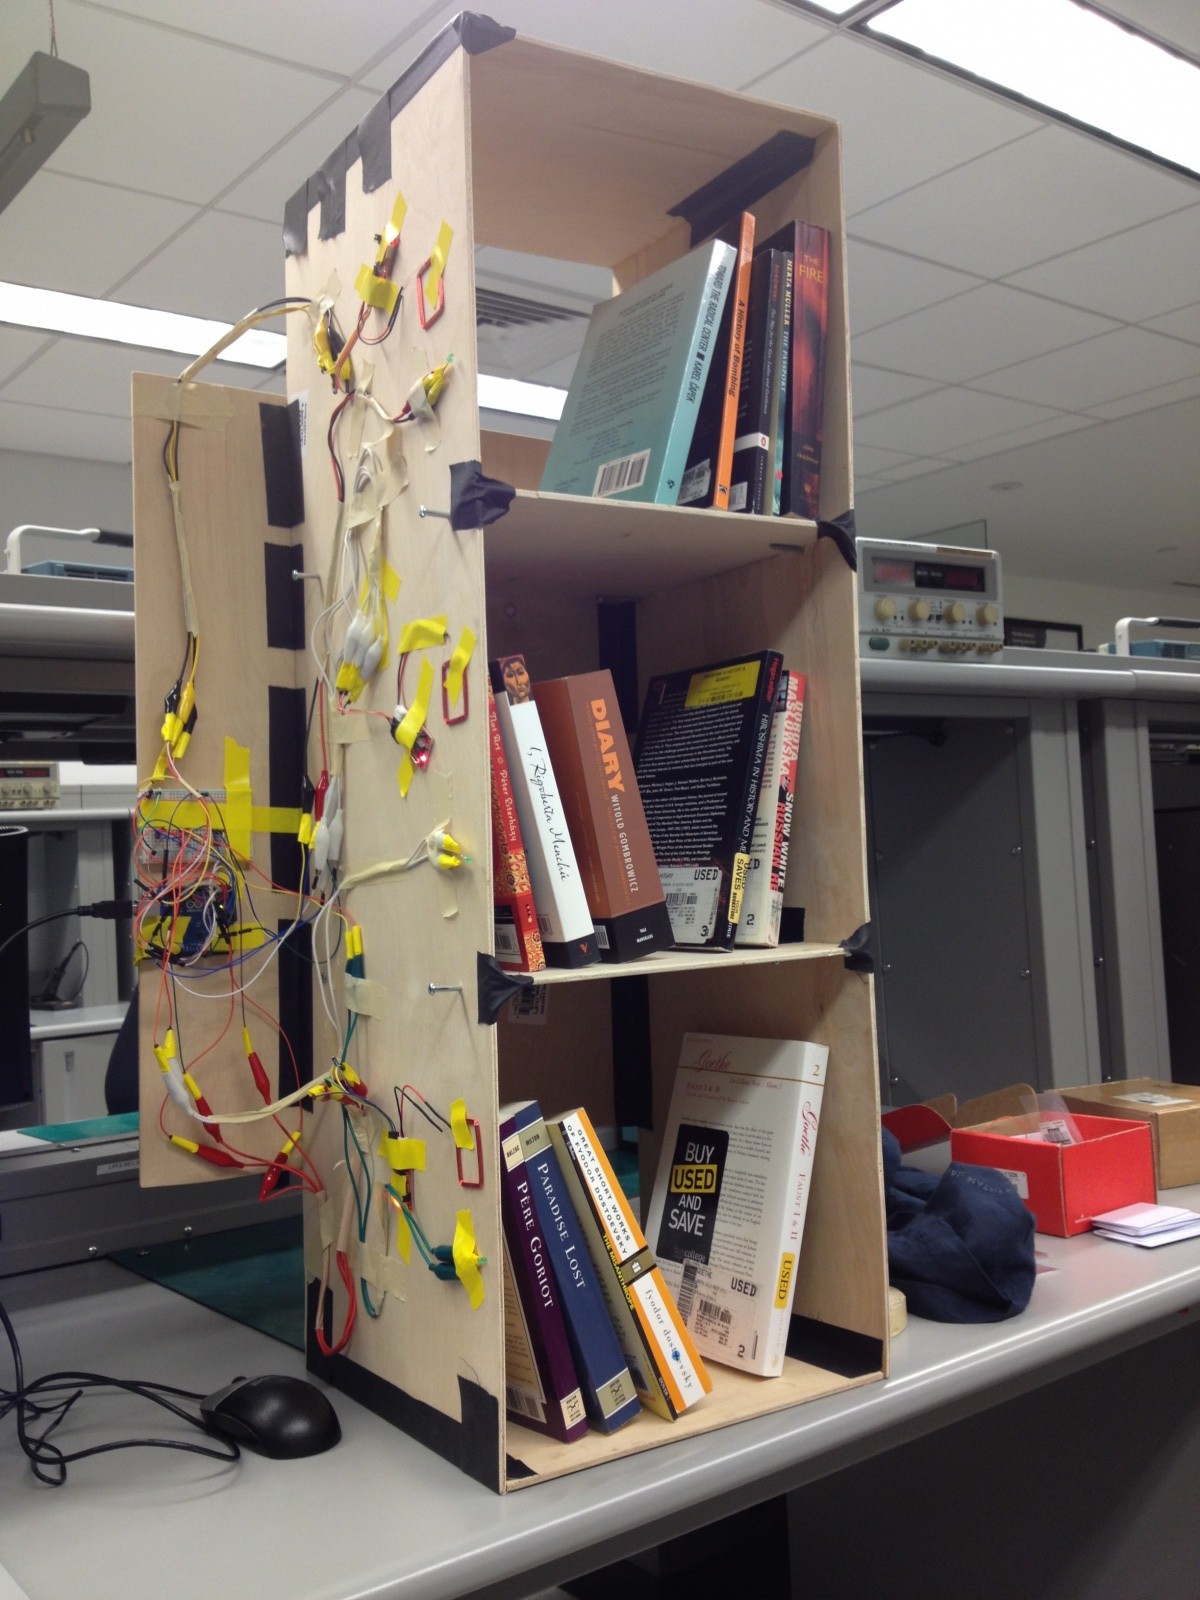
This is our entire bookshelf, stocked with books, and ready to use.

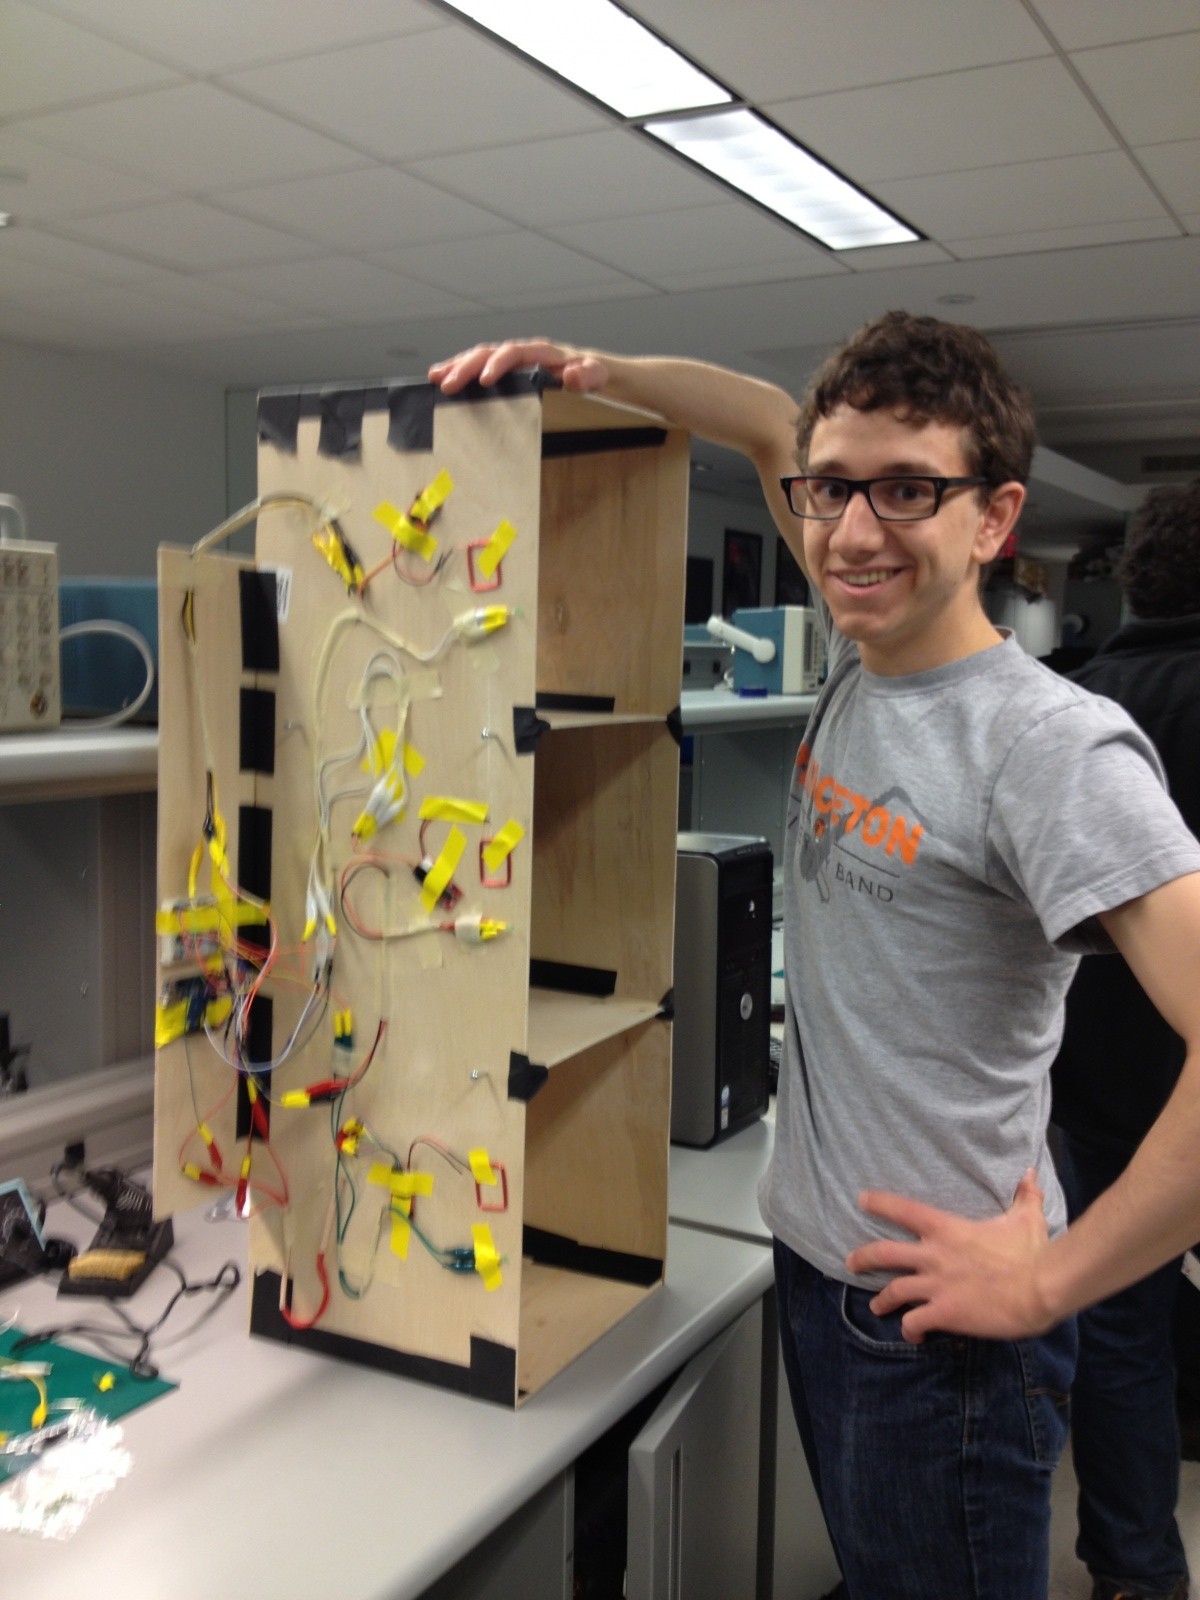
Mario with Biblio-File. Success!!

e. List of changes since P6

  • We made the tag-query code on the Arduino interruptible, so that we can command a shelf LED to light up without waiting for the query to finish. This allows the shelf to respond more quickly to user requests to light up a shelf.
  • We were able to get the third RFID scanner working. It wasn’t working at the time of our P6 blog post, but after replacing some wires it is now functioning.
  • We cached the database to help our web application load faster.

f. How our goals and design evolved

Over the course of the semester, we revised our design to take into account the technical limitations of our hardware. For instance, we had originally envisioned having a setup in which each bookshelf’s RFID reader would statically sense the books on the shelf, and be able to report a change in the set of books it detected. This would have made the shelf somewhat more convenient to use, but it turned out to be impossible with the RFID readers we had (they had too short of a range and could only detect one ID at a time). We also added features, such as the system beeping when a book was successfully read, that gave the user more feedback, making the system more responsive. Many of these sorts of usability changes evolved from feedback from our user tests; our web-interface, especially, was refined and simplified greatly over the course of the semester, in response to tests which revealed overly complex or counterintuitive aspects of the interface.

Though our design changed greatly over the semester in response to technical limitations and user feedback, our design goals have remained basically the same: to create an intuitive, usable bookshelf to help users keep track of their books without getting in their way. The user-driven changes we made were all informed by this desire for simplicity and usability, and our final design reflects our constant pursuit of these design goals. Throughout our user tests with different iterations of our project, we found that our design goals resonated with users.

g. Critical evaluation of our project

Our final project is in some respects a success. Our user testing showed that users enjoyed interacting with it, and didn’t find the time constraints induced by the “tap-in, tap-out” system of RFID readers too annoying. We saw some exciting moments of “joy” as our users realized how the bookshelf worked, which was very gratifying. However, we’d be worried about the ability to scale our current system, and about the impacts of long-term use, which we weren’t able to effectively user-test. Because users have to tap in and tap out, it’s likely that over time, the database would become incomplete, and if the user ever decides not to wait to tap out books it’s hard for the database to recover enough to be useful again in the future.  Still, with further iterations, more involved user testing, and more exploration of available technologies, we think that our product definitely has the potential to become a useful real-world item.

From our project, we’ve learned a lot about the constraints of this space. Users we interviewed have a very emotional attachment to their books, which spurs dislike of systems that force constraints on them. Additionally, we’ve learned a lot about the technical constraints of RFID chips and scanners. Originally we believed that scanners would have a longer range and, more critically, that we would be able to read multiple RFID tags if multiple tags were present in the scanner range. We’ve since found that both these assumptions, at least when dealing with consumer-priced RFID tags and scanners, are false. Implementing the scanning software was also an interesting exercise; for example, we learned that we needed to power-cycle the RFID scanners in order for tag reading to effectively work.

h. Moving forward

Our first step in moving forward with this system would be to invest in higher-quality RFID readers; as mentioned above, readers that could passively sense the presence of multiple books at a longer range (say, about two feet) would make the system easier to use by eliminating the need to tap in and tap out. If we make this critical improvement, it will be necessary to conduct further user-testing to see how this change affects the system’s overall usability, and whether it introduces unexpected usability bugs. We would also invest in a real bookshelf to replace our plywood frame; while the shelf we currently have certainly works, it’s not pretty and is somewhat fragile. Having a nicer-looking and more solid shelf is also necessary for our system to be pleasant and usable.

In conducting further usability tests, we would stick to the same general scheme and set of tasks we used in previous tests, since the key tasks and goals of our system will not have changed. The main difference would be that the tasks would involve just putting the book on the shelf or taking it off (rather than tapping in and tapping out); this is a relatively minor change.

i. Source code

Our code is stored in a git repository which can be found here. You can use this to download and view all of our source code. There is also a README, which we linked to again for your convenience.

j. Third party code

  • pic2shop: A free smartphone app and API that provided us with ISBN barcode reading.
  • Google Books API: We used this API to obtain information such as book title, author, and cover image given the ISBN number extracted with pic2shop.
  • Heroku: We did not use Heroku code per se, but this is where our web app is hosted.
  • flask: flask is a Python-based web micro-framework. We wrote our web app using flask.
  • flaskr: An example flask app (a simple blog) which served as the foundation for our web app code.
  • Twitter Bootstrap (css library) and jQuery (js library): We utilize these in the frontend for our web app.
  • redis: We use redis, a simple key-value store database, for storing book information.
  • RFID Seeedstudio Library: This library provides the basis for our RFID reading. However, it only supports a single scanner at once, so we had to make significant edits to this code.

k. Materials for demo session

Everything that we will be presenting is saved here!

Biblio-File P6

a. Group num­ber and name

Group num­ber: 18
Group name: %eiip

b. Mem­ber names

Erica (eportnoy@), Mario (mmcgil@), Bon­nie (bmeisenm@), Valya (vbarboy@)

c. Project summary

Our project is a smart book­shelf sys­tem that keeps track of which books are in it. You can see the web appli­ca­tion por­tion of our project here, and our source code here!

d. Introduction

In this user test, we evaluated both the hardware and software components of our system. We had users actually use Biblio-File to add books to their shelf, search for books (both those that were and were not on the actual shelf) and play with the system. In particular, we were testing to see whether or not our system actually made searching for books easier. To test this, we had users search for book both with and without Biblio-File. Moreover, we wanted to see if adding many books was annoying or tedious for the users, and if the delay due to RFID reading was particularly annoying or frustrating.

e. Implementation and Improvement

Our P5 post can be found here. We also made a few changes since P5, which are listed below:

  • Completed implementation of the server-client-daemon architecture – we can now user-test using only our system, without needing “Wizard-Of-Oz” simulation
  • Modified the RFID library to enable low-latency use of multiple scanners (original code didn’t support multiple scanners)
  • Alphabetized entries by title in the web app to let users scroll through books in a sensible order
  • Added magic administrative functions to help with user testing: auto-populating bookshelf, clearing database, etc.
  • Computer now beeps loudly after a sensor detects an RFID to give users feedback

f. Method

i. Participants
For our user test we chose three undergraduate students with varying levels of technical expertise. Our first tester is an engineer, who often uses technology, and was very interested in how our system worked. Our other testers were less experienced with technology as a whole, and were completely unfamiliar with the Arduino and the other tools that we used in our bookshelf. We chose them to see how intuitive our system was, and how annoying or frustrating the delays might be. People who are less familiar with these tools are also less used to delays, and will therefore have a more natural reaction to them. Similarly, people with less technical expertise are less likely to assume anything about the app, and we can therefore see how they use it, what they try to do but cannot etc.

ii. Apparatus
In order to conduct the test we used a stack of shelves in the TV room of Charter. The location might not have been optimal, because there were other people there playing video games, so there was a lot of noise and distractions. That being said, it was cool that our system was so mobile, and could be applied to any bookshelf anywhere. We attached our system to the shelves, and brought our own books to use for the tasks themselves. We let the users use one of our own phones to test it, to avoid the need to download pic2shop for barcode scanning. That being said, they could have easily used their own mobile device if they chose to.

This is the version of the system that we used for our user tests

iii. Tasks
The easy task is find­ing a book on the shelf, or search­ing for a book that is not present. Users can choose to use our mobile app to search for a book, or they may attempt to man­u­ally search the shelf. If our sys­tem pro­vides added value, we hope that they will opt to con­sult our mobile app. To do this task we provided the users with a very full bookshelf. Each user saw exactly the same books on exactly the same shelves. We timed how long it would take the users to find a book that was on the shelf, and one that wasn’t, both with Biblio-File and without.

Our medium task is adding a sin­gle new book to the sys­tem; it con­sists of adding an RFID tag to the book, adding it to the sys­tem using our mobile inter­face, and then plac­ing the book on the shelf. The purpose of this task was to test how easy our system is to use, and what a user would intuitively want to do given a system like ours.

Our hard task is adding an exist­ing book col­lec­tion to the sys­tem; this consisted of four books, for test­ing pur­poses. This is the last task a user would have to complete with our sys­tem, and it this is very sim­i­lar to the pre­vi­ous task. It consists of using the mobile inter­face and an RFID tag to add books to the bookshelf. The main purpose of this task was to test the tediousness of adding many books to a collection.

A video of one of our user tests can be found here!

iv. Procedure
To conduct the study, we first introduced our team and had the user read and sign the consent form, and fill out the demographic questionnaire. We then explained the concept of a Think-Aloud Study, and practiced the methodology on an unrelated problem (see script in appendices). After this, we demonstrated how our system works (in general, without showing them any of our tasks). We then ran the easy task, and timed it, followed by the medium task and then the hard task. Afterwards, we told the users how our system was meant to work (if they didn’t understand it to begin with), and asked some follow-up questions to check how annoying our system was (if it was at all) and how the user felt using it. The answers to these questions are included in the appendices. The users were encouraged to think aloud and ask questions throughout the study.

g. Test Measures

We measured two within-subjects variables related to book access and retrieval, whether or not a book is on the shelf and whether or not the user was using our system. We chose to measure these to see if our system gave the user any quantitative speedup in common book interaction processes.

  • Time taken to retrieve a book on the shelf.
  • Time taken to realize a book is not on the shelf.
  • Time taken to interact with a book using only the physical bookshelf.
  • Time taken to interact with a book using our system.

h. Results and Discussion

Our tests showed that in general, our design is sound, although a repeated measures ANOVA with a sample size of 3 showed no significant difference in using or not using our system (p > .05, see ANOVA output in appendices). Many users were enthusiastic about what we were able to do; in particular, many were delighted that we could gain a lot of information from a single photo of the ISBN barcode. We deliberately did not give users a complete demo of our system because we wanted to judge its intuitiveness. Even without complete instructions, our testers largely understood the system, which we’re very proud of. However, for some tasks, such as removing books from a shelf, it’s clear that more specific instructions would be helpful.

Users relied heavily on receiving some sort of feedback that an RFID tag had been sensed, which we implemented in the form of a loud beeping sound. This worked well. Also, users did not seem impatient when we asked them to add many books to the system at once.

There are some small changes that we’d like to make. For example, when there are no books in the shelf, we shouldn’t display the search bar, since users often attempt to add a book by typing the title into the search bar first. We may also want buttons to display a “not on shelf” message instead of a greyed-out “Light up!” button when they’re not on the shelf, since 1 in 3 users did not recognize the design motif of a disabled button. Also, there are some bugs we still need to fix, such as the barcode scanner redirecting to iTunes occasionally, and the lag with the LEDs on the shelf.

We also need to clarify the tap-in tap-out process to the user. While it is not the most intuitive, it is based on the technical limitations of our hardware, so we will have to compensate in instructions. Since some users attempted to tap a book in before adding it via the software, we should enable our software to allow either ordering. We should also change the instructions to say “place the bookmark inside the front cover,” since some users placed the bookmark too deep inside the book to be read.

i. Appendices

i. All things read or handed to participant

ii. Raw data

Biblio-File P5

a. Group num­ber and name

Group num­ber: 18
Group name: %eiip

b. Mem­ber names

Erica (eportnoy@), Mario (mmcgil@), Bon­nie (bmeisenm@), Valya (vbarboy@)

c. Project summary

Our project is a smart book­shelf sys­tem that keeps track of which books are in it. You can see the web application portion of our project here!

d. Tasks we have chosen to support in the working prototype

Our hard task is adding an existing book collection to the system; this should consist of at least three books for testing purposes. This is the first task a user would have to complete with our system, and it consists of adding RFID tags to the books, adding them to the system using our mobile interface, and then placing the books on the shelf.

Our medium task is adding a single new book to the system; this is very similar to the previous task. It consists of using the mobile interface and an RFID tag to add a book to the bookshelf.

The easy task is finding a book on the shelf, or searching for a book that is not present. Users can choose to use our mobile app to search for a book, or they may attempt to manually search the shelf. If our system provides added value, we hope that they will opt to consult our mobile app.

e. Differences from P3 and P4

Our tasks have not changed from P3 to P4, though the interfaces the user will interact with and the workflows have changed somewhat. This is because our tasks are goal-oriented, and we believe that the goals of the system remain unchanged. Additionally, the hard task is the first task that an actual user would have to perform, so we believe that testing the proposed tasks in the order given is valuable.

f. Revised interface design

i. Changes as a result of P4 and the rationale behind these changes

The main feedback we received from our user testing was that it takes too long to add a book. In order to fix this we removed the screens that asked our users to verify the information, and we no longer require our users to photograph the cover. Instead, we now have them sim­ply scan the bar­code and we use the Google­Books API on our end to get the rel­e­vant infor­ma­tion. We also noticed that many users struggle with adding a book to the system. We fixed this by adding a clear, obvious, and noticeable “Add Book” button to the main page. In user tests, users also did not use our search feature because they could see all the books on one screen. In our high-fidelity pro­to­type, we utilized mobile design heuristics in cre­at­ing a page with large text and images. A consequence of this is that fewer books are shown at a time, and the user is able to search via predictive queries, implemented using a typeahead.

From the hardware side of things, we initially wanted to use Seeed Studio RFID readers placed behind the bookshelves to statically sense the presence of multiple books, and thereby be able to inventory the contents of the shelf. Users prefered this method to a “tap-in, tap-out” approach to managing books. However, it looks like we may have to take the “tap-in, tap-out” approach since a fundamental limitation of the readers’ hardware seems to be that they can only read one tag at a time. This means that the user will have to tap each book to the scanner when replacing or removing a book.

ii. Updated storyboards 

This storyboard illustrates our most difficult task – adding an entire collection to the system.

Here we illustrate our moderate task – adding one new book to the system.

Finally, here is our easy task – retrieving a book from the bookshelf.

iii. Sketches

Our new bookshelf will have a “tap-in, tap-out” system for adding books, because the RFID scanners are not good enough to simply sense what books are on/off the shelf.

g. Overview and discussion of the new prototype

i. Implemented functionality

In this new prototype we greatly improved the book-adding paradigm. Now, instead of having to go through multiple screens and steps, a user simply takes a picture of the ISBN, puts a sticker or bookmark in the book, and places the book on the shelf. We also implemented a search function, where the users can search by author or title.  We have added “Light Up” buttons to light the shelf the book is on (although the physical light is still done via wizard-of-oz techniques, as explained in more detail below). We provide no button for deleting a book, because the difference between removing a book from the shelf and deleting it from the database is unclear and we do not want our users getting confused.

We are using a computer to communicate between the Arduino and the web server, to maintain a seamless interaction from the user’s perspective. In particular, we need this setup in order to query the bookshelf state remotely from a web application. We are also using an Arduino to power, run, and com­mu­ni­cate with the RFID read­ers. We are using an Arduino because we need a micro­con­troller of some kind to interact with the RFID scanners, and we already have an Arduino, which is rel­a­tively easy to use.

ii – iv. Left out functionality, wizard-of-oz techniques, and the rationale behind these decisions. 

We decided to leave out the physical bookshelf from our high-fidelity prototype. Instead, we will continue to use a normal bookshelf and wizard-of-oz techniques to implement the physical finding of the book and the light to indicate its location. We are doing this because our user testing showed us that the aspect that we really need to work on is our application and user interface. Thus, when building our high-fidelity prototype we focused most of our efforts on that. By emphasizing these functions we hope to get better feedback from users. Our earlier feedback indicated that the workflow was most important, so we hope to test the new and improved workflow on users next week. Moreover, we had to wait on building the physical system because we had some issues with our RFID reader, and getting the wires needed to make it work. Furthermore, upon experimenting with the RFID reader we discovered that its range is smaller than we expected, and that it can only sense one RFID at a time. Because of this, we decided to change our system to have a “tap-in, tap-out” function – instead of having the bookshelf keep track of all the books that are on it, users will a tap a book to the reader when placing it on the bookshelf, and then tap it again to tell the bookshelf that they have removed the book. Getting an RFID reader that could do everything we wanted would have been expensive and not feasible, so we came up with this solution to do the best with the materials we have access to. We have a wizard-of-oz web-form which allows the user test administrator to indicate which shelf-number a user placed the book on, simulating what will later be happening via Arduino and RFID.

v. Code not written by us

For our project we used some code that was not written by our team, as well as many publicly available libraries and applications. In particular, to implement the barcode-scanning functionality of our application we used an app called pic2shop, which scans the barcode, reads the ISBN, and then sends that data to our application. We also used the Google Books API in order to get data about a given book (the title, author, and cover image) from the ISBN number. The web app itself is hosted on Heroku and built using the Python framework flask, and is based on the example application called flaskr. Twitter Bootstrap and jQuery are used for the frontend. We also used the RFID SeeedStudio Library for Arduino in order to operate the RFID scanner and read RFID tags.

h. Here are some images documenting our prototype!

Mobile interface/screen. From here users can search for the book by title or author, add a new book, or browse their collection.

Users can search for books and the typeahead will provide suggestions to auto-complete their query.

When the user presses “Go” the app takes them to the book. From here they can press “Light Up” to light up the shelf that the book is on.

This is the same application via web interface. This is what it looks like in a browser.

When a user adds a new book they are taken to another application (pic2shop), which takes a photo of the barcode.

Once the barcode has been scanned it returns to our application and the user is shown these instructions.

Though there is no delete button, administrators do have the ability to delete books if necessary.

This is the wizard-of-oz interface to simulate the RFID sensing on our shelves, which has not yet been implemented.

This is the browser resized to simulate what our application looks like on an iPad.

This is our RFID scanner.


Assignment 2 – Valya Barboy

1) Observations
I conducted my observation by writing down what people did before classes. I also asked about seven people (one of whom was a professor, to see how the responses differed) the following questions:

  • What do you do between classes
  • What do you wish you could do between classes

The notes from my observations and interviews are below:
Activities (observed):

  • Lots of people talk with their friends
    • Comment: sometimes professors need to take a minute to get them to settle down and get back into class mode, creates a delay
  • People loitering outside of class
  • Listening to music (as walking to and from class)
  • Walking (often rushing) to their next class

Activities (reported):

  • It’s a good time to call home — can talk for a little bit but not too long, can check it but don’t have to have a long, detailed conversation
  • Read articles online
  • “I don’t schedules classes one right after the other, because I want time to think about the material, schedule my homework, organize my life, and do my readings”
  • Professor activities:
    • Set up technology
    • Talk to students
    • I like to watch the students walk in
  • “Sometimes I just sit there awkwardly waiting for class to start, and I feel like I’ll be judged for going on facebook so I’m bored and have nothing to do”
  • “I first look at my watch, realize that my professor let me out 7 minutes late, and then I walk to my next class and then everyone looks at me weird”

Desires:

  • On first days of classes often classes are distinctly silent, because it’s a little awkward and you don’t know people and how they’ll react, can we fix the awkwardness?
  • Printing in between classes
  • Food in between classes
  • Coffee
  • Often the ten minutes are just enough time for the walk — if you get out of class late, you won’t be able to make it, and you’ll be late, fix that?
  • Charge electronics
  • Do something for the next class (there’s rarely enough time to)
  • Have the registrar calculate average waiting time (or expected waiting time) to optimize the transition, and make a more efficient schedule
  • Aggregate all of the class preferences and all of the professors’ availability times and make schedules for people
  • When scheduling, get information about what tends to run late, etc. so that you have better information with scheduling

2) Brainstorming (with Erica Portnoy)

  1. PuppyFinder: Tells you where puppies are, so you can pet them on your way to class
  2. TextSafe: Warns you if you’re about to crash into something, to make using your phone on the way to class safer
  3. ReadMe: Finds interesting things for you to read based on pervious activity
  4. EatQuick: Tells you how to optimize your meal experience based on distance to dining hall, crowdedness, and friend location/preferences
  5. BathroomBreak: Tells you how you can detour in between classes (most efficiently) to stop by a bathroom
  6. PrinterPass: Tells you where you can get your work printed in between classes (taking into account outages and popularity)
  7. FreeFood: Tells you the nearest free food, to grab on your way to class
  8. PathFinder: Optimizes how to get to class (taking into account stairs, or no stairs for bikes, as well as avoiding crowded areas)
  9. MealPlan: Connects to friends, get their schedules, and optimizes planning for meals
  10. SchedRight: Gets data on what classes run late, how long it takes to get from one place to another at different times in the day, and then gives the data to the registrar for optimal schedule creation
  11. TrafficJam: Looks at crowdedness in different areas on campus, and tries to redo scheduling/move around rooms, to minimize mobs and make the traffic approximately uniform around campus
  12. VideoIn: Opens a video conference after class ends, so that students rushing off to their next class can still ask the professor questions
  13. DryAlarm: Waterproof alarm clock for inside the shower, which sends reminders, to make sure that you can get to class on time/don’t miss anything
  14. BookGloves: Allow you to read on your way to class, possibly digital to interact with ebooks, iPads, etc.
  15. MomCall: Makes and ends phone calls based on your class schedule (to call your parents in between classes, but make sure you’re not late), and sends polite texts upon hanging up to apologize
  16. GroupMusic: Play music collaboratively (some sort of shared playlist that anyone can add to), in the time before lecture starts

3) Ideas for Prototyping
I chose to prototype ideas 2 (TextSafe) and 4 (EatQuick), because they’re the applications that I would want to use the most. EatQuick was one of a few applications to do with food, and I chose it because I got a lot of concerns from the people I talked to about meal scheduling/eating in between classes. I think TextSafe is useful because it would make people able to go some of the things that they want to get done in between classes (texting, checking emails, facebook, etc), while doing so safely and not getting hit by cars. Some of the other applications, I also liked, but did not choose because they were less interactive than I wanted. They also helped with things like scheduling beforehand, which would definitely optimize the Princeton waiting time, but in a different way. Such applications would also be harder to test – really, only time could see if they were working well.

4) Prototypes
This is TextSafe, prototyped:

This slideshow requires JavaScript.


And here’s EatQuick:

This slideshow requires JavaScript.

5) User Testing
I chose to test EatQuick, because it’s more interactive, and there are more things you can do with it, so user testing would be more useful with it. This is the first test of my app:

This slideshow requires JavaScript.


Notes:

  • “It tells me where I should eat and then it tells me where my friends are, if I select try here it gives me some likelihood that people are in there and how long it’s going to take for me to eat there.”
  • “It probably gets its information from the places my friends have eaten previously, ICE, and friends on ICE”
  • You should show me what friends I’m likely to see there so I can make a better decision

This is the second test:

This slideshow requires JavaScript.


Notes:

  • “It helps me figure out where to eat based on distance, or time, or where my friends are, or a combination”
  • “You probably get distance from the GPS, time from the line/queue (using the card swiper?), and can see what your friends have chosen to do”
  • It should give you more actual data, not just a suggestion as to where to go
  • Or make that information optional?
  • She wanted a button to give you more data
  • The map is confusing, it was unclear that the red dot was a dining hall, didn’t know what to do

This is the last test:

This slideshow requires JavaScript.


Notes:

  • Map is confusing
  • Make the features, and the things you can do more clear
  • Tell me which friends are there, and which friends you’re telling to go there
  • I was multitouch options
  • Can I have a select all button?

6) Insight and Future
I learned that in the future, I really should work on improving the map feature. As indicated in the notes above, it’s really unclear what to do with it, so some kind of instructions would make it better. In general, the best way to do it would probably be to have some sort of pop-up with information. Some additional features that people wanted were:

  • Shortcuts – select all, get some info quickly, without going through so many steps
  • Instructions
  • More specific information on friends (not how many, but specifically who)
  • Possibly add in food quality/menus
  • The ability to get more information – the app calculates things for you, but it would be good to know why it decided that, maybe see how it prioritized the different features you selected, or let you decide what’s more important to you
  • People tended to like the idea but want it more flushed out, want more information, want more features

Bottle Organ RockBand

Erica Portnoy (eportnoy@)
Bonnie Eisenman (bmeisenm@)
Mario Alvarez  (mmcgil@)
Valya Barboy (vbarboy@)

Bottle Organ RockBand:

The Bottle Organ RockBand is a musical tutorial: it lights up the bottle that you should blow in next, teaching you to play a song (specifically, Mary Had a Little Lamb)! We were inspired to do this project by little kids’ instructional pianos, whose keys light up to teach people to play simple songs. Three of us play the flute, so the bottle organ was a natural and cheap choice of instrument. Also, we thought that light would diffuse really well through a water-milk mixture, making the instructions easy to follow (and it would look cool!). We thought the diffusion of our LEDs through the fluids worked really well. We also liked the fact that the different notes were different colors, because it makes the tutorial easier to follow. Finally, we’re proud of the tuning of the bottles. Originally we had hoped to build a larger-scale organ to span an entire octave, but because of the limited number of LEDs we could not do that. We also thought about making it more interactive (using the SoftPot to adjust tutorial speed, having a user compose a song and the tutorial play it back, etc.) We ultimately decided, however, that it would be more beneficial to focus our efforts on making the output device, because adding sensors would yield only minimal gain. Another limitation is that currently our song is hardcoded, so it can only play one song at a time. That being said, the notes themselves are in a separate array that our code reads in and parses, so giving it any other song would be easy. Finally, one major design flaw we had was that the bottles were standing very close to our electronics. If we were going to do this again, we would keep our bottles in some container, safely away from our Arduino. Overall, we are pleased with the result. We even did a user test!

Sketches:

Binary Balloon Stopwatch - counts seconds by giving the binary number via lit-up LEDs. Didn't work because we don't have helium, and have too few LEDs.

Binary Balloon Stopwatch – counts seconds by giving the binary number via lit-up LEDs. Didn’t work because we don’t have helium, and have too few LEDs.

Diffusing light through a pumpkin so that it looks like a flame - ultimately cool but kind of worthless...

Diffusing light through a pumpkin so that it looks like a flame – ultimately cool but kind of worthless…

Bottle Organ RockBand - our final design!

Bottle Organ RockBand – early sketches of our final product!

A video of our final result:

Showing various people playing our final product, and the making of our Bottle Organ!

List of materials:

  • 1 Arduino
  • 2 220 Ohm resistors
  • 2 47 Ohm resistors
  • 1 USB cable
  • 8 alligator clips
  • 9 wires
  • 1 breadboard
  • 4 LEDs
  • 4 plastic bottles, filled with a water and a few drops of milk
  • Online tuner

Instructions!

IMG_1991IMG_1990

Once you have the necessary materials, start by building the circuit, following the diagram included. The circuit should be 4 LEDs and resistors in parallel, with all connecting to the ground on the Arduino. We used weaker resistors for the weaker LEDs, to make them all closer in brightness. Using alligator clips to connect to the LEDs is useful for positioning them beyond the breadboard. Each LED is then placed under a corresponding plastic bottle so that the light diffuses upwards. To set up the bottles: acquire four plastic bottles. If necessary, remove their labels. Then, use an online tuner such as this one to determine the volume of liquid necessary to produce the desired note for each bottle. We recommend simple trial and error using water. Mark the level and note on the bottle with a marker if desired. Water doesn’t diffuse light very well. In order to improve diffusion, add a small quantity of milk to each bottle. We used a standard soda bottle cap to measure out the milk, and used between half of a capful and a whole capful for each bottle; add milk until it looks cool to you, testing diffusion using an LED. We also experimented with some other liquids, such as tea; we encourage you to experiment with liquids as well. Volume, not density, determines pitch, so the type of liquid shouldn’t matter. Finally, place the bottles above the LEDs, plug the USB cable into the Arduino and the computer, and start making music!

The final set-up should look something like this:Photo Feb 13, 9 07 54 PM

Code:

/*****
 * File: mary_lamb
 * Description: blinks LEDs to play
   Mary Had a Little Lamb.
 * HCI L0
 * netids: bmeisenm, mmcgil, vbarboy, eportnoy
 *******/

// Define which pins represent each note.
const int cpin = 3;
const int dpin = 5; 
const int epin = 9; 
const int gpin = 10;

void setup()
{
  // initialize the serial communication:
  Serial.begin(9600);
  // initialize pins output:
  pinMode(cpin, OUTPUT);
  pinMode(dpin, OUTPUT);
  pinMode(epin, OUTPUT);
  pinMode(gpin, OUTPUT);
}

// Make a pulse at pin for a length of time
void pulse(int pin, double time)
{
  int maxbright = 255;
  for (int i=0; i <= maxbright; i++) {
    analogWrite(pin, 255 - i);
    delay(time/255.0);
  }
}

// "Plays" a song
void playsong(int notes[], int lengths[], int numnotes) {
  for (int i = 0; i < numnotes; i++) {
    pulse(notes[i], lengths[i]);
  }
}

// Main run loop.
void loop() {
  // Defines pulse lengths.
  double shortpulse= 1500;
  double shorterpulse = shortpulse * 0.8;
  double longpulse = shortpulse * 1.5;
  // Defines the song! (in terms of pins & lengths)
  int notes[26] = {epin, dpin, cpin, dpin,
                 epin, epin, epin, dpin,
                 dpin, dpin, epin, gpin,
                 gpin, epin, dpin, cpin,
                 dpin, epin, epin, epin,
                 epin, dpin, dpin, epin,
                 dpin, cpin};
  int lengths[sizeof(notes)];
  for (int i=0; i < sizeof(notes); i++)
    lengths[i] = shortpulse;
  lengths[6] = longpulse;
  lengths[9] = longpulse;
  lengths[12] = longpulse;
  lengths[17] = shorterpulse;
  lengths[18] = shorterpulse;
  lengths[19] = shorterpulse;
  lengths[20] = shorterpulse;
  lengths[sizeof(notes) - 1] = longpulse;
  // Play song.
  playsong(notes, lengths, sizeof(notes));
  // Delay at end just for fun.
  delay(4000);                 
}