P3 – BackTracker

Group #7, Team Colonial Club

David Lackey (dlackey), John O’Neill (jconeill), and Horia Radoi (hradoi)

Mission Statement

We are evaluating a system that makes users aware of bad posture during extended hours of sitting.

Many people are bound to sedentary lifestyles because of academics, desk jobs, etc.  If people have bad posture during the hours that they are seated, then it can lead to back problems later in life, such as degenerative disc disease.  We want our system to quickly alert people in the event that they have bad back posture so that they can avoid its associated negative long term effects.

From our first evaluation of our low-fidelity prototype, we hope to gain insight into what it will take to make a wearable back posture sensor.  We also want to learn how to correctly display relevant back posture information / statistics to the user.  Figuring out how to alert the user is important as well.

Concise Mission Statement

It is our mission to help users recognize when they have bad posture while sitting so that they can avoid long term back problems.

Team Roles

David – Drafted mission statement.
John – Initiated construction / task evaluations.
Horia – Formatting.

Description of Prototype

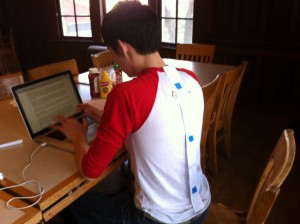
Our prototype consists of two components: the wearable device and the desktop interface. The first is intended to replicate how the user engages with the wearable component, and, as a prototype, demonstrate how vibrations are delivered to points on the users back where they are deviating from their desired posture. The second component serves two purposes: 1.  to demonstrate how the user sets their desired / default posture, and 2. to display to the user how the specific areas of their back deviate from their desired position over time.
image

User is working at table with device attached. Note that there are there sensors, each one designating a specific portion of the spine.
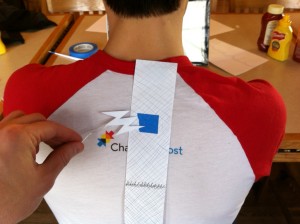
image_1

Here we demonstrate a vibration given by the device. We represent the location of vibrating motors with the placement of blue tape.
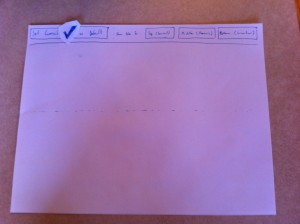
image_2

Base interface before readings have been taken / default has been set.

image_3

Once user sets default / desired posture, a confirmation check is placed on the screen for validation.
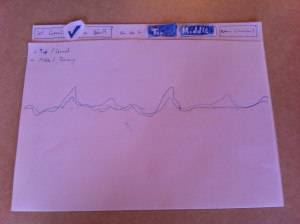
image_4

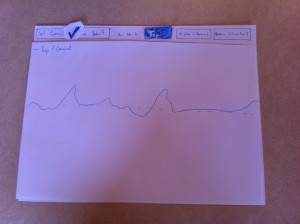
The user chooses to display the information provided by the top set of sensors.

image_5

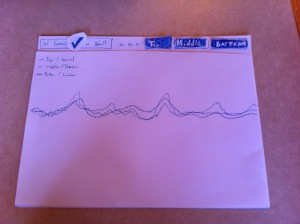
The user chooses to also display the data received from the middle set of sensors. This data is laid over the other set of data that has previously been selected.

image_6

The user has selected to show all three sets of data.

Task Descriptions

Task #1: Set up a desired back position (medium)

For this task, the user is placing the device on their back and is designating their desired back position. Doing so enables the user to use the remaining features, and allows the user to customize the “base” posture that they wish to abide by.

[kaltura-widget uiconfid=”1727958″ entryid=”0_q2ik6xwp” width=”400″ height=”360″ addpermission=”” editpermission=”” /]

Task #2: Alert user if back posi­tion / pos­ture devi­ates too far from desired posture (easy)

For this task, the user is alerted if they deviate from the posture they originally wished to maintain. This helps the user become conscious of – and thus, adjust – any areas of their back that may be receiving excessive stress. The user is notified by the vibration of a motor near the area(s) of concern.

[kaltura-widget uiconfid=”1727958″ entryid=”0_s475xnr3″ width=”400″ height=”360″ addpermission=”” editpermission=”” /]

Task #3: Mon­i­tor how their pos­ture changes. (hard)

[kaltura-widget uiconfid=”1727958″ entryid=”0_1of32m3f” width=”400″ height=”360″ addpermission=”” editpermission=”” /]

Prototype Discussion

1. We created both components using paper and tape, using pen to designated different forms of information – data over time, buttons, and our mesh resistors.

2.  We agreed that a mock paper wearable device, as well as as a mock paper computer interface, were an appropriate step before creating a sensor-rich, coded version.

3. One thing that was difficult was determined how we wished to represent the deviance data over time. We decided that the best was to have a baseline: then, as a sensor bent one way, it traveled above this baseline – conversely, as it bent the other way, the plot line traveled below.

4. One thing that worked well was using different versions of the graph on different sheets of paper. This allowed us to easily show how user actions (specifically, selected buttons) would effect changes in the graph.

L2: Team Colonial — The Muuzi

Team #7
John O’Neill: jconeill@
David Lackey: dlackey@
Horia Radoi: hradoi@

Project Description

Our main project aimed to create a pointer device which enables the user to obtain a different sound based on the position of the nozzle of the gun – a musical uzi, or, as we have affectionally called it, The Muuzi. The idea came to us after we saw initial P1 brainstorm. We decided to use the accelerometer to determine the position of the gun’s x orientation, which we mapped to a range of pitches using an Arduino mapping function. The range we chose to map to was found via trial an hour; the one we settled one was the most relatively desirable, and thus, consider this version of the project to be a success. We managed to solve an issue with our intervals by performing integer division and multiplication (in order to normalize the intervals and avoid having two different noises being played at the same position.) In the future, we might expand the project to a 2- or 3-dimensional space.

Materials

  • 1 One Plastic Gun
  • 1 Accelerometer
  • 1 Arduino
  • 1 Piezo Sensor
  • 1 Breadboard

Instructions

First, place the breadboard on one side of the plastic gun and the Arduino on the opposing side. Orient and attach the accelerometer as it appears in the included photos so that any movements of the gun will correspond correctly with the provided code. Next, wire it such that the ground pin leads to A2, the power pin leads to A5, and the x-axis pin leads to A5. Now add the buzzer to pin 8, the Piezo sensor to A3, and complete the rest of the circuit as demonstrated in the accompanying photos.

Videos

gundave-480p
gunhoria-480p

Pictures

IMG_5629

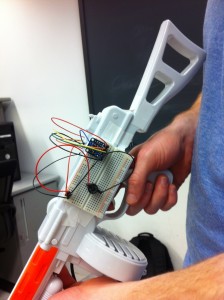
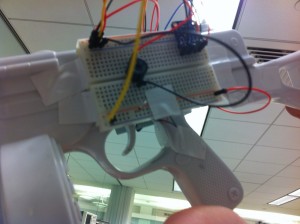
The breadboard, featuring the accelerometer and the buzzer.

IMG_5628

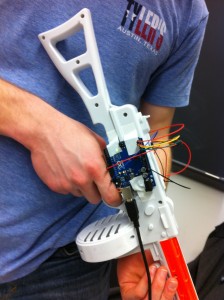
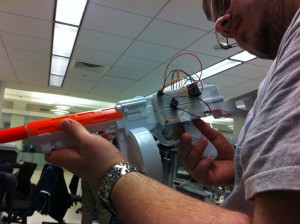
The Arduino, attached to our musical uzi.

IMG_5635

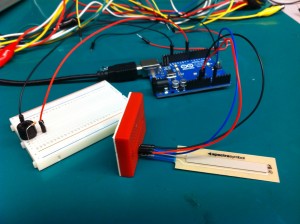
A close-up view of the Piezo sensor, located behind the actual trigger (since the actual one generates a noise itself.)

IMG_5633

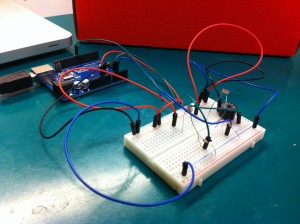
A user testing the Piezo sensor as a firing mechanism.

Source Code

const int groundpin = A2; // analog input pin 2
const int powerpin = A0; // analog input pin 0
const int xpin = A5; // x-axis 
const int xmin = 396;
const int xmax = 620;

void setup()
{
 // initialize the serial communications:
 Serial.begin(9600);

 // Provide ground and power by using the analog inputs as normal
 // digital pins. This makes it possible to directly connect the
 // breakout board to the Arduino. If you use the normal 5V and
 // GND pins on the Arduino, you can remove these lines.
 pinMode(groundpin, OUTPUT);
 pinMode(powerpin, OUTPUT);

 digitalWrite(groundpin, LOW); 
 digitalWrite(powerpin, HIGH);
}

void loop()
{
 int val = 0;
 int xreading = analogRead(xpin);
 // if the gun is pointed downward
 if ((xreading - xmin) < 20) {
   val = 0;  
 }  
 else {
   val = map(xreading, xmin, xmax, 1000, 5000);    
   val = val / 500;    
   val = val * 500;  //make values more discrete
 }    
 int x = analogRead(A3);  // read in sensor behind trigger
 if (x > 10)
   tone(8, val, 1000);
 delay(100);
}

Prototype #1: Slide Machine

This project created a music instrument in which the pitch varies according to a resistive slider. It succeeded in making the pitch vary by using a slider. It involved an led which lights up according to the power put up by the pwm. But because it was pointless, we did not include it in the final version.

slider-480p

IMG_5641

Mapping a slide sensor to different pitches. 

Prototype #2: Holy Tones

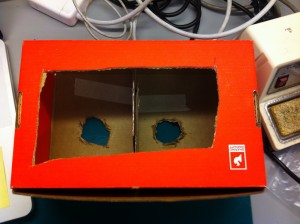
This prototype used two photocells, as well as a custom-made box which two holes, which allowed us greater control over the light that the sensors encountered. We built it as a way of developing a non-contact musical instrument, and found it moderately successful.

redbox-480p

IMG_5624

The base of our prototype, which houses two photocell sensors.

IMG_5625

The box that went over our breadboard, which had a divider to help isolate the light on each side.

Assignment 2 — John O’Neill

Observations

Person #1: Thursday, February 21st, in McCosh 46 right before a 10am POL 307 lecture.

The student, like most of the other students waiting for lecture, was using their laptop, and, like many other students with laptops out, where going through the morning ritual of checking emails. Every seat in the lecture hall has its own old, wooden desk which is angled slightly upward, and because of the angle, the laptop was gradually sliding toward the student; this forced the student to either 1. constantly shift the laptop back towards the top of desk, or 2. prevent the laptop from sliding further by stopping it with their chest, causing the student to hunch over their keyboard.

Person #2: Monday, February 25th, in Colonial Eating Club, slightly before 10am

The individual was eating a quick breakfast before leaving for a 10am lecture. They arrived fairly late, so they were eating quickly, and they focused on their food more than speaking to others at their table. They placed their phone on the table so that they could quickly check the time / ensure that they weren’t running late. Rather than hanging up their coat and placing their backpack in the coat room, this individual hung their coat on the back of their chair and placed their backpack underneath the table. As they were leaving, they quickly made a cup of coffee, which they carried with them to class.

Person #3: Tuesday, February 26th, in a Corwin Hall classroom, right before a 1:30pm precept

This person was one of the only students in the room using a laptop. They divided their time between email and a last-minute skim over the electronic version of the reading materials,  occasionally talking with a few other students in the room. The individual appeared extremely focused, keeping fairly constant eye contact with their laptop even when they were talking to the other students around them.

Idea Headlines

1. Quiz on quotes from reading
2. Guessing game of professor arrival time
3. Simple, personal, single-question, cross-classes questionnaire
4. Quiz that asks students to generate possible test questions / paper topics
5. Email blast that reminds students to retain good posture & other friendly reminders
6. Email-based game of mafia among waiting students, where story is automatically generated
7. Email-based game of rock, paper, scissors among waiting students
8. Easily ask friends who are already getting food to prepare you a plate
9. Phone buzzes more and more rapidly as lecture approaches, letting you know how much time you have left to eat
10. Each person waiting shares something funny or interesting (e.g. op-ed article, gif, etc.) to everyone else, vote on best
11. Uses your calendar to easily show the pockets of free, suggests things to schedule (e.g. lunches, time to read, etc.)
12. A reminder to call your mom
13. Takes the surveys from Psychology students (who are in desperate need for thesis data) and disperses out to anyone who is bored
14. A virtual game of duck duck goose, where someone “catches up” to another person by tapping their phone faster than the other person
15. Helps you find people to walk with to class with
16. Helps you find people who are free and would also want to talk on the phone / chat online
17. A collaborative way to sum of the reading, the only way to enter is to contribute something useful, which is to be determined by a moderator that is anonymous and randomly assigned before each precept

Prototype Rationale

2. Guessing game of professor arrival time, Price-Is-Right style
This would offer a really fun, engaging way to get students interacting with one another, and has the added benefit of involving the professor.

16. Helps you find people to walk with to class with
I really enjoyed the idea of finding individuals that are walking in the same direction and having them meet up – who doesn’t enjoy some company on the way to class?

Photos / Descriptions of Prototypes

Prototype #1: Guessing when the professor will arrive

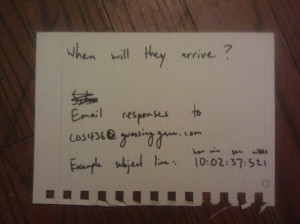
A prompt for the guessing to begin, either projected in class or sent via email.

A prompt for the guessing to begin, either projected in class or sent via email.

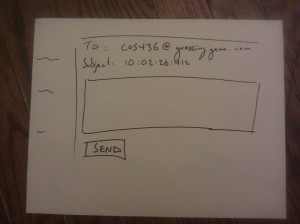
Students submit guesses for when they think the professor will arrive.

Students submit guesses for when they think the professor will arrive.

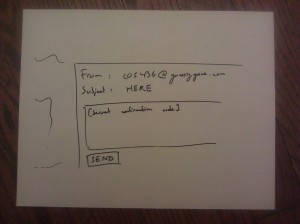
Professor replies to email to set his/her arrival time. In this email, originally set to the professor, is a secret code used to confirm that he/she is in fact the professor.

Professor replies to email to set his/her arrival time. In this email, originally set to the professor, is a secret code used to confirm that he/she is in fact the professor.

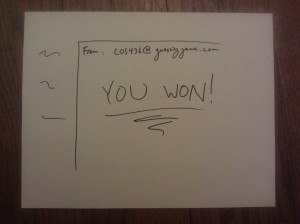
If a user guesses the time that is closest to the professor's arrival time without going over, they win.

If the user guesses the time that is closest to the professor’s arrival time without going over, they win.

Prototype #2: Finding people to walk with to class

ENIMAGE1362194854515

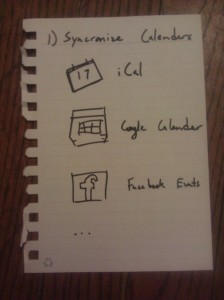
Ask user to synchronize their calendars so app knows of their whereabouts.

ENIMAGE1362194865985

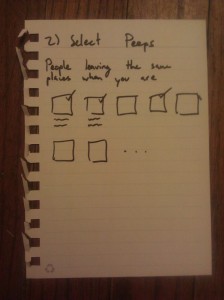
Choose which friends you want to know about if they are in the surrounding area.

ENIMAGE1362194884830

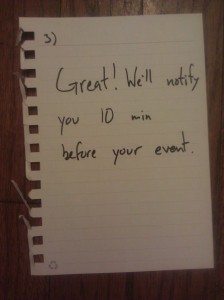
Confirmation message

ENIMAGE1362194894787

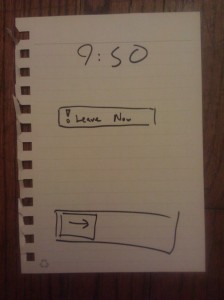
User is notified that it is time to leave

ENIMAGE1362194903973

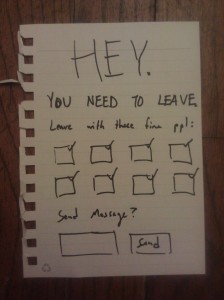
The user is also notified of who should also be in the surrounding area and is prompted to send them all a message

ENIMAGE1362194920473

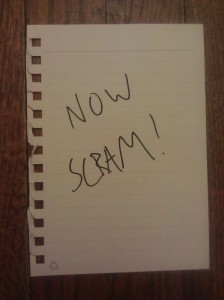
Don’t get left behind!

Photos / Notes from User Testing

User chooses to synchronize facebook events to app.

User chooses to synchronize facebook events to app.

Observations for User 1

  • Proper confirmations need to be made for synchronizing various folders
  • User finds transition from screen #2 (people selection) to screen #3 unclear
  • Enjoyed the tone of the text
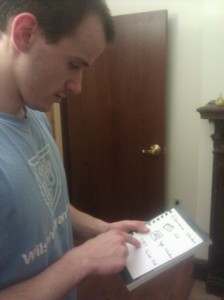
User unlocks phone to examine notification

User unlocks phone to examine notification.

Observations for User 2

  • Wished there was a way to see who is actually in proximity (using GPS?), not just those individuals who should be
  • Unsure if leaving screen should automatically select all individuals by default
  • Moved fairly quickly from screen to screen
User chooses who they want to message

User chooses who they want to message

Observations for User 3

  • Noted that screen #3 should have exit route
  • User also finds transition from screen #2 to screen #3 unclear
  • Noted that notification could let you know where you’re going and how many people are around you

List of Insights from Testing

  • Next iteration would use actual location of individuals. One reason this wasn’t considered for the original design is because constant monitoring of location 1) raises privacy concerns and 2) doing so dramatically drains battery / is thus far impractical
  • Should be able to set the amount time between notification and arrival time (10 minutes by default, but should be able to customize based on location)
  • A variation of the previous post: calculate time needed to walk from location to location and send notification at the corresponding time