Observations:
(MAE 305 lecture and HCI lecture) In the CS 104 lecture hall, the seats are tightly spaced. Frequently, those who sit on the sides of the lecture hall need to get up in order to let others through. This can be an inconvenience and is uncomfortable for those sitting in the lecture. Another observation I made was that many students who make the long walk to the CS building blow on their hands for warmth upon entering lecture. They do so in the 10 minutes before lecture in order to prepare for the note taking or typing they will do during the class.
(MOL 348 lecture) In this lecture, the professor asks questions to the class in the form of clicker questions. In the 10 minutes before class, I asked a student about any inconveniences she had experienced with the iclicker system, to which she responded “I forget my clicker all the time!” I then decided to observe the class for other students who have had the same problem. Sure enough, in the first 10 minutes, one guy dug frantically through his bag before letting out an exasperated sigh. Perhaps a better system could be devised.
(At ORF precept) I observed my preceptor as he walked into the classroom shortly before the start of precept. One thing I noticed was that, although he shouldered a laptop bag, he was holding a lot of things in his hands instead of placing them in the bag. Among the things he was holding were a textbook, notebook and Macbook. With all things out, he was able to set up for the precept quickly, but the walk to the classroom looked uncomfortable and potentially hazardous. He then proceeded to put some notes on the board and check the time.
(On the way to ECO 101 lecture) On the walk to lecture, I observed many people walking with a cup of tea or coffee in one hand, and a phone in the other. Activities on the phone varied, from making a call to sending texts. This is hazardous to phones, as dropping a phone while walking is a common occurrence and results in many broken screens. One girl I observed was holding a tall cup of coffee in addition to a set of notebooks while texting. She looked flustered as she struggled to type out her message.
Brainstorming:
(Collaboration with Jae Lee)
- Hand warmer mats on desks, activated when they sense force
- Poll/attendance at entrance of lecture hall/precepts for classes that take attendance
- Poll/attendance at exit of lecture hall that discourages people from leaving early
- App that tells you where your friends are and if seats are occupied in a lecture hall
- App that has a map of the lecture hall that you can use to “reserve” seats for friends
- App that tells you outlet locations in lecture halls and if they’re currently being used
- App that lets bikers press the crosswalk button without getting off their bike
- App that wakes you when you doze off in lecture or even before the lecture starts
- A live chat app OIT that is accessible on all computers built into lecture halls
- An app that cancels odor when it detects that you fart or burp in a lecture hall
- A system that lets professors see what they’re writing from the back of the room
- A portable device that can project things clearly onto a blackboard
- A device built into a blackboard that erases it automatically from the previous class
- A system that allows for delivery from restaurants directly to your lecture hall
- A device that scrolls your phone by following the movement of your eyes
- A keyboard that condenses keys to whichever hand you hold the phone with
Favorite Ideas:
11. See what you write
I chose to prototype this application because it has the potential to benefit the overall learning experience of students, and because I wasn’t exactly sure how the system would work.
16. One handed keyboard
I chose to prototype this application because I wanted to get user feedback for it in hopes of both improving the details of its design and solving the problem that I observed in people walking to class while texting with one hand.
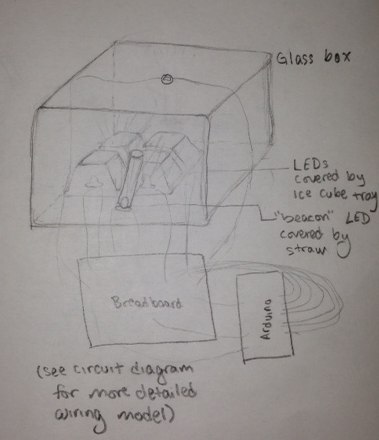
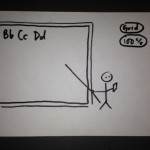
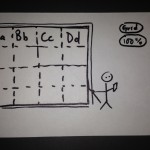
Prototypes:
Blackboard Visualization App:
Professors can use this app before and during lectures while they write on a blackboard using a camera from the back of the room perspective. The goal of the app is to allow for neater presentation of material and to make professors more conscious of how large they write on a board. Additionally, professors would no longer need to inquire, “can everybody see this in the back?”
-
-
Handheld app that helps professors visualize and allocate space. Video from camera at the back of the lecture hall
-
-
Grid view encourages alignment and neatness
-
-
Full view lets professors see if they are writing too small
-
-
Full grid view combines the two views
Gravi-Keys:
The idea behind this app is that there is an external sensor that detects how many hands you are using to hold your device. If it senses that you are using one hand to type on your phone, the keys will automatically gravitate toward the hand. This decreases the area of each key and space between keys, but the idea is to allow for the reaching of far away keys, such as P and “Send” for the left hand and Q for the right hand. This makes texting while holding other things easier, especially for students going to class.
-

-
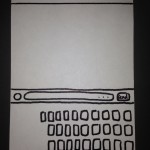
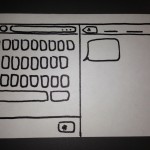
Original view of messages app on iphone.
-
-
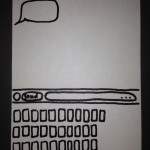
Gravi-Keys: Keys gravitate toward whichever hand you are using to hold the device.
-
-
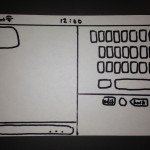
Left hand vertical configuration. Moves the send button to the left of the screen in addition to keys.
-
-
Left hand horizontal configuration. All buttons are on the left side of the screen
-
-
Right hand horizontal configuration. Updated current message bar to be on the left side of the screen.
User Testing:
I had users test Gravi-Keys. The feedback I received from the tests was tremendous and helped me improve upon many aspects of the design. Based on which hand the user was using to test out the design, I asked users to spell out a word on the screen using only one hand that would require them to stretch their thumbs.
Nora Chen:
Nora enjoyed all configurations of the application. Her small hands made it difficult for her to spell out words containing the letter ‘P’. She was the first to demonstrate that having the “Send” button on the right side of the screen greatly inconveniences left-hand phone users, and contributed to the initial design of just shifting keys by adding button shifts as well.
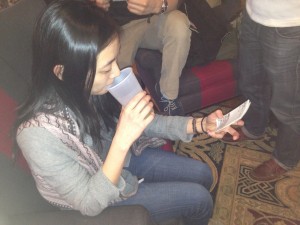
This user was able to text while taking a sip of her drink.
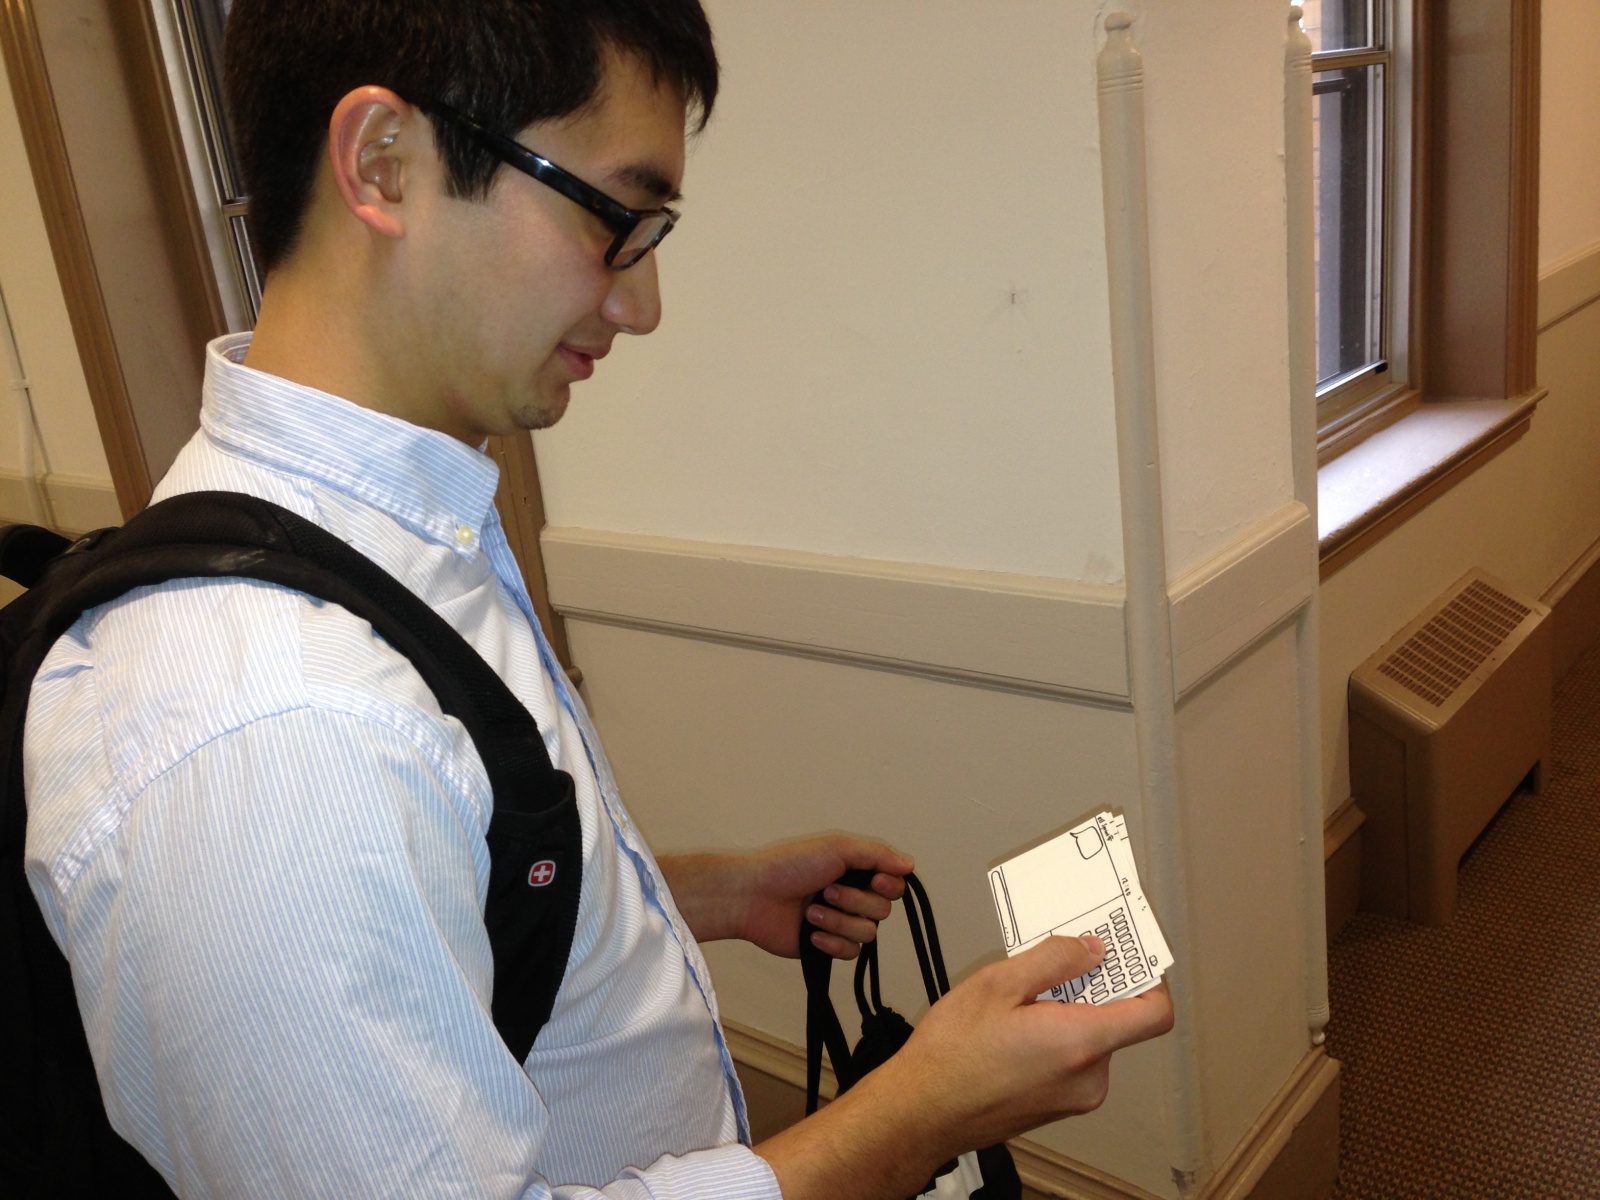
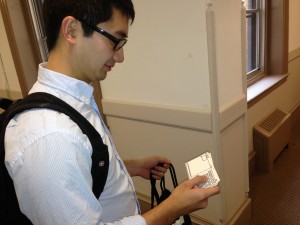
David Newell-Smith:
David was holding a drink while he tested. He had difficulty spelling out words containing the letter ‘Q’ on the regular configuration. He felt that the right hand vertical configuration made the keys too small, as his thumb was quite wide, but felt that the horizontal configuration was more promising.

This user realizes the difficulty of typing with one hand on the normal keyboard.
Stephen Wang:
Stephen, like David, preferred to use the horizontal configuration over the vertical configuration. He said the smaller keys of the vertical configuration would have been an inconvenience, but the horizontal configuration suited him.
This user enjoys the benefits of the right hand horizontal configuration. He was satisfied with the results.
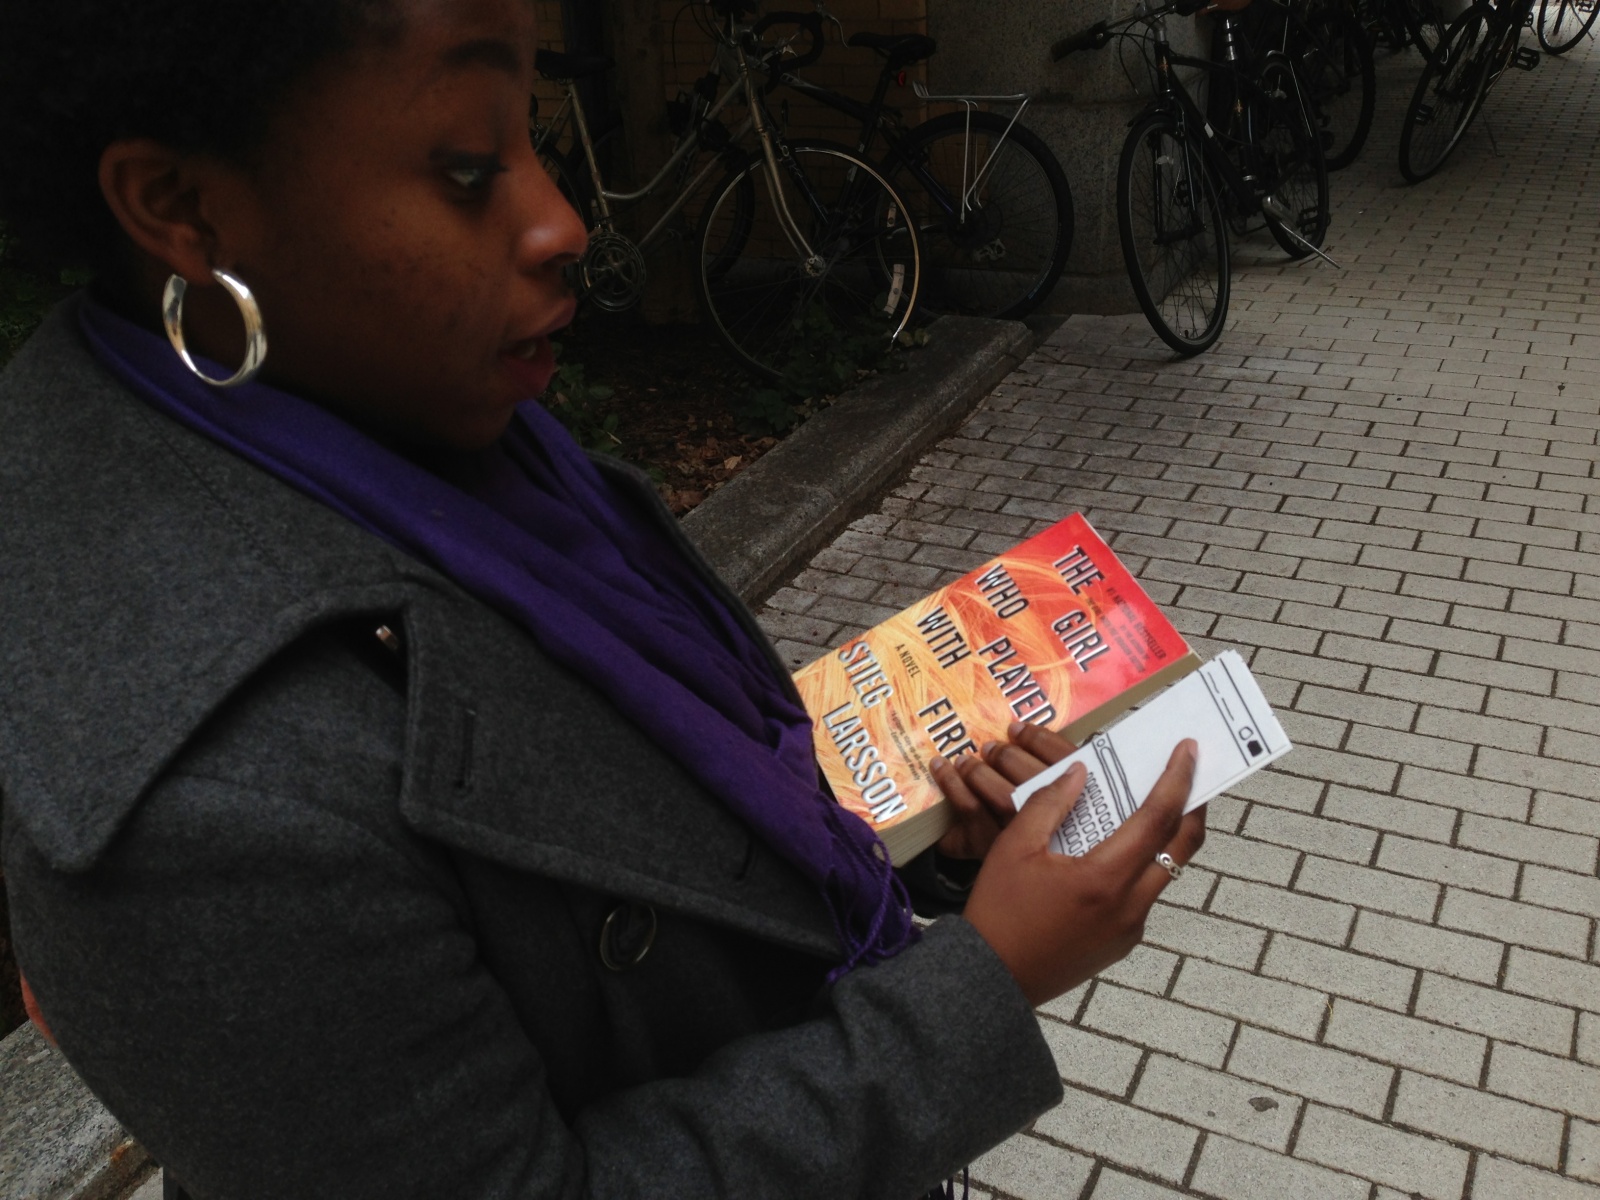
Oladoyin Phillips:
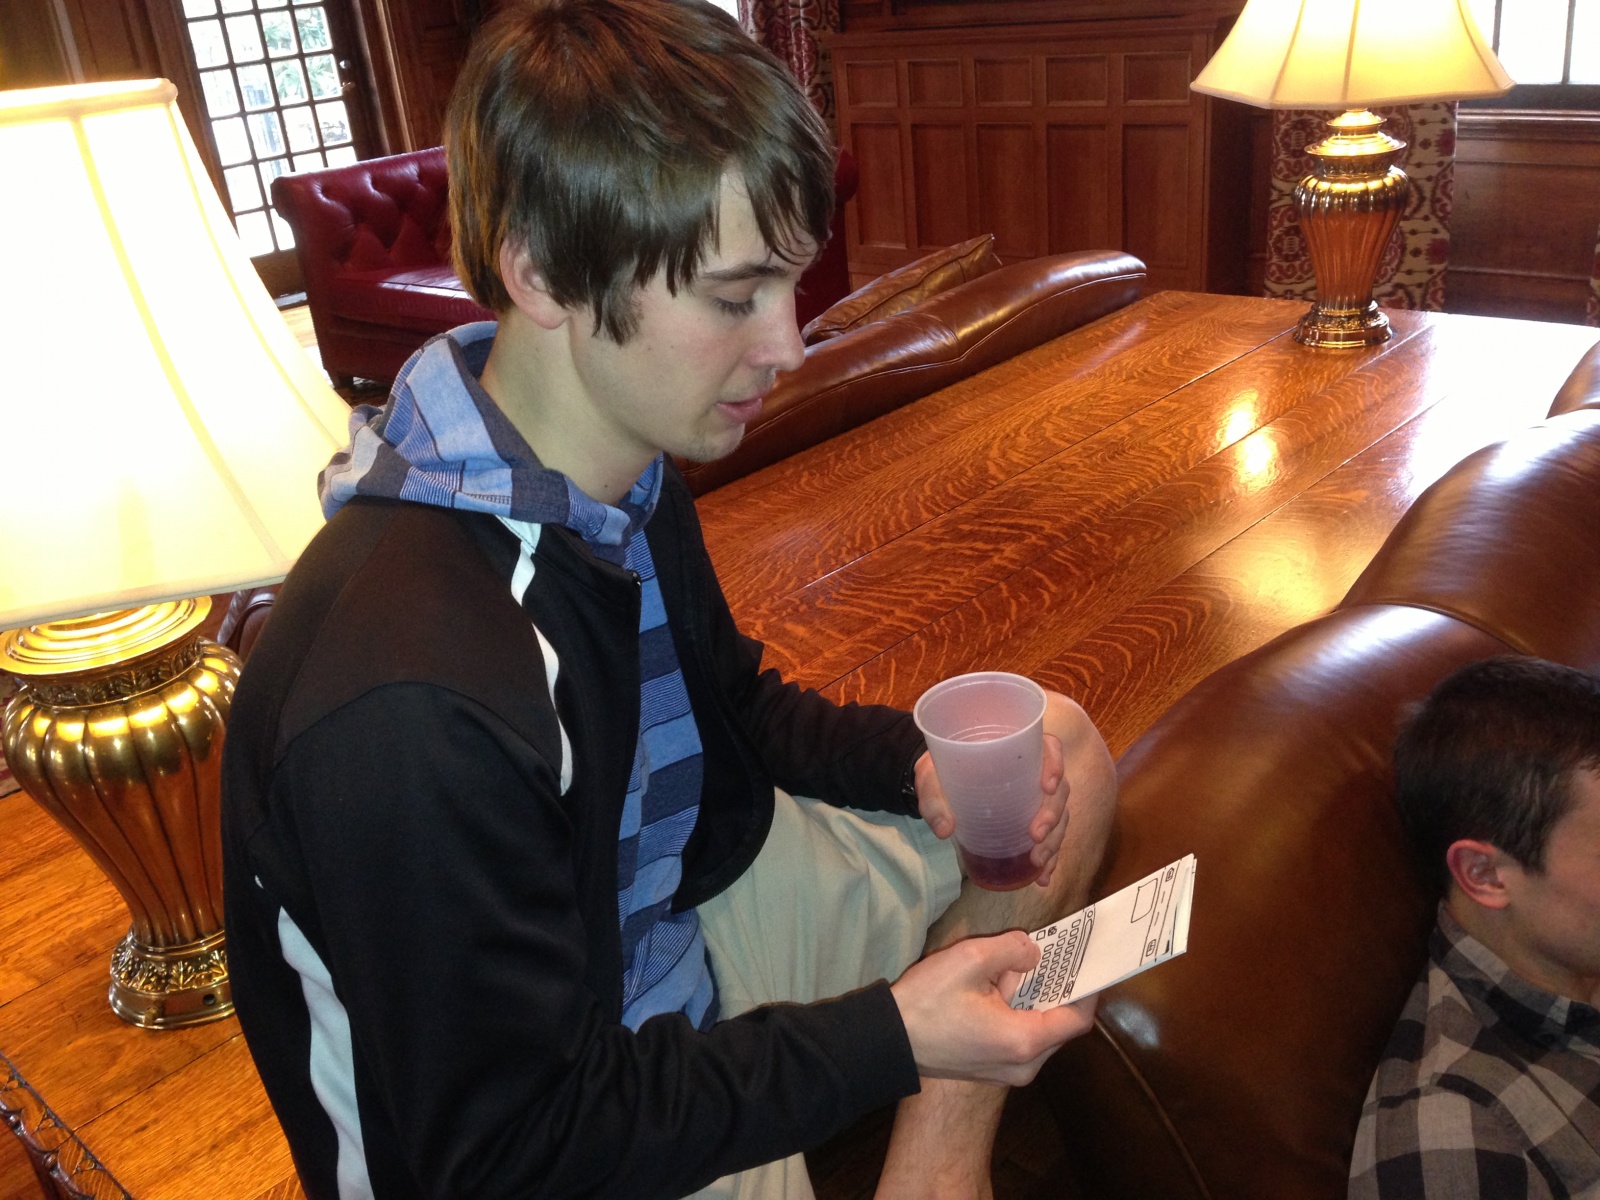
Oladoyin was able to successfully use the app while holding a book, which was something that many students did during my observations. She had difficulty typing out the word on the normal configuration, but benefitted from all shifted key configurations.
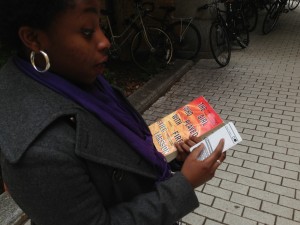
This user is able to text while holding a book.
Nana Kwasi Boohene:
Nana’s long fingers made typing on the normally configured keyboard easy, but he agreed that the new configurations allowed for gripping the device more securely. He was the first to point out that the design should include key shifts for both right and left handed phone users.

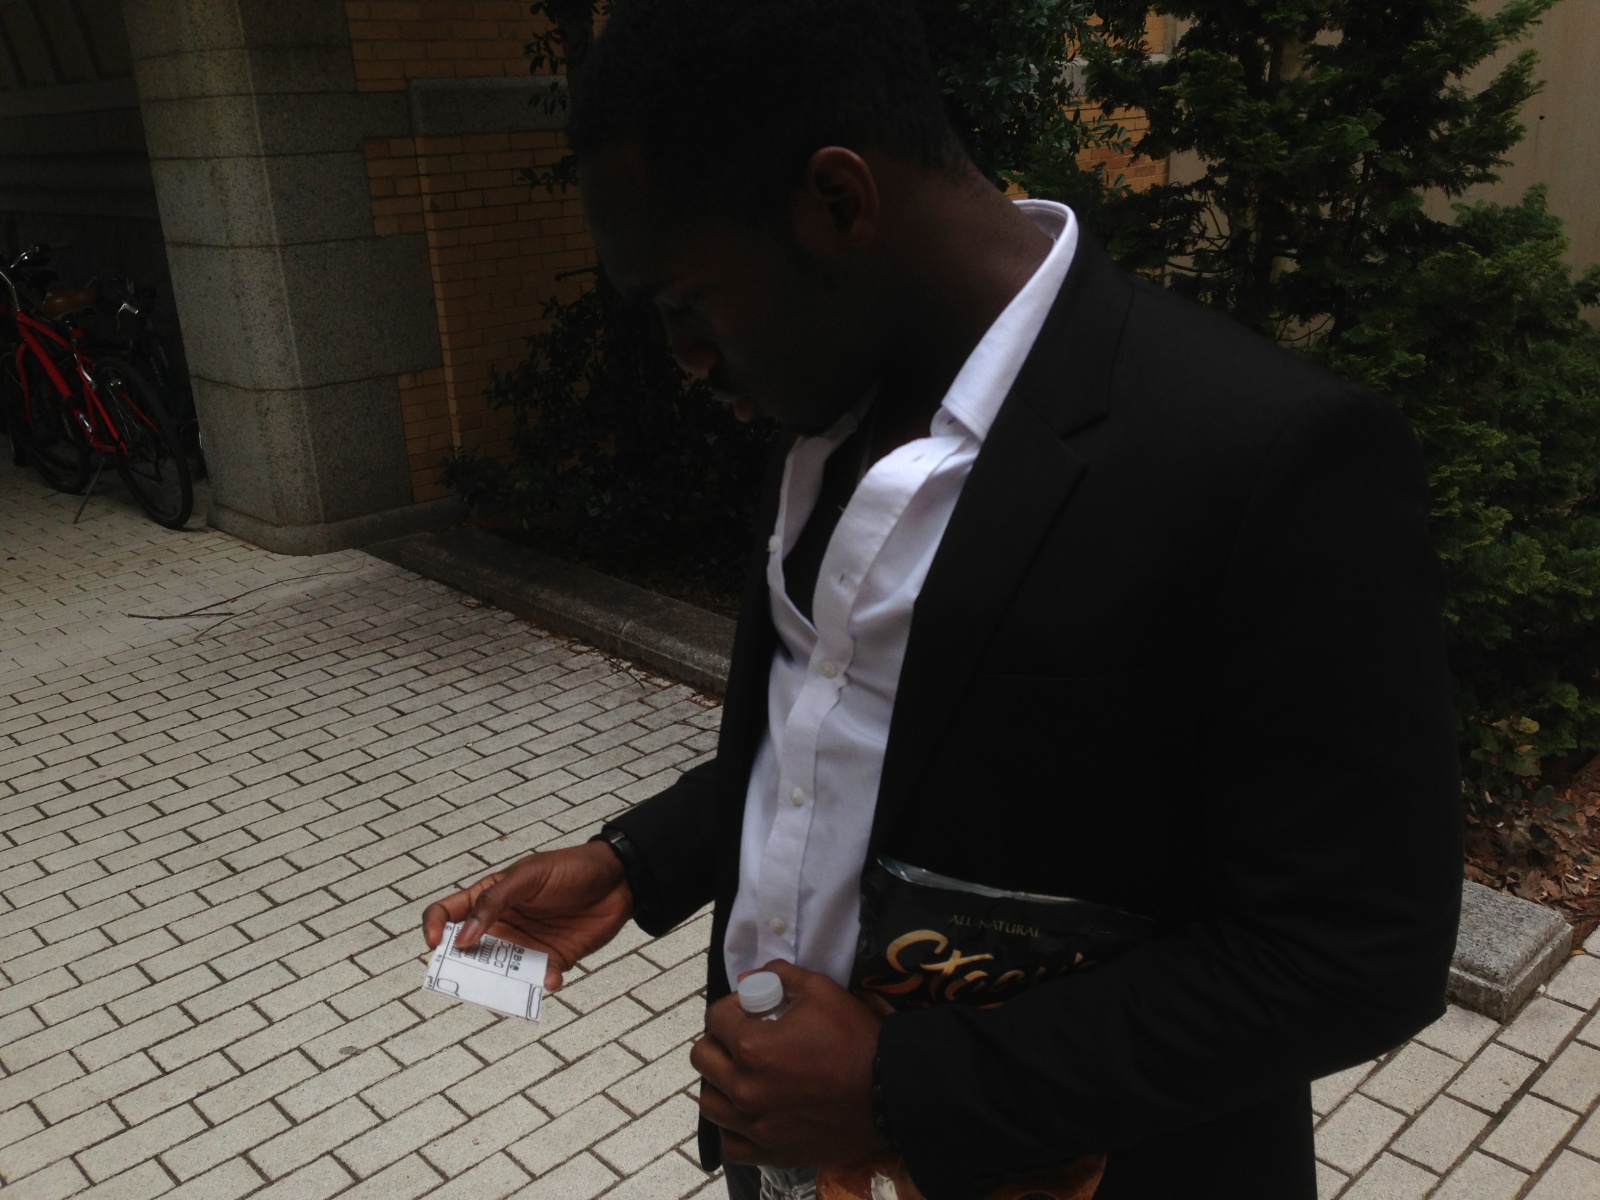
This user is able to text while holding snacks and a drink.
Insights:
- Users generally voiced concerns about how the device would actually detect how a user is holding it. This problem has yet to be worked out.
- When testing the left-handed horizontal configuration, one user pointed out that the current message bar should not grow downward and change the position of the keys. Instead, they should grow upward on the right side of the screen. I made this change when making the right-hand horizontal configuration (see prototype photos).
- For the Gravi-Key configurations, users had the easiest time reaching the furthest keys in the normal configurations, but the closer keys became harder to hit due to the inflexibility and large area of the thumb (i.e. ‘P’ became easier to hit than ‘Q’ for a left-hand user and vice-versa for a right-hand user). A correction was made to make the leftmost keys larger and the rightmost keys smaller for the left-hand configuration and the same for the right-hand configuration.
- Most users preferred the horizontal configurations to the vertical configurations in terms of how useful or accurate it would be.
- One user pointed out that other texting methods such as swipe could resolve the cramped setup in the vertical configurations.
- Another user suggested that the space created when keys gravitate can be used for more display area, other buttons, or even ads
- All users were pleased with the design and wanted to see more! They agreed that texting with one hand could be inconvenient at times, and that this product could potentially be of help to them.