Group 20 – Name Redacted
Brian worked on the project summary and the discussion of the three prototypes.
Ed worked on the prototype that modeled the TOY programming machine.
Matt worked on the prototype corresponding to the binary lesson.
Josh worked on the prototype for the tutorial to teach instructors how to use this system.
We all worked on the mission statement.
Rational for the Assignment: Most school districts do not teach computer science and are constrained by technological costs and teacher training. Our project hopes to rectify these two problems by creating an easy to use, fun, and interactive computer program that allows students to learn the fundamentals of computer science without the need for expensive hardware and software. Our end goal is to create a project that allows users to “code” without typing on a computer. Thus, this prototype gives us a great opportunity to test the feasibility of this design. From a user perspective there is very little difference between taping paper to a whiteboard and having us draw in the output from putting magnets on the whiteboard and have a projector show the output generated by the computer. Thus, we hope that the low-fidelity prototype can give us not only an accurate depiction of how the user will interact with the final system but also provide valuable insight into how to improve the overall user experience (especially since the goal is to create fun and interactive experience for middle school students).
Mission Statement: Our group strives to provide every student with a method to learn the fundamentals of computer science in a tangible, fun, and interactive way. Most schools in the country do not teach computer science because of resource and financial limitations. However, computer science is one of the fastest growing industries, creating a wide gap between the supply and demand of computer programmers. By creating a cheap and effective way to teach the fundamentals of computer science, we hope to give students from all socioeconomic backgrounds the ability to become computer programmers.
Updated Task: We switched our difficult task from the Simplified Turtle Graphics to the teaching of the TOY Lesson to instructors. Since interviewing an instructor in P2, we realized that a large part of the success of our project relies on teaching instructors how to use the system. Thus, since our user group expanded from only students to students and teachers, it made sense to focus one task on how instructors would use our interface.
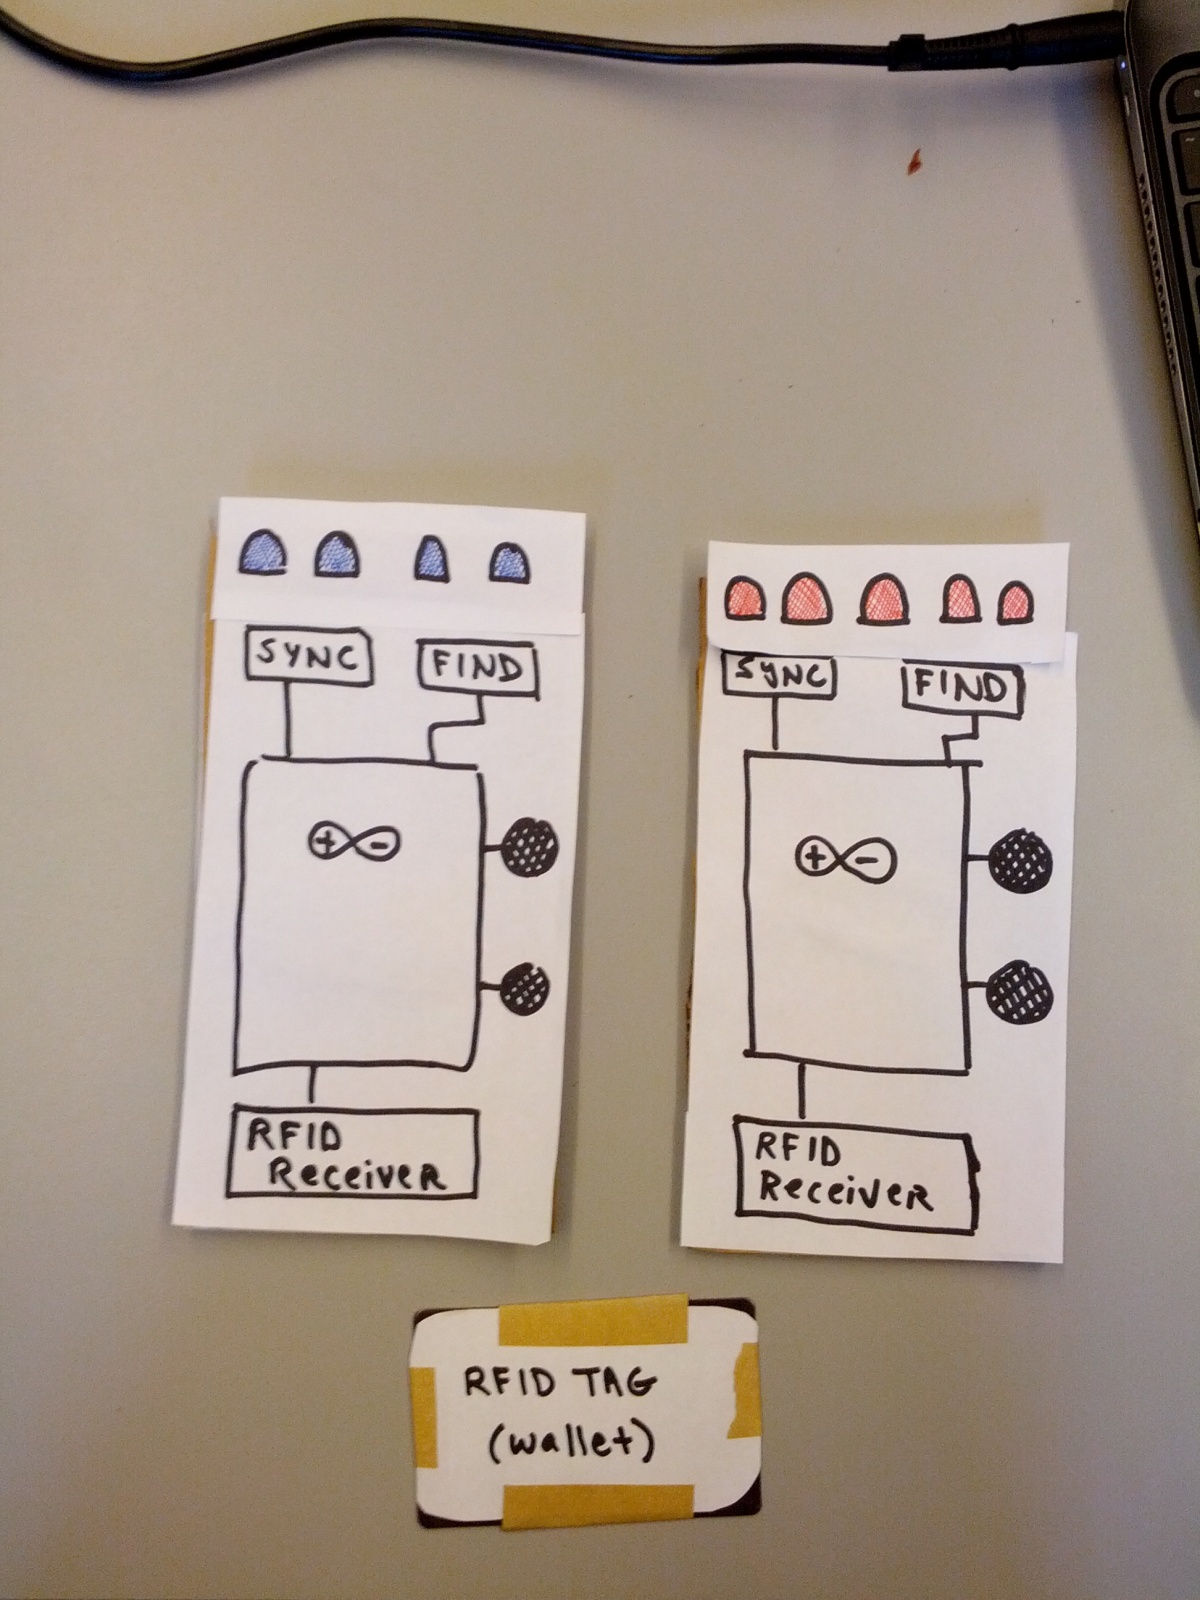
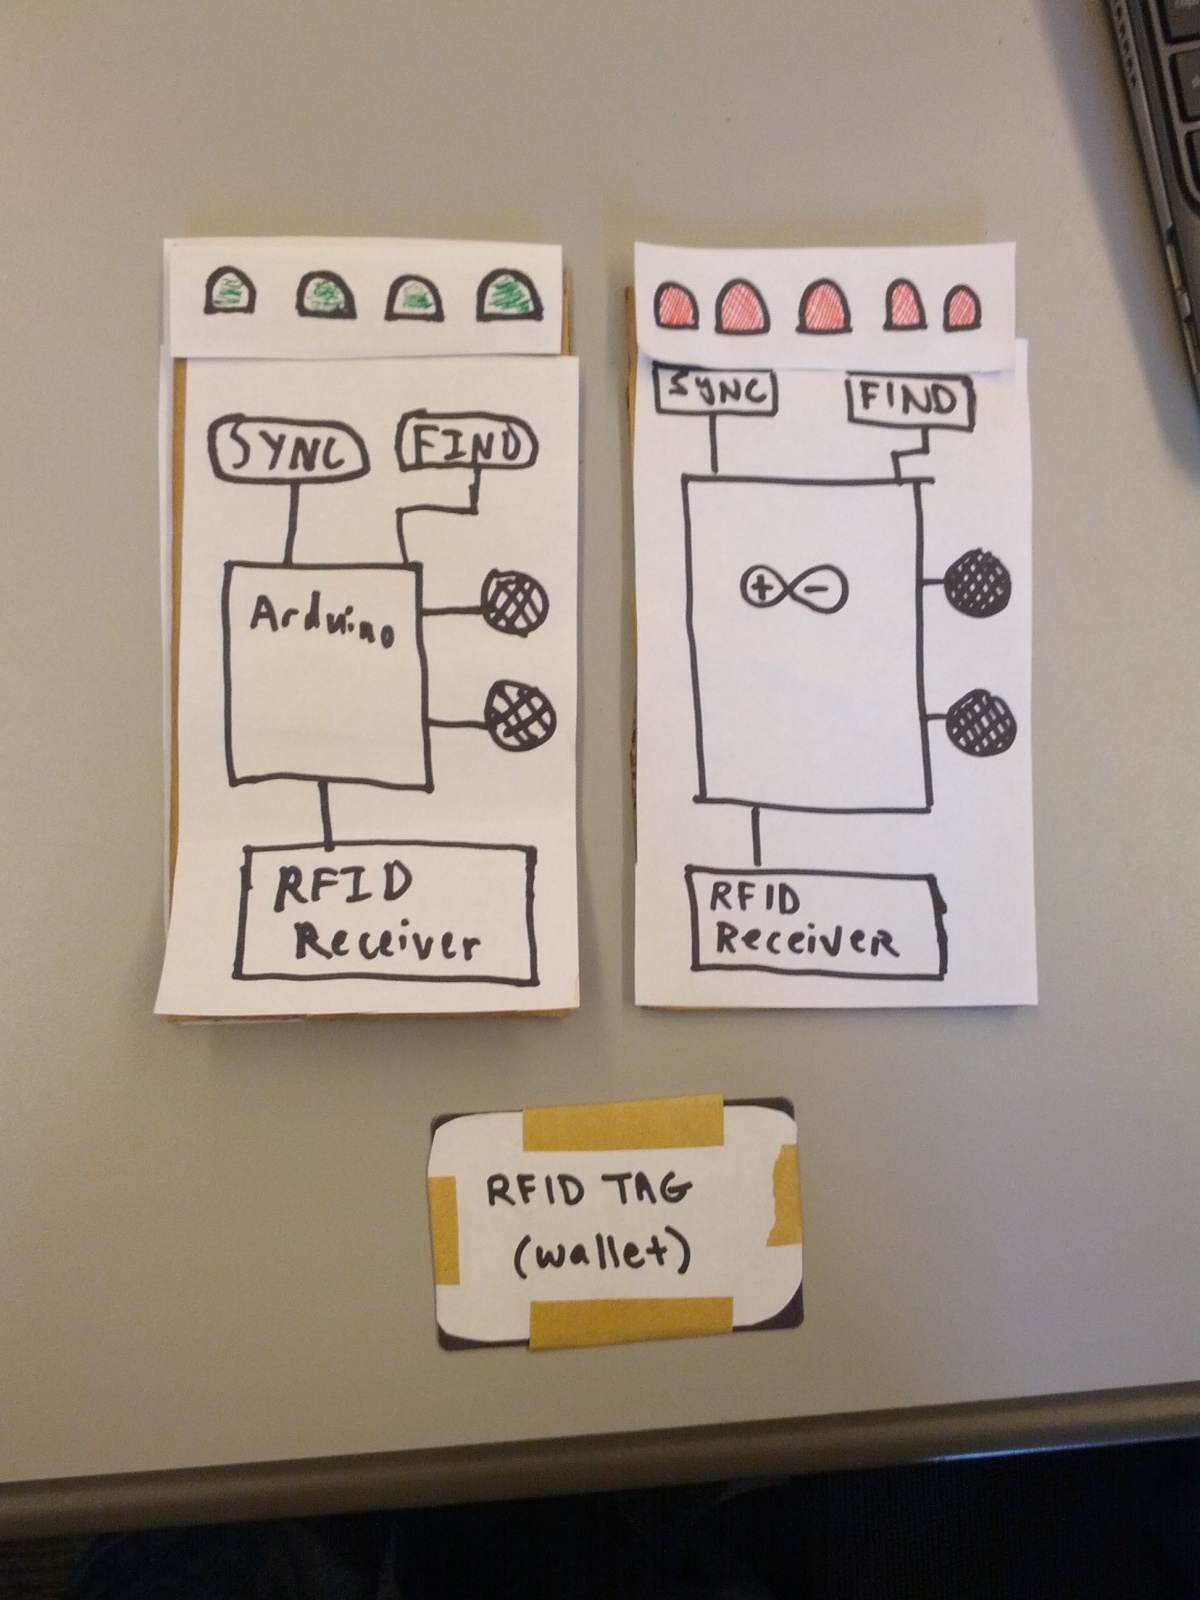
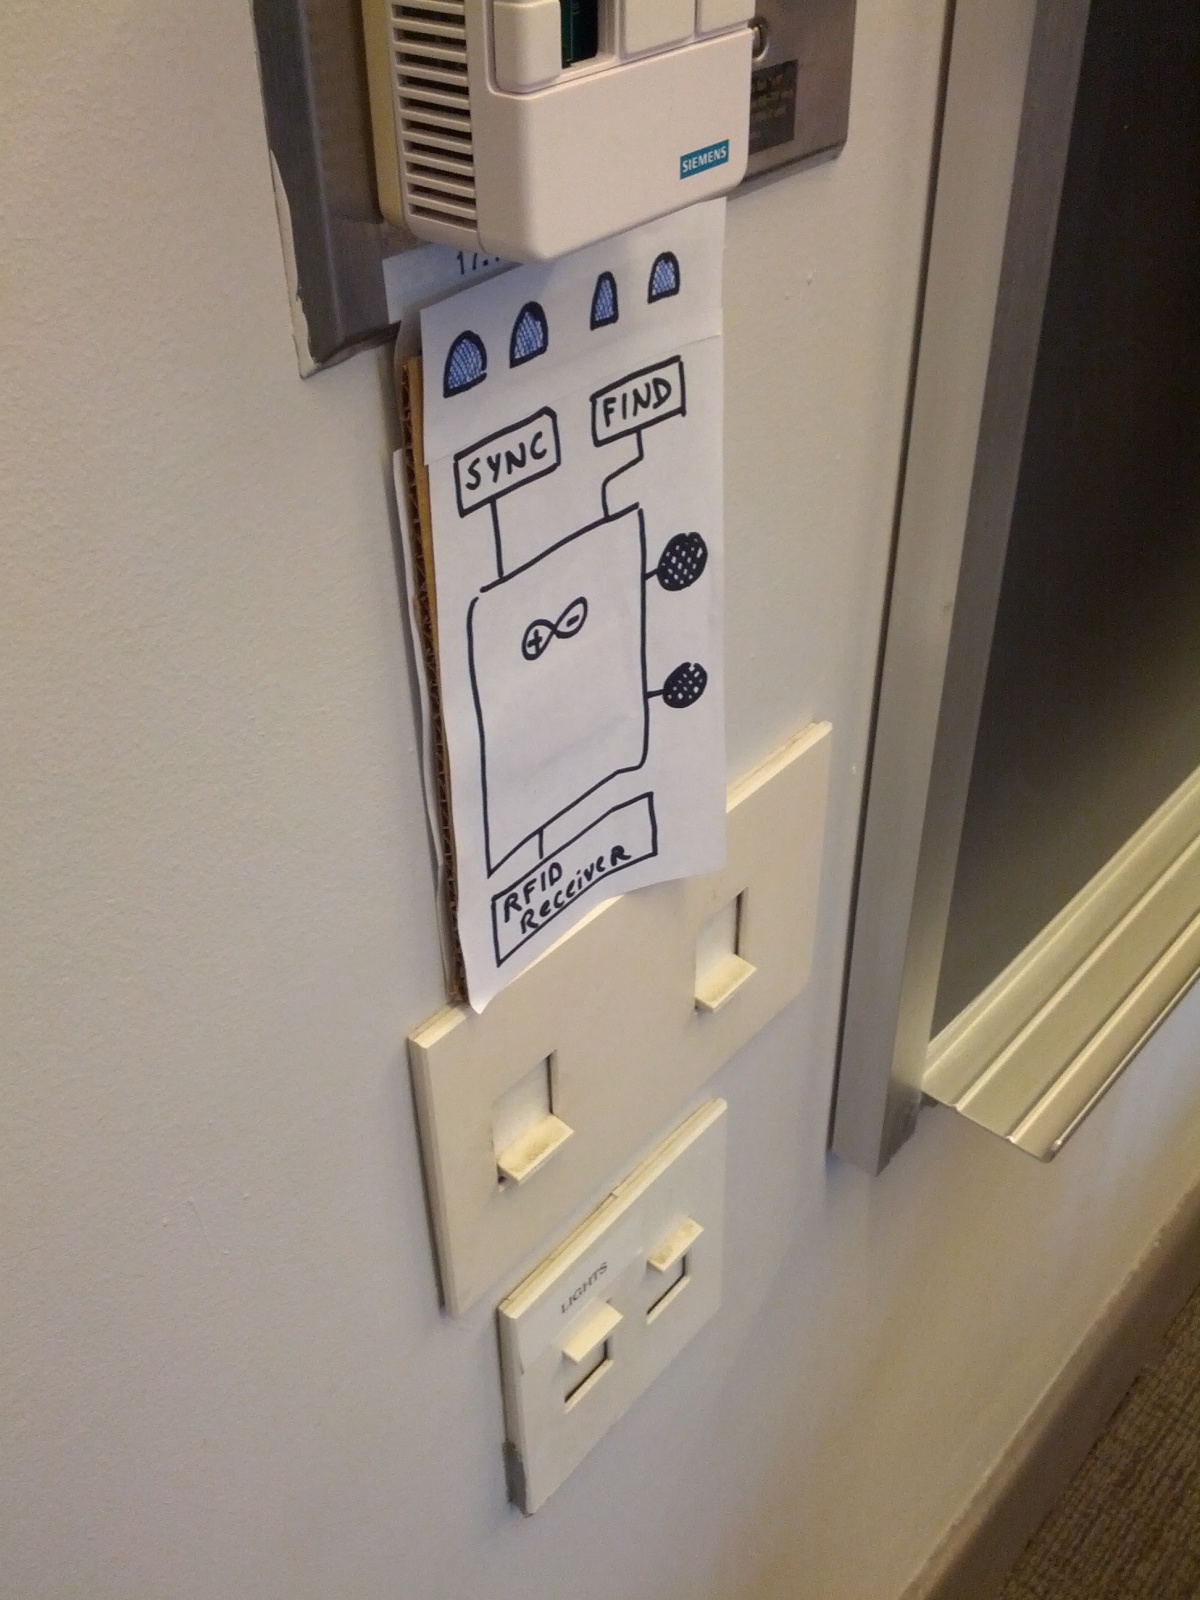
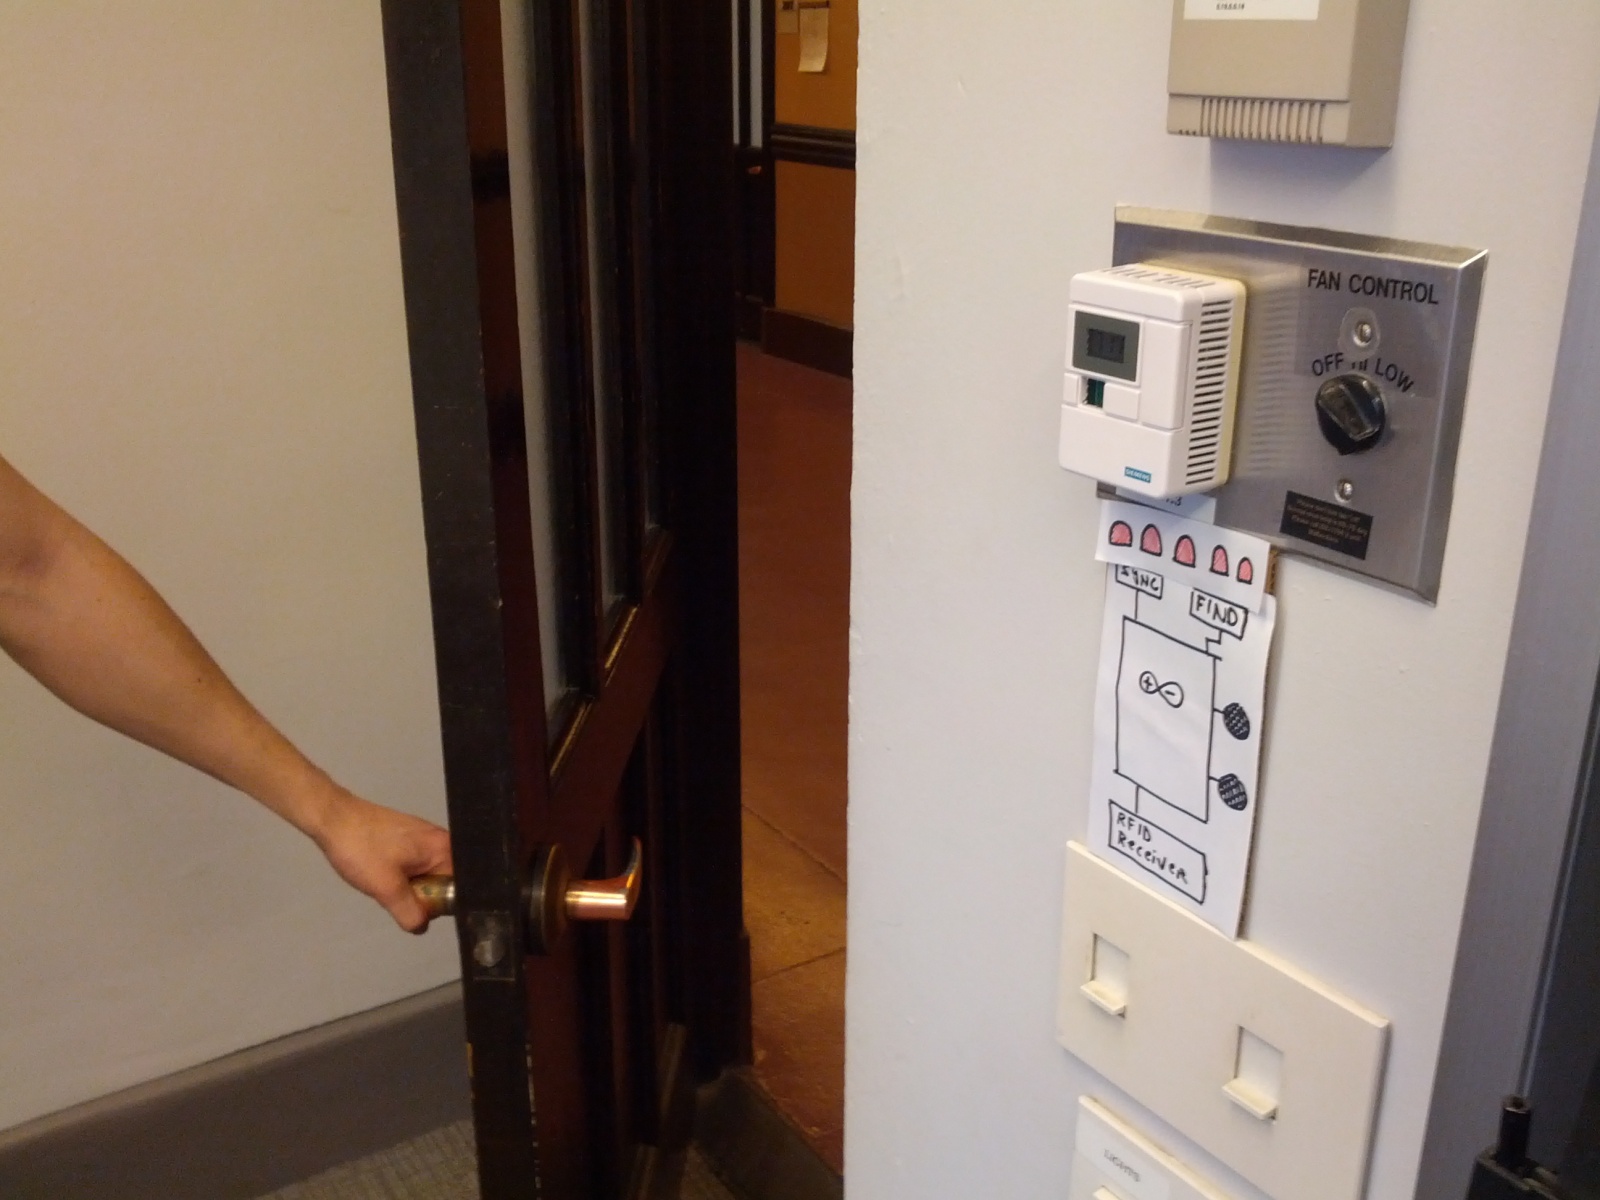
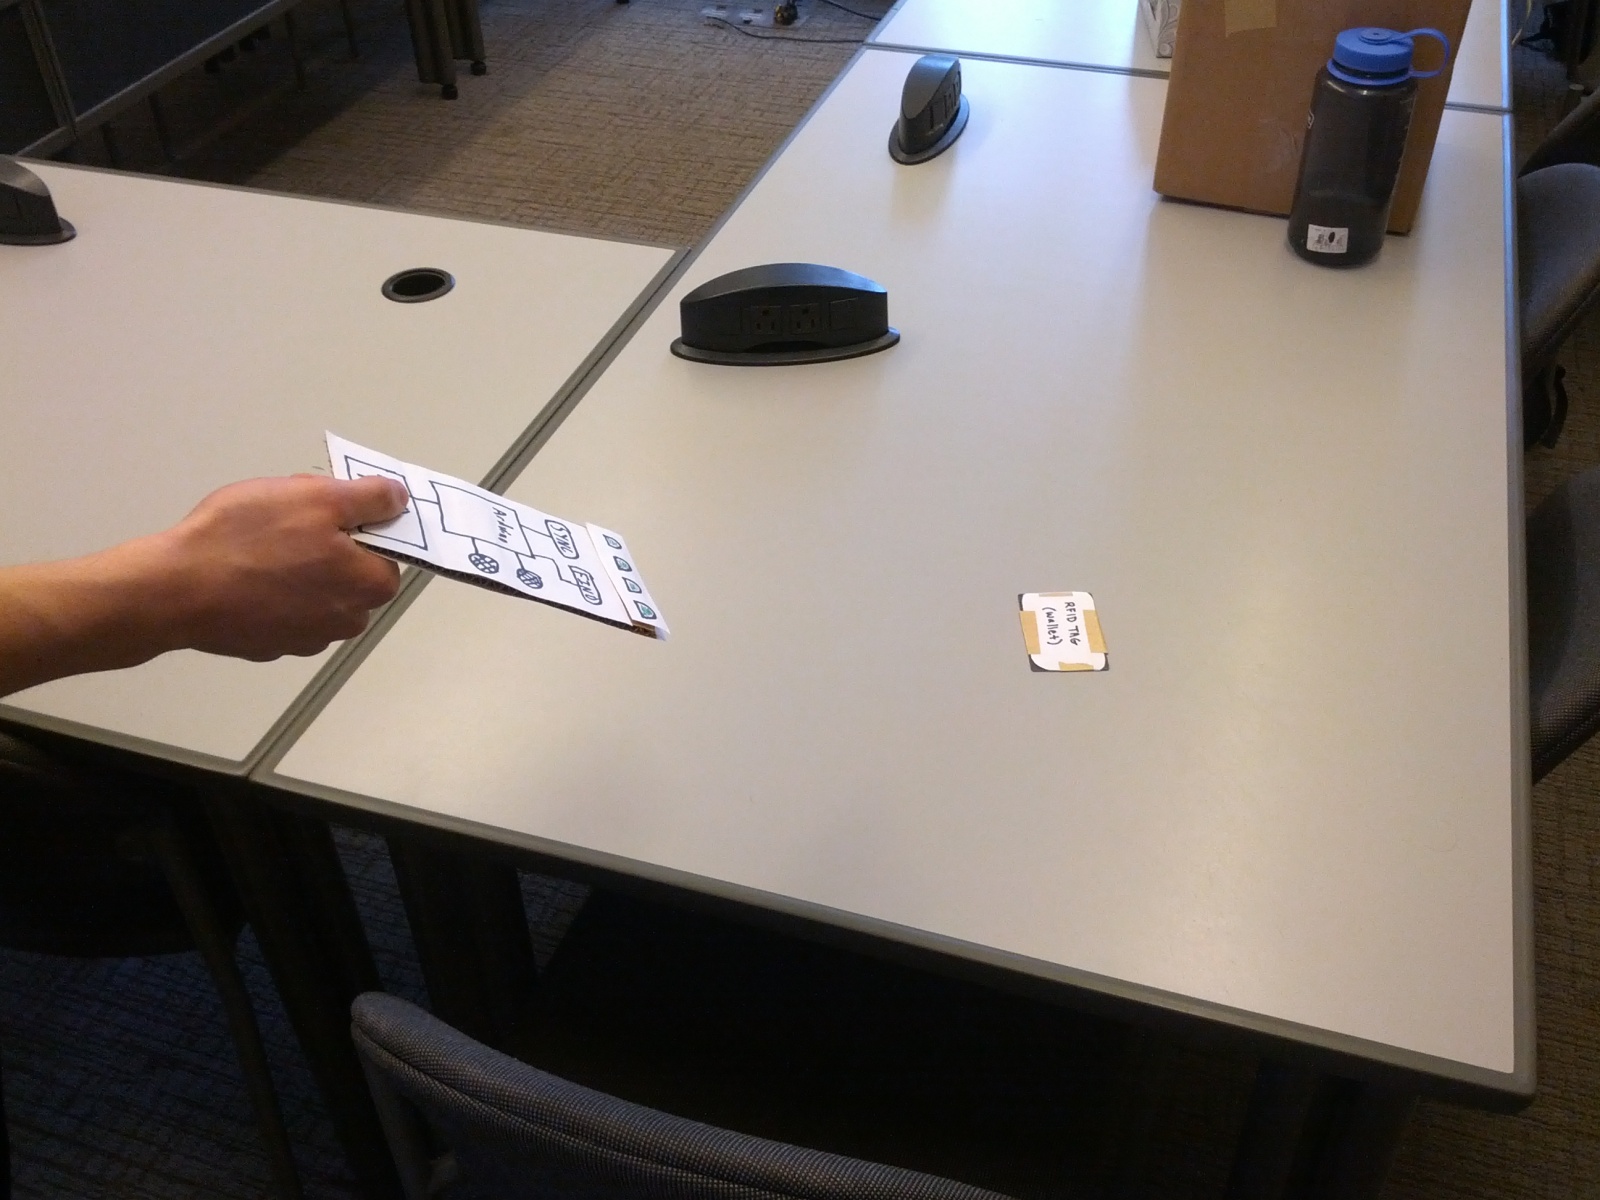
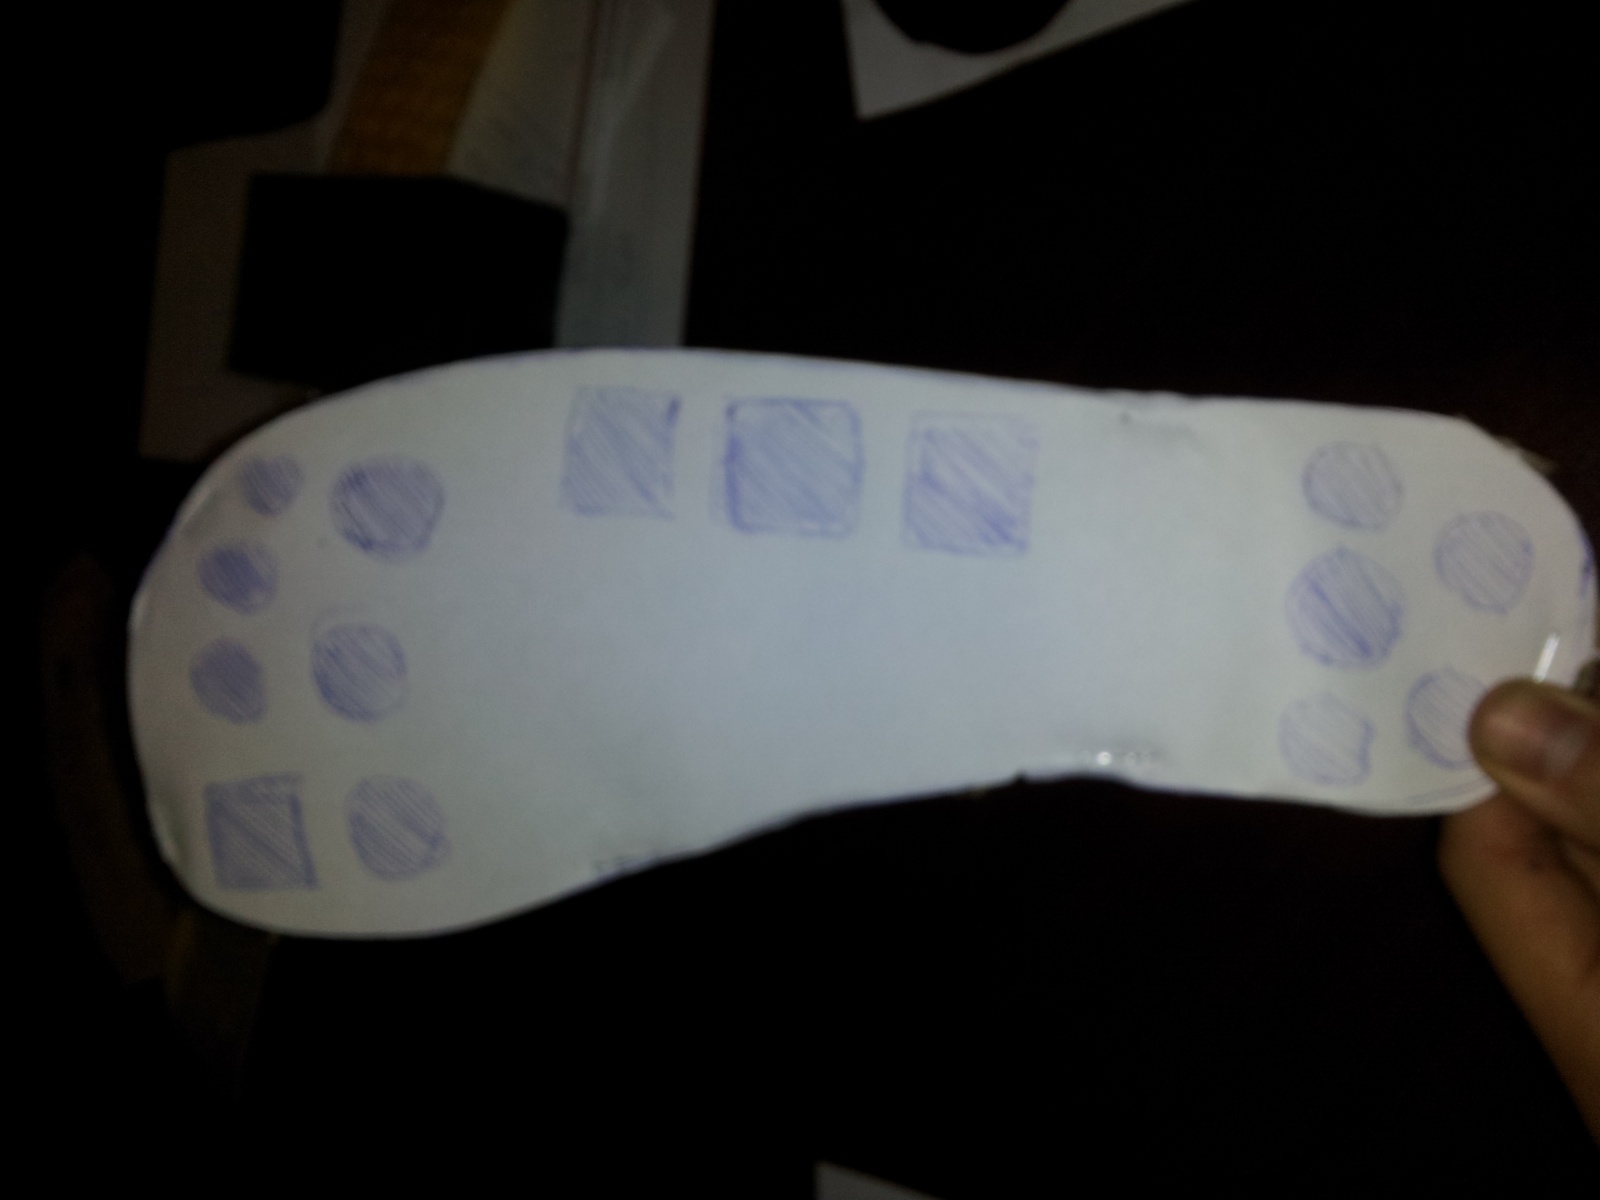
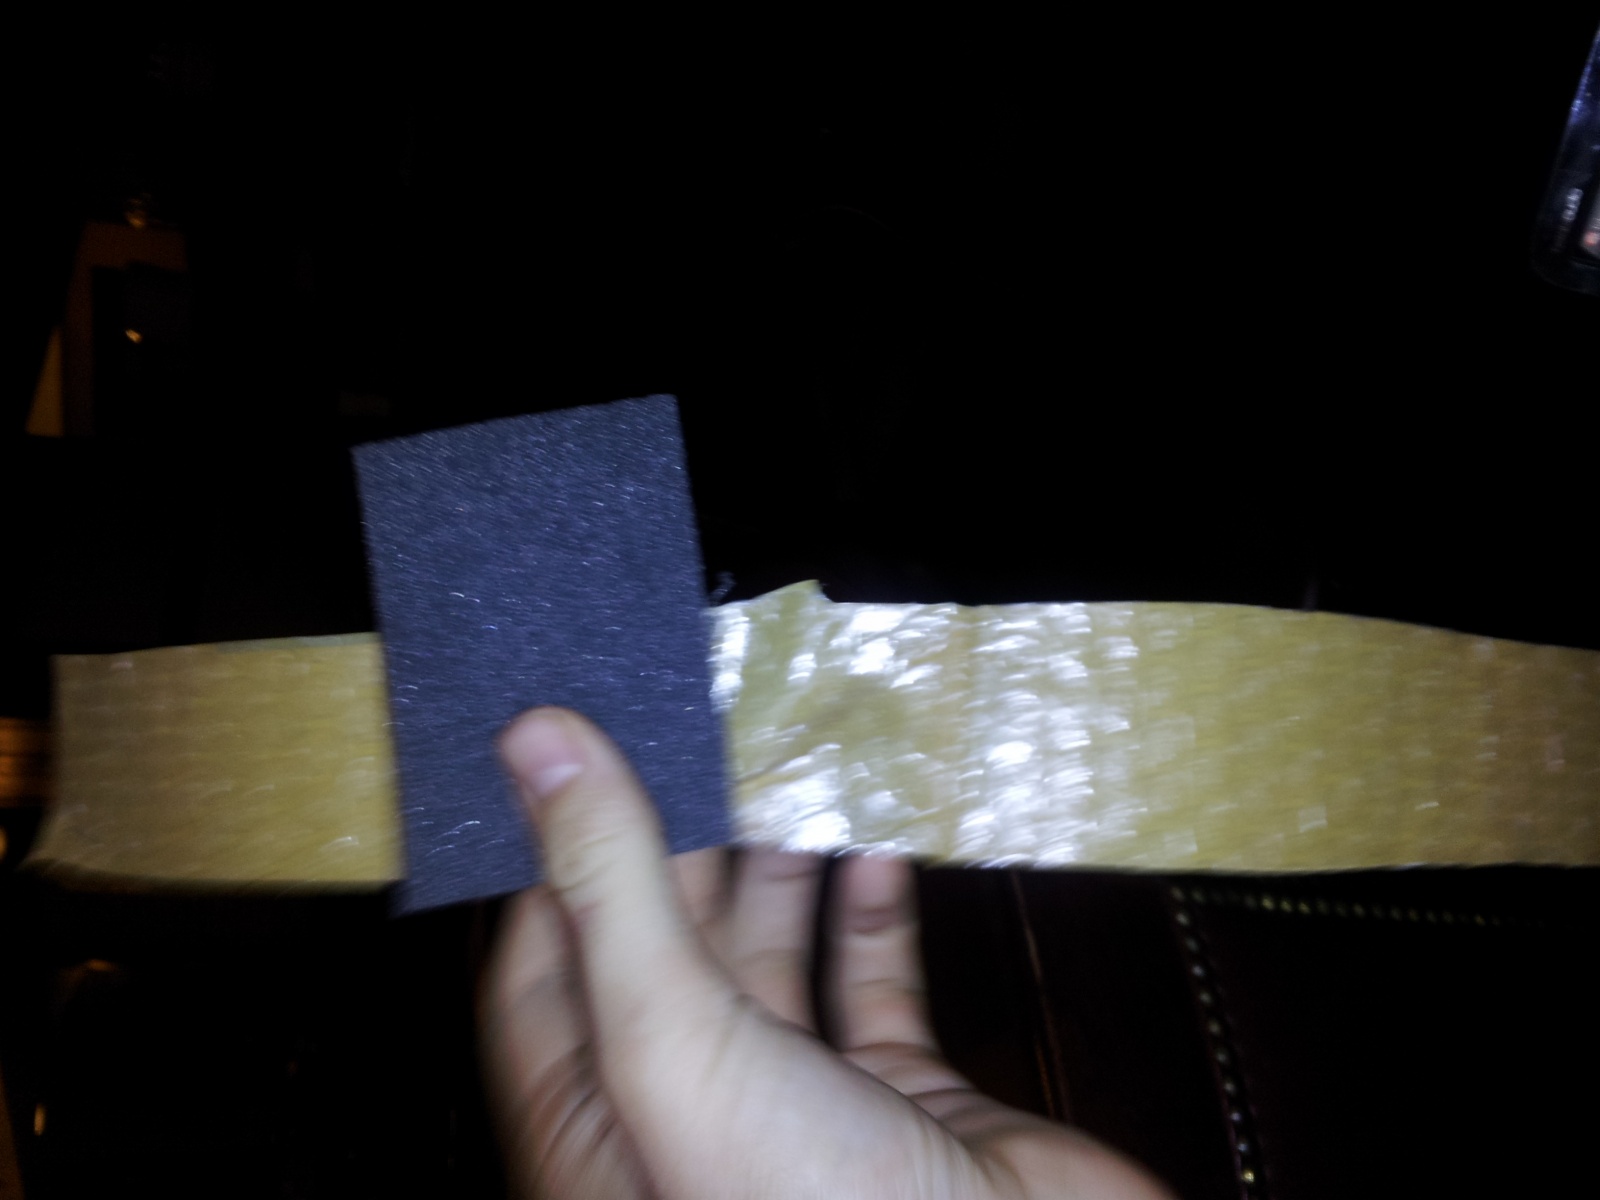
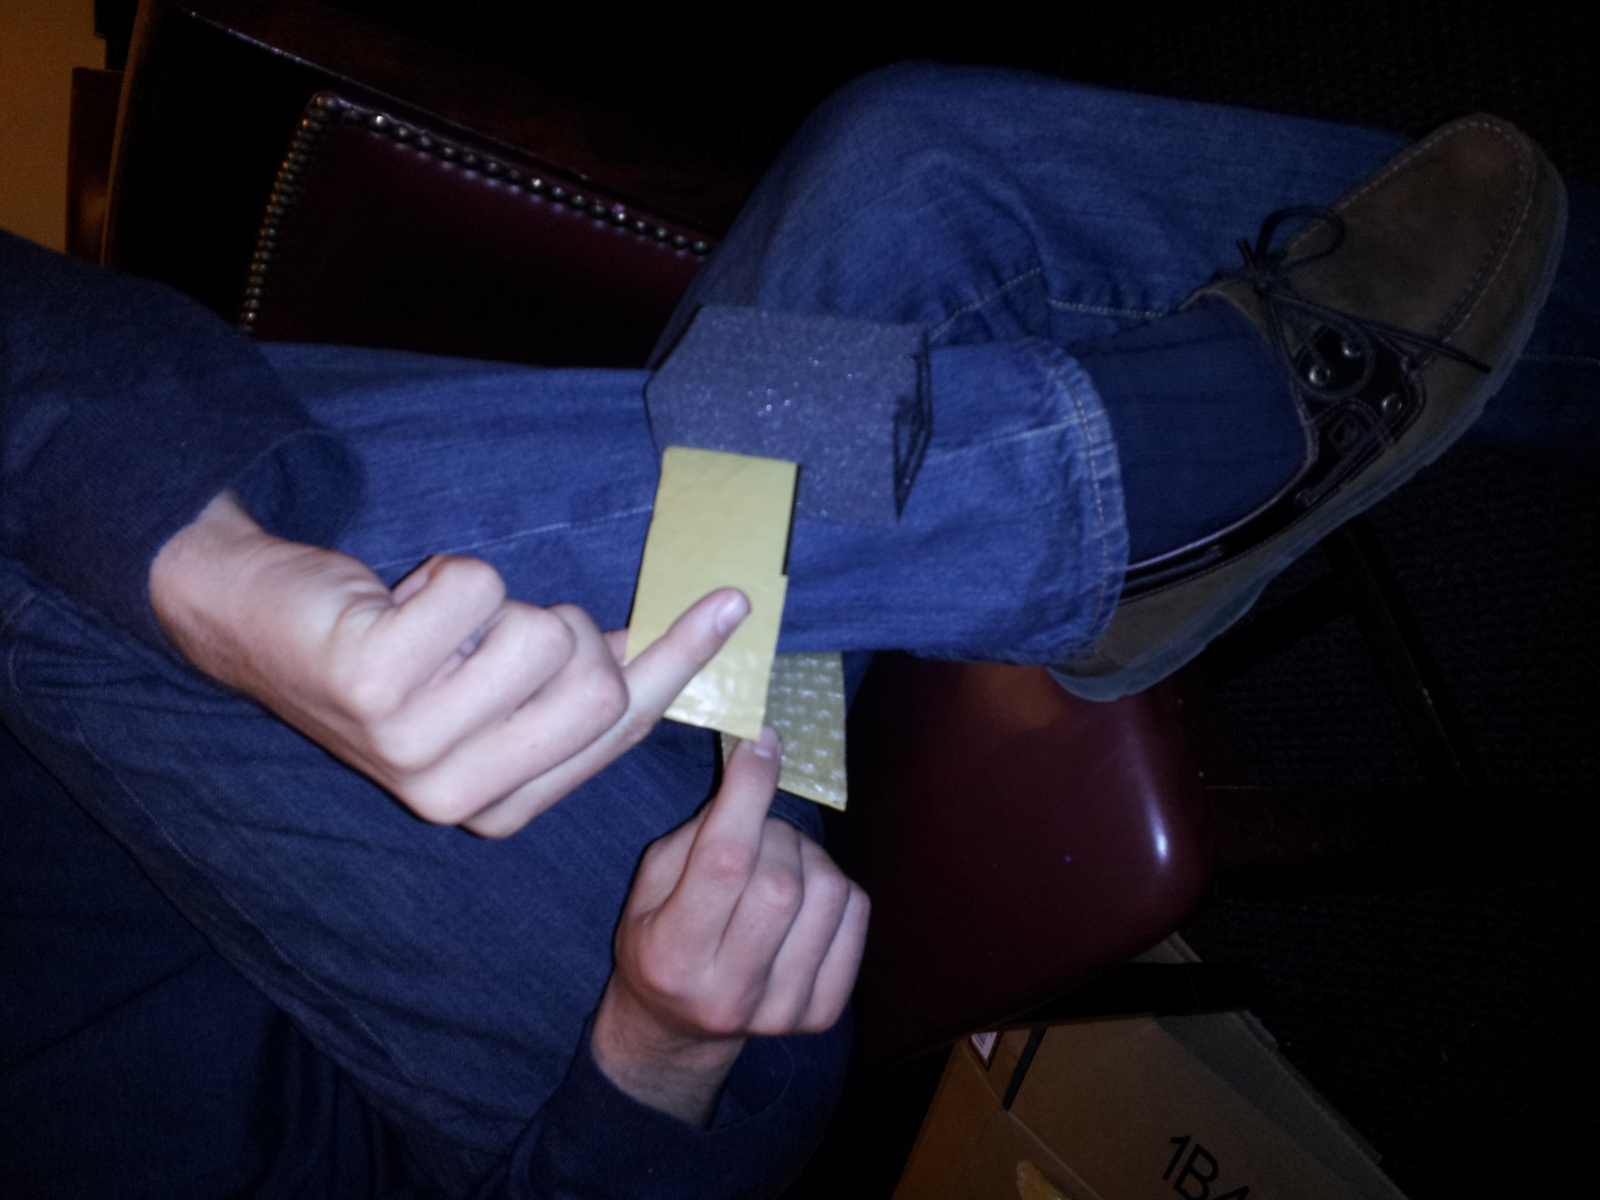
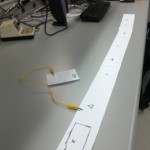
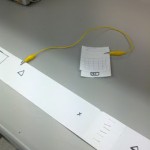
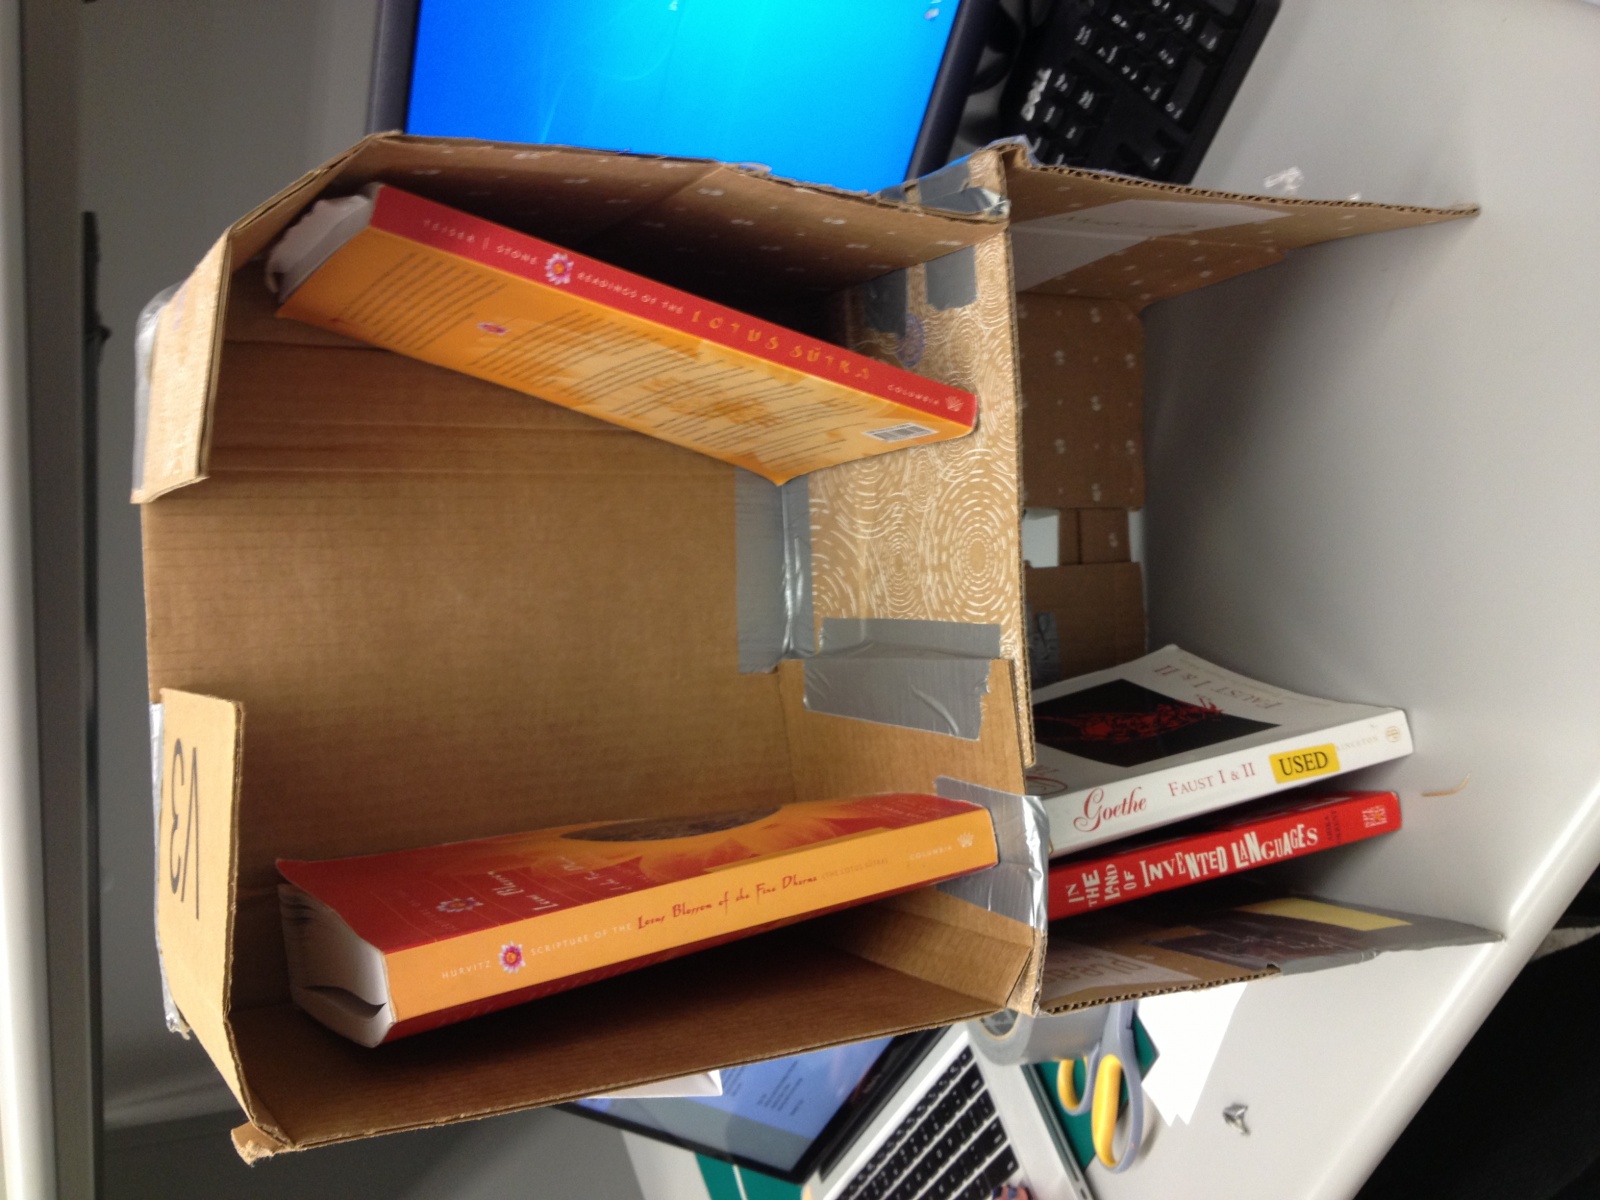
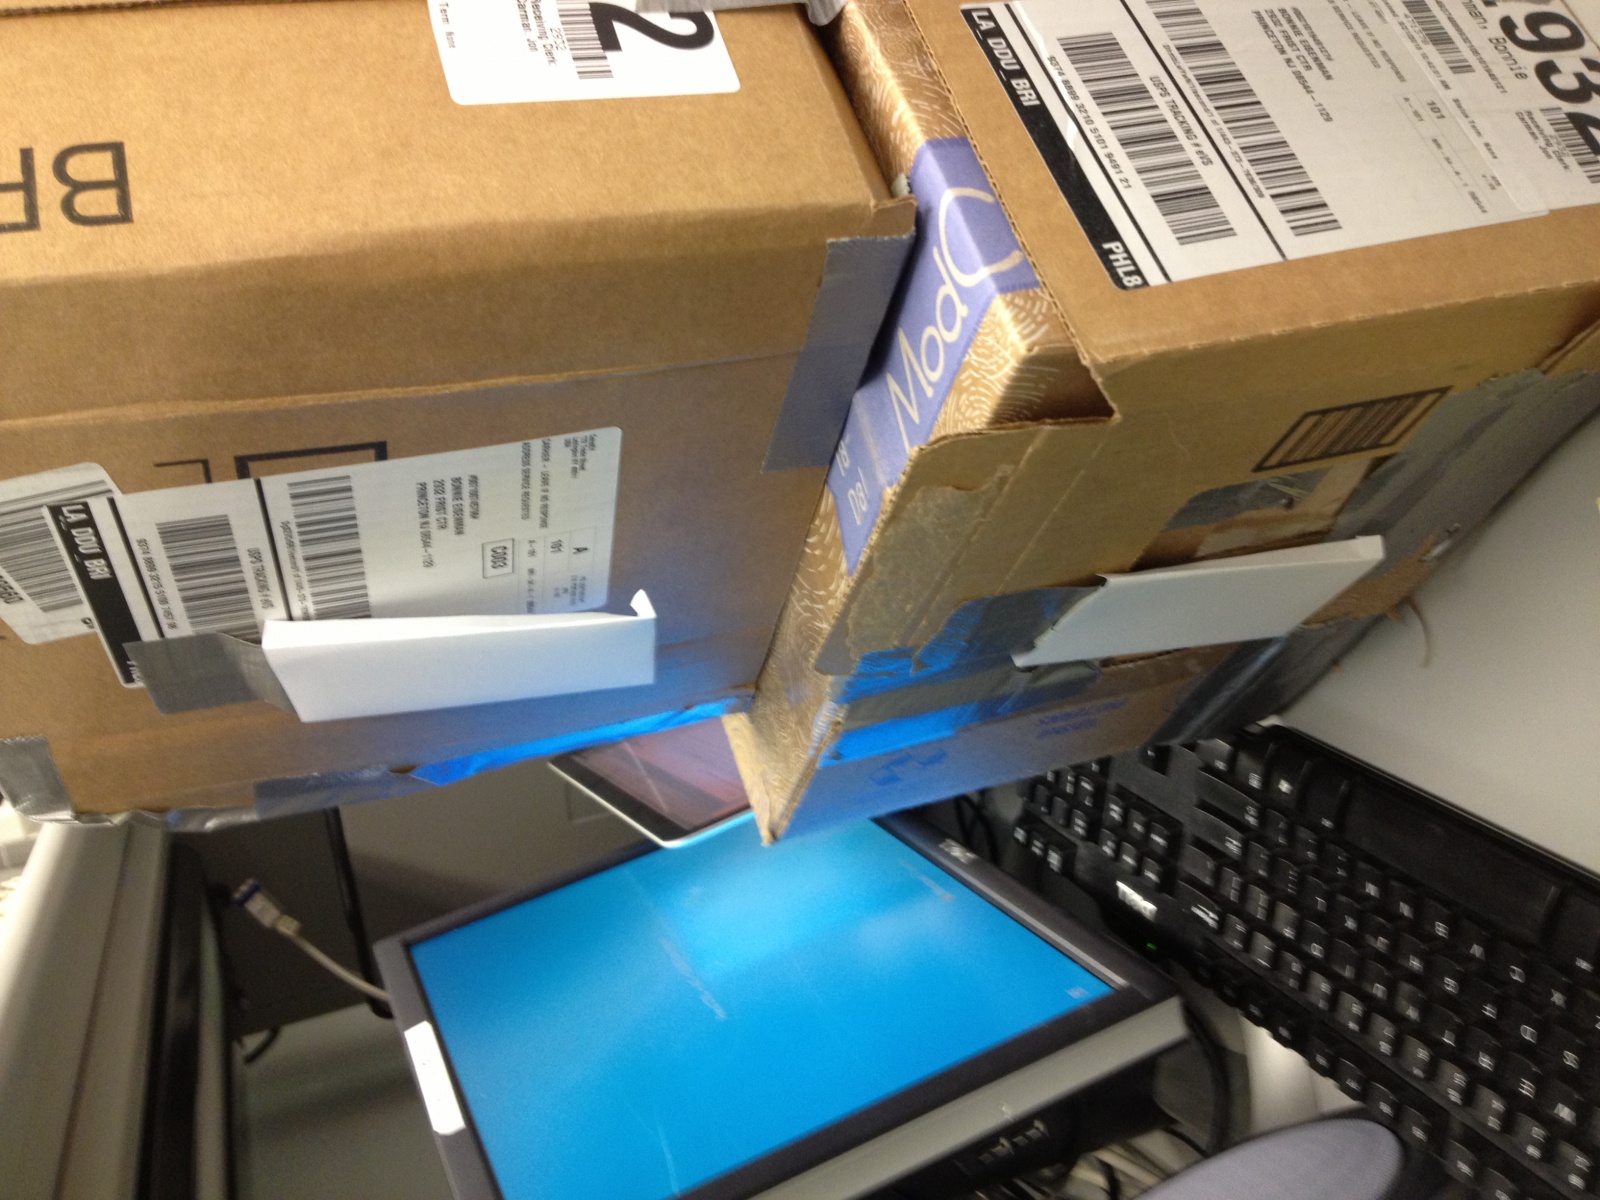
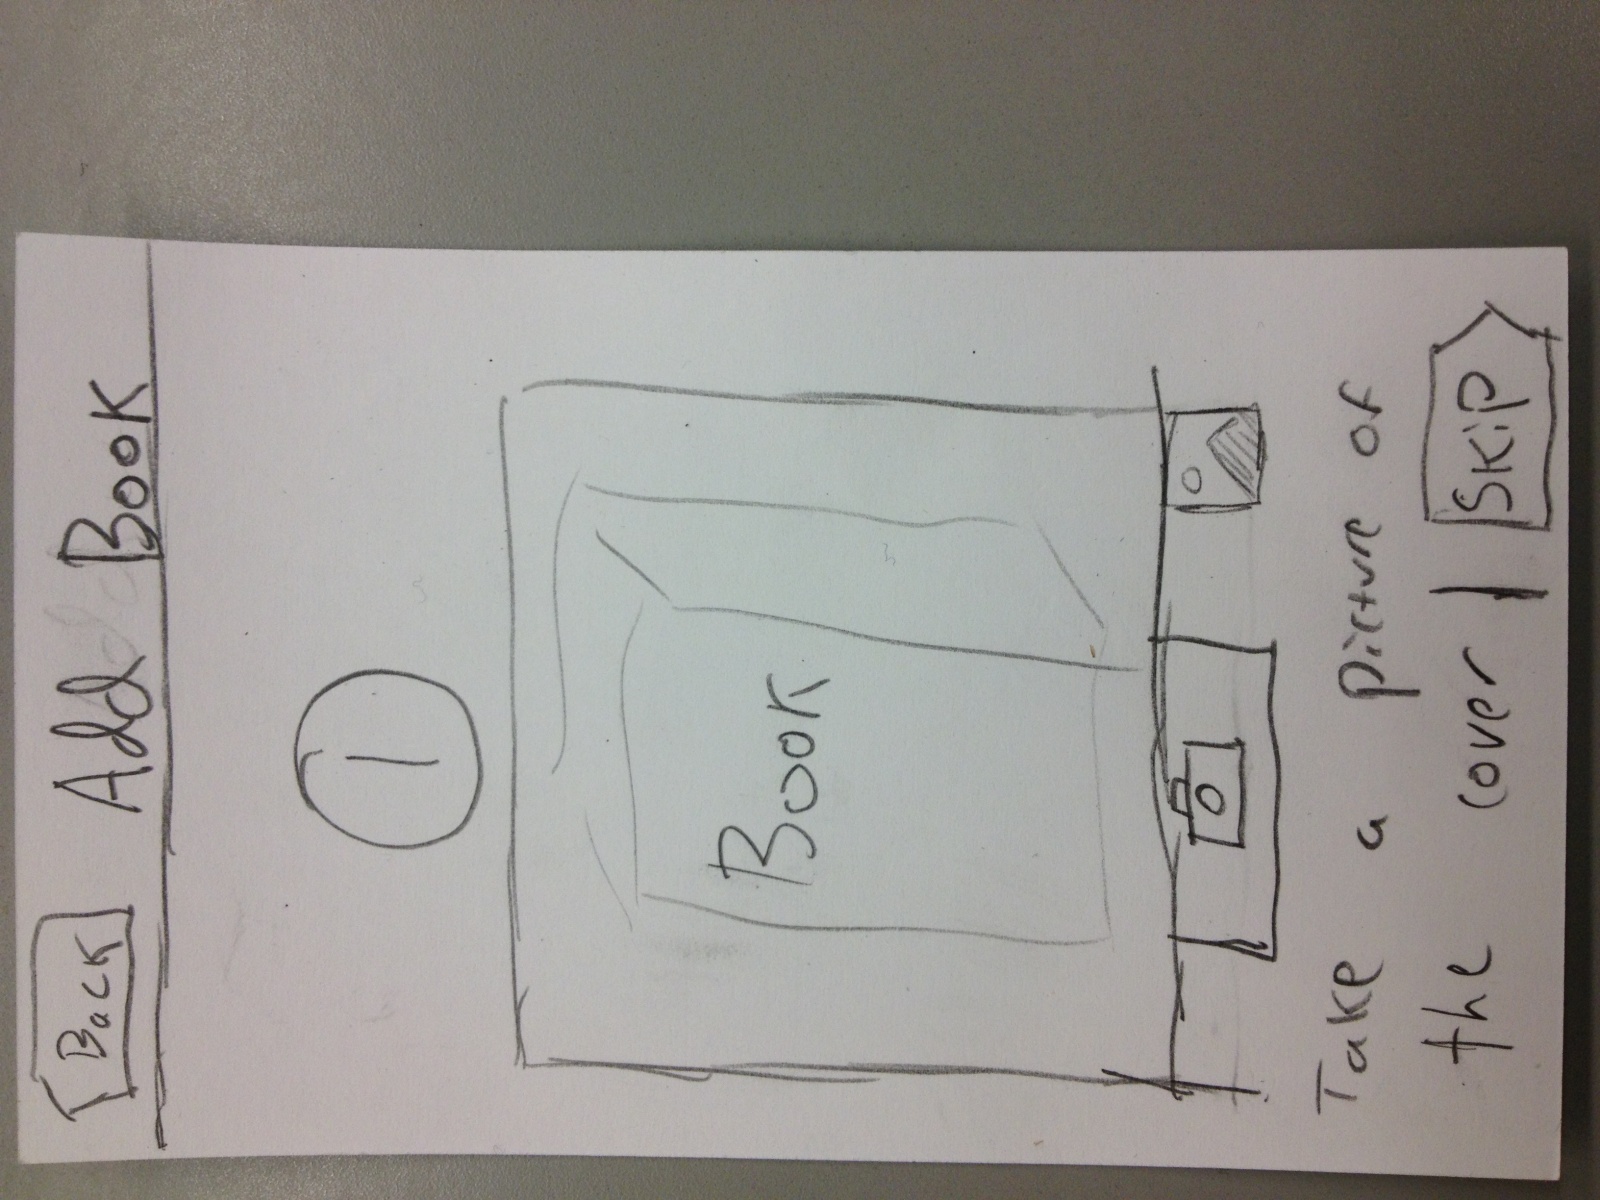
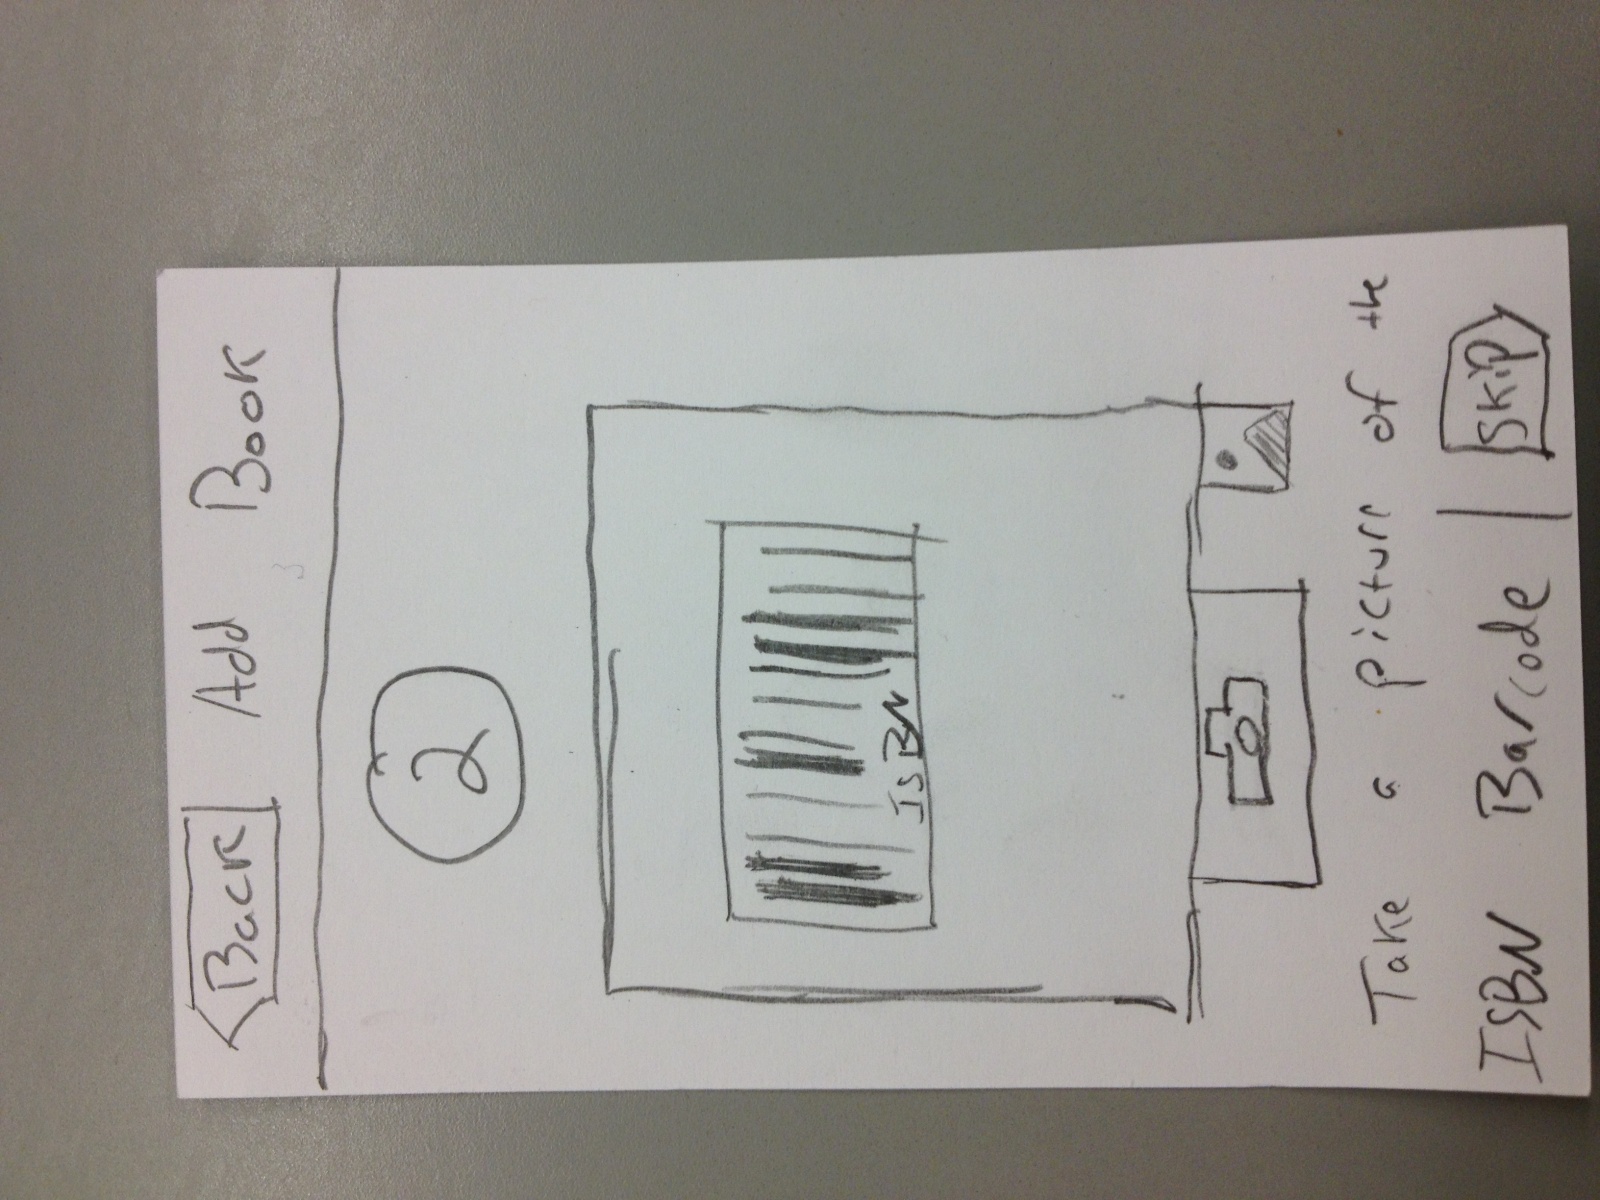
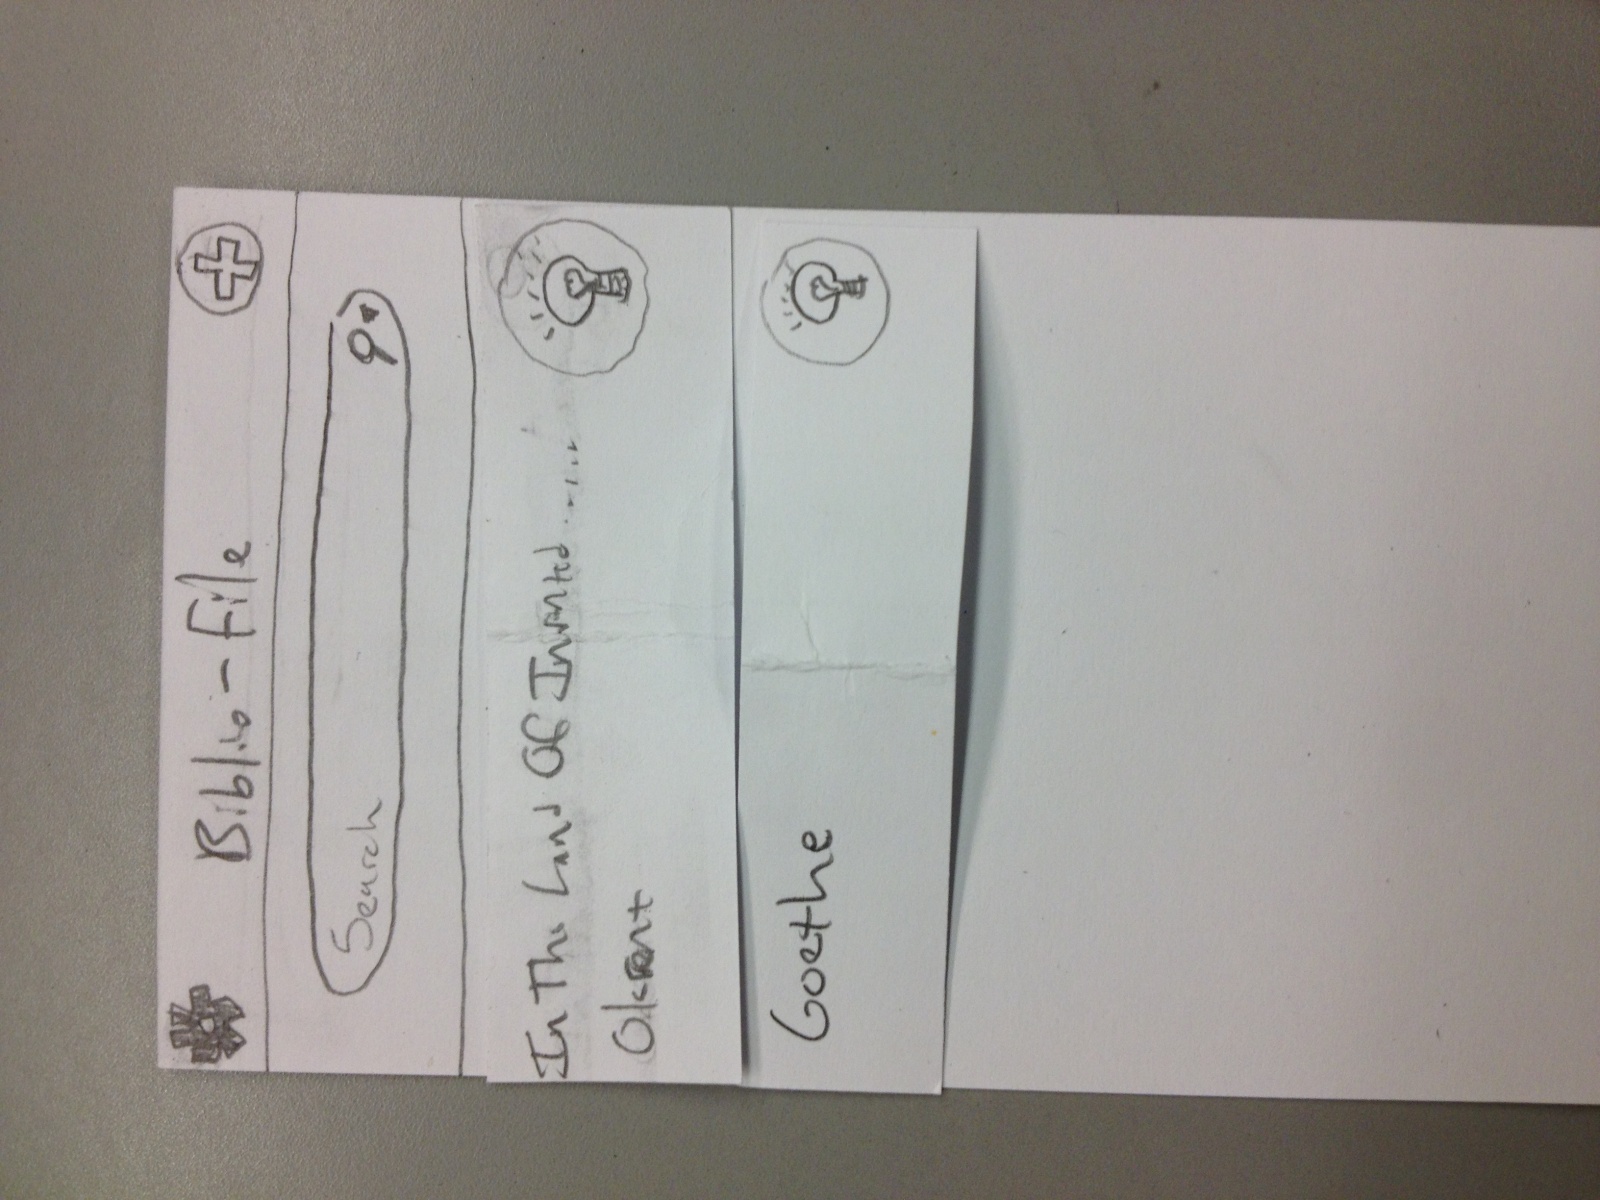
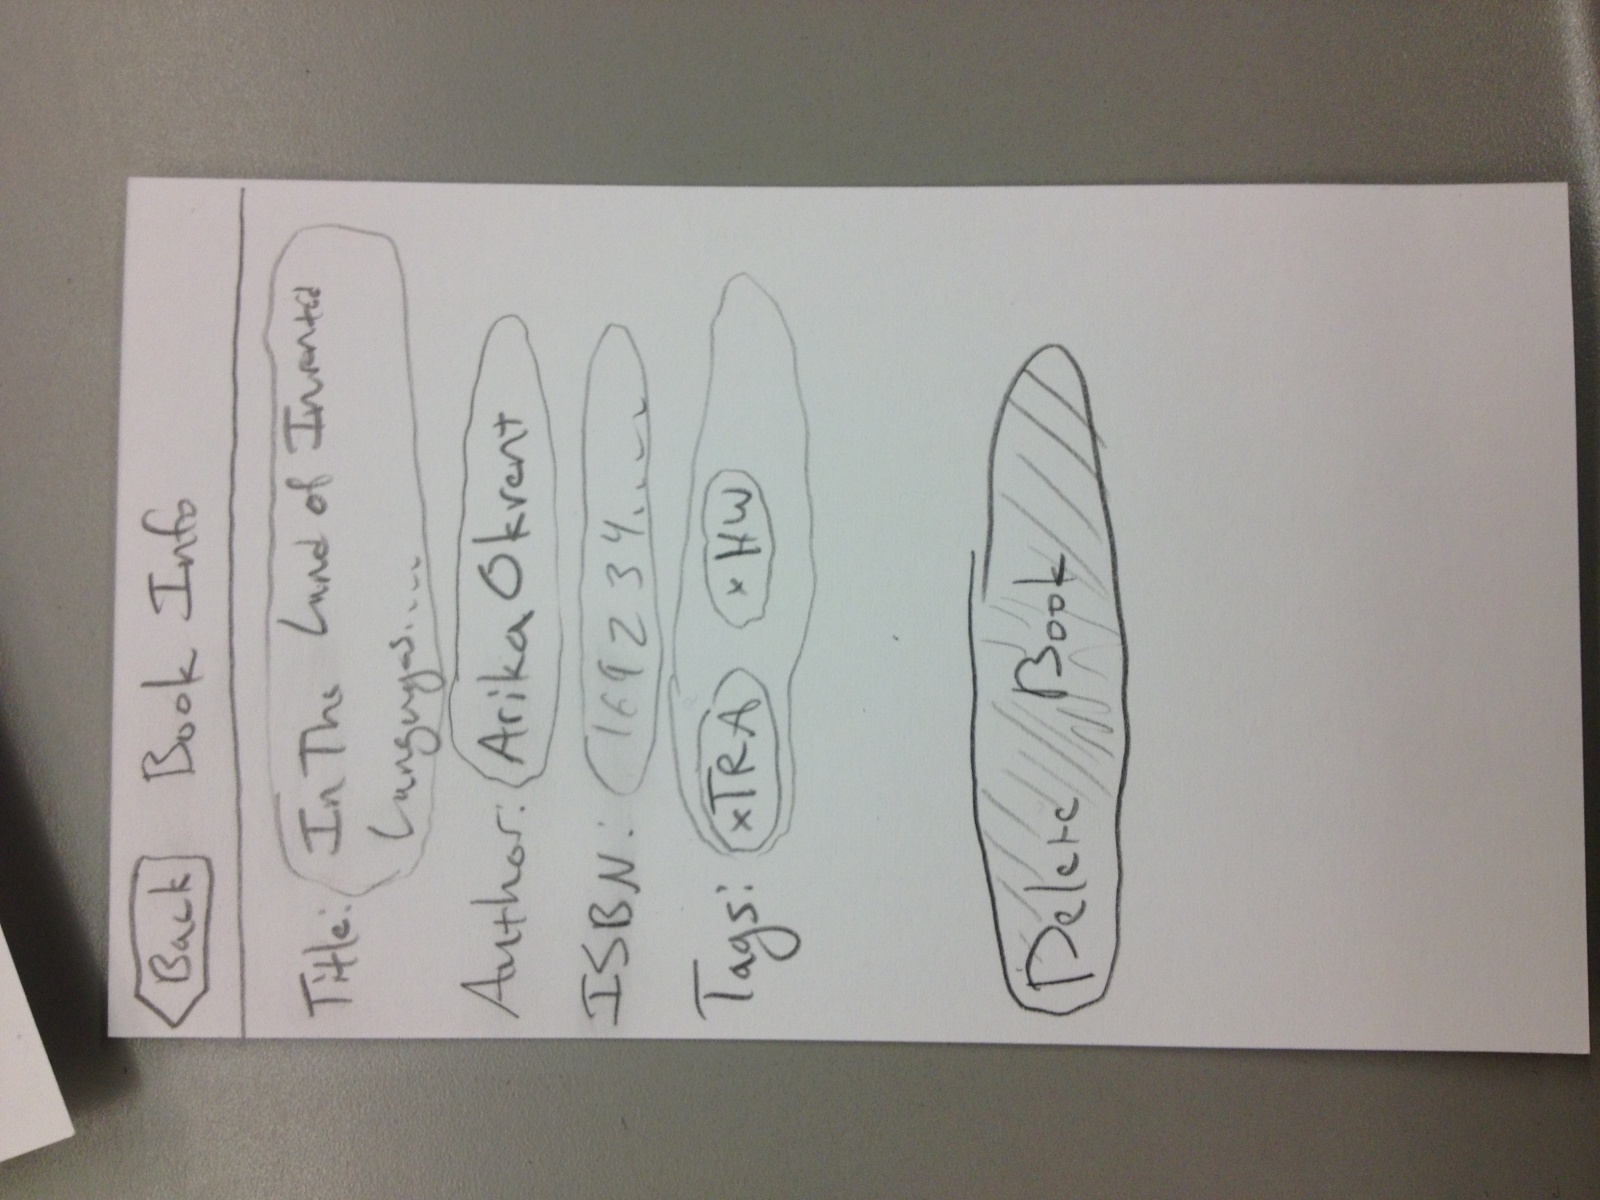
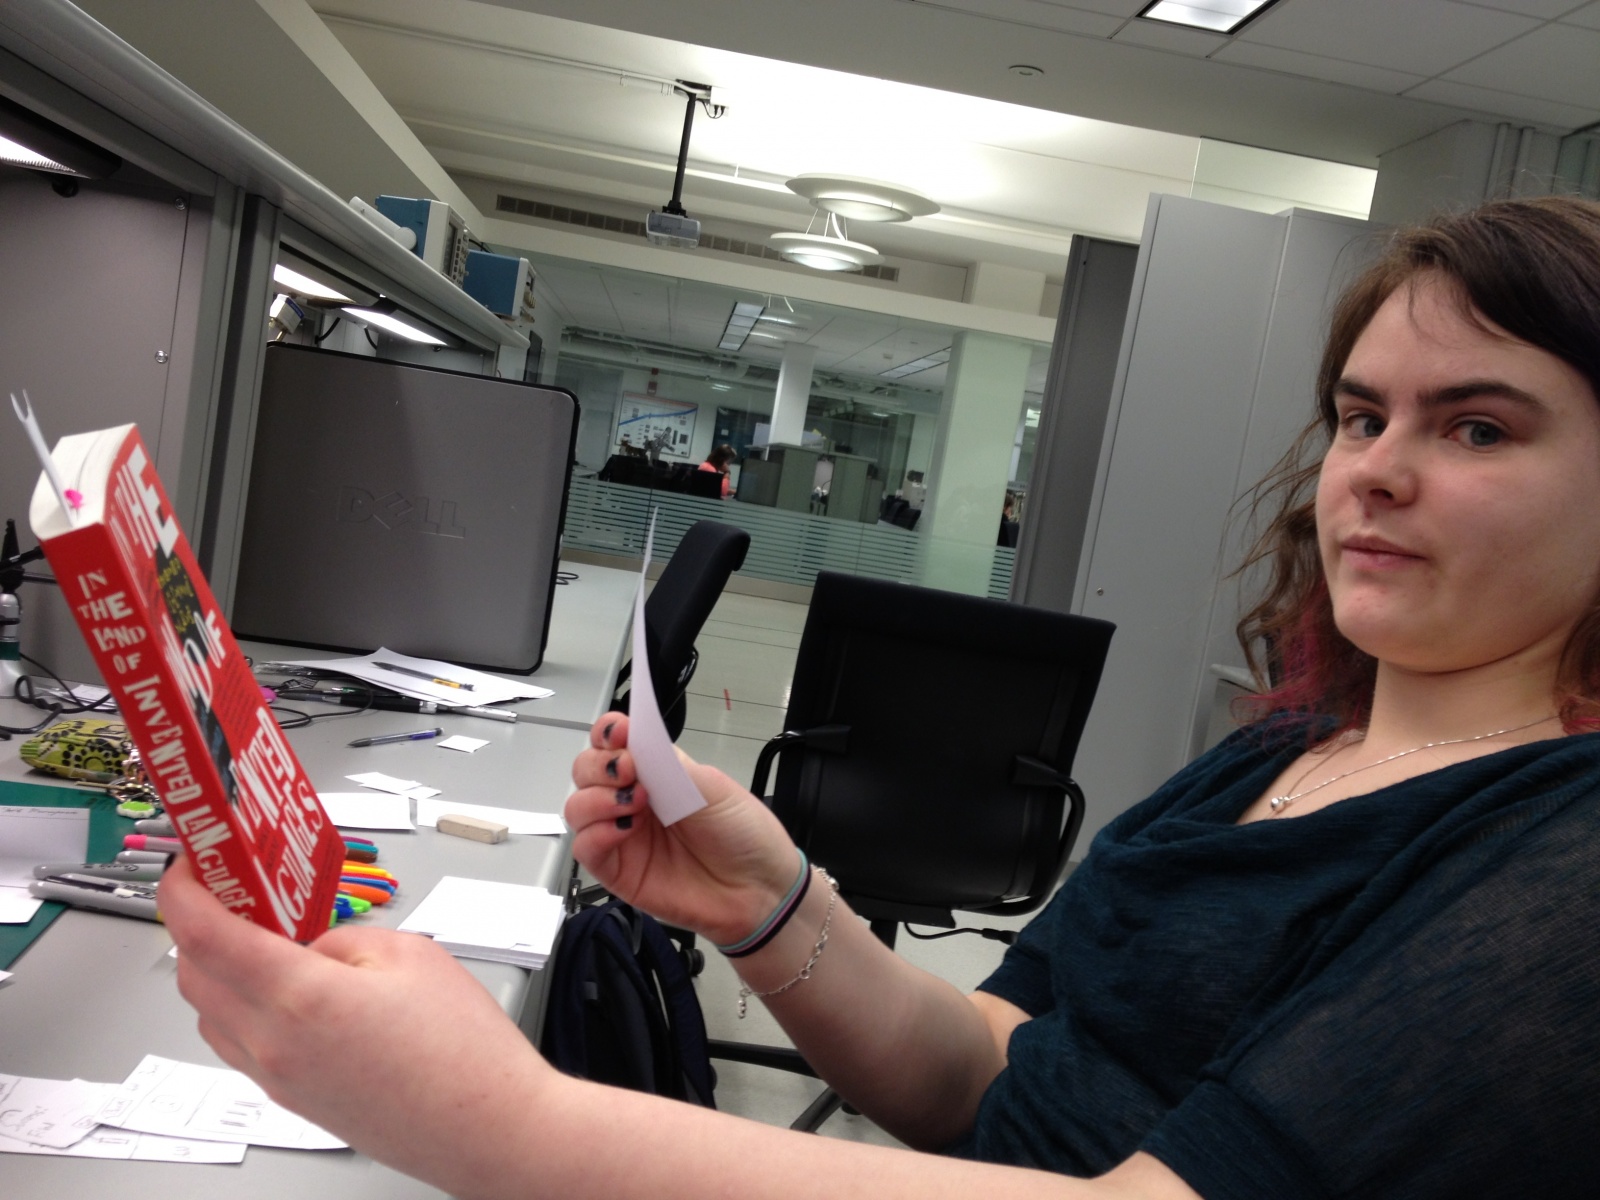
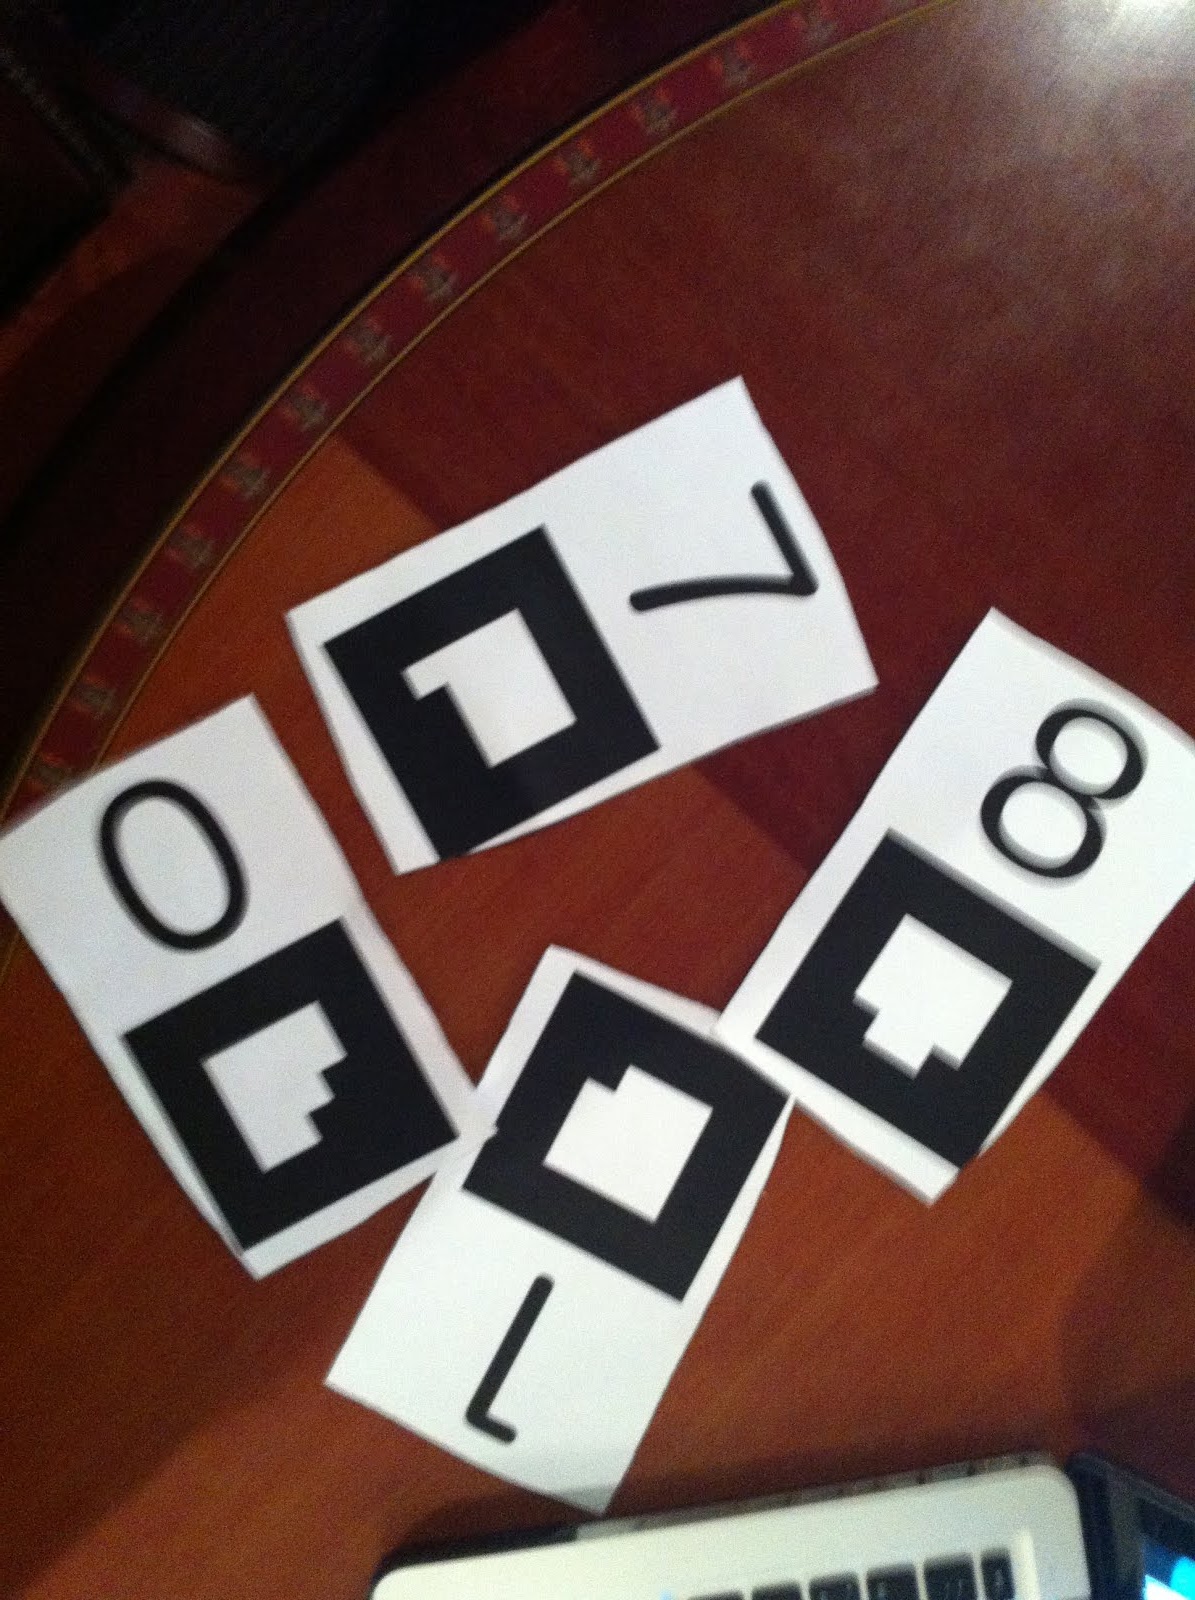
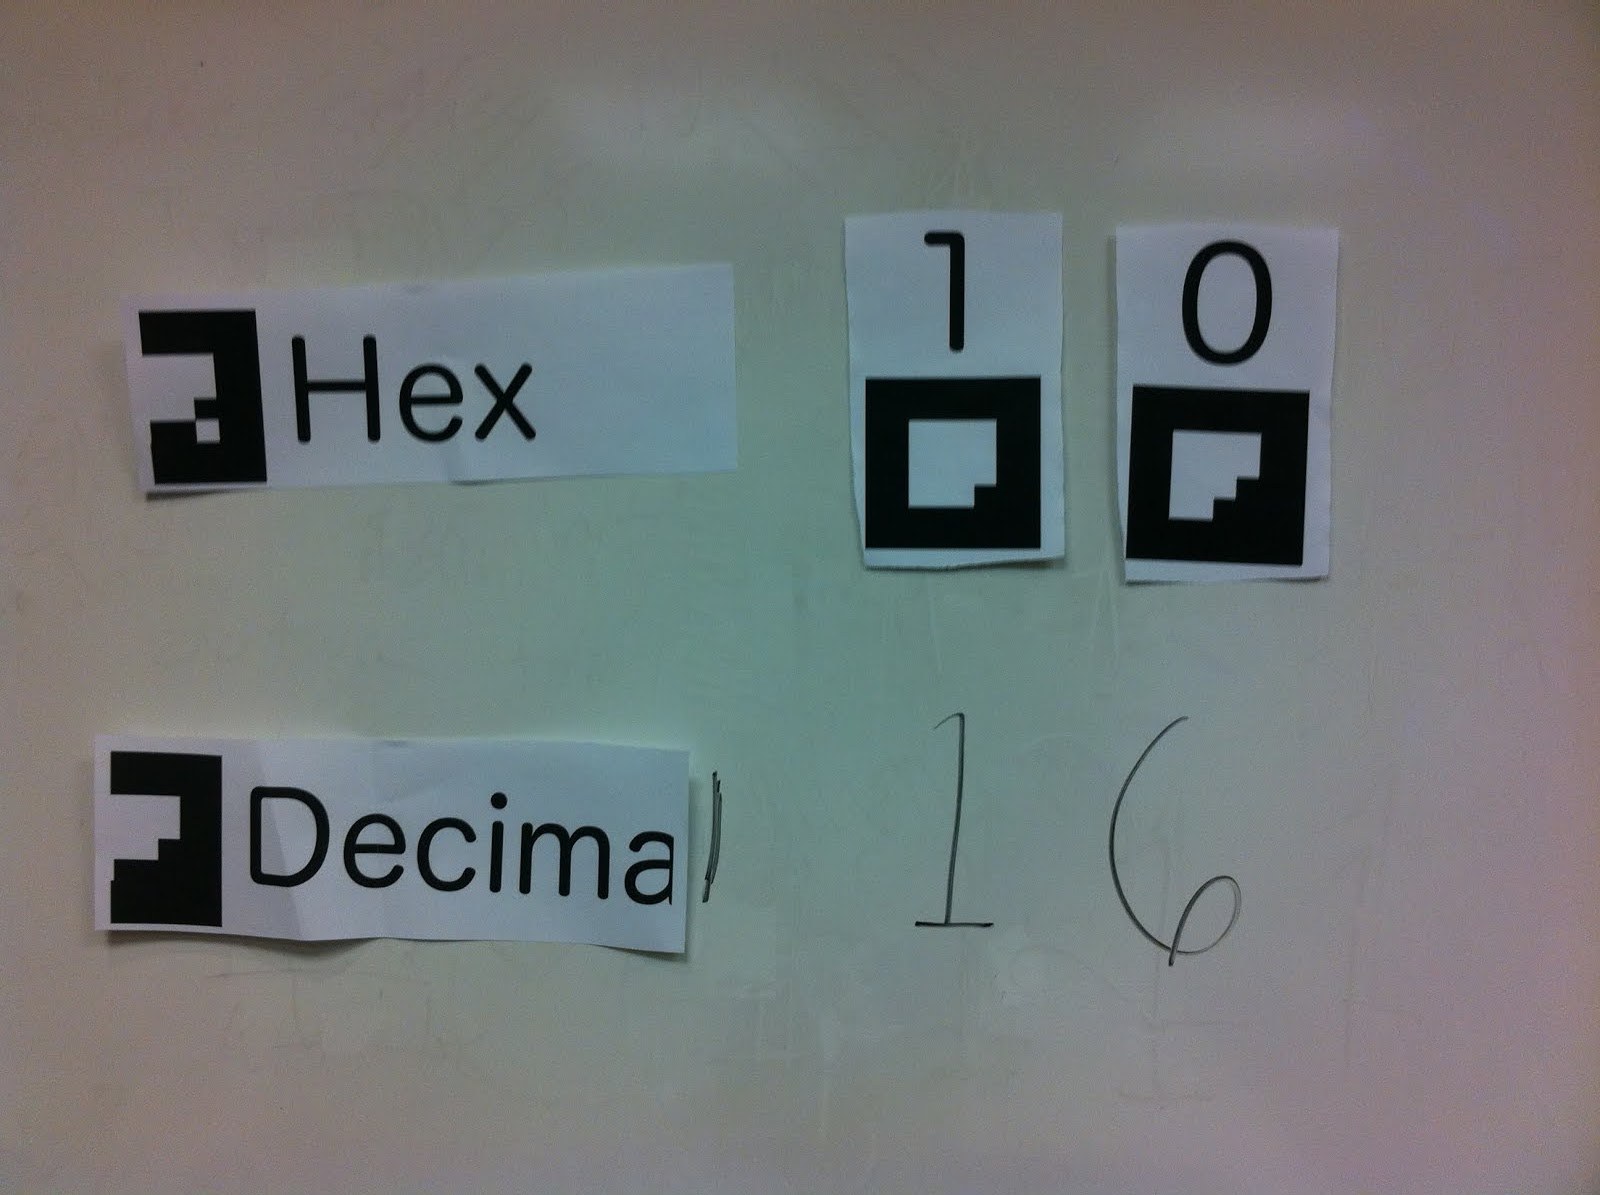
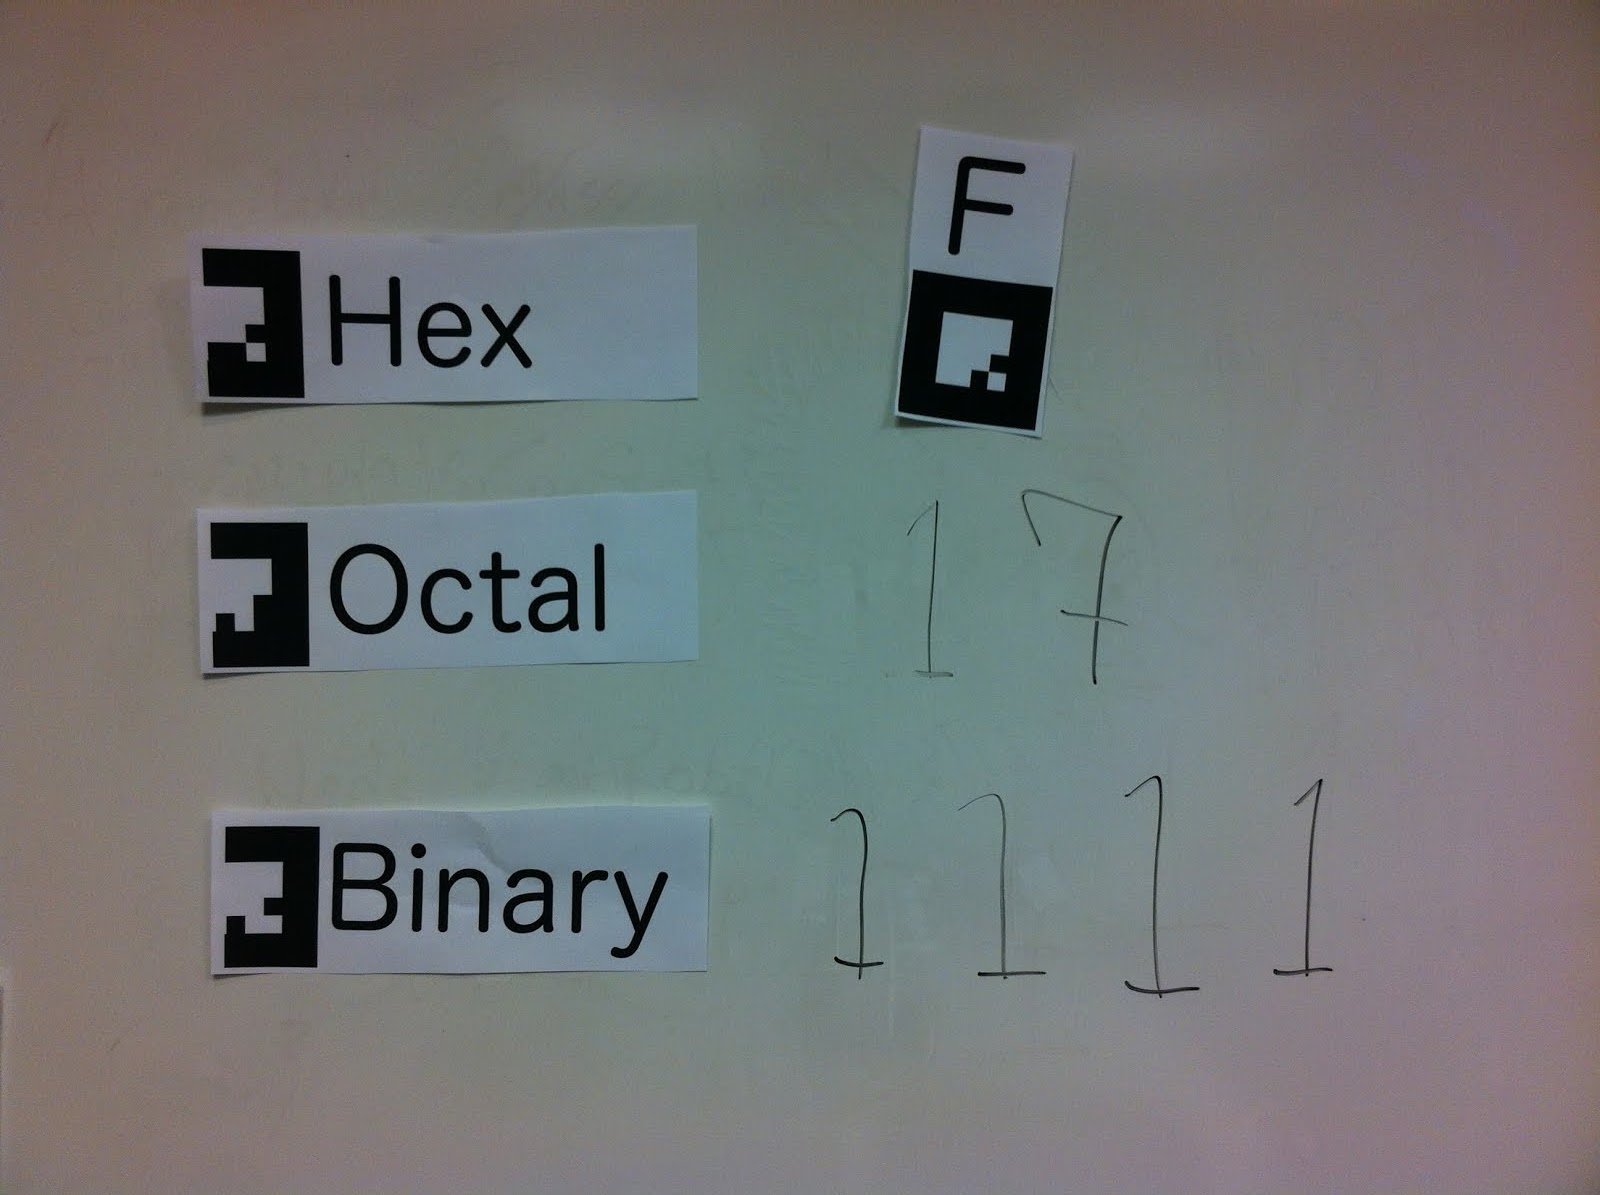
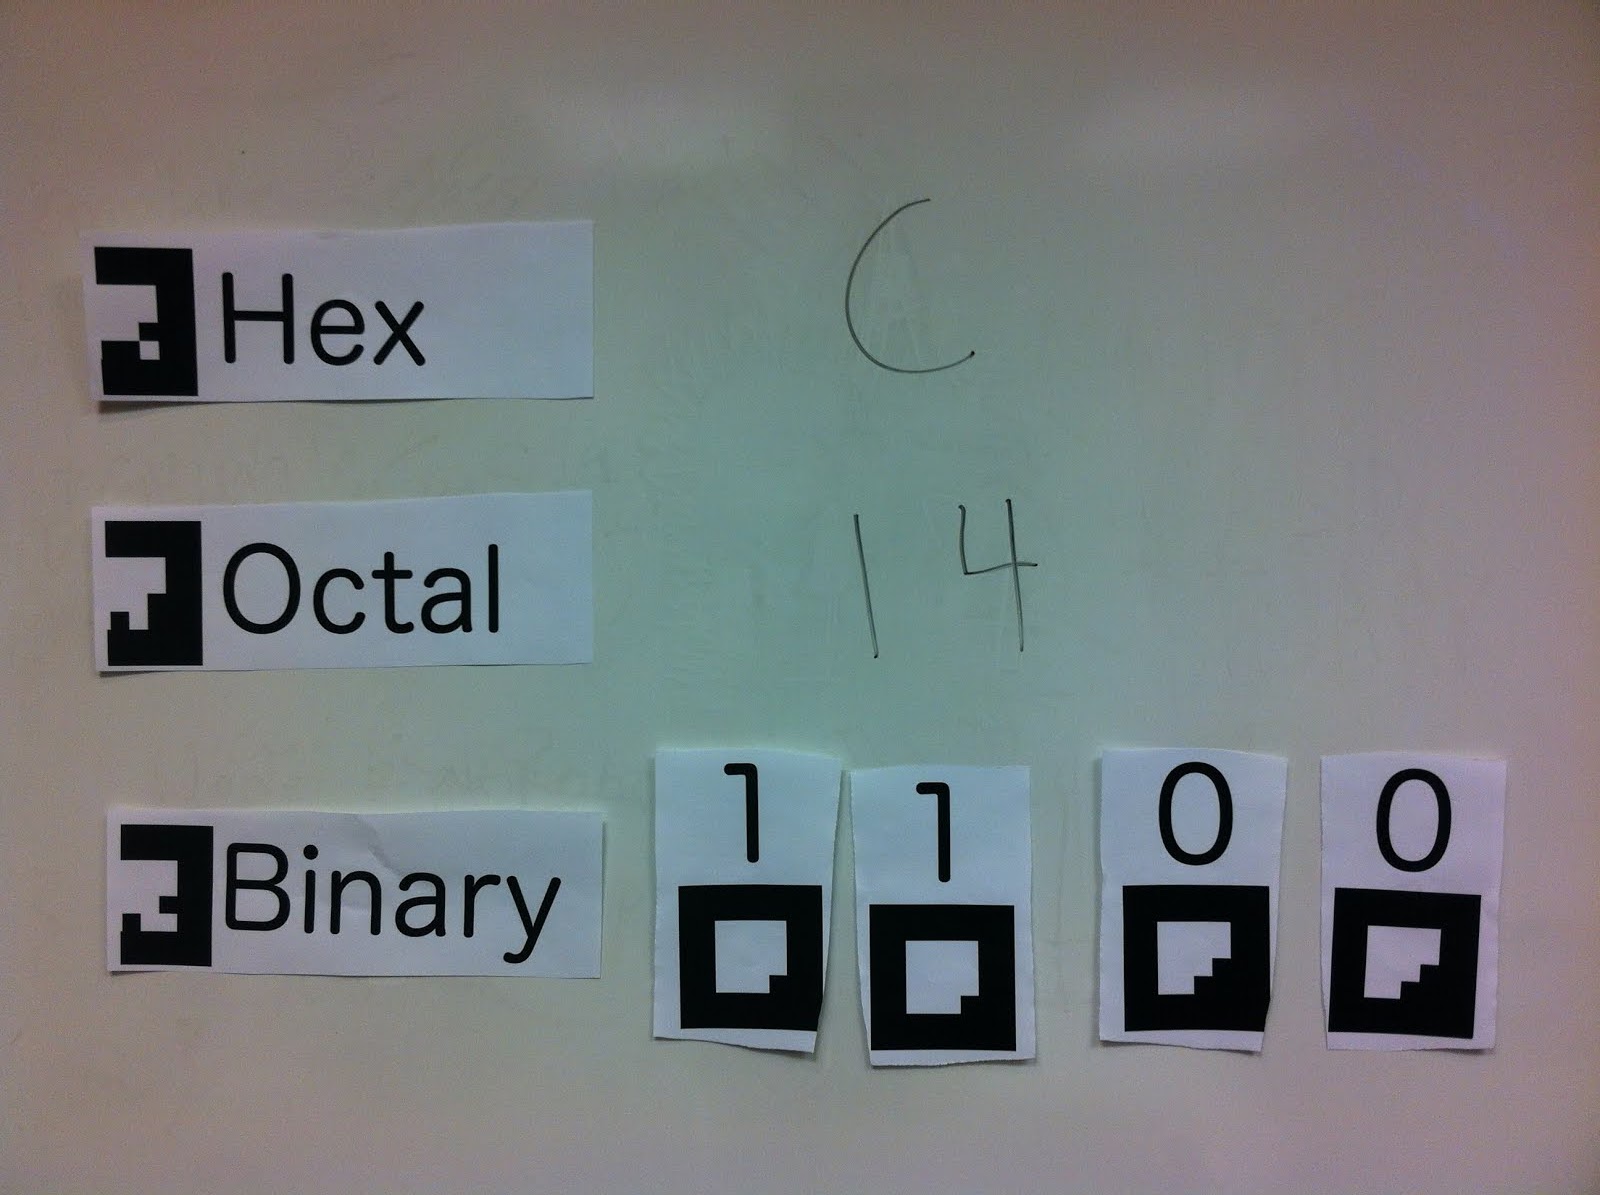
Description of Our Prototype: Our prototype uses paper cards with “fake” AR Tags and labels that look similar to those in a real system. We used tape on the back of the cards to mimic how users will put magnetic or otherwise adhesive cards onto a whiteboard. Our prototype obviously does not rely on a projector or web camera, and so we used whiteboard markers to emulate the information that the program would project onto the whiteboard. For the tutorial we drew what the whiteboard would look like as the user stepped through the program. We have 16 number cards (for 0 to f) and labels for binary, octal, hexadecimal, decimal, LABEL, MOV, PRINT, ADD, SUB, JNZ


Completed program
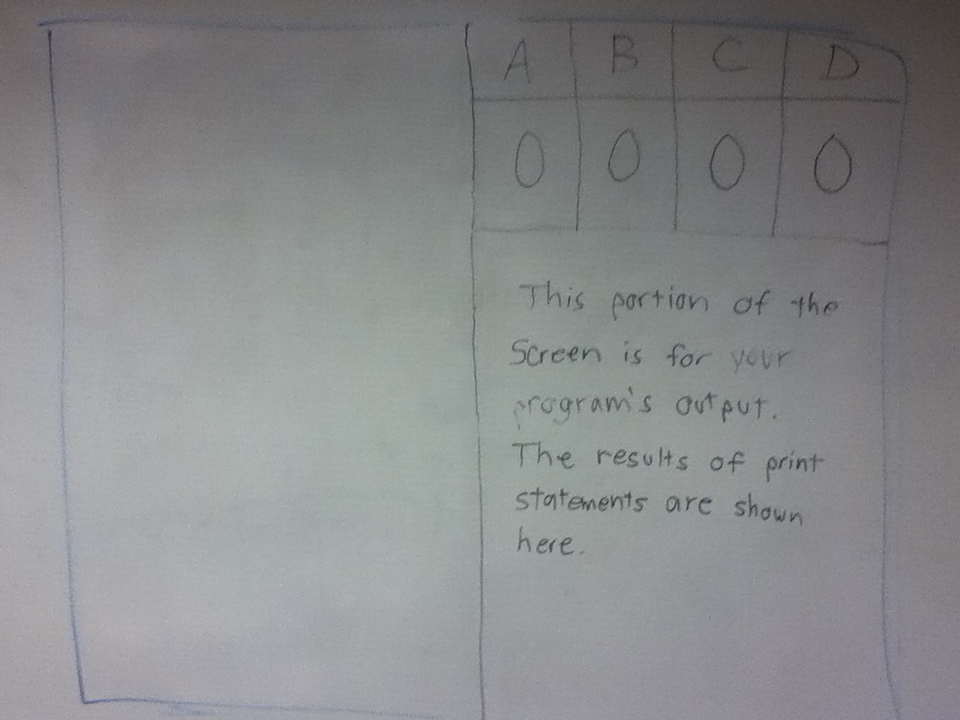
This is where the program outputs.
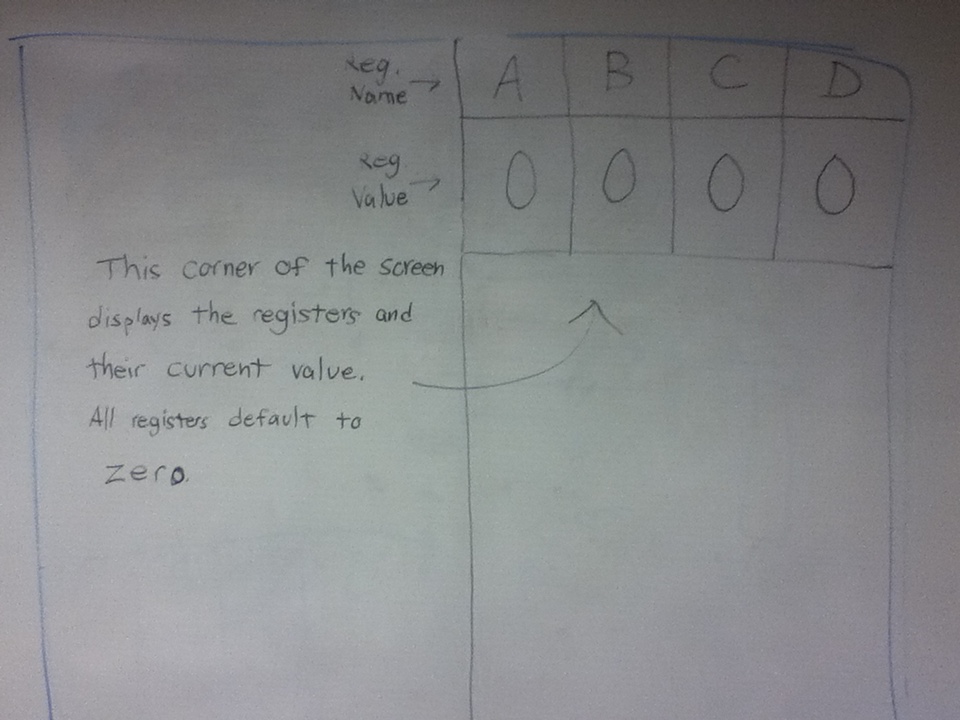
This is where the memory is displayed. Our interviewed potential users said that understanding memory was a very difficult concept to grasp.
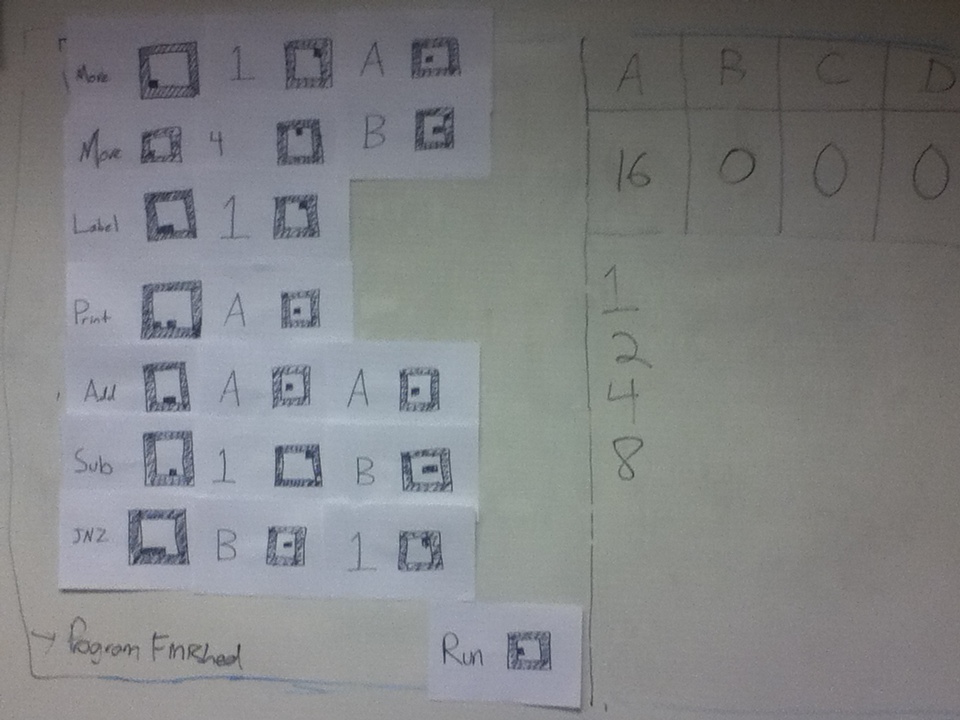
Completion of program with output.
This is where the code goes (the students places the magnetic blocks here).
Task 1 – Teaching Binary:
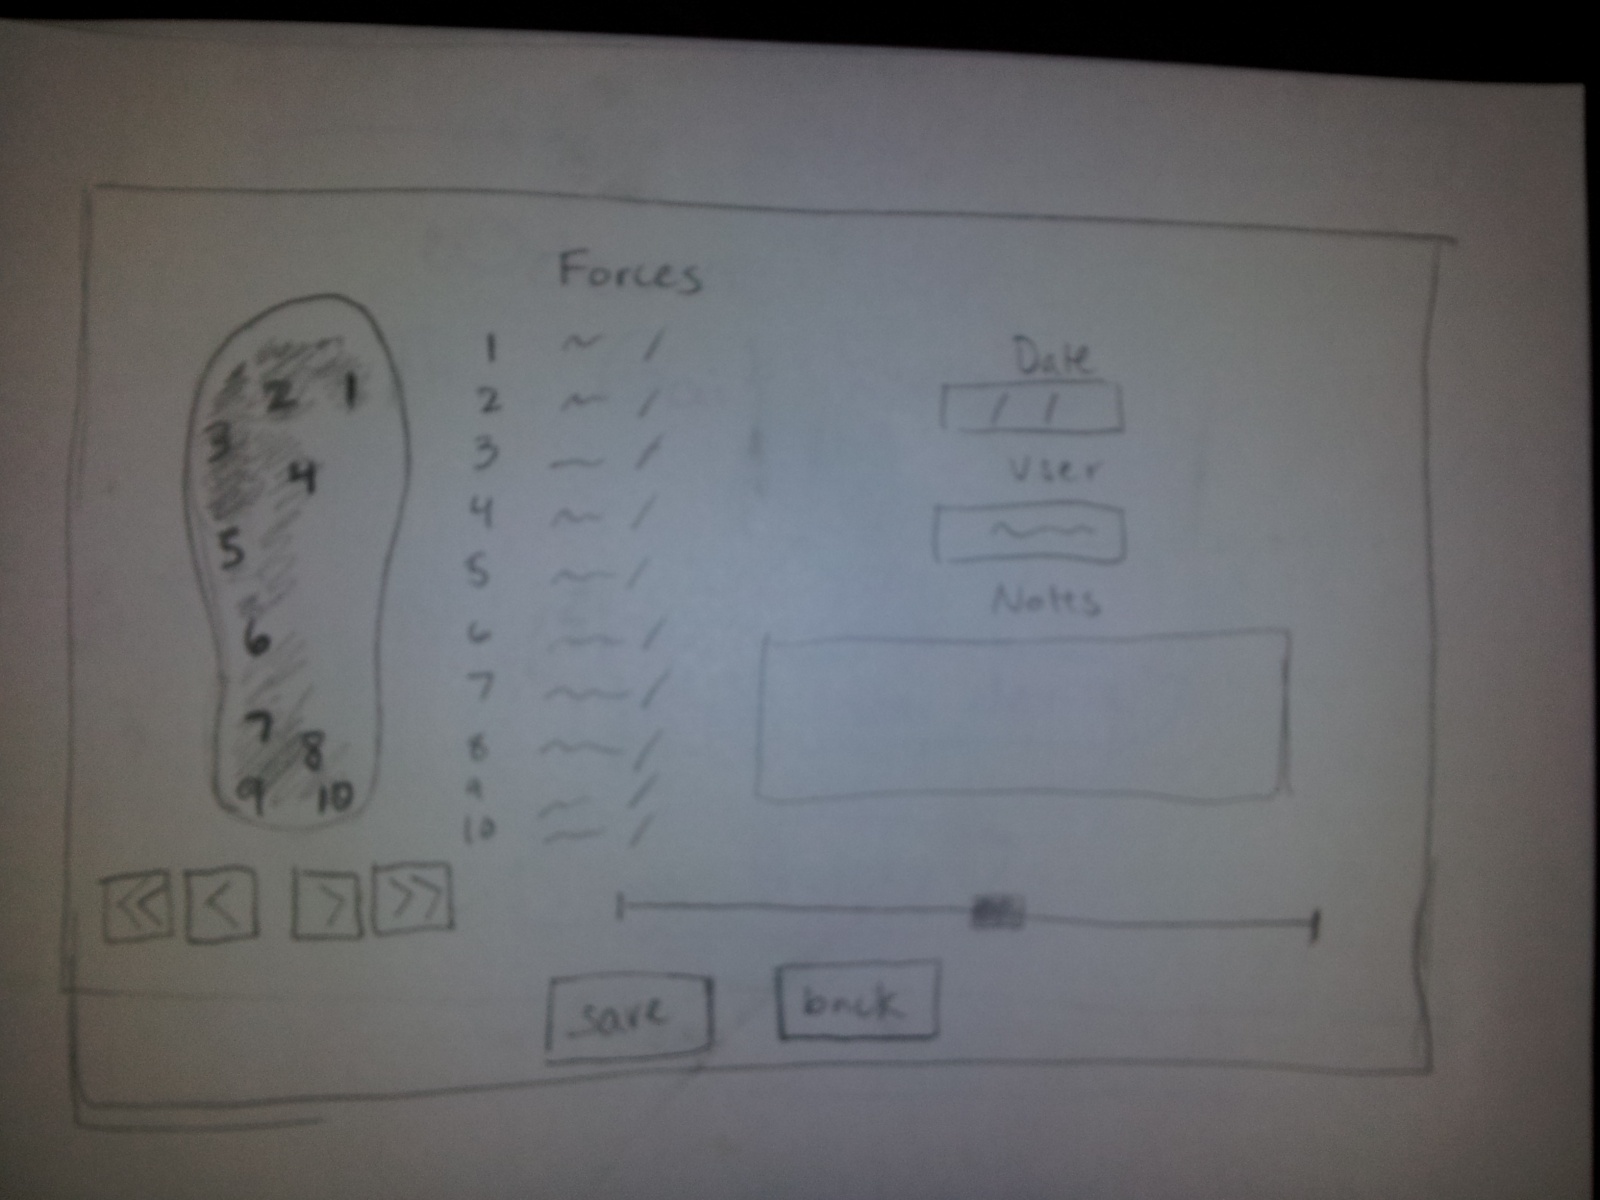
The objective of this task is to provide a simple, clean, and interactive teaching environment for students to learn the difference between different number bases (specifically binary, octal, hex, and decimal). For user testing, we would approach this from two angles. First, we will test what it is like to teach with this tool. For that, we would have the tester imagine they are teaching to a classroom of students and using this as an aid in the lesson. Second, we can see the test through the eyes of the students. Our tool is meant to be interactive, so after a quick lesson on what the tool is and how it works, we might ask students to complete quick challenges like trying to write 10 in binary. The point of this system in both cases it to try and simplify the teaching process and increase engagement through interactivity.
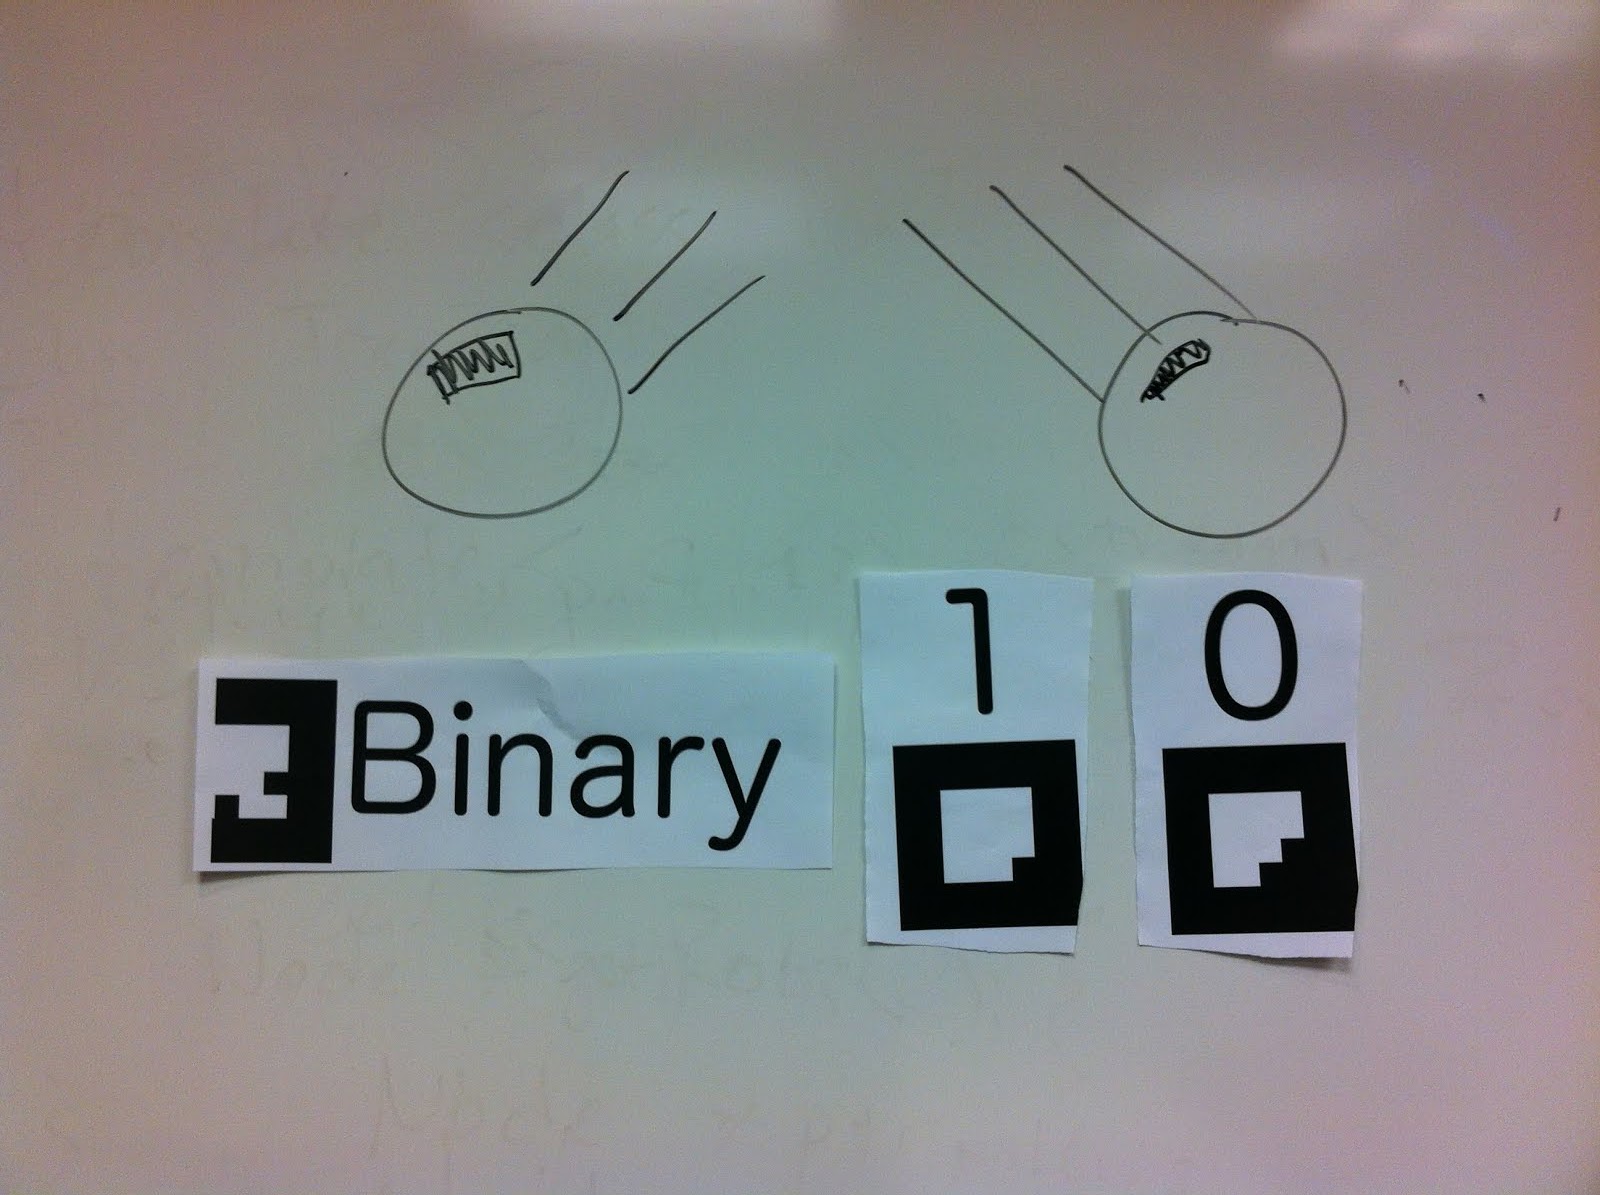
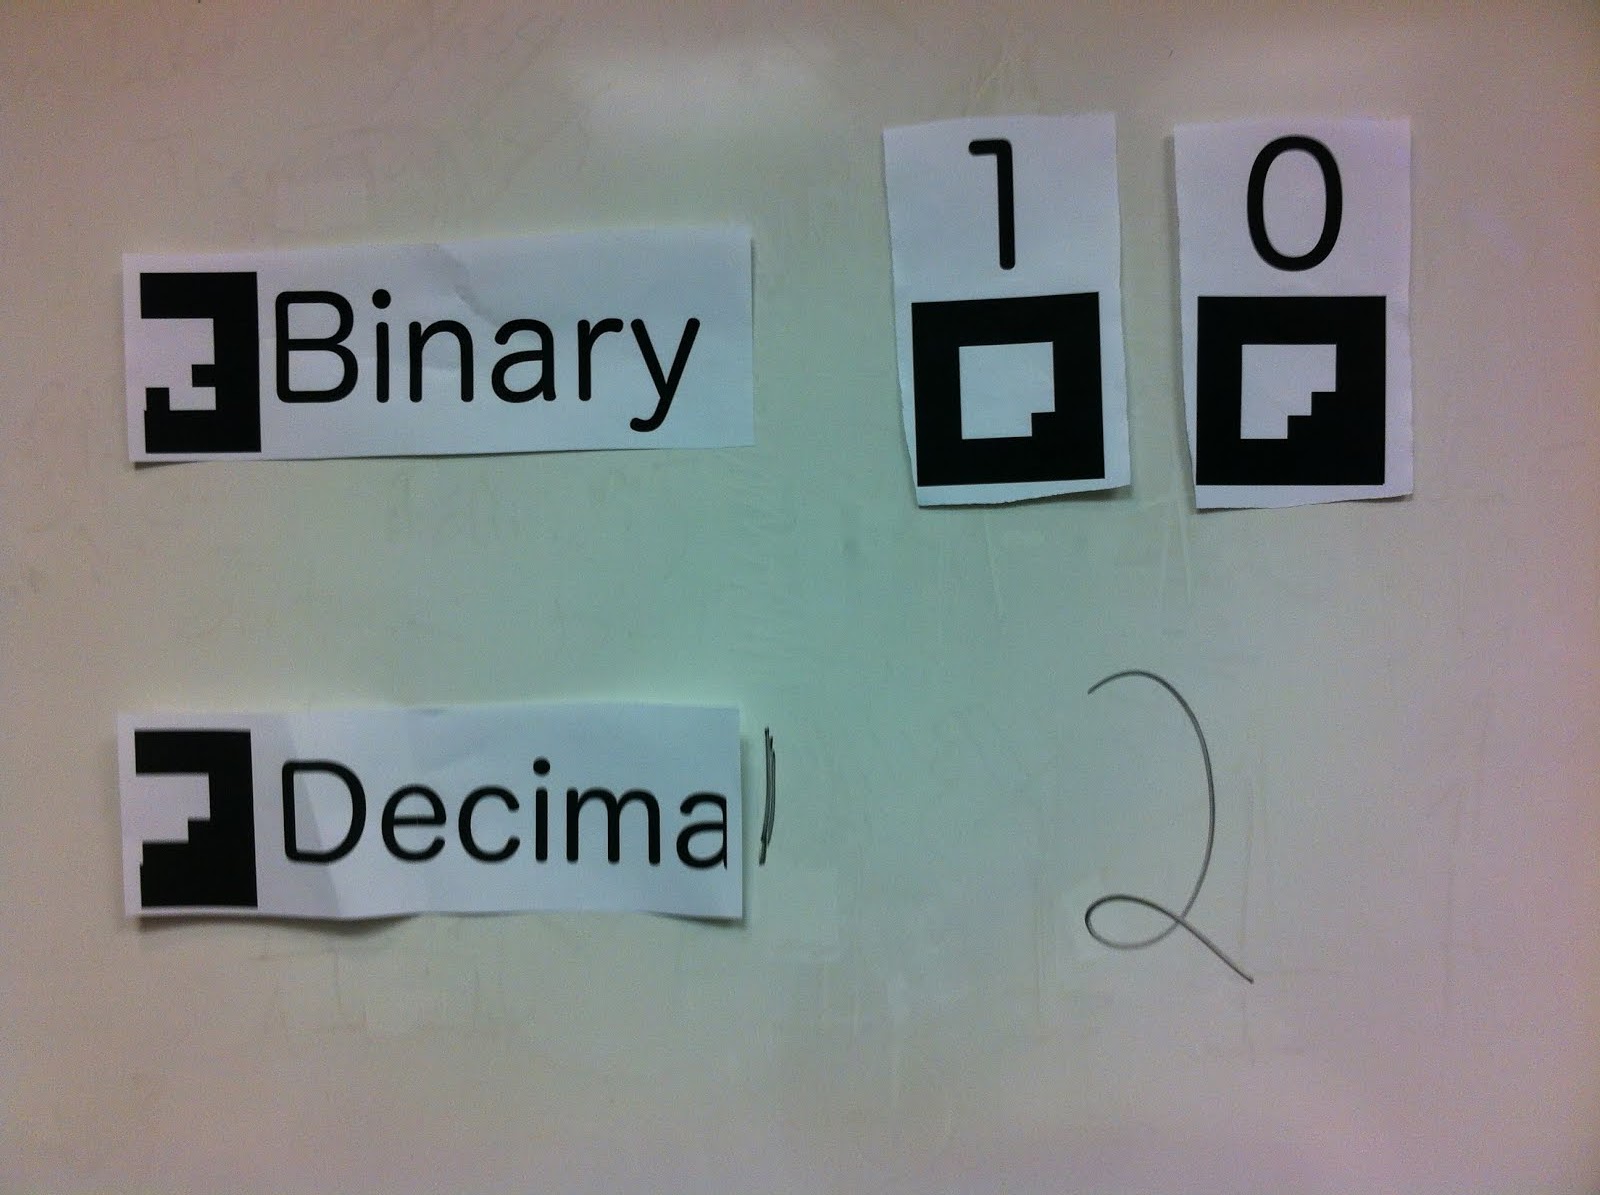
Imagine you are teaching a lesson. The basic idea of our UI is that there are 4 numerical base cards:
And 16 number cards:
They have adhesive on the back and they stick to the white board. Users then place these cards on the board. In our real system, we would project output on top of the board and cards, but for this lo-fi prototype, we will use marker, written by the tester, instead.
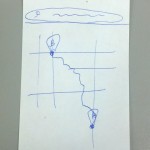
The first way that you could use the system is to put one numerical base card down and place a string of numbers after it. The system will interpret that string of numbers in the base and provide a representation of that quantity. In the below example, it displays balls.

Another way using the system would be to put down more than one numerical base cards and then place a string of numbers following just one of those card. The system would then populate strings of numbers following the other bases so that they are all equivalent.
If the user places down something that is not valid (such as a value beyond the base), we would use highlighting from the projector to let them know their error.

Task 2 – TOY Programming:
This lesson is used to teach the fundamentals of how all computers work. We provide users cards with a simplified version of assembly language and visual tags printed on them. The teacher or student will use this system to learn about computation and simple logic in a classroom setting. As the user places cards on the board, the projector will overlay syntax highlighting and other visual cues so the user gets feedback as he or she is writing the program. Then, when the user is done writing the program, they place the RUN card on the board. The system first checks if the program is syntactically correct and, if not, displays helpful messages on the board. Then, the system walks through the code step by step, showing the contents of memory and output of the program. As the commands are all very simple and straightforward, there is no confusing “magic” happening behind the scenes and it will be very easy for students to understand the core concepts of computation. However, the language is complete enough to make very complex programs. Our paper prototype very closely resembles the form of our final project. We created the visual tags out of paper and stuck them on a whiteboard using tape. We mimicked the actions of the projector by drawing on the board with markers.
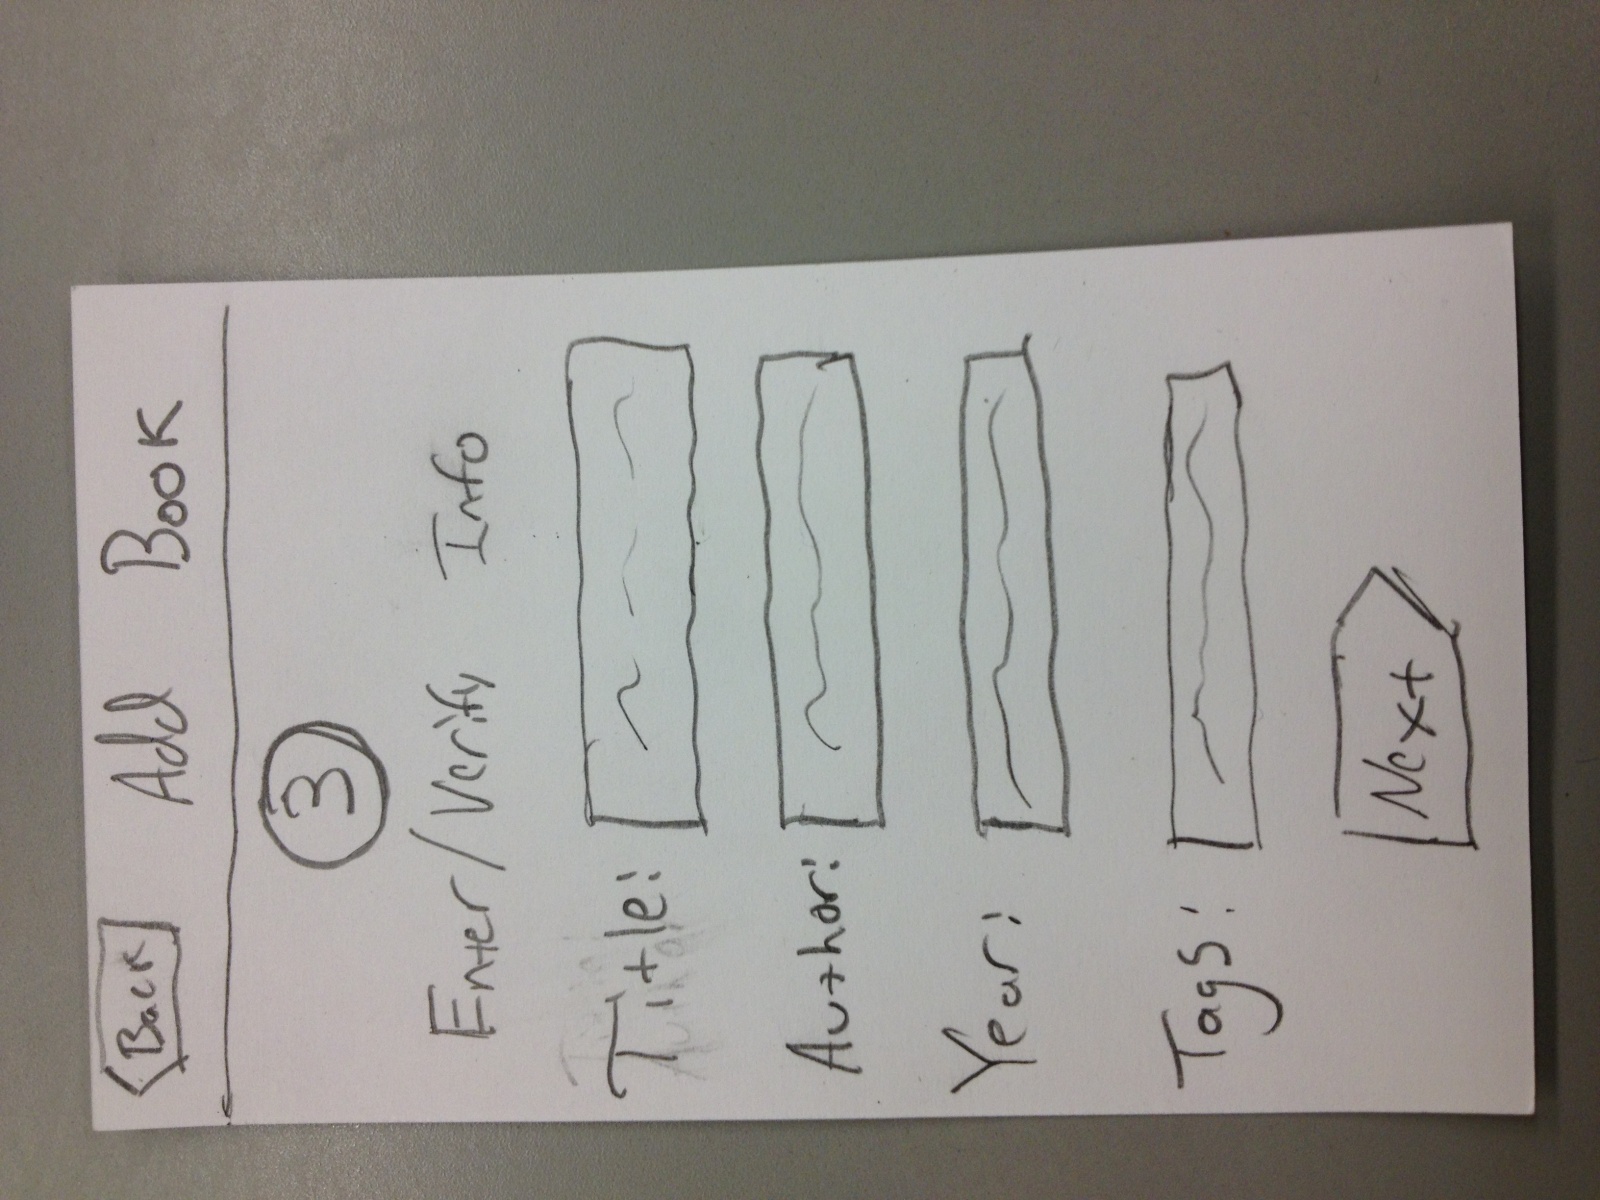
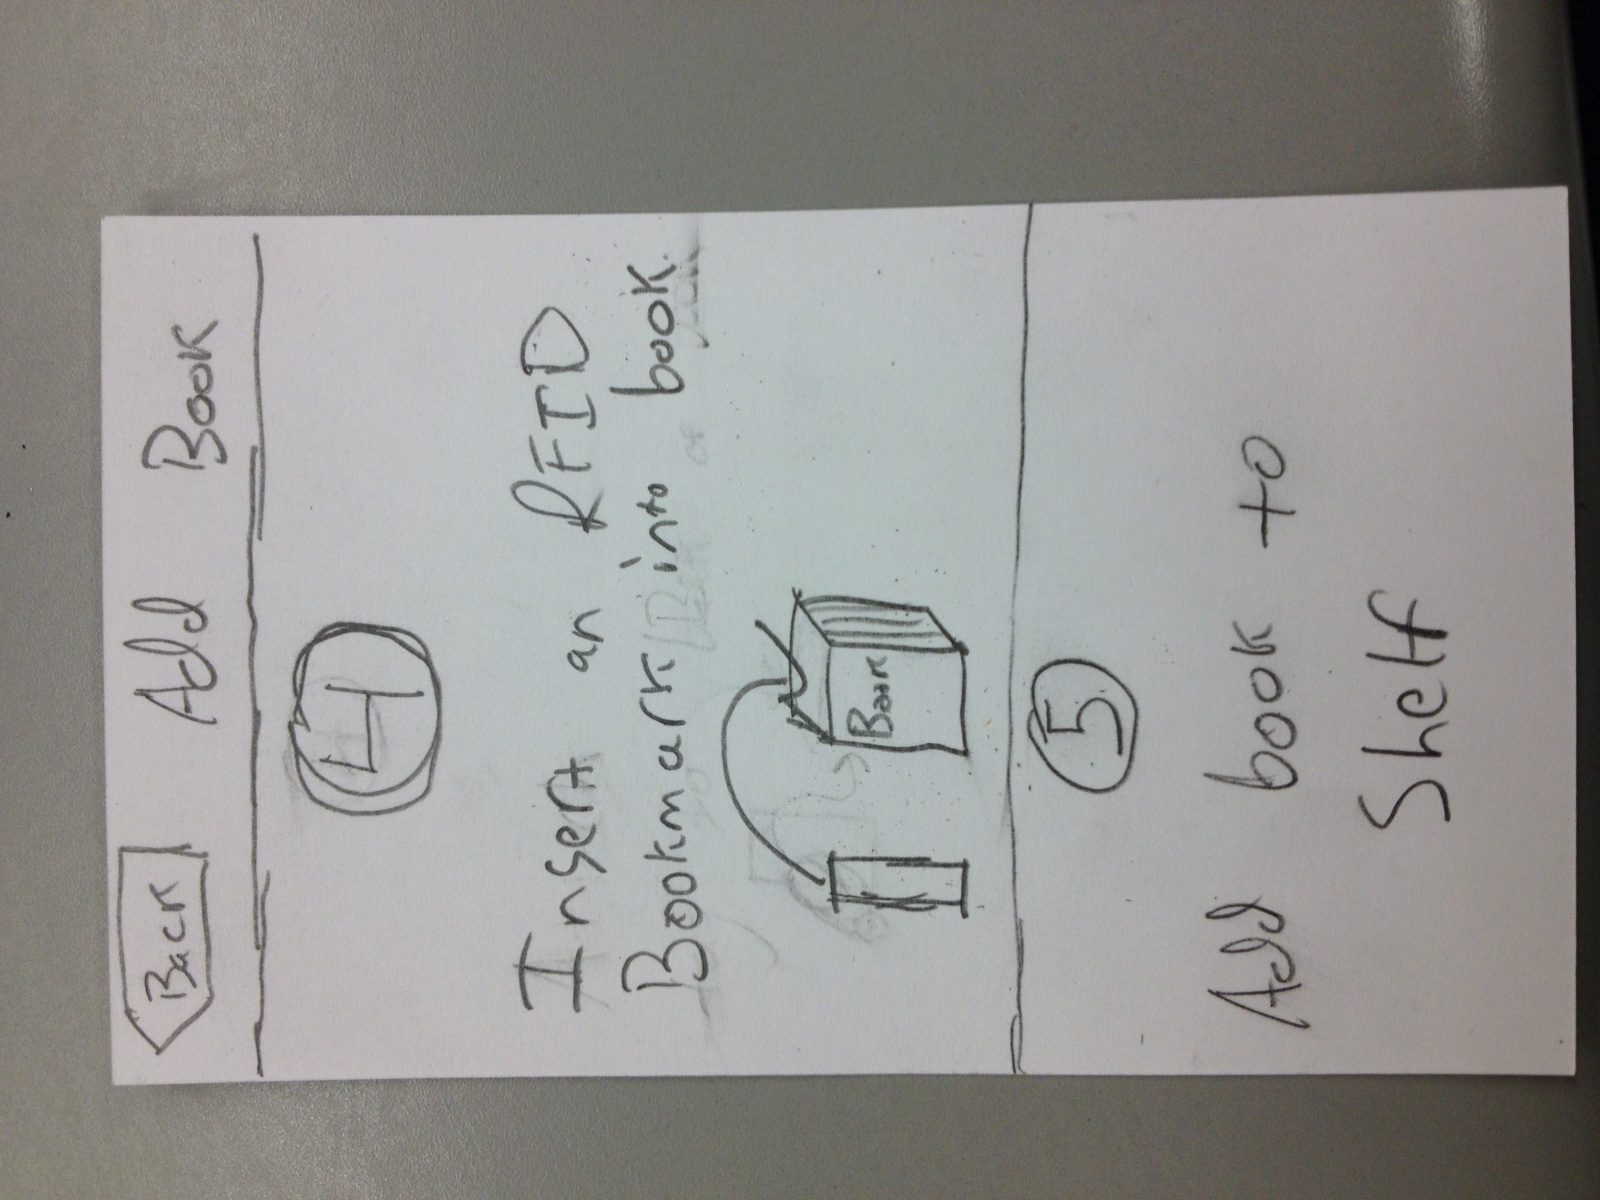
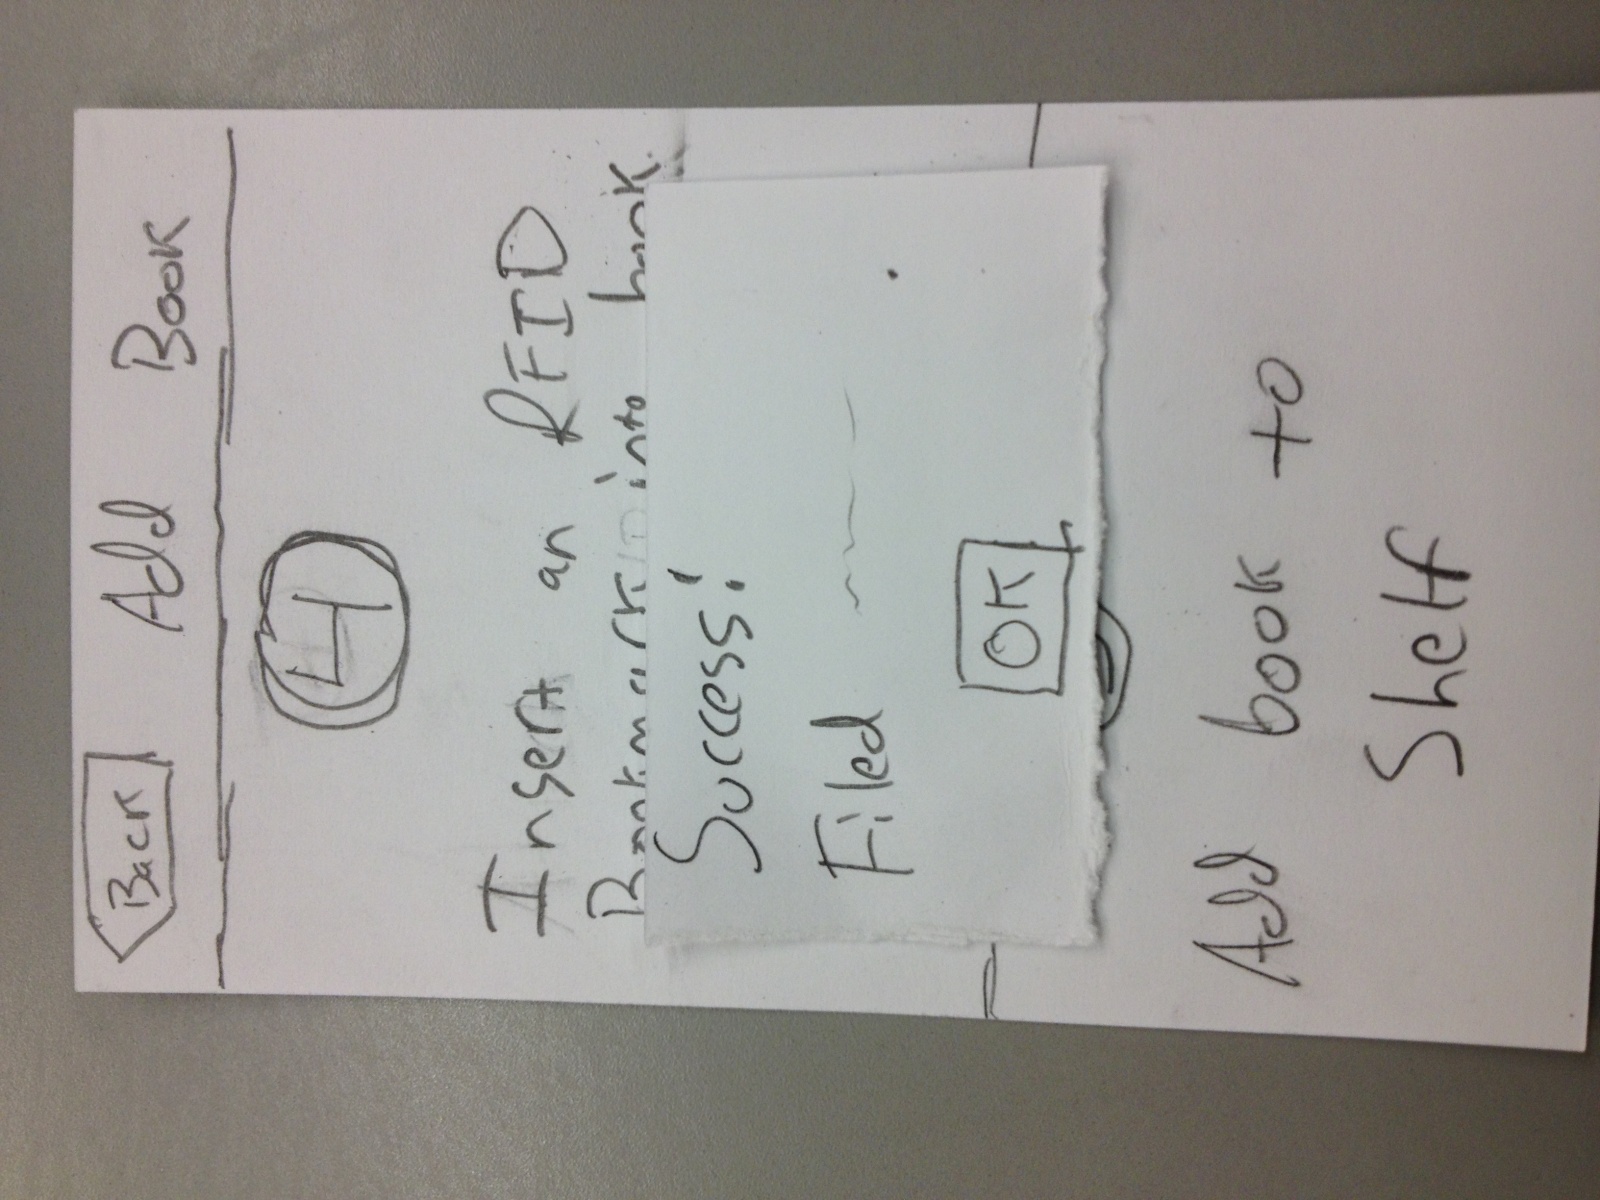
Task 3 – Teaching Tutorial:
The purpose of the tutorial would be to familiarize users – the teacher in particular – with the main display interface and teach them how to properly use the instruction cards. Prior to starting the tutorial, the user will need to be given basic instructions on what the system is, why it is useful, and how to setup the system and run the program. Once started, the user should not need any additional help. Text and prompts will be projected on the screen to guide the user through the tutorial, teaching him what the different parts of the display represent and how to properly use each instruction card. The tutorial will advance to the next step when after a certain period of time has elapsed, the user has completed a designated task, or the user presses a continue key such as the space bar the the computer. Mistakes can be recognized and corrected by the system itself if the user does something wrong.
Discussion of Prototype:
We made our prototype by first creating blocks that were similar to how they would appear on the magnets that the users will use. The blocks have AR Tags (which for now we made up), and a label. There are blocks for all of the numbers from 0 to f, and blocks with keywords that are supported in the “computer language” we are developing. Another part of our prototype was drawing on the whiteboard how the whiteboard will look during a lesson. This meant creating the three sections that will be projected – code, memory, and output. We wanted to draw these sections on the whiteboard for our prototype since they change real time for our project and thus we could emulate with markers what the user will see when they use our program. By using the whiteboard, we used a new prototyping technique. We believed that it was more suitable than paper because of the increased flexibility it gives us over paper. When we test our prototype with real users, we want the freedom to display the correct output, memory and error messages. This would have required too much paper since we have many different possible values in each of the four registers at any given moment, among other things. Also, since our system will rely on the whiteboard, it made sense to have the users interact with a whiteboard when testing our prototype.
One of the challenges that we had to confront arises from the primary user group being younger students. Thus, we had to keep the tags simple and few enough that students could reasonably understand what they did yet we still wanted a reasonable amount of functionality. It was difficult to come up with a good whiteboard interface for the users. We wanted something simple that still conveyed all of the useful information. One idea that we considered was an input tag that would allow the user to input data to the TOY program. We decided however that this made the programming unnecessarily complex while not adding that much benefit. Most of the difficulty in creating the prototype was similar, and the issue came from deciding what functionality to include that would offer a complete introduction to the material without overly complicating the learning process. Even though using the whiteboard rather than paper presented some difficulties, I think it works very well in terms of simulating the program. It was also important that our prototype not lay flat on a surface, since the final project will use a projector image on a whiteboard. I think our prototype very closely resembles how we currently think the end product will look.